I don’t have a seat kicking around and don’t feel like making one, I will at some point but not this time, I’ll check out eBay and see whats going like a budgie…cheep.
Loads to choose from, quite like some of the Chinese offerings but the flattish ones are all geared up to look like cafe racer style, what I would really like is something similar to an MTX50 seat, flat and rides over the tank by a few inches, very simple.
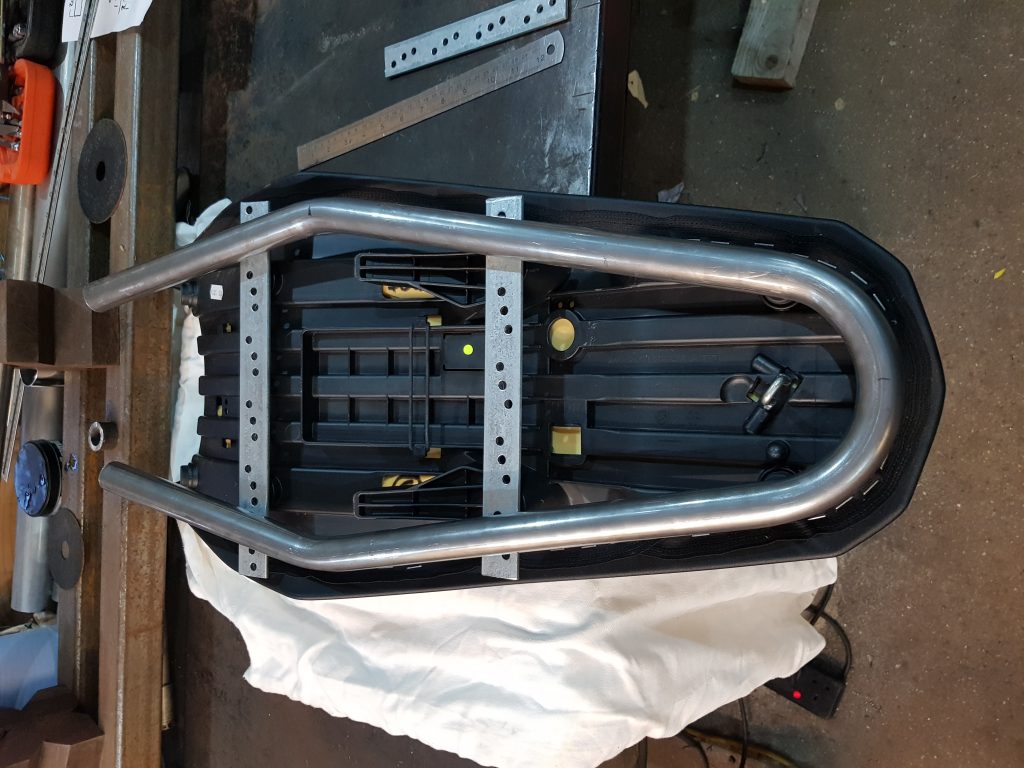
I have looked at too many seats and I’m getting bored, I’ll just get something I like the look of and worry about how to blend it with the tank later, my choice is from a 2016 Yamaha Tracer 700, taken from a showroom bike, 35 quid delivered and it’s mint.
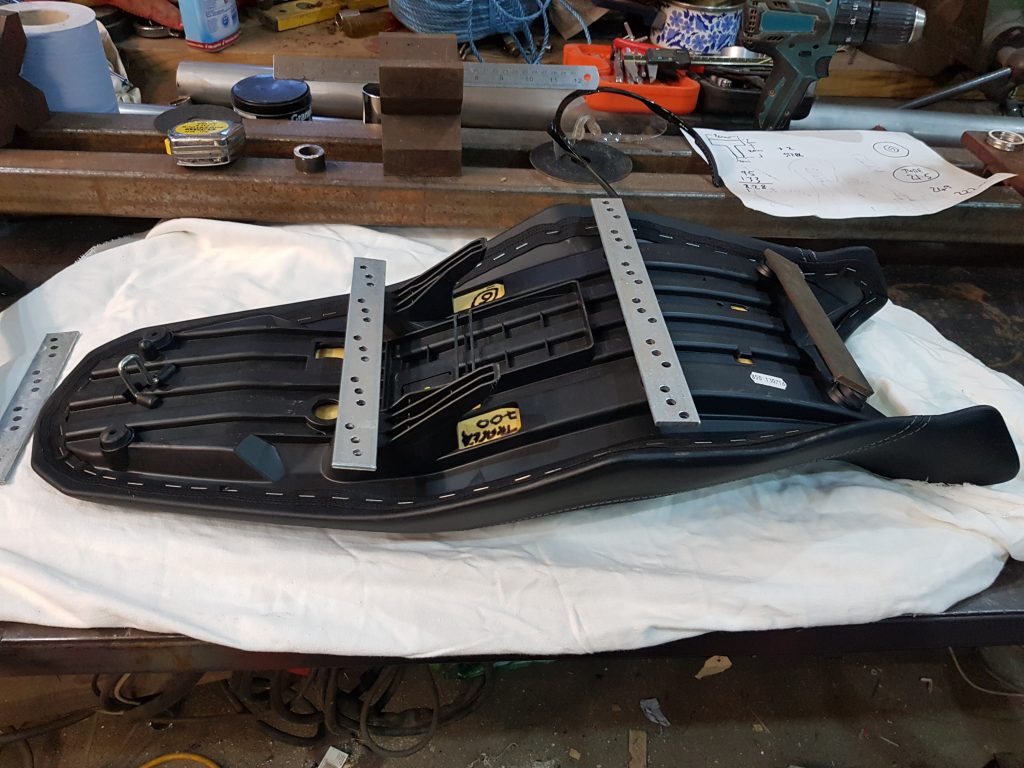
There it is in all it’s glory, I have roughly cut a few cross braces from some left overs from a guttering job I did for my mum, thats all I could find, this gives me some idea of how to make a sub-frame.
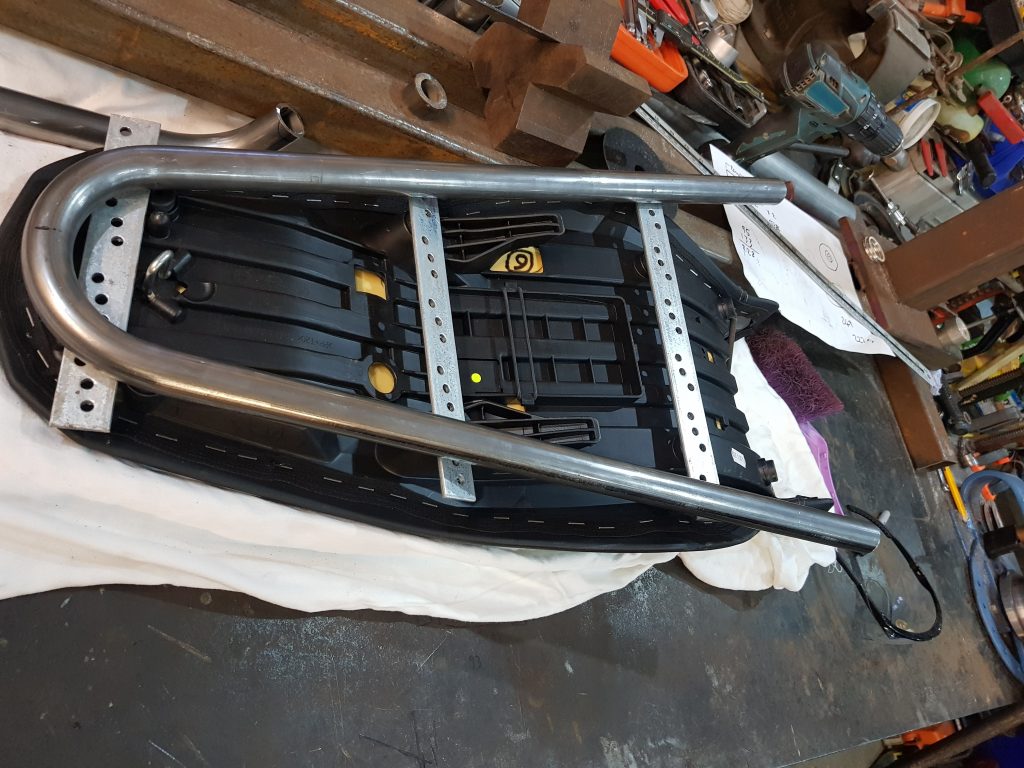
I bent a length of tube very simply just to see where to go with this, starting to look like a fit.
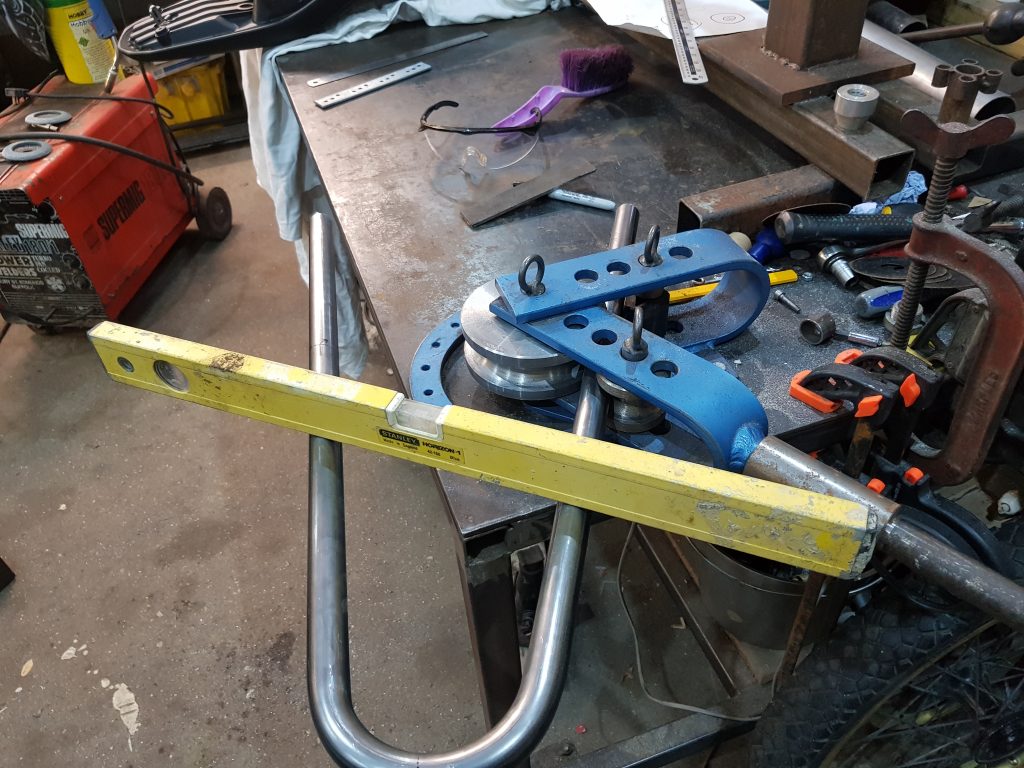
A few tweaks on the bender and it’s starting to take shape!
Looks pretty tidy.
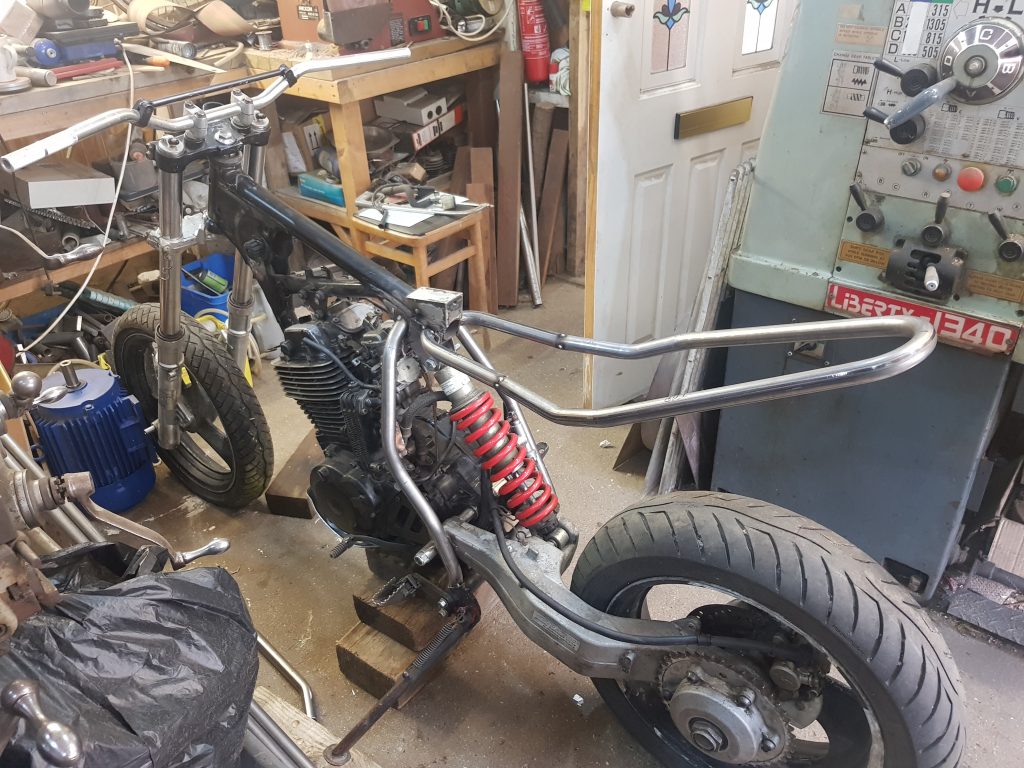
There it sit’s, I used some engineering string attached to the centre of the handle bars and lined that up with the centre of the rear tyre so I could eye up where to weld the subrame, the technology we use is mind blowing.
Starting to look alright, need to make another brace for the right side, feels odd to make the braces differently but this is the first single sided swing arm bike I have built.
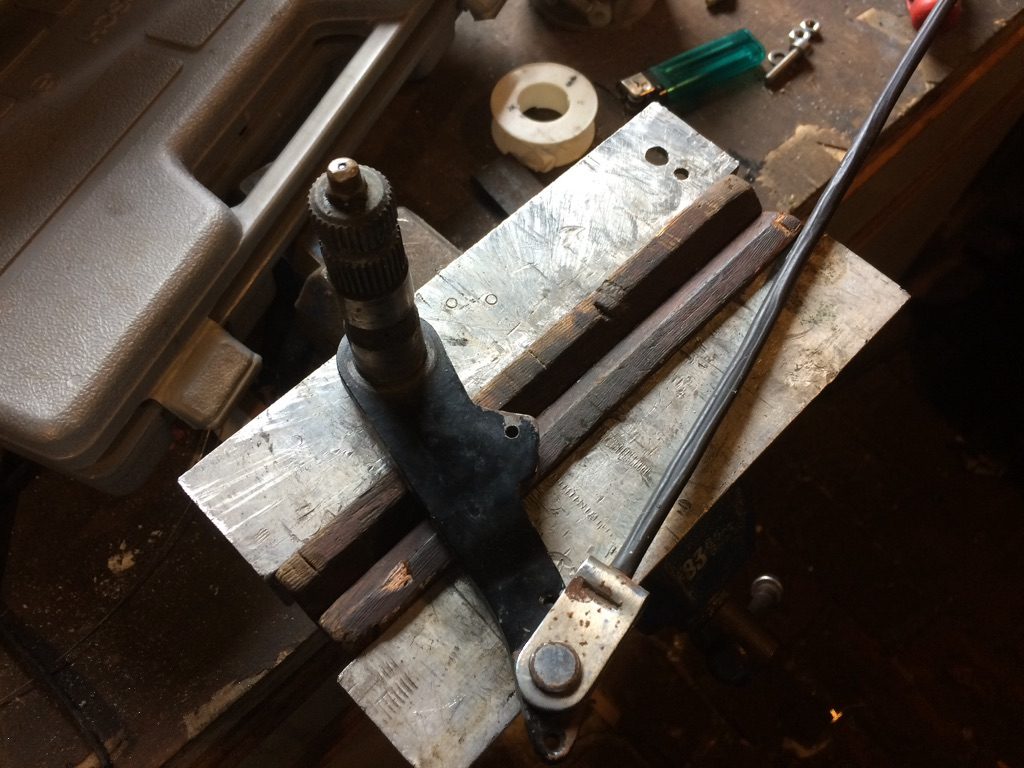
Been busily not doing much in the lock down, like most folk I guess, tinkering in the garden and more importantly doing a few bits to the XT project…. OOOHHH exciting I hear you cry! So, it’s about time I got this thing standing on it’s own two feet, I purchased a set of yokes on eBay from Legend-biking, they went missing as things do from time to time but I was sent a replacement set so I could continue, different year bike but I decided it would probably be ok, my mistake.. seems like the later models have a longer head stock tube, by about an inch so the newly arrived yokes wont fit…..ok I’ll chop a bit out of them and make these ones fit!
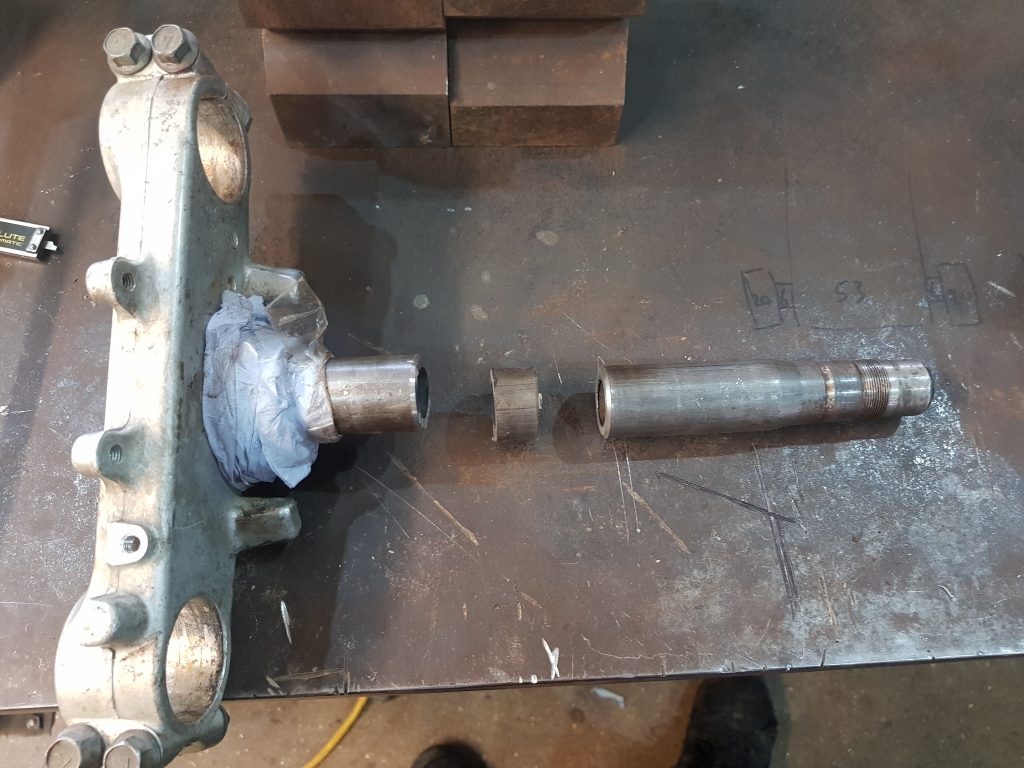
Before you say it, no I could’nt just wind down the nut further, the upper bearing is smaller so would not reach as the shaft widens. We, the Scavengers pride ourselves on our wide shafts and exposed nuts, rumour has it Mac’s nuts are CHROMED, I cry like a girly when I get caught by a stinging nettle so I’ll stick with my nuts as they are, standard.
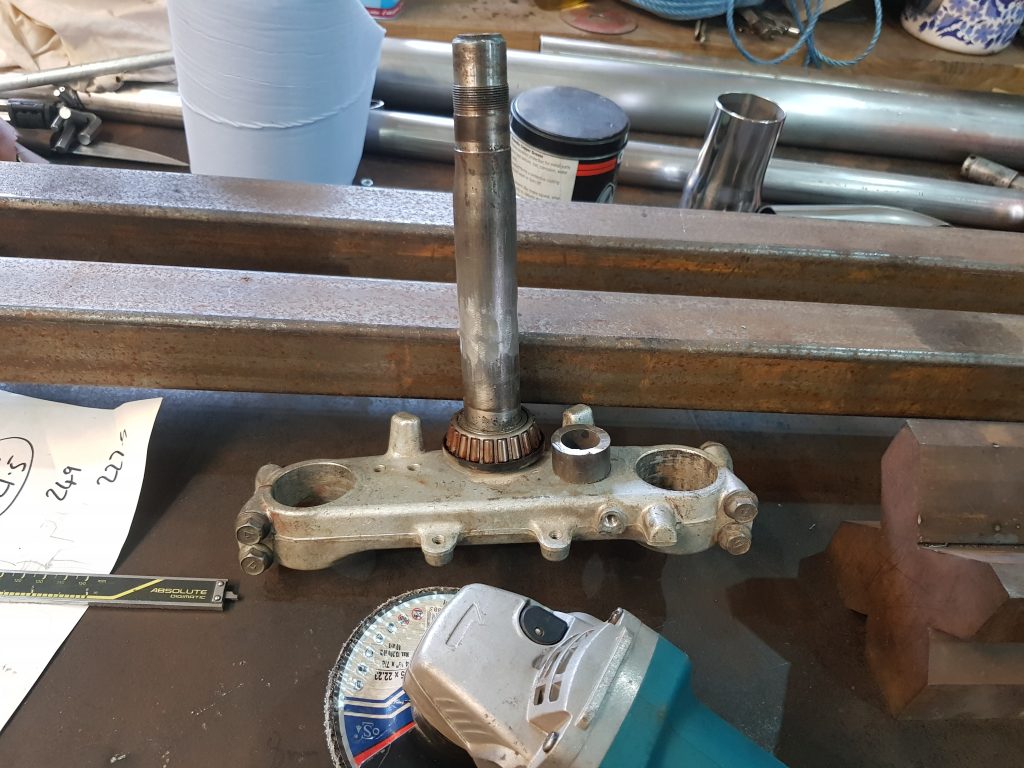
There you go, a nice big straight shaft with a pot of lube in the background and a GRINDER…what the hell is happening!!!! I thought we were family friendly…..
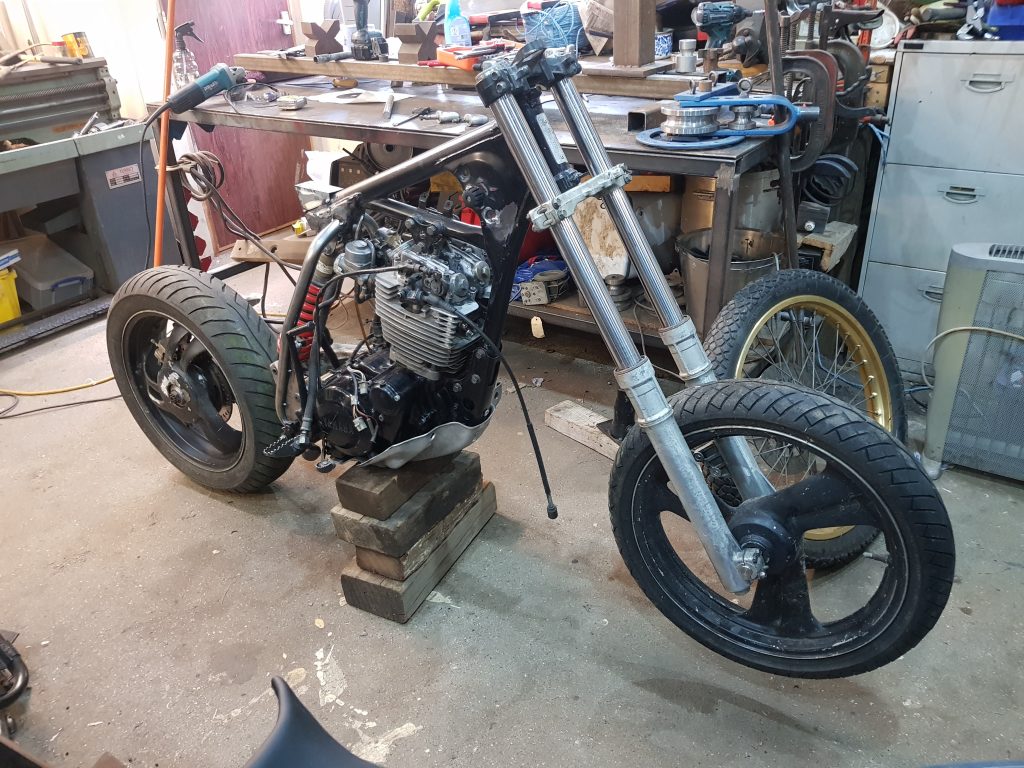
Pretty happy, the front end is working as it should at this stage, time for me to give the back end a seeing too…..TEE HEE HEE…., honestly, a couple of beers and this place is going to ruin..
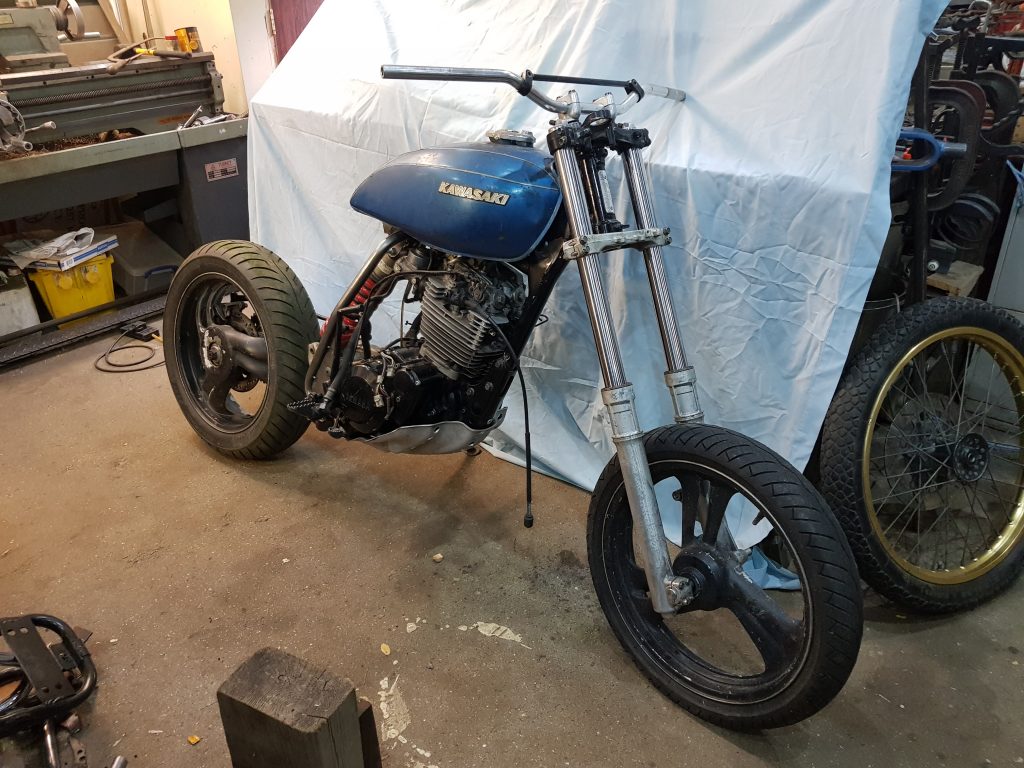
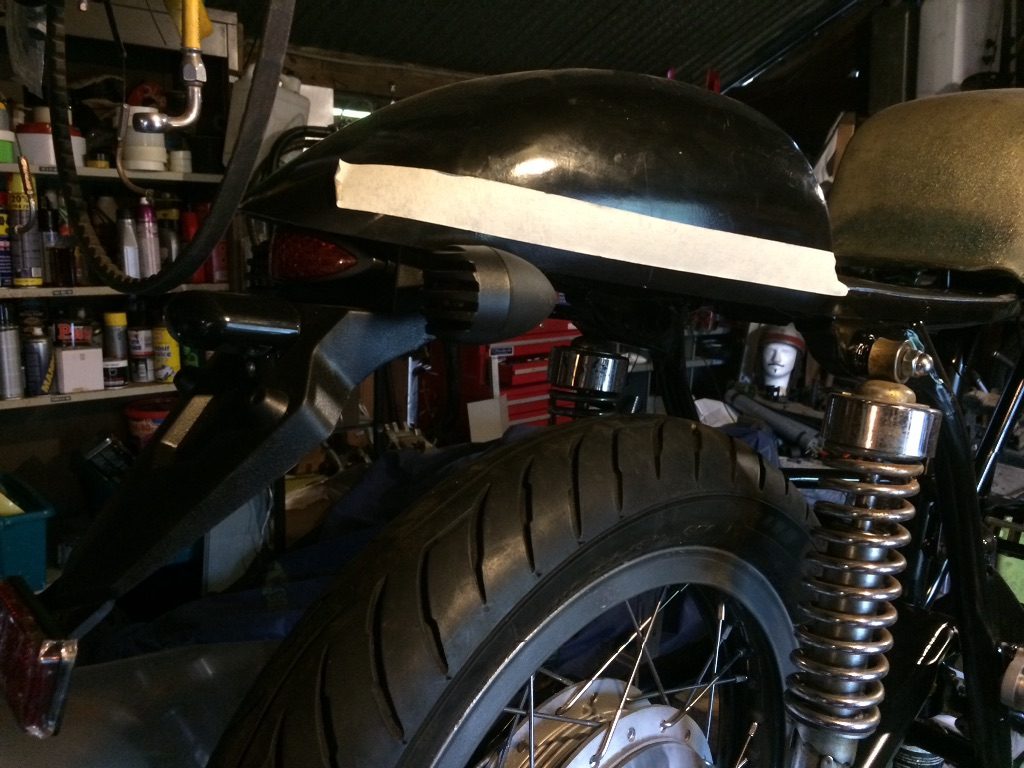
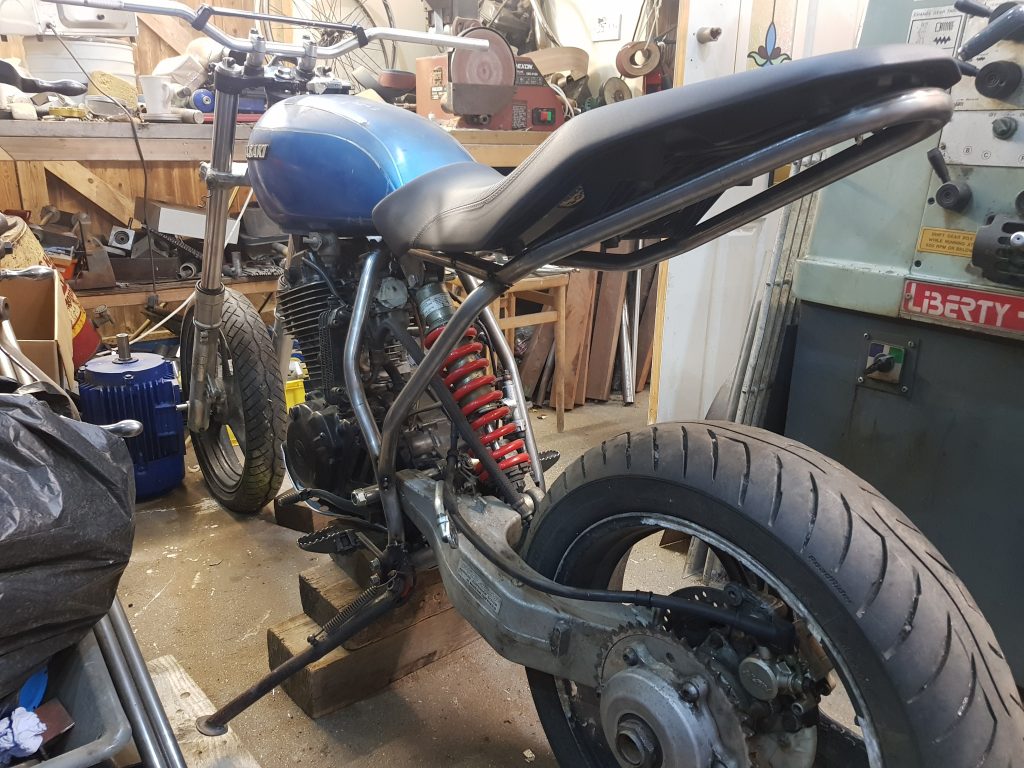
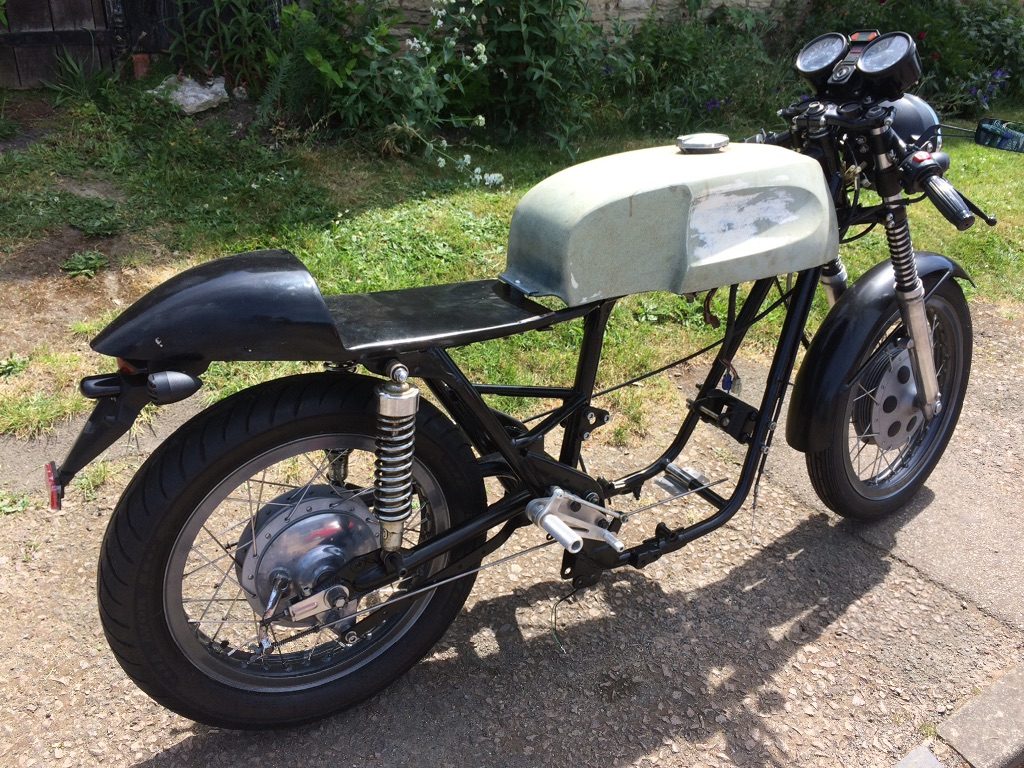
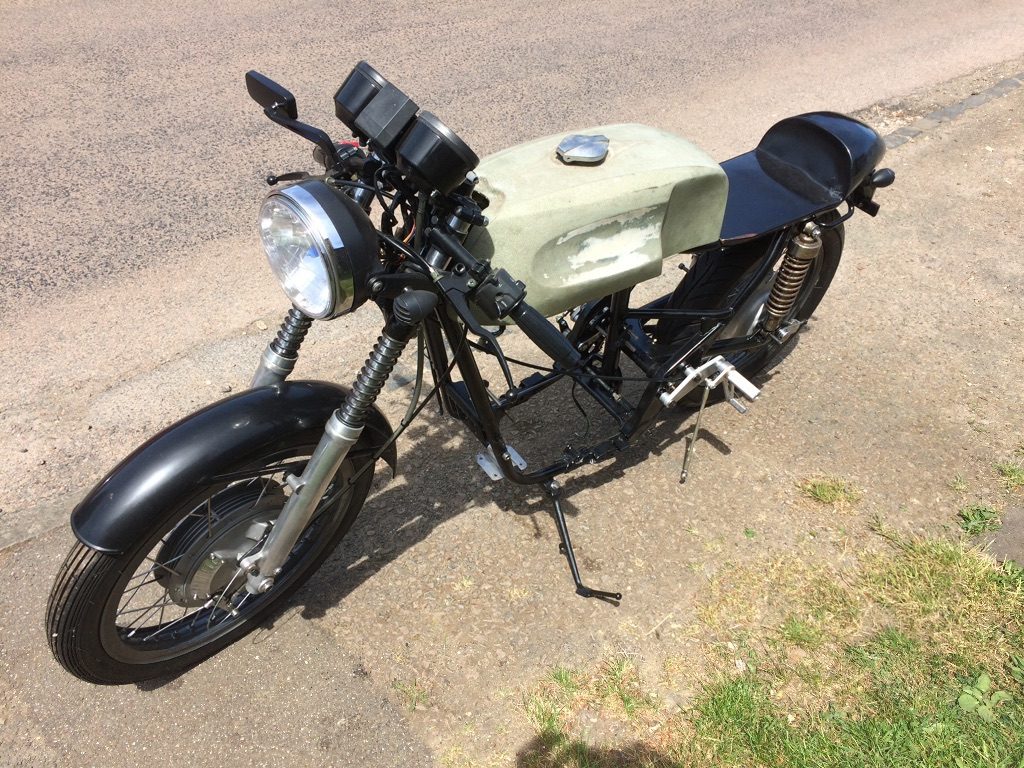
Here’s a sneaky peak so you can see what direction I’m heading in, Z400 tank from ’75 and straight’ish handle bars that I failed to return from the Last job I did for Mac, the tank cost me 35 quid plus postage on eBay, it does not fit well but is the shape I want so it’s staying, the seat is from 2016 and is an even worse fit but thats staying too, I really like it…just need to blend it all together, it’ll be fine, I have a plan!!
So, sometime ago whilst chewing the fat with Mac, probably half cut, there was talk of maybe starting a new project, this time I wanted to do something different. It must have suspension this time as my back is aging quicker than me, something comfy, cool to look at (do we even say cool anymore or was that an 80’s thing I forgot to drop..? man..) and more of an off-road twist
There was a sniff of a project coming available from an old friend of Mac’s, quite a reliable chap that doesn’t ask the earth for anything either, the details were vague but we knew it was a big single pot trail bike from the 80’s, mostly complete and with a log book! That ticks all the boxes I need but I was pretty skint at the time so had to back out although I was really keen.
Sometime later whilst perusing Mac’s vast warehouse of motorcycle madness he took me to a dark corner on one of the lower floors, took a key from around his neck and opened a small side door and lead me in to the ‘New projects store room’ There it was, a Yammy XT600, well most of it, the good bits! A few months later when finances were easier it was mine! Thank you ‘Bank of Mac’, very much appreciated.
There is an engine, forks, front wheel and a box of bits also, quite a few bits missing but the way I’m seeing it is they were parts that would have been replaced anyway. A previous owner has had a go at changing the look of the bike by removing the tail section to remodel it, I think they were going for a cafe racer style but that’s not what I’m doing so I’ll just chop it off.

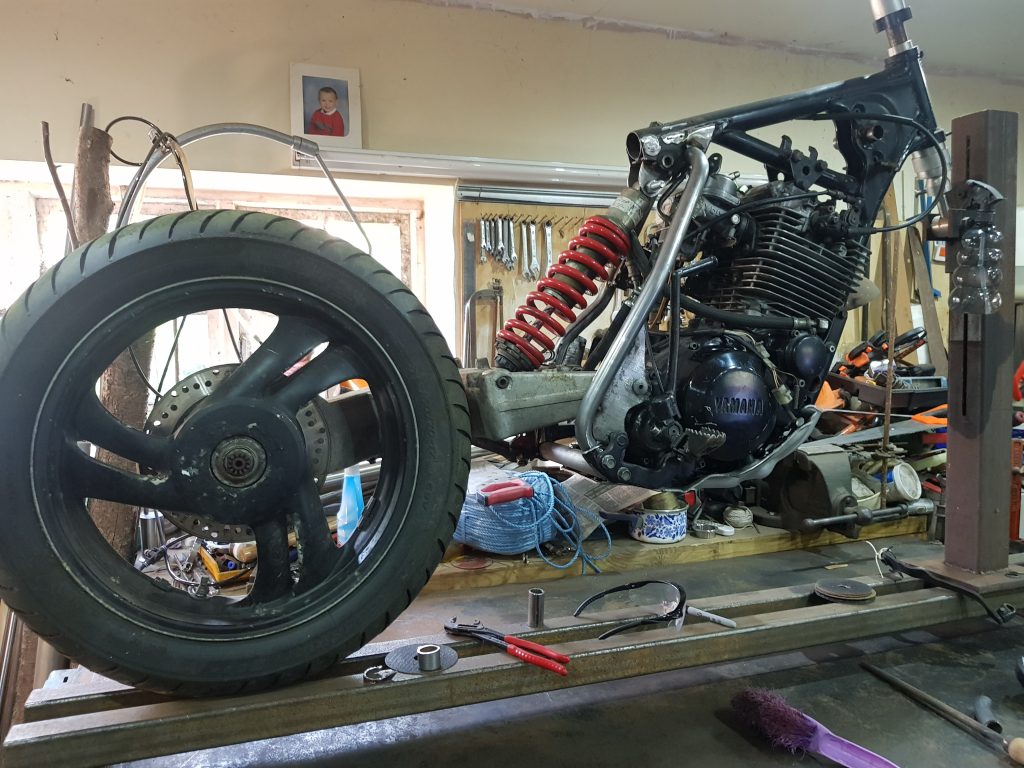
I should point out this is a couple of weeks in to Covid 19 lockdown so getting hold of parts will be tricky but not as tricky as getting hold of bogroll for some unknown reason.. Rumour has it Mac knows a man, he can get Andrex triple ply, it’s not what you know.. A quick slice later and the cafe racer mod is gone, engine/swing arm are bolted in, I don’t have a back wheel…I’ll have a look around my parts to see what might fit.
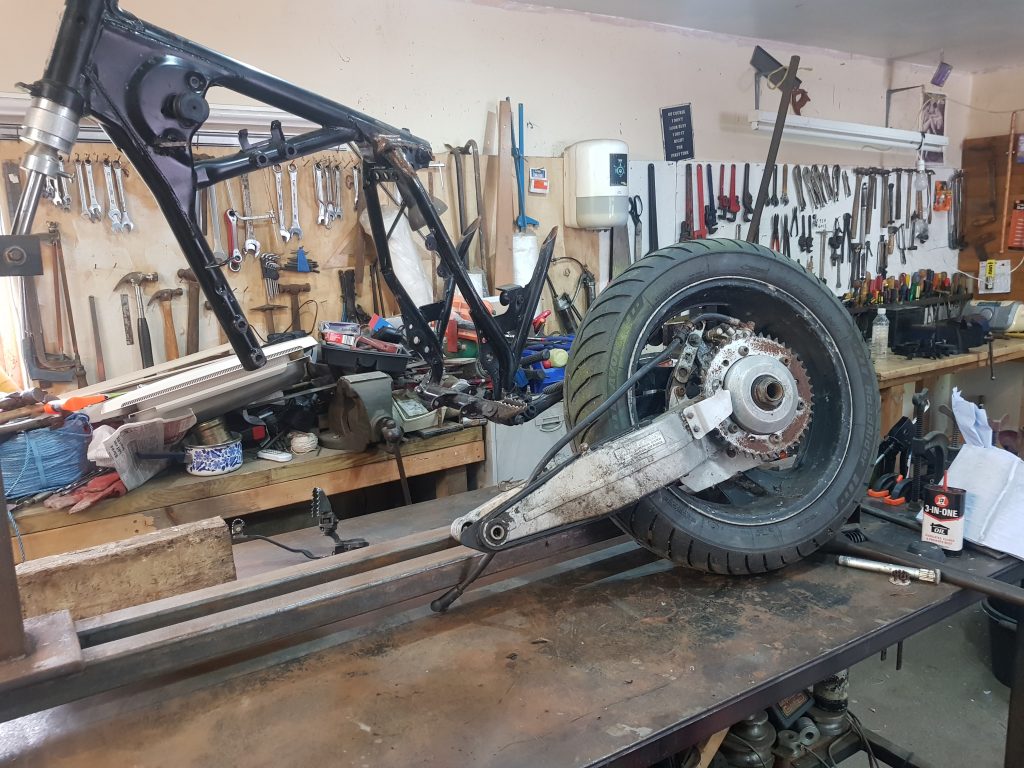
I could not find a normal back wheel but I found a back wheel in a single sided swing arm from a Honda Bros 400 also from the 80’s or 90’s..? It does not even close to fit, it’s wider and offset and does not sit central, might as well be from a different bike. I am going to need to remove more frame to get this to fit.
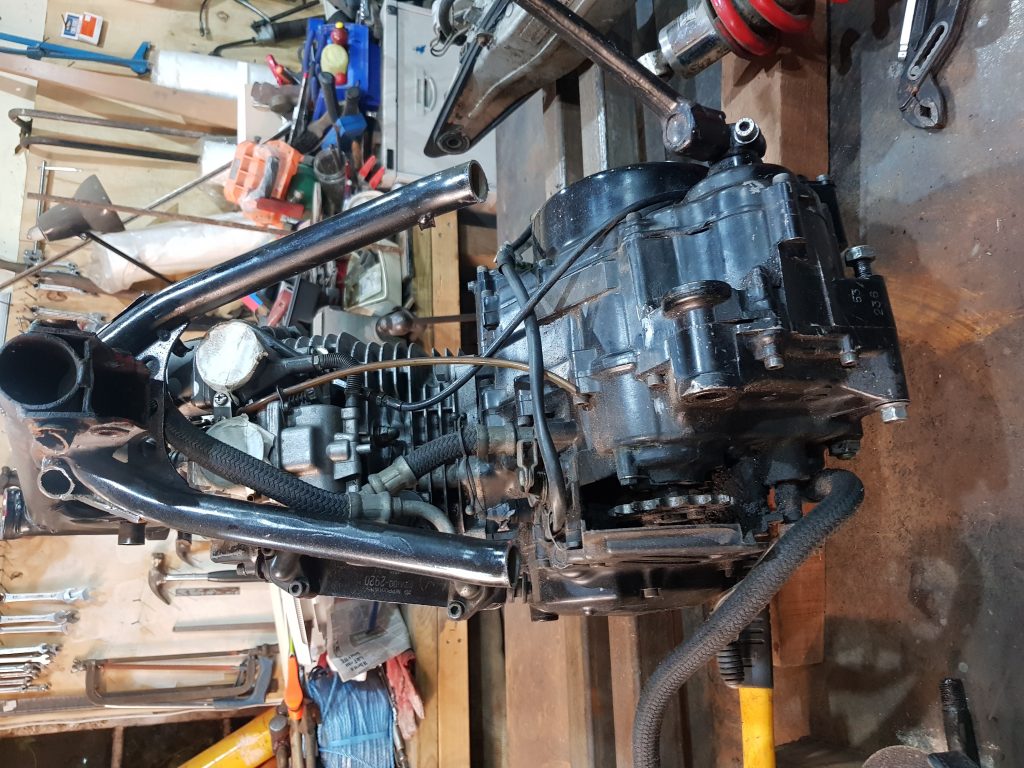
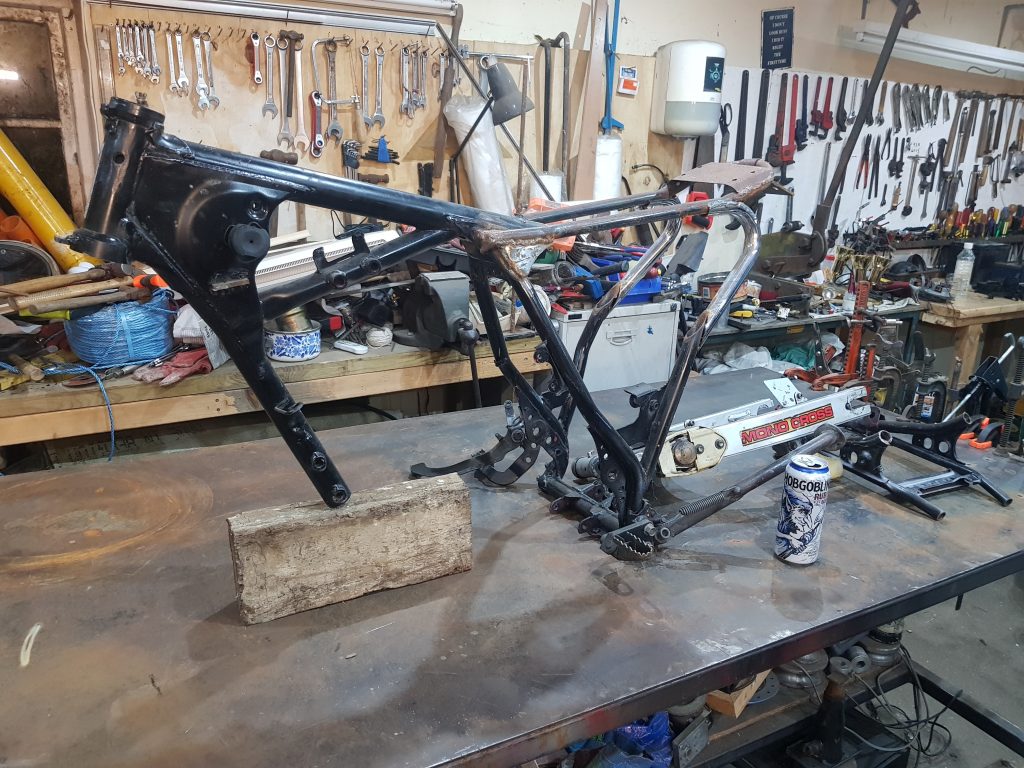
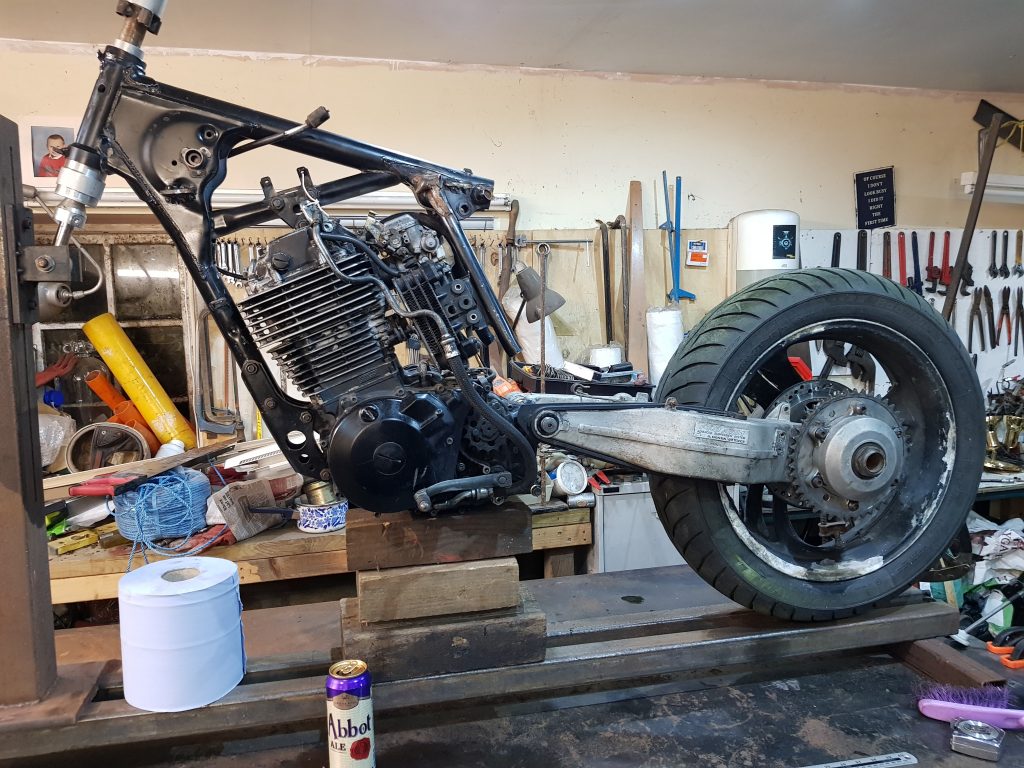
So I have removed more frame, I’m sure I’m going to lose both of these down tubes completely but I’m leaving them there for now. Time to try a fit with the swing arm and see just how far out we are..
That looks hopeful, the swing arm spindle is the right size, it fits through the back of the engine fine and I can make the frame to suit, time to try the suspension unit for ride height.
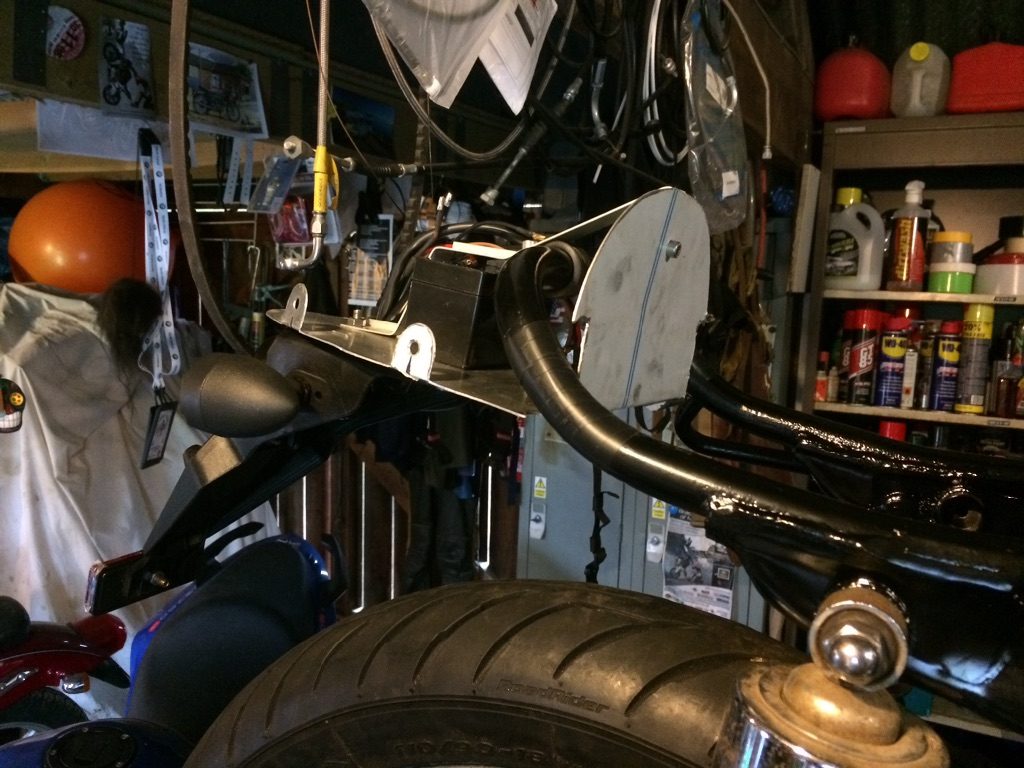
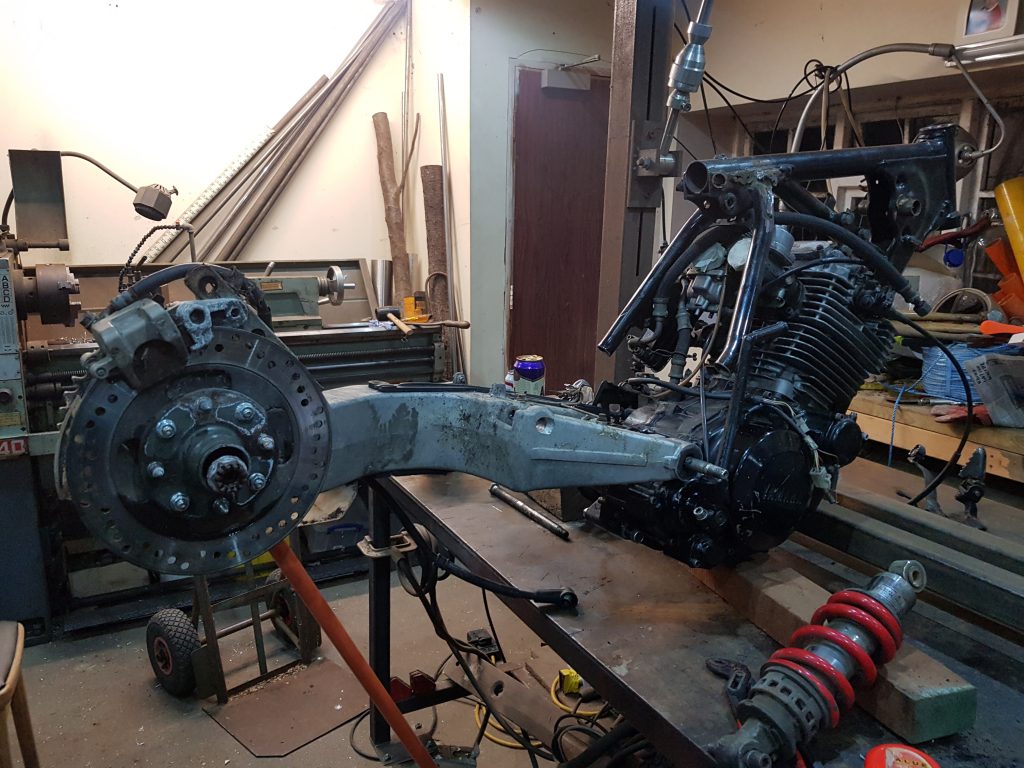
Now I’m not a pro at this game but I’m pretty sure the rear wheel needs to be lower than the handle bars so I suspect the suspension unit either needs to be longer or drasticly move the top mount, I’ll phone Mac and see what he has in stock.
Turns out Mac has ordered the house staff (not allowed to call them servants) to draw him a body temperature bath of goats milk and has ordered 12 punkah wallah’s to circle him whilst he watches close up images of Harley Davidsons on his 50 inch flat screen held by 2 Telly wallah’s, so no he cant answer the phone right now so I’ll move on to spacing the swing arm instead.
One of the issues I’m having is the offset between the centre of the bike relevant to the drive chain, if I move the swing arm to a place where the sprockets line up it means the rear wheel will track 18mm to the right so it is no longer following the front wheel, ideally I want the rear wheel to track exactly behing the front and I want the sprockets to line up, I forgot to get a picture of this but if you bolt the sprocket on the wrong side of the carrier and make a 5mm spacer to go between the carrier and the bearing it’s close enough, just make spacers to suit the swing arm at the pivot and we are getting closer!
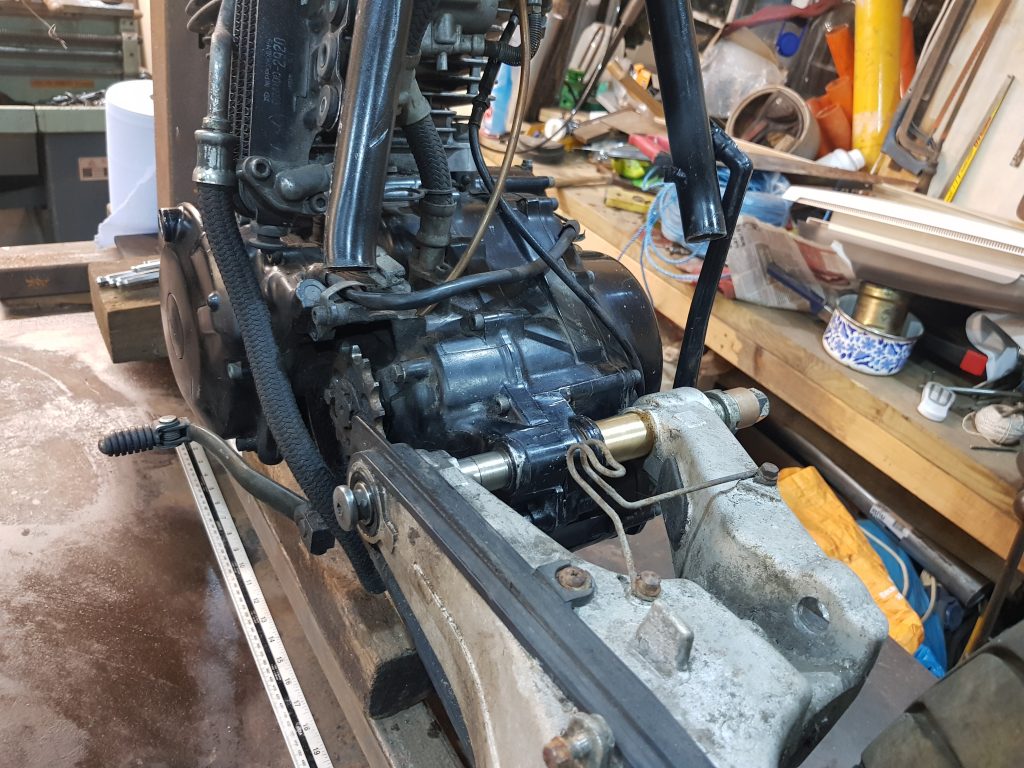
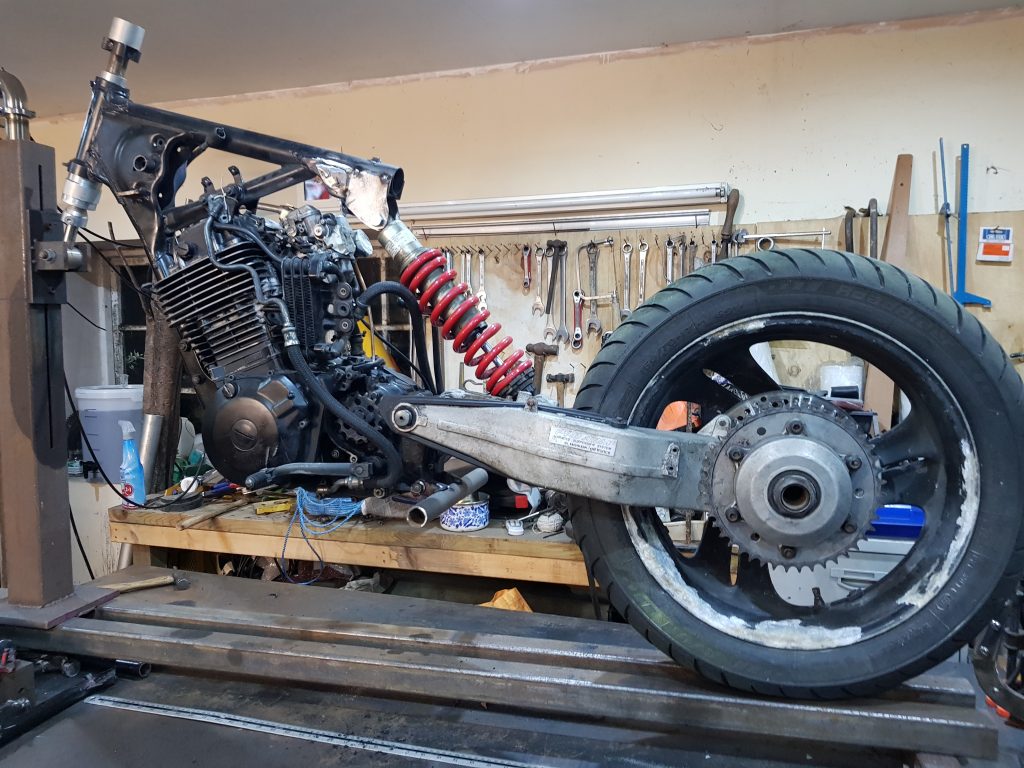
Now I have the sprockets and both wheels in line I’ll jack it up on the jig I made (£40) and work out how the new frame will accomodate the mounting points for both swing arm and foot pegs.
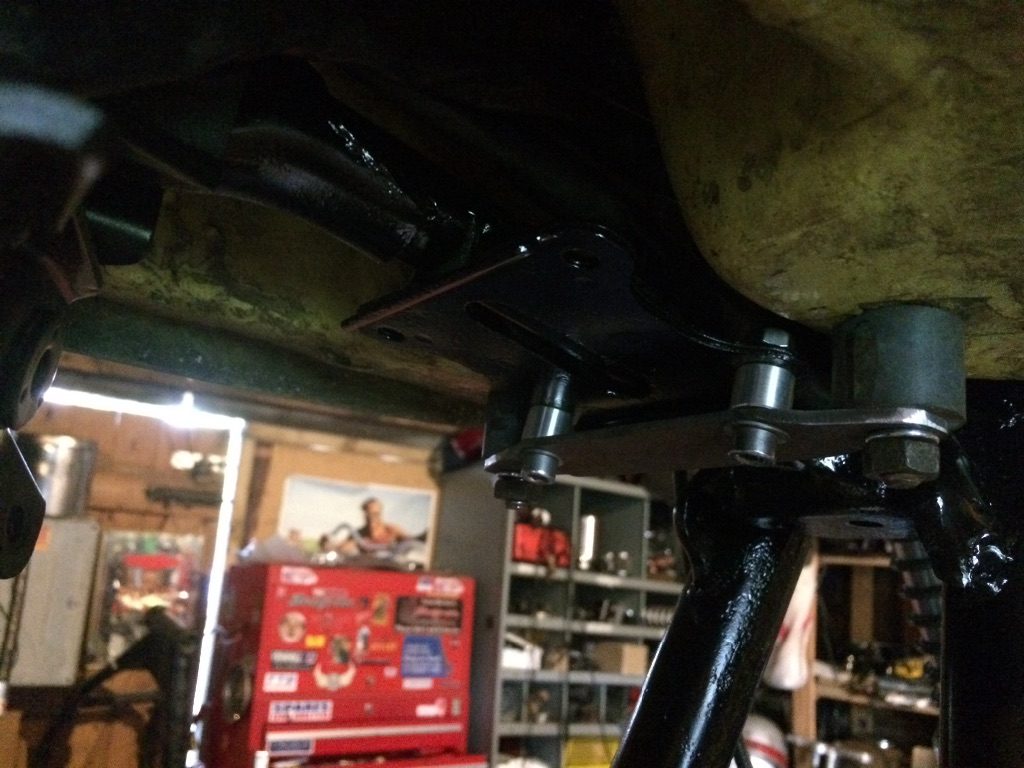
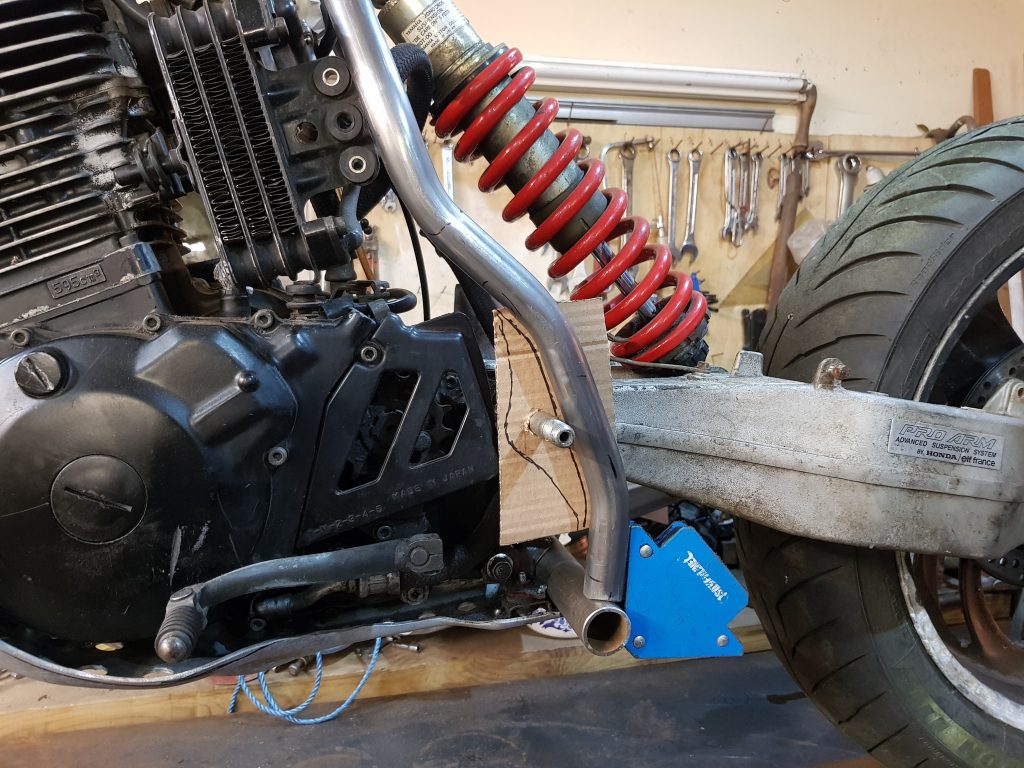
As you can see here the bottom mount/footpeg hanger is no where near wide enough, if I join a tube here it would foul the swing arm, see centre screen, this should be a one inch tube housing a gusset that accepts the swing arm mount and then attaching to the spine. (big frame tube under the tank) This needs to be at least 25mm wider, maybe more..?
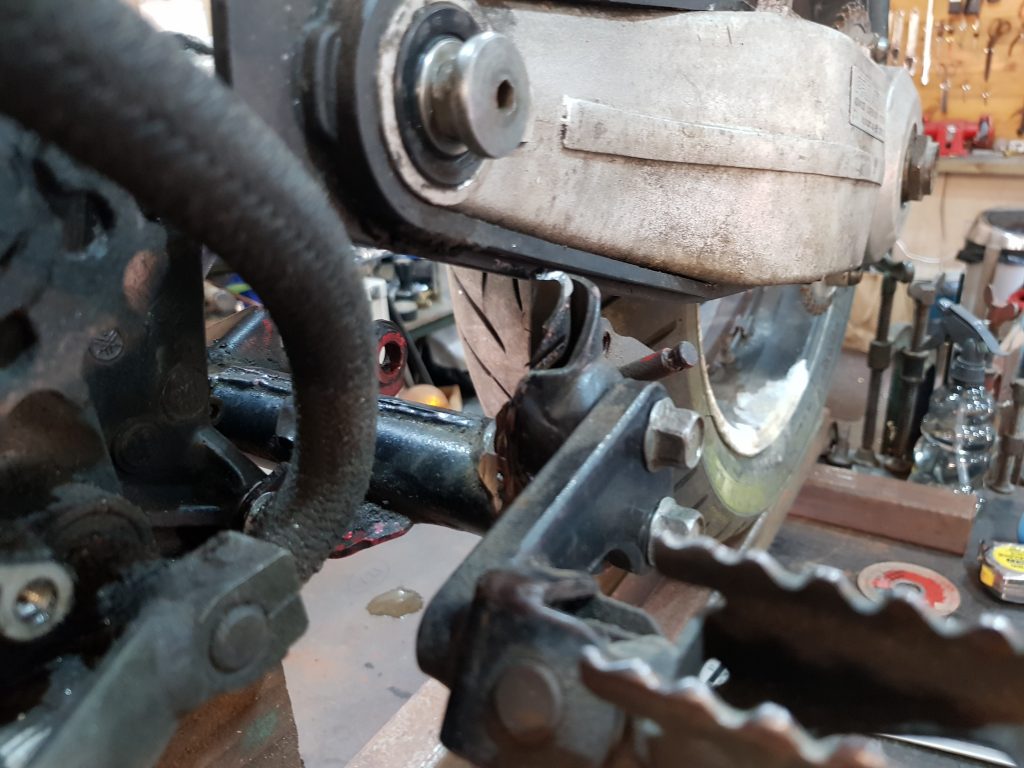
I need enough sticking out either side to attach the frame to the spine, it’s just not enough.
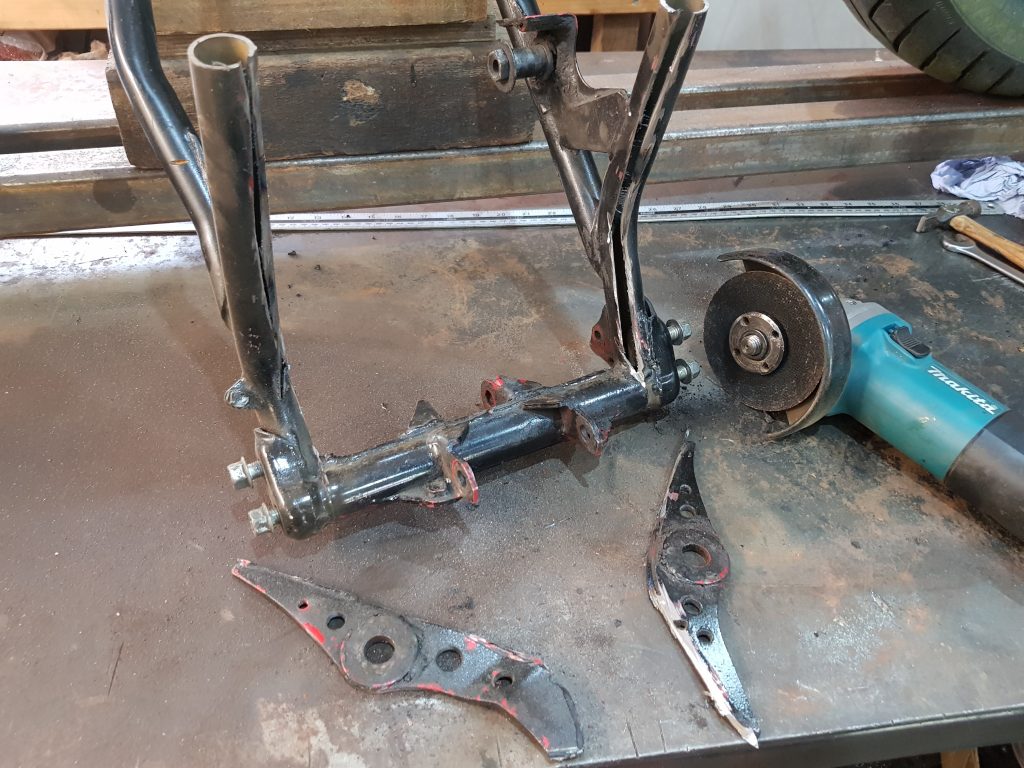
I’m not going to be able to make much use out of this, I could cut and extend it but that seems a bit of a bodge, I have an idea!
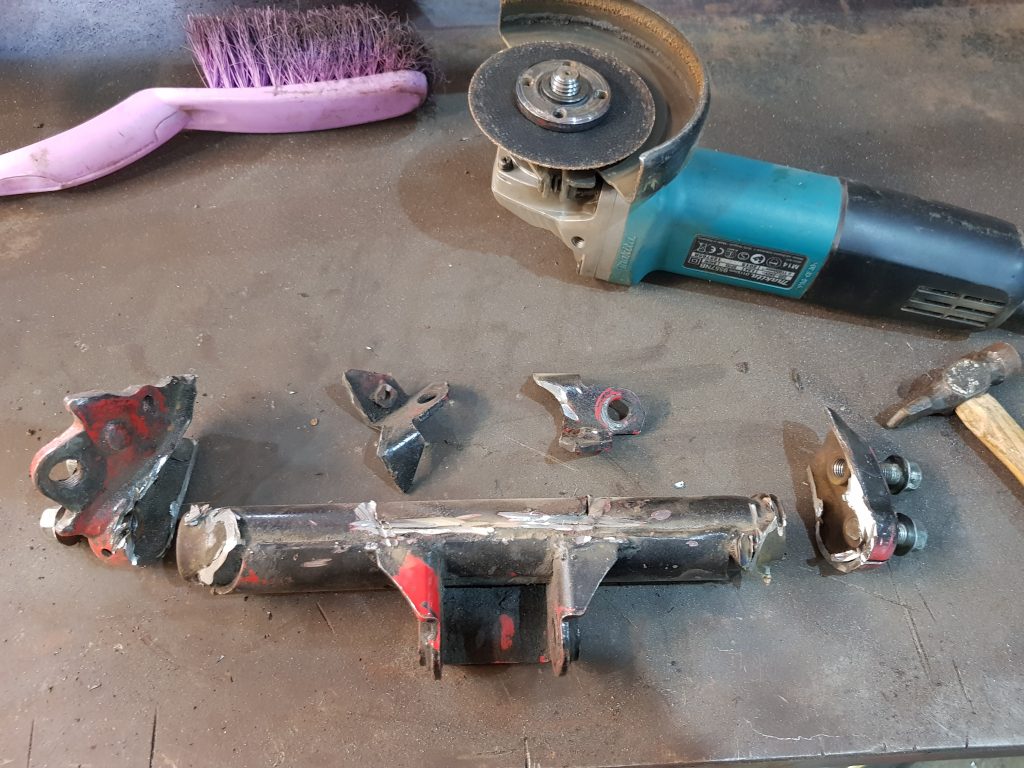
I’ll cut off the mounts and footpeg hangers, I’ve got some 32mm cold drawn tube from an earlier build so I’ll make a new’un.
I’m going to play it clever and make the tube an over an inch too long on each end so I can concentrate on making the swing arm and frame mounts, plenty left over to stick the foot pegs on with, well thats the plan.
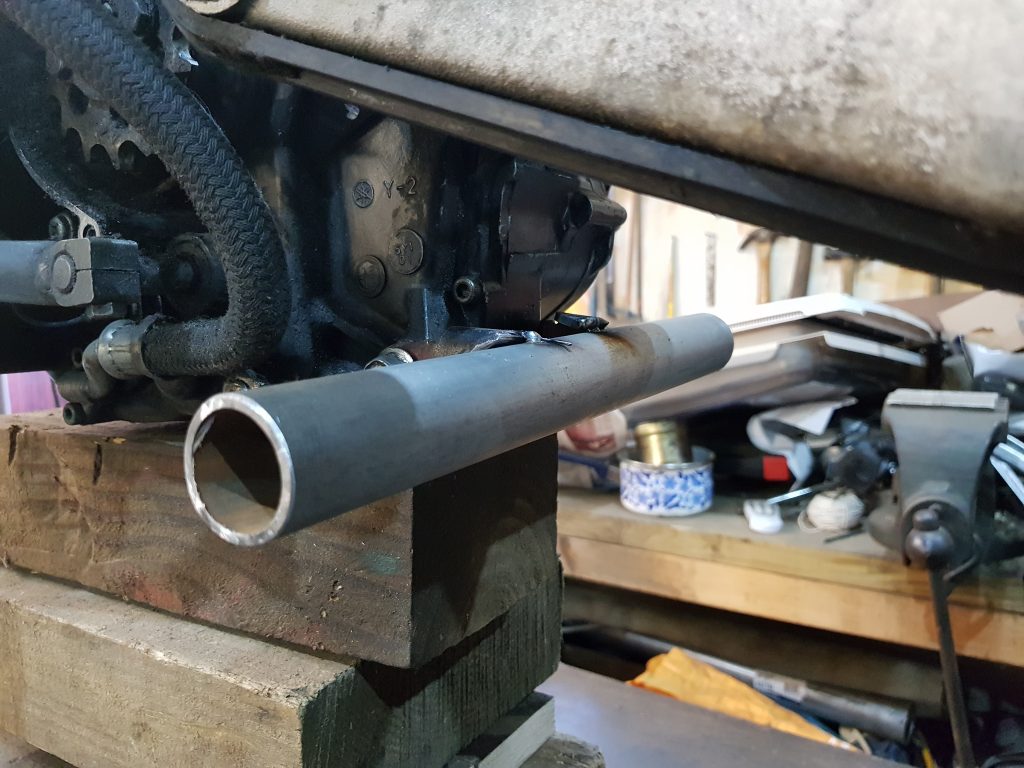
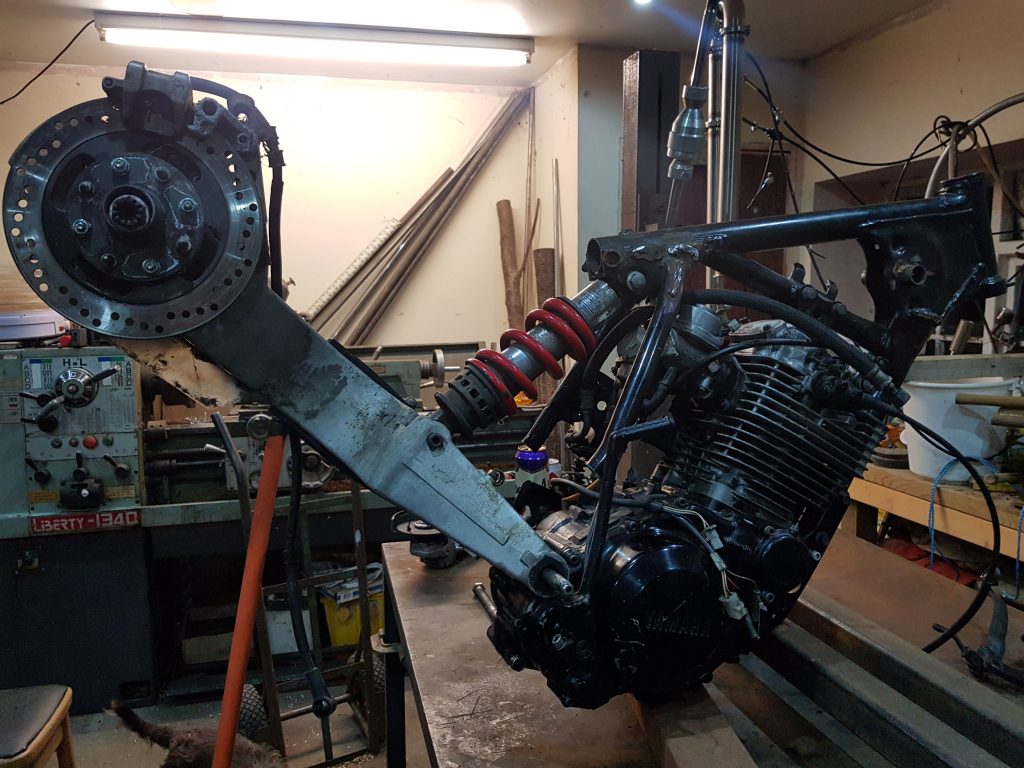
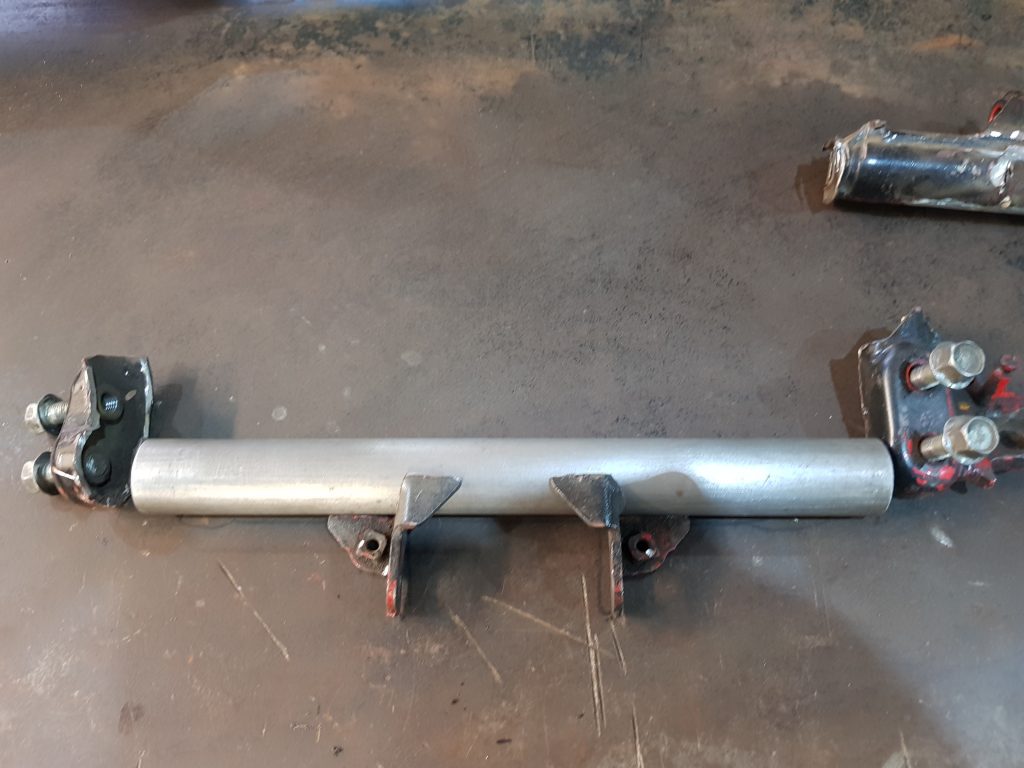
There we have it, the tube is now tacked to the mounts and is in place but I have just realised I need to switch back to mounting the rear shock absorber as any alteration I make up top will affect how much room I have to mount these up tubes from the swing arm, Mac had at some point finished his milk bath and dropped off a longer shocker but it’s still to short!
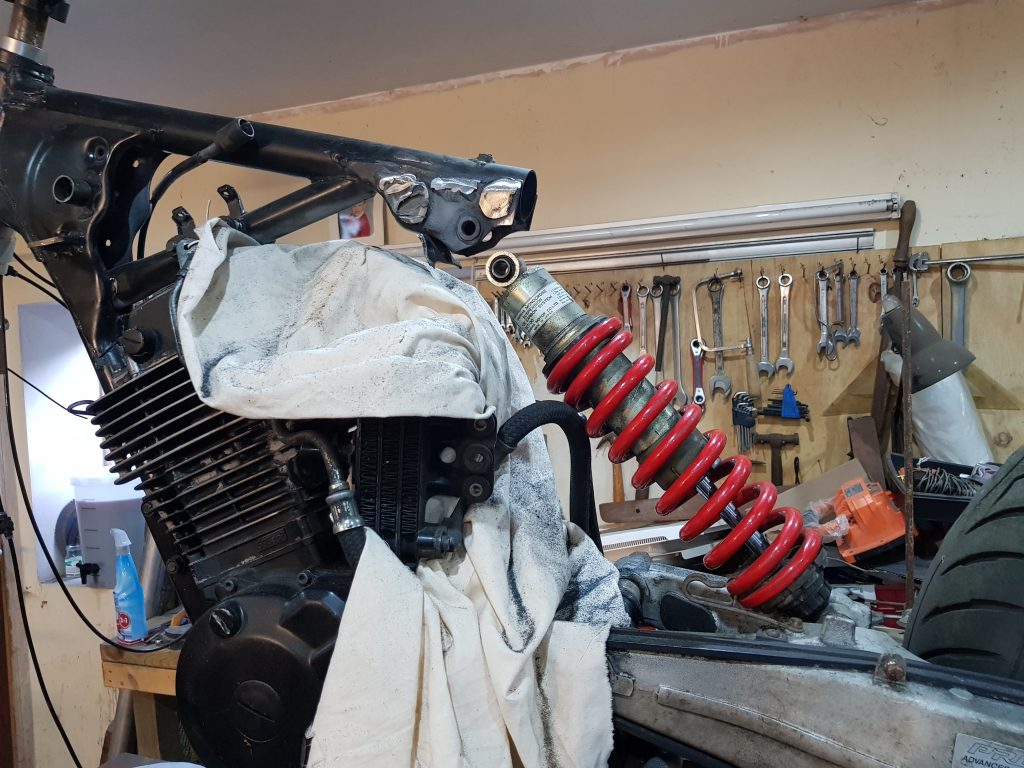
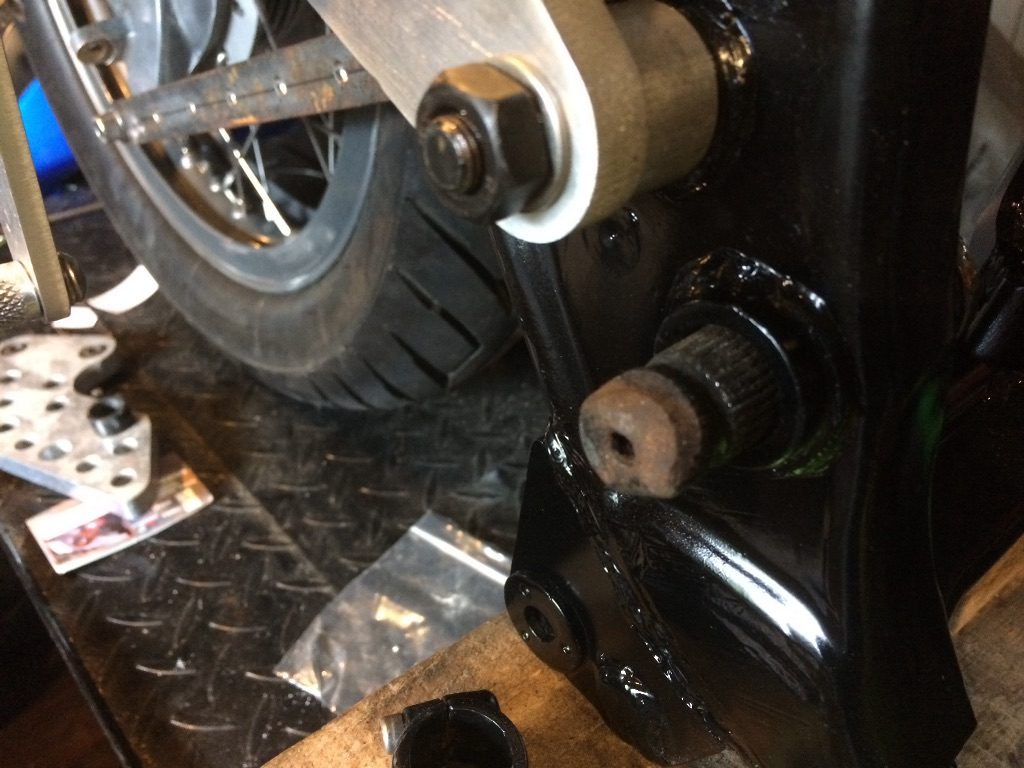
The bottom mount needed a bush making as the original bolt from the Bros was too skinny, easy fix. The top mount is entirely a guess and may need changing, I chose this possition for what looks a good ride height but as I don’t have a front end yet one could argue my calculations, I’ll try this and if it’s wrong I’ll fix it.
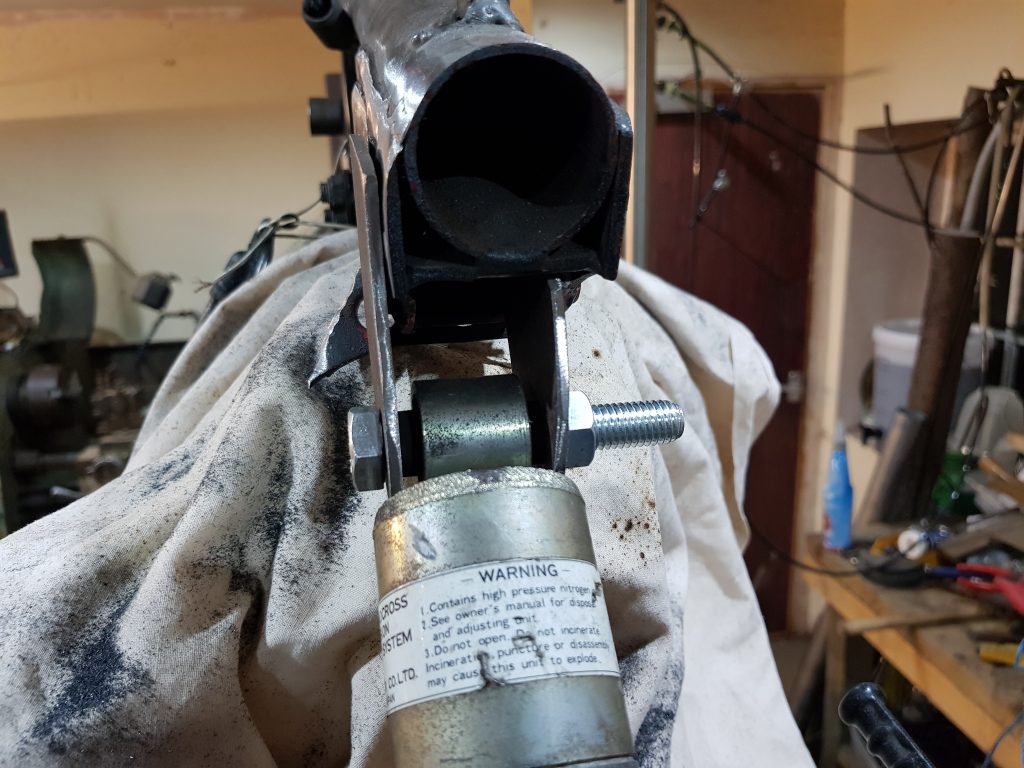
The bottom mount on the single sided swing arm is off set to the left a bit, the top mount on the bike is in the middle so I have moved it around to suit, looks wrong but it needs to be like this. This unit used to run with rockers on the bottom mount but is now going to be mounted direct so maybe to stiff to use like this, we will see.
Next job is to make the up tubes and join the bottom mount through the swing arm mount to the spine, lots of bends, I’m using inch tube with 1/8th wall and making the bends with my ebay bender (£270), it bends with brute force and a little luck.. (I bought plenty of tube to play with).
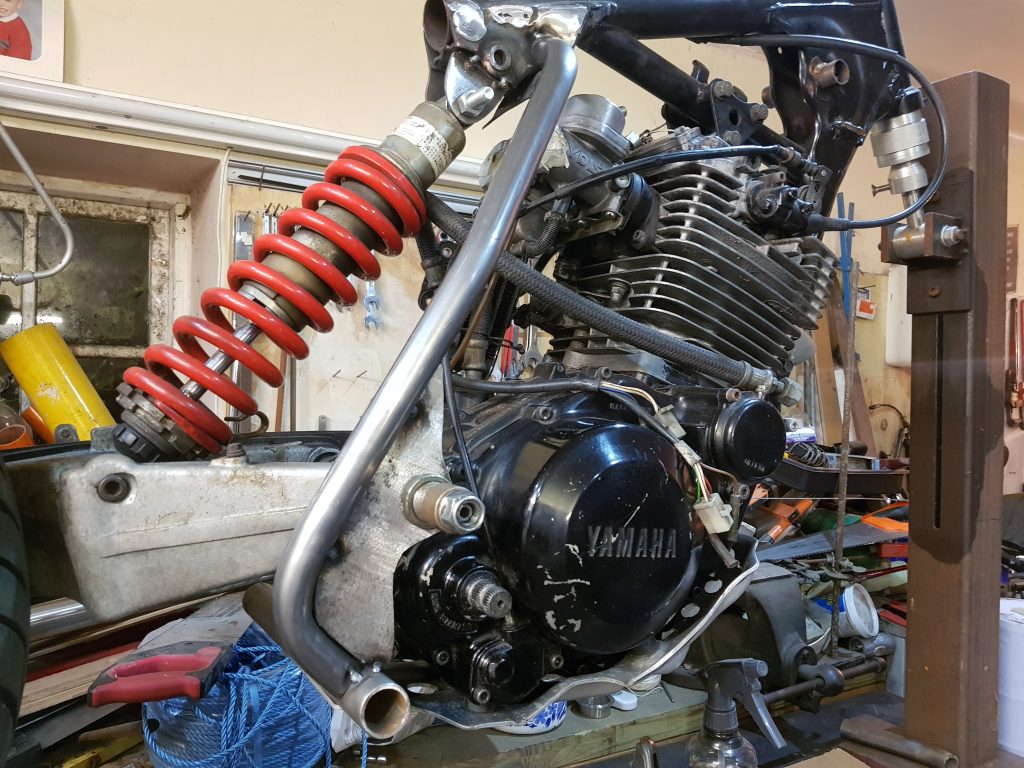
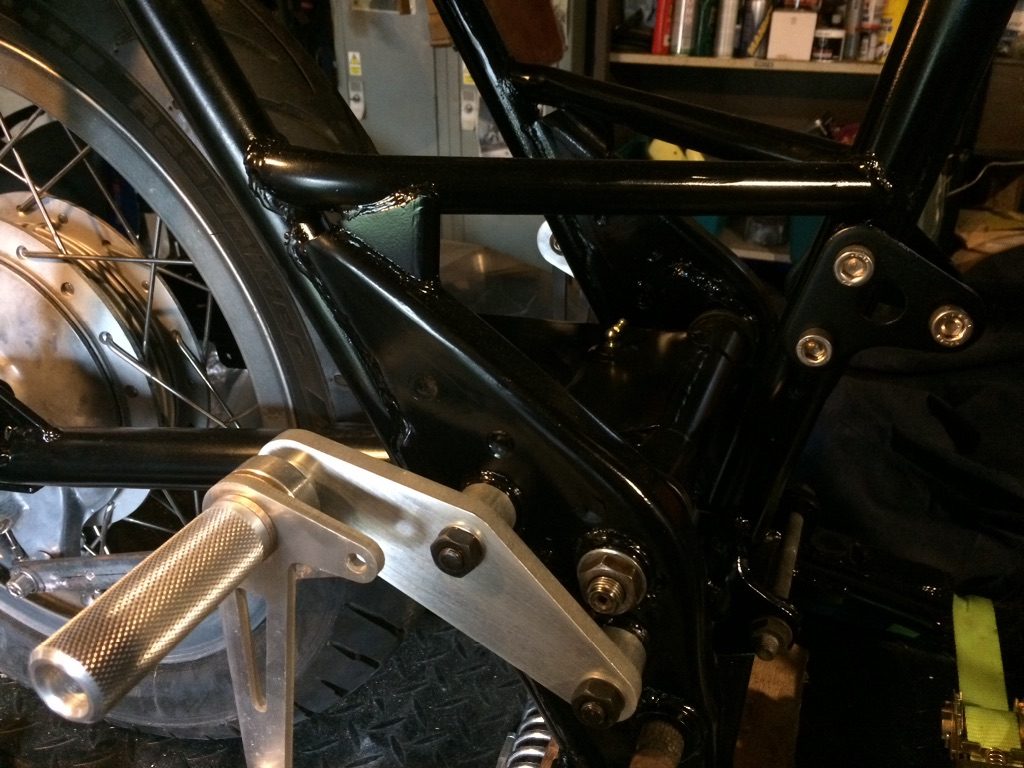
So there you have it! First side done and tacked in place including a gusset, these are very tricky to make and the skill takes years to master.
Or you could rip a bit off a box and draw round the tube with a sharpie, like I do.

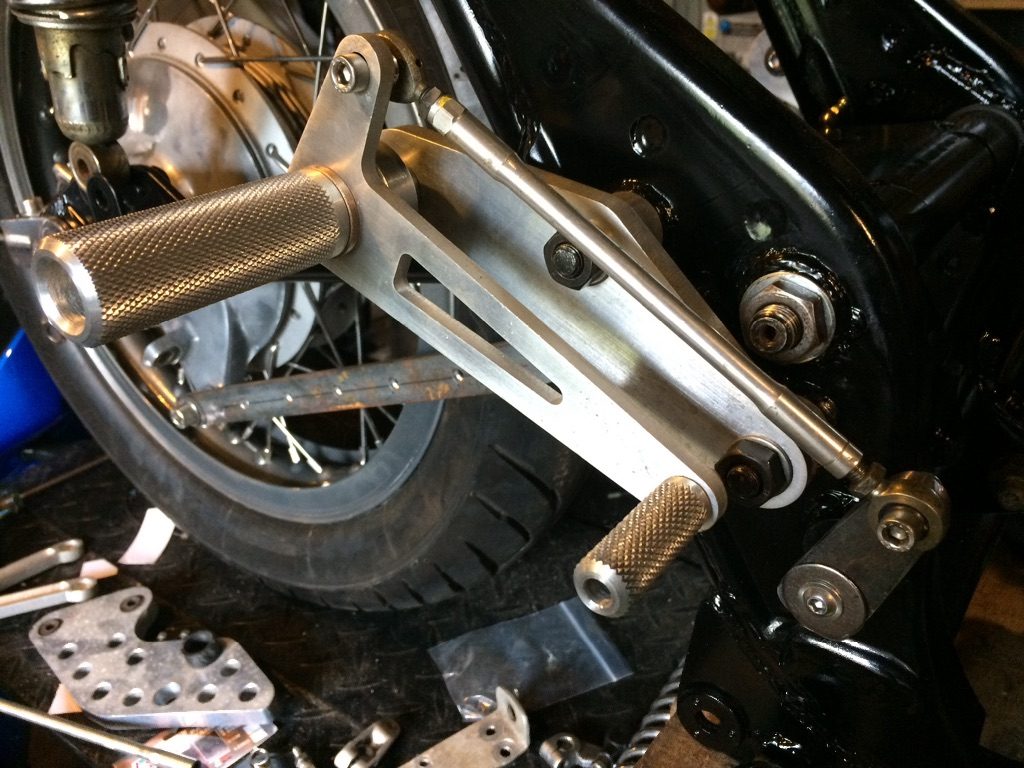
Footpeg mount tacked back in place, also mounts the stand.
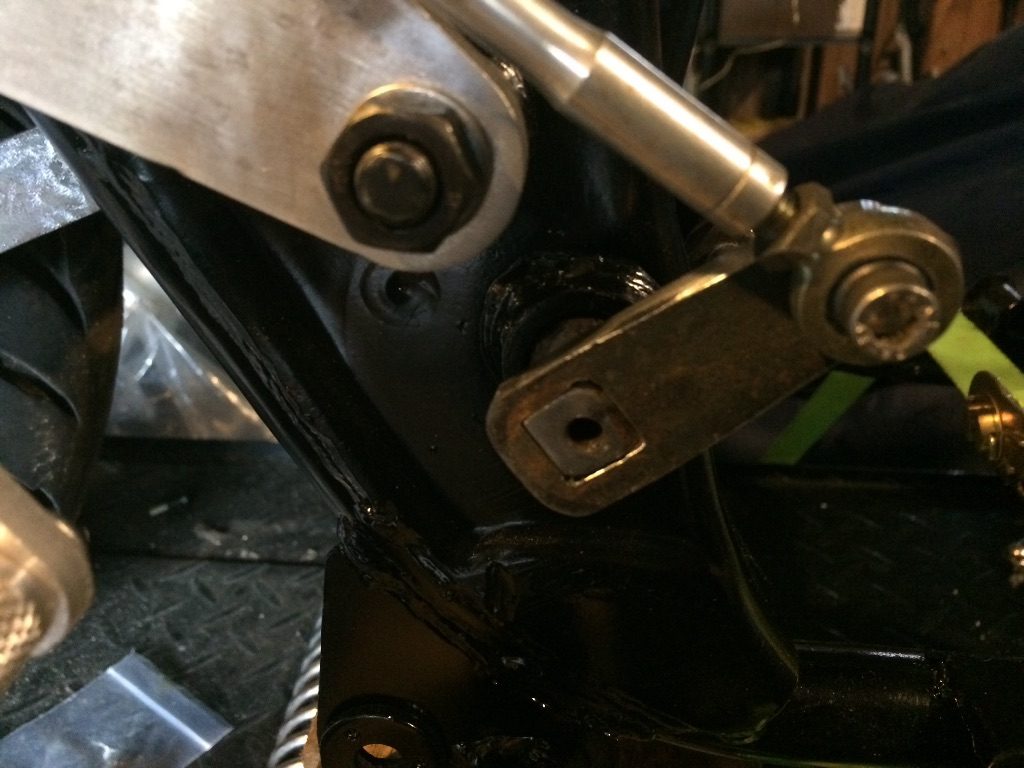
Also mounted is the right footpeg, this is also mixed up with the rear brake, it was drum braked but now I have a disc so this is pushed to the back burner for now, I have bought a second hand master cylinder/pot from a xl650 Transalp, I took some measurements and worked out this was the cheapest one I could find so it would be a good fit. As it happens Mac has a contact not far away that makes hoses and are happy to play silly buggers so I’ll let them worry about the plumbing.
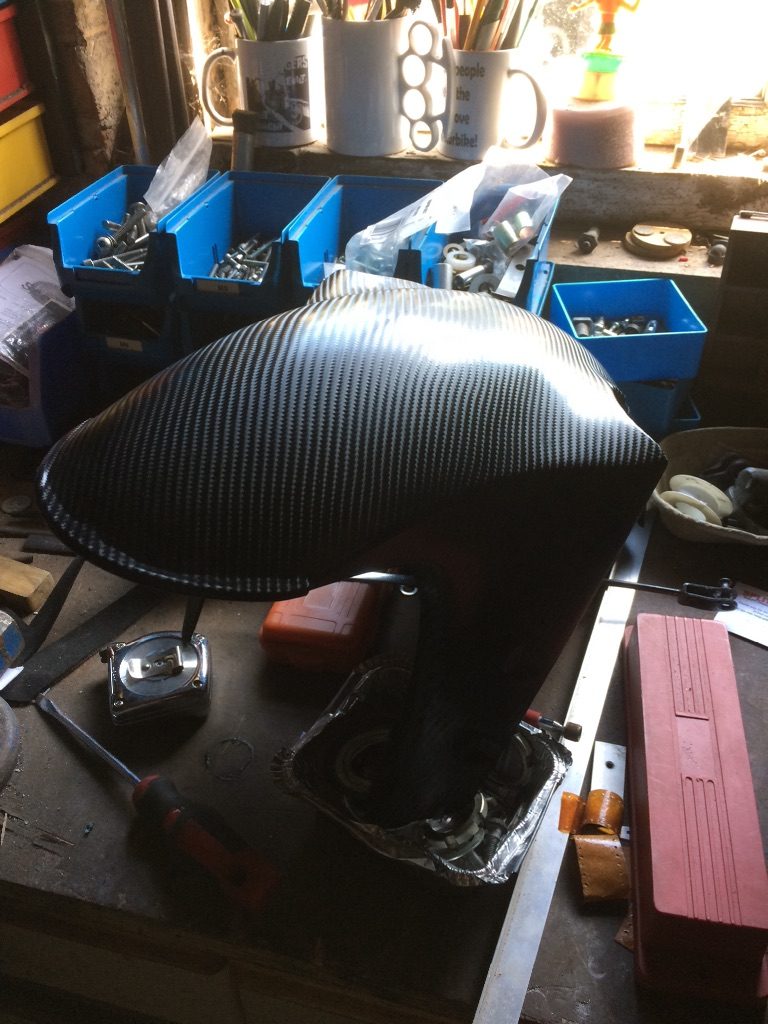
My R1 front end came with a right scabby (Red) mudguard which needed some repairs. As most paint shops are currently shut …. and me being impatient, (once the item was solid again) I thought I’d have a go at vinyl wrapping ……….. Bl**dy Hell ………… what a palava….. it was like psycho meets blue peter …. not for the feint hearted. Anyway after much swearing its finished and although I may say so myself …. not a bad finish.
Having had some time to spend in the garage I realise how unlikely it will be that I’ll even ride the Cafe racer as I am neither 18 years of age nor a yoga instructor…. and the thought of pulling up at some lights screaming in agony at my seized hip joints as I try to lift my foot off the rear sets to place it on the tarmac before the bike meets it – doesn’t fill me with ‘joy joy’ feelings.
So Having come to this conclusion I backed the Harley out of the garage only to wonder how long it would be before I found mid controls and drop handle bars equally as uncomfortable.
With this in mind I have started on plan B.
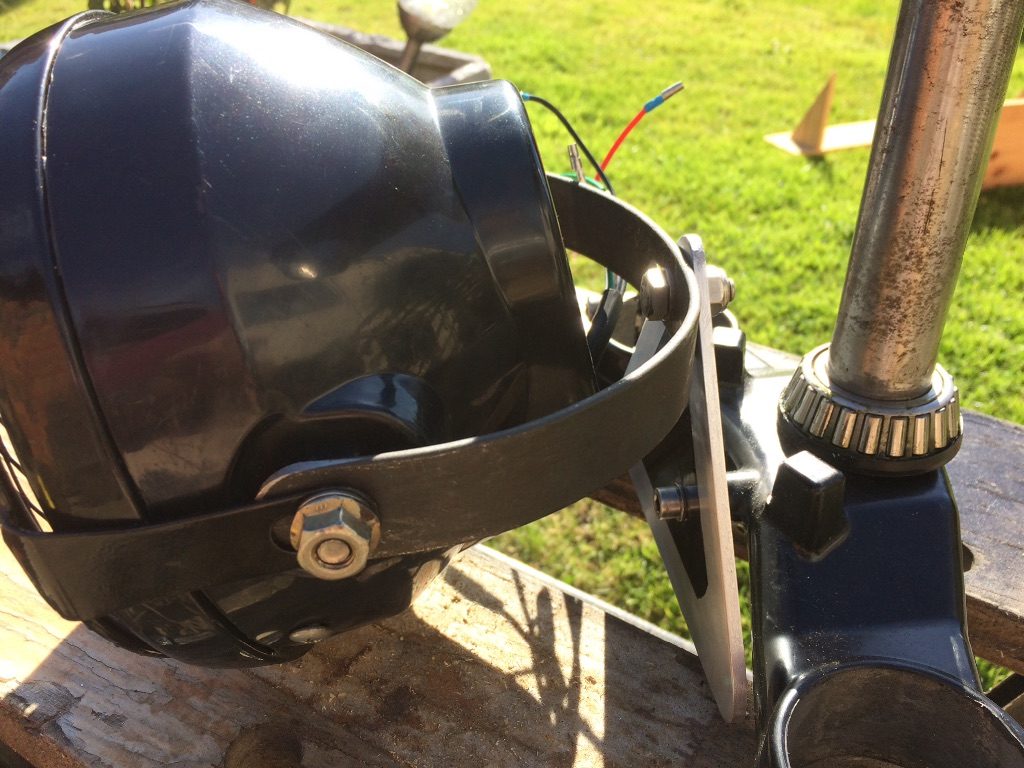
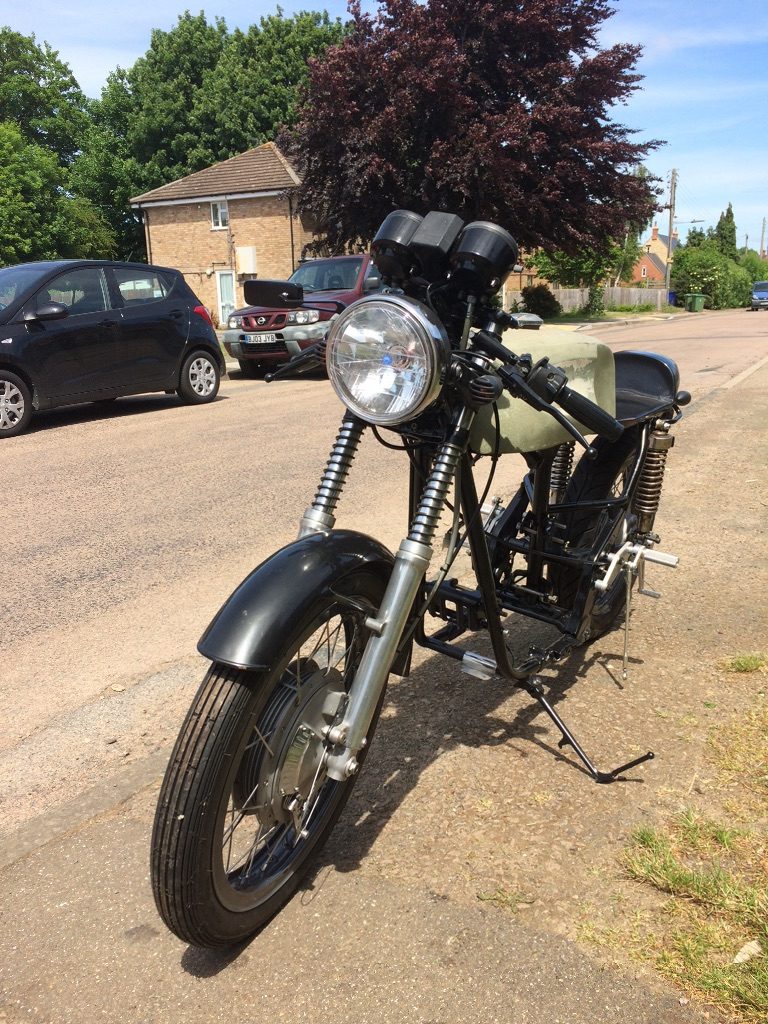
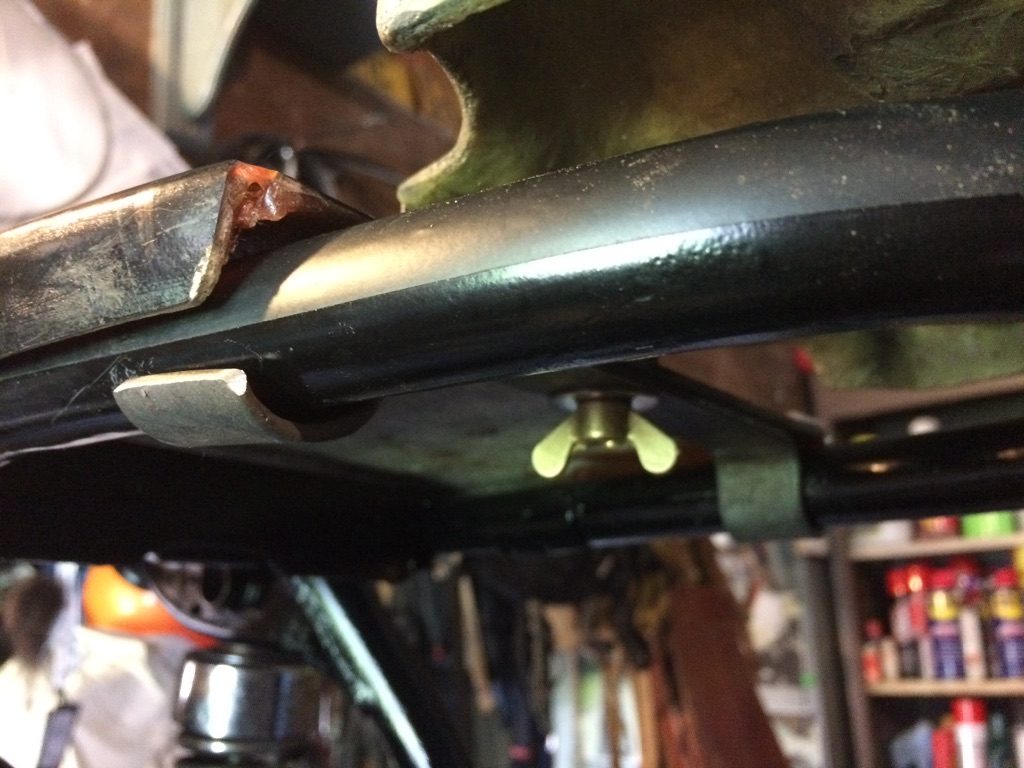
Firstly take a set of R1 forks that you have laying around the garage…. as I didn’t want the headlight brackets (on the forks) I took a headlight (also in the parts bin) with indicators incorporated (with negates the necessity to fit bar end indicators ) and made a semi circle bracket, mounted it to an ally bracket that I knocked up and bolted it to the bottom yoke (shame the screw holes were not parallel) The nuts on the sides and on the back adjuster will be replaced with nice big brass wingnuts when they get here. I’m not sure how it will look yet (sticks out further than I’d have liked) until it gets married to the bike.

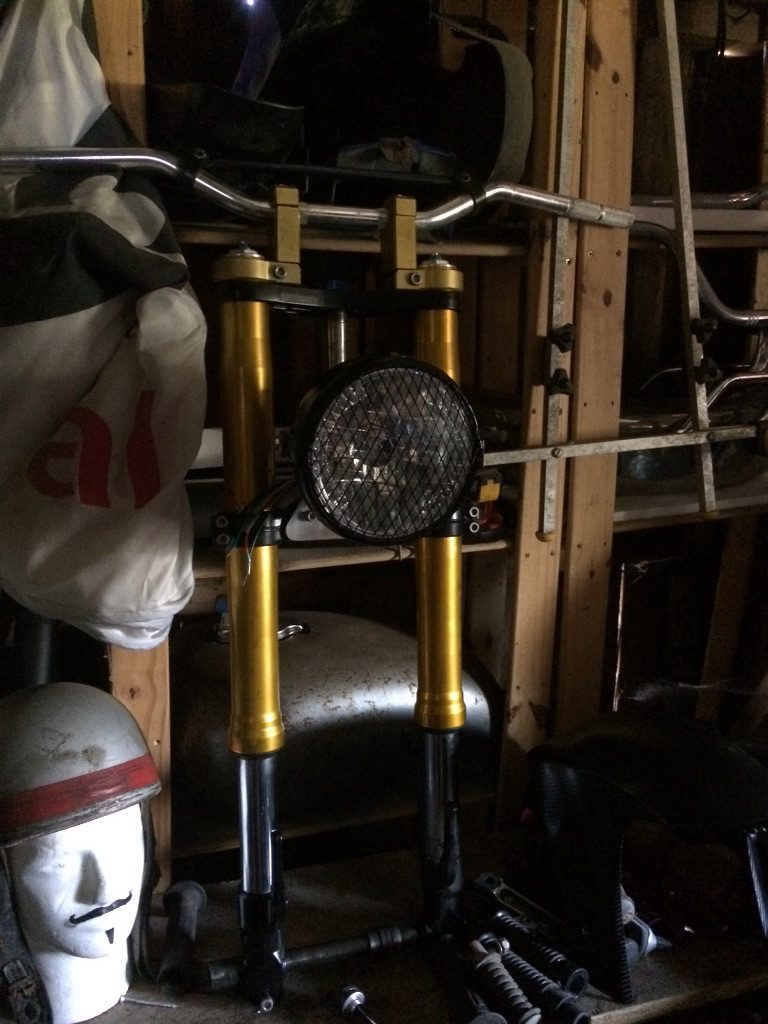
So …… rough mock up and the front end should look something like this …. however I’ve realised that the bars now look too skinny but as luck would have it I’ve also got a set of 1″ bars stepped down to 7/8 but this will mean the risers will need boring out to an inch……. enter the ever helpful Mr. Heisenberg (who has already knocked me up a very useful tool for removing the front spindle.
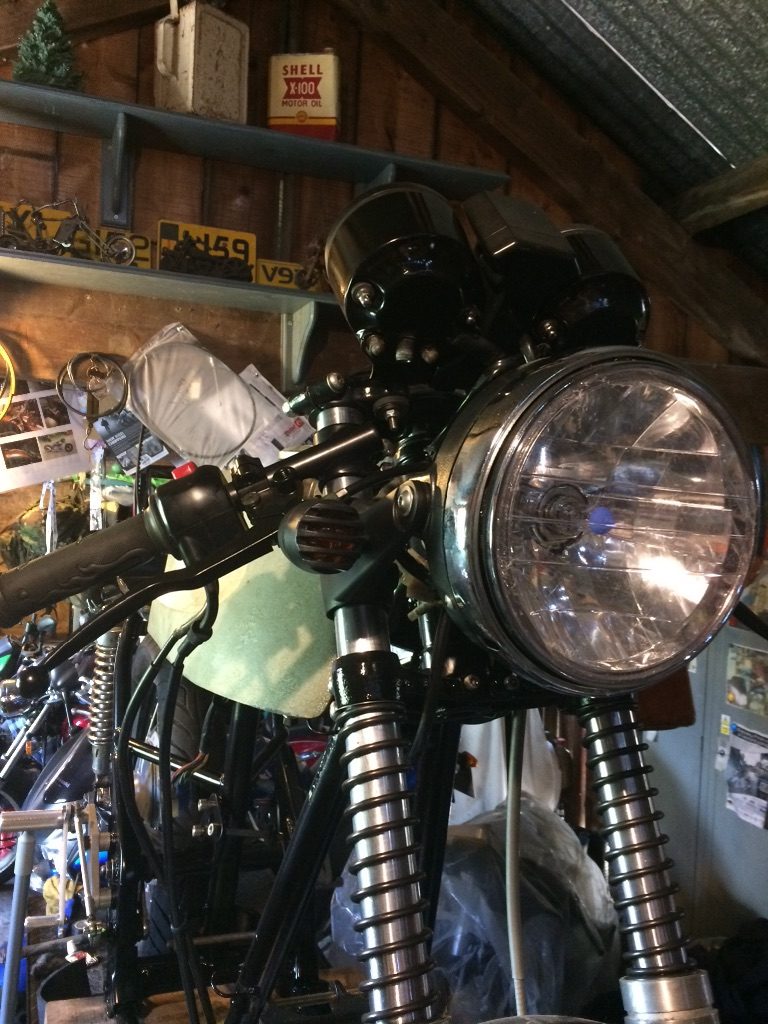
Top yolk on and clocks attached to see how it all looks up front.
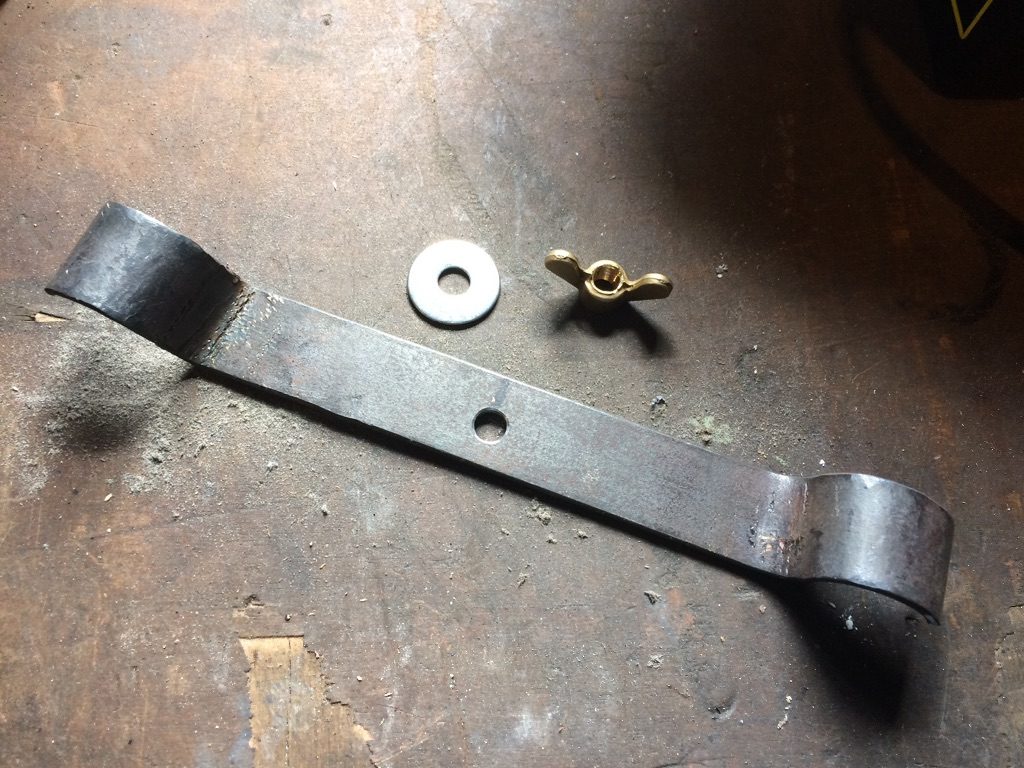
Nothing quite like taking your frustrations out on a hot piece of metal and get something that actually works at the end of it. I wondered how I was going to mount the rear of the tank and marry it up to the seat unit at the same time whilst keeping it all secure but rubber mounted (to limit the stresses on the fibreglass tank). So – out came the blow torch and being lucky enough to own an anvil … the beating began. Once painted I’ll add some foam strip to limit the wear on the frames paint.
After much grinding, drilling and filing- the brake lever is done. As much as I hate doing it …. I have ordered a spacer from evilbay to sit behind the lever. Once all the bits are done ( and the weather is good) I’ll spray them up.