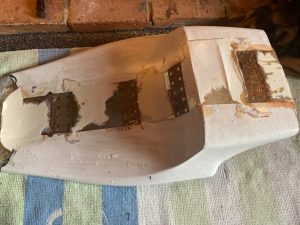
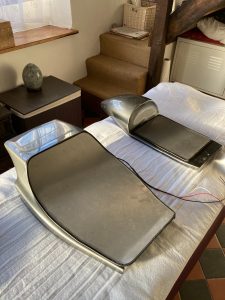
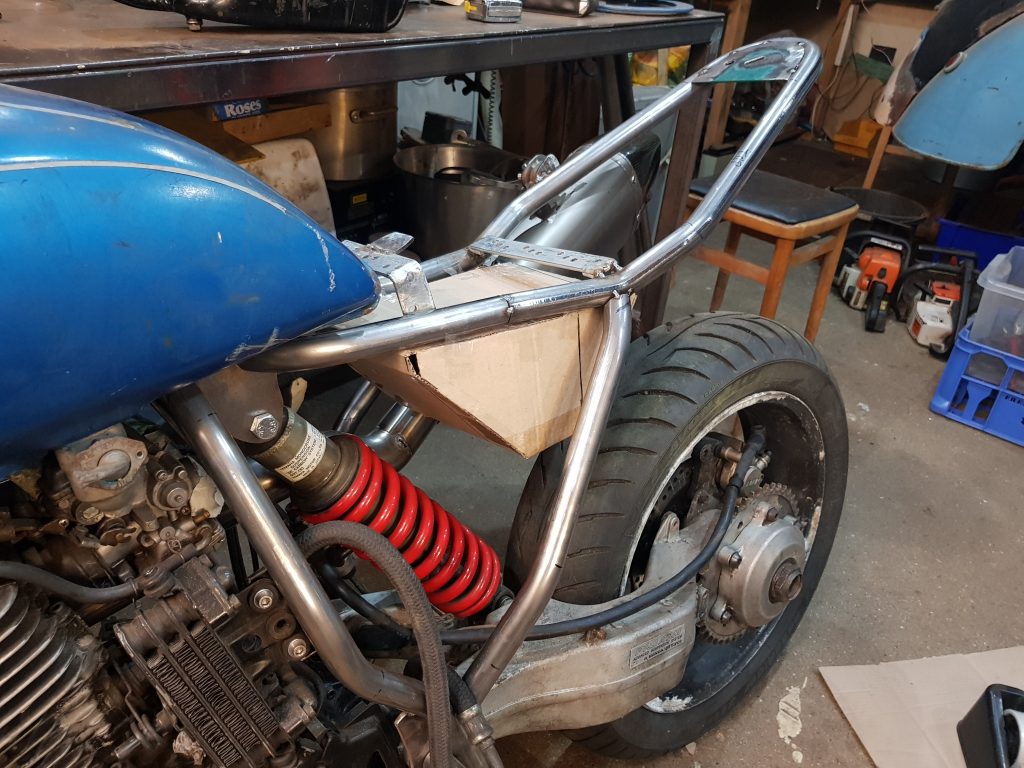
I was lucky enough to get the FXR with a fat rear end in it already … however this has caused all sorts of issues with clearance for a rear mudguard and nothing I have will sit over the rear tyre and still squeeze into the frame. I didn’t want to do the whole small mudguard thing and so whilst playing around with the bike I decided to junk the whole mudguard idea and instead go for a tail unit instead which should give the whole bike a more aggressive look. Enter a fibre glass unit from evilbay. Far too narrow for the American bottom sized frame so it was cut up the centre and re fibre glassed with strengthening plates. Once I’m happy with the strength of it it’ll be time to pretty it up.
Seen below as I’ve started peeling off the cardboard ‘mould’
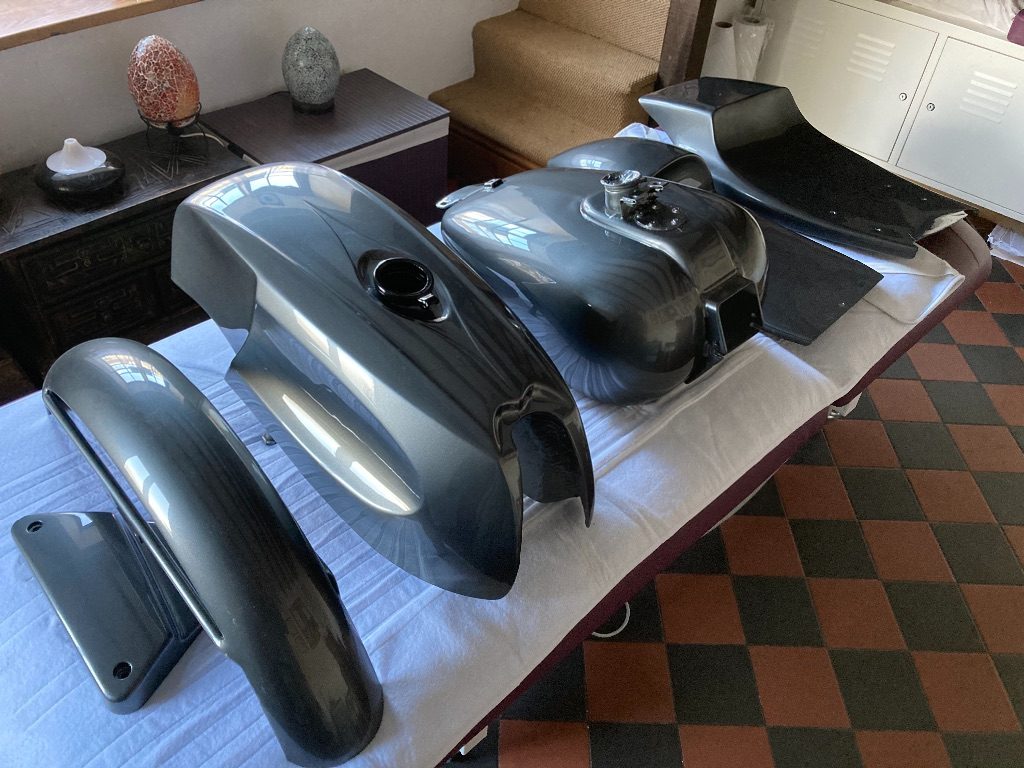
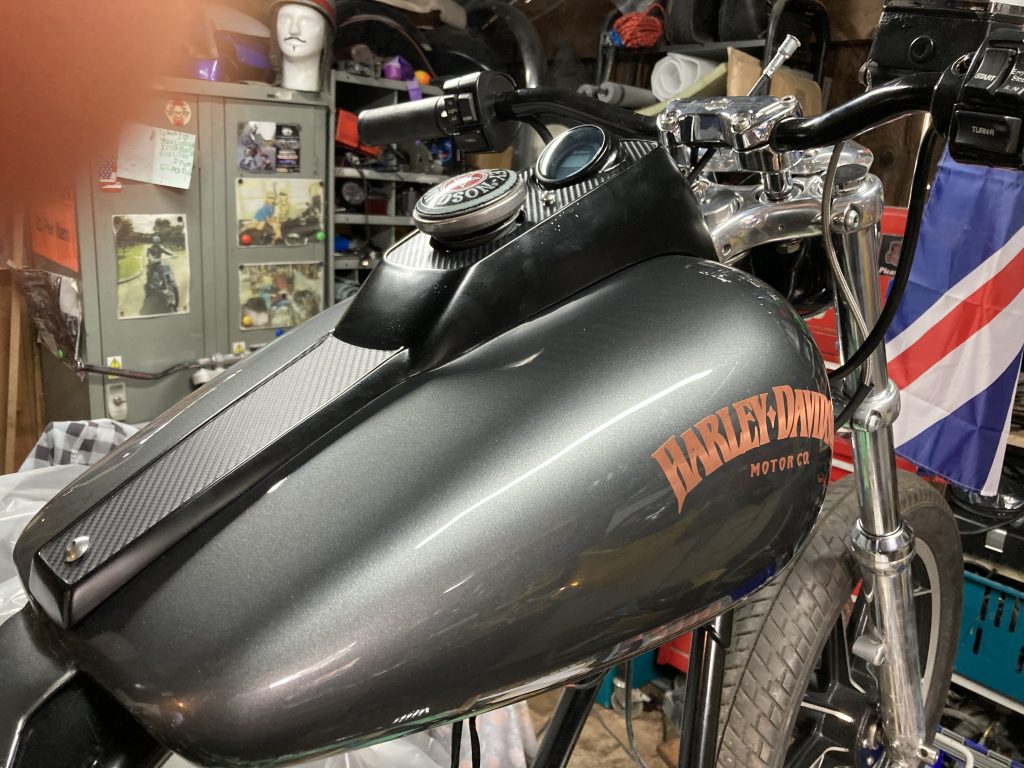
Hours of filling and shaping (stupidly in the garage as it was so cold ….. and covered everything) and finally it started to look like it might actually work … time for paint. I went for the same gun metal grey as the XS was being sprayed in both for simplicity cost and I actually well love gun metal grey.

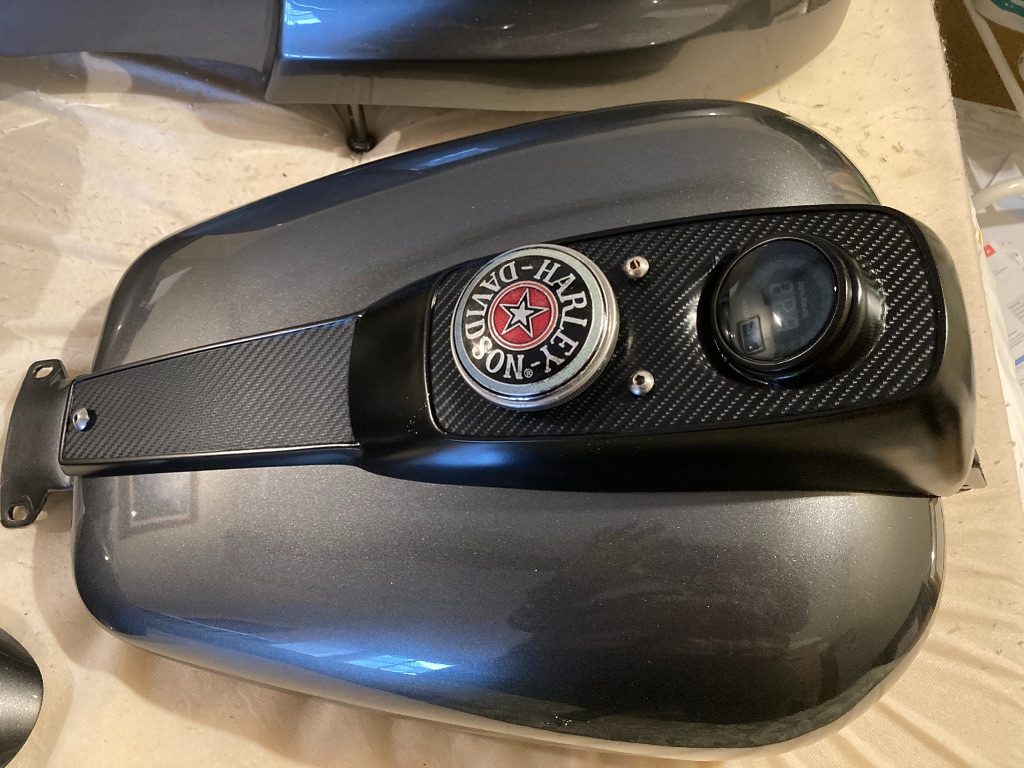
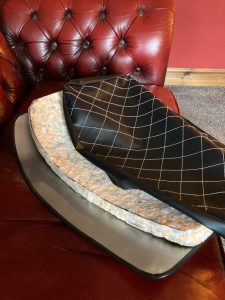
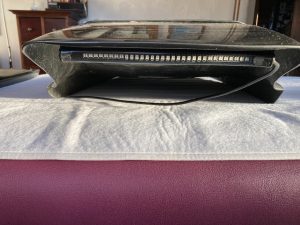
After receipt of the paint the centre console (also painted) was reunited to the tank with it’s new digital rev counter mounted. It looked a bit bland so I added a splash of carbon fibre to perk it up a bit.
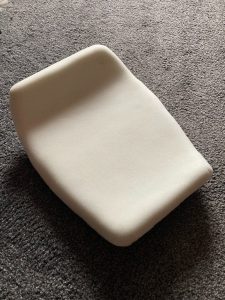
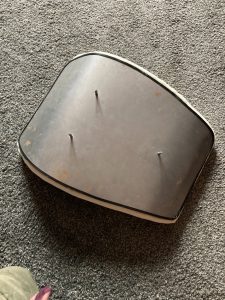
Time to address the seats (need to do the XS too). 1mm metal bought and shaped, foam cut to suit and cap in hand to my lovely daughter to fire up her sewing machine to make the cover .. still more to do – watch this space.
the rear of the Harley has the indicators fitted into the frame tubes at the rear. So without cluttering up the rear with lights and number plates – where to put the rear light/ brake light?
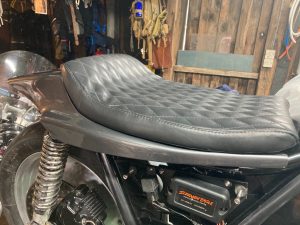
New seat …. not much more to do now … just need the engine back (looking pretty)
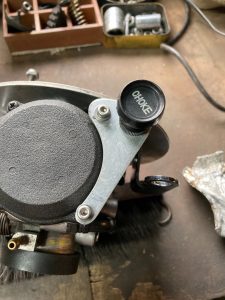
One of the many jobs I wanted to do on the FXR is to clean things up including the choke cable. On my sporty I made an adaption plate to mount the choke next to the carb – so seemed natural to make another for this bike.
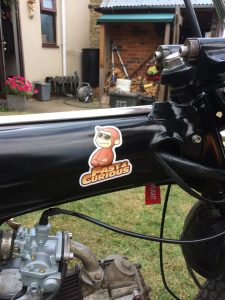
Saw this in a popular furniture outlet as I was wandering zombie like behind a trolley. Saw it, wasn’t sure what I’d do with it but thought it’d look good on a bike…. somewhere.
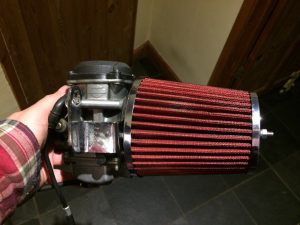
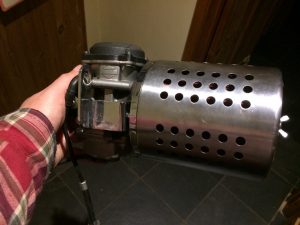
Loving the look but will have to see how far it protrudes before I decide to use it.
Things are moving on (a little faster than expected) meaning that I’ve had to jiggle stuff around to create space. The XS frame went off to paint along with the tank, tail piece and front mudguard and the Harley frame went off to powder coat, The XS frame came back sooner than expected and so is down in the cellar….. as much as I’d love to build it there’s little point as I’d have to pull it apart again to get it back up the stairs, so I’ve got as far as I can. I’m assured that the engines only a few days away from completion, the frame for the Harley will be back this week and …. the ‘sporty’ is due back (the fault was found to be a cracked carb and a faulty coil) this week …. I know “no Biker ever said” but I really do have too many bikes …. time to find some storage!

I was finally able to convince ‘Oaken shield’ to part with his bike that he’d had sat in his garage for seven years.
Having started to break it down its obvious that he’d already put some work into the project but as happens to the best of us, time and funds dictate a different path in life …. so my gain ….. Hurrah.
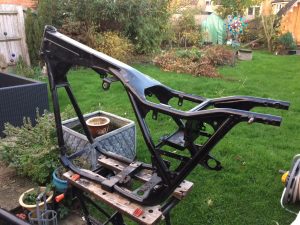
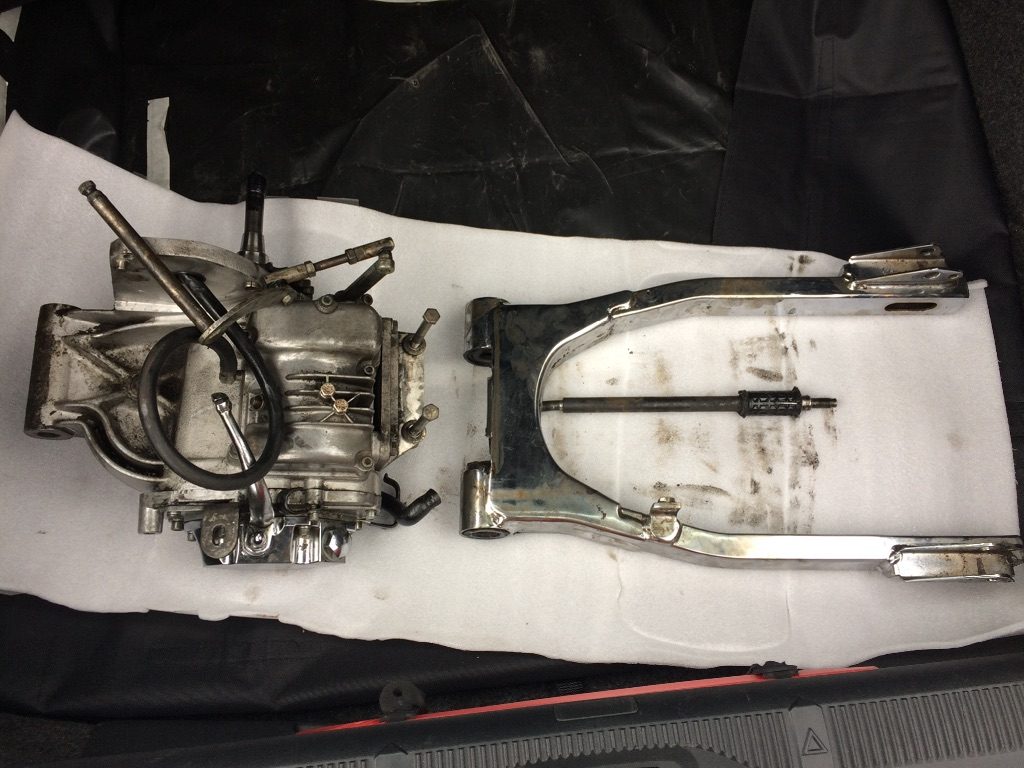
This is my first venture into “Big Twins” and their ‘interesting’ engine/gearbox arrangements (the sporty was so much easier) … and who thought of having the gearbox as part of the rear swing arm?? Anyway the bike is almost stripped and as the frame has seen better days it’s time for a visit to the powder coaters and the engine will go off to my good friend John for him to go over it with a fine tooth comb to ensure there are no unpleasant surprises.
I’m unsure exactly what I am going to do with it yet …. I am assured that the frames for these bikes are well sought after so I’ll probably use the grinder somewhat sparingly and go for a mild custom / refurb job. I have been told by my good lady that this is not to be a keeper ….. but the more I’m working on it the more I like it…….. Ummm.
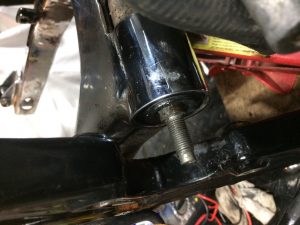
Ok – Soon established why this bike has never been fully stripped down … evidently a “common problem” is that, through poor maintenance, the swing arm shaft ‘welds itself’ to the inside of the gearbox housing through which it runs . It was obvious after a few delicate slaps with a hammer that it wasn’t gong to budge – so what next? For those of you (that included myself until this week) that are unaware .. the swing arm runs either side of the gearbox that in turn bolts to the engine which is suspended solely by a rubber mount at the front of the frame … So how to progress???

Plan is now to leave it on its side and drizzle penetrating oil down the shaft (fnarr fnarr) and then after a day or two introduce it to my copper hammer and see if it budges. If this doesn’t work, Heisenberg has promised to visit with his Acme Chemistry set.
Freedom !!
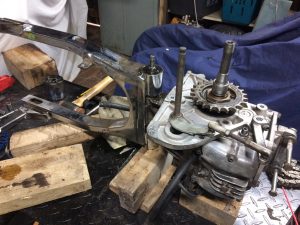
Following a visited to the marvellous and talented Mr Chris ‘Cooperman’ Cooper, He managed to undo what 34 years of mother nature and poor design had done to the shaft servicing the rear swing arm (that runs through the gearbox housing).
After what seems like forever of soaking in all manner of oils, fluids, acids, snake oils and bodily fluids, then heating and freezing (then repeat the above over and over)… then hitting it with a variety of hammers …. we placed the offending item(s) onto Cooperman’s 15 tonne press and I was a little upset (given the effort I’d put in) that it ONLY took six and a half tonnes to get the shaft to part company with the ally casing – with, I must add an alarmingly loud bang! A few extra slaps with a hammer and the bearings we free. Happy bunny!!
Home.
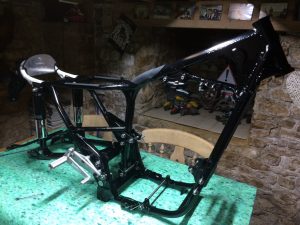
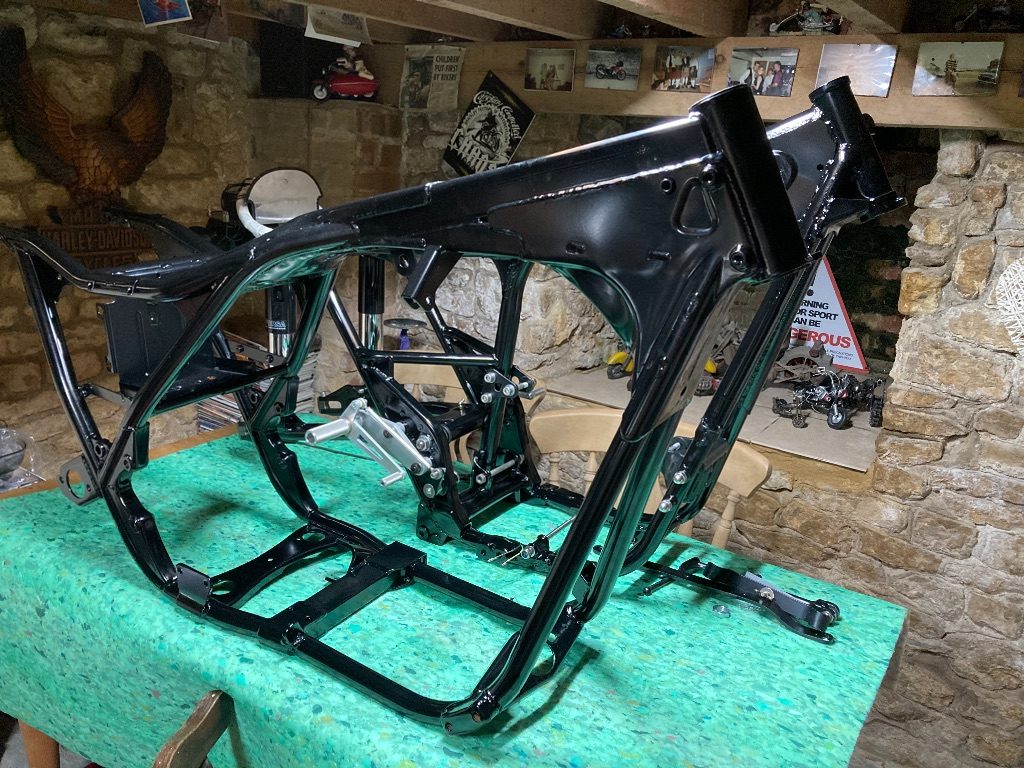
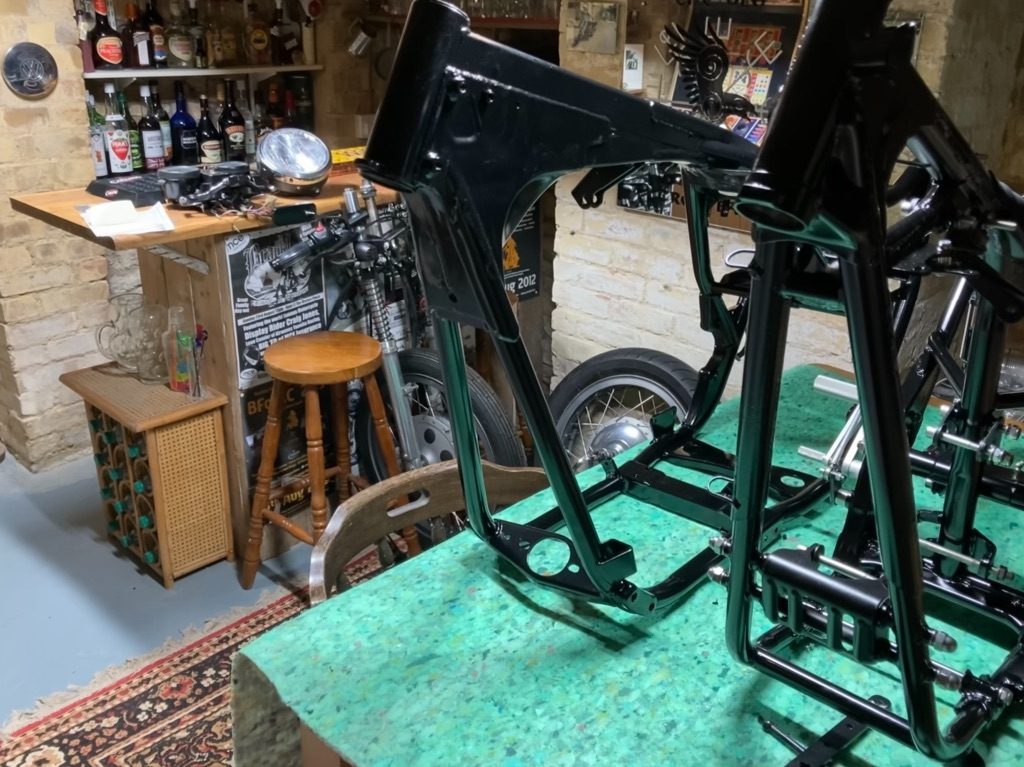
Frame back from powder coating …….. Hadn’t really thought this through so for the time being this and the XS project are living in the cellar / bar.
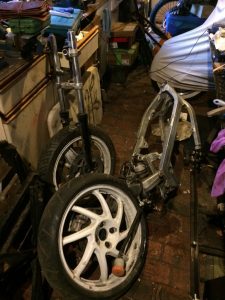
After seeing what Heisenberg has achieved with his XT / Honda hybrid I must admit that when I saw this on evilbay I had to have it ….. even though I have no idea what I’m going to do with it yet. A trip down to sunny ( yes it was sunny) Bournemouth and greased the palms of a lovely fella called Andy it was time for chips on the sea front before bringing this lot home. Now ….. what to do???
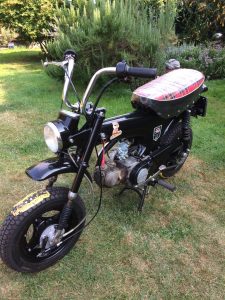
My boy done good. He dragged the monkey bike from where I’d left it in the garage to “finish it later” , cleaned up the charging system, re wired it, put new points and condenser and after much head scratching ( as none of the wiring colours were anywhere near matching). The little bike fired up. Josh took her for a few circuits of the garden and nearly trashed it against a discarded Belfast sink!
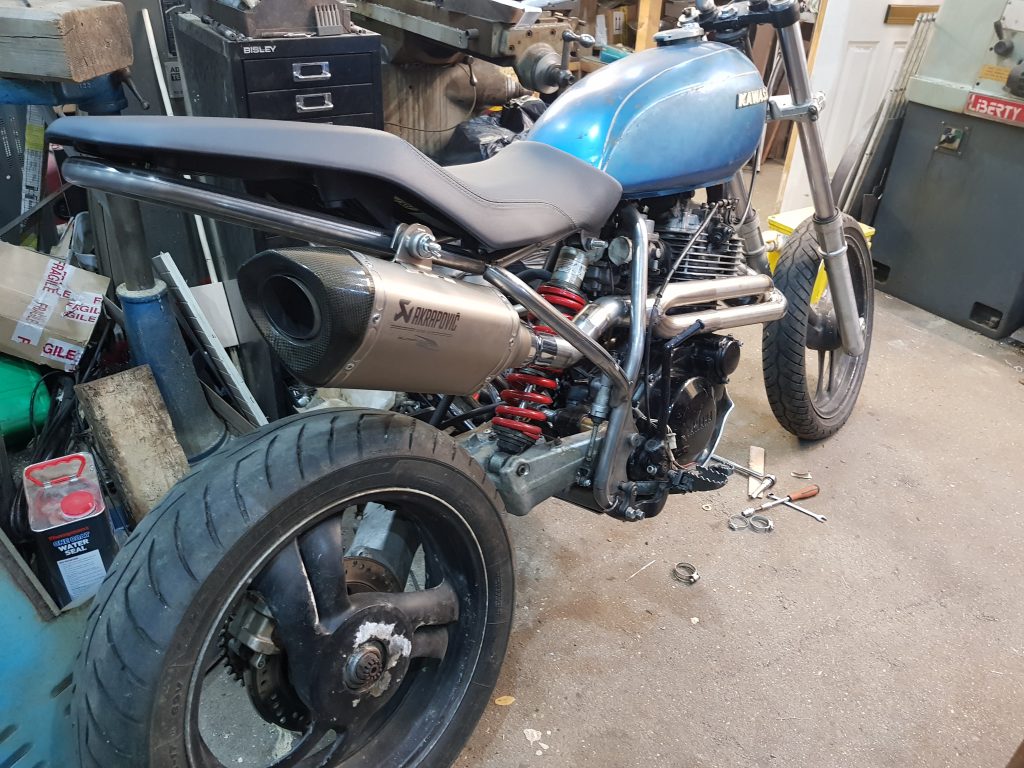
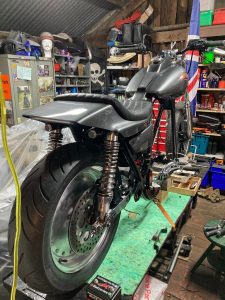
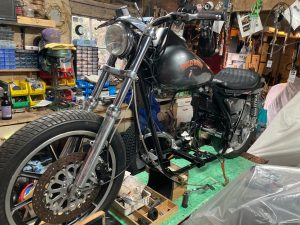
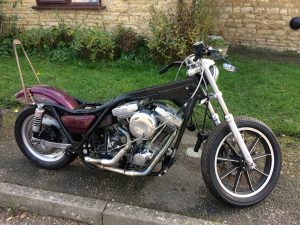
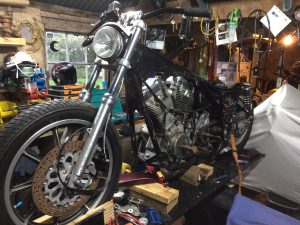
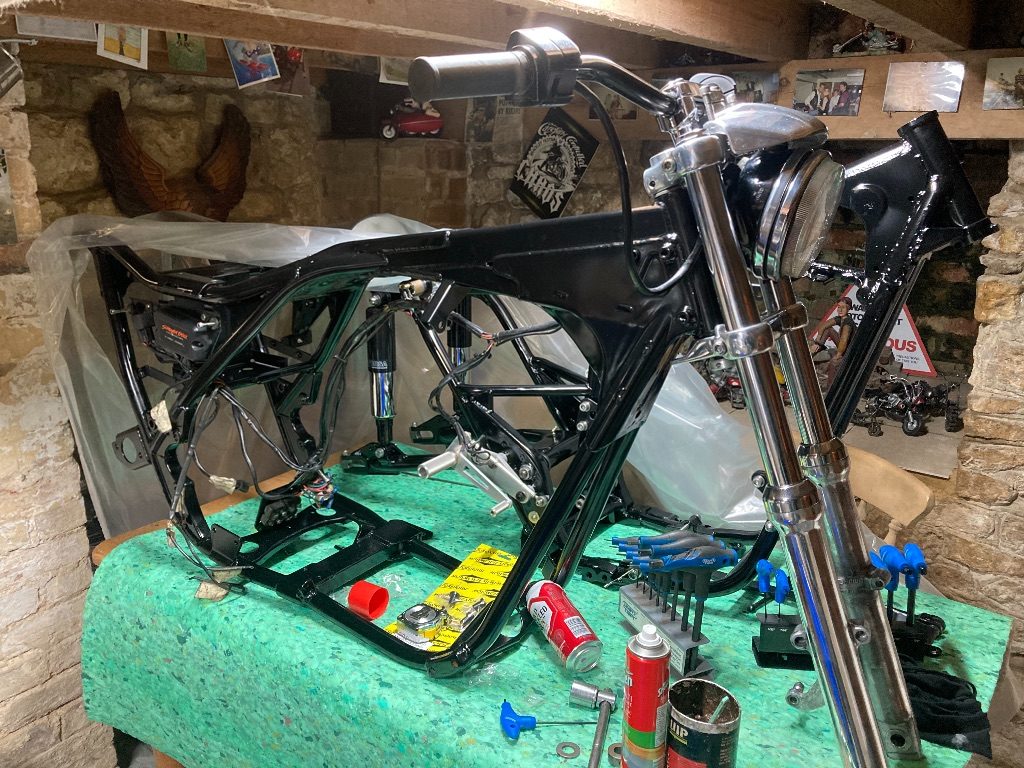
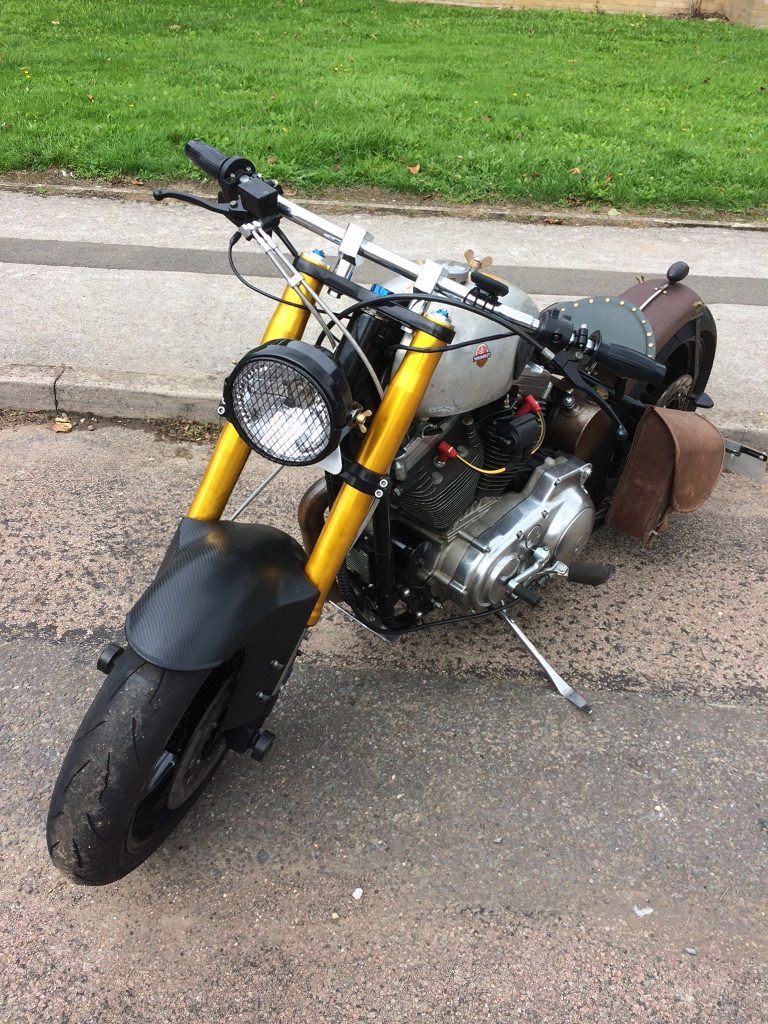
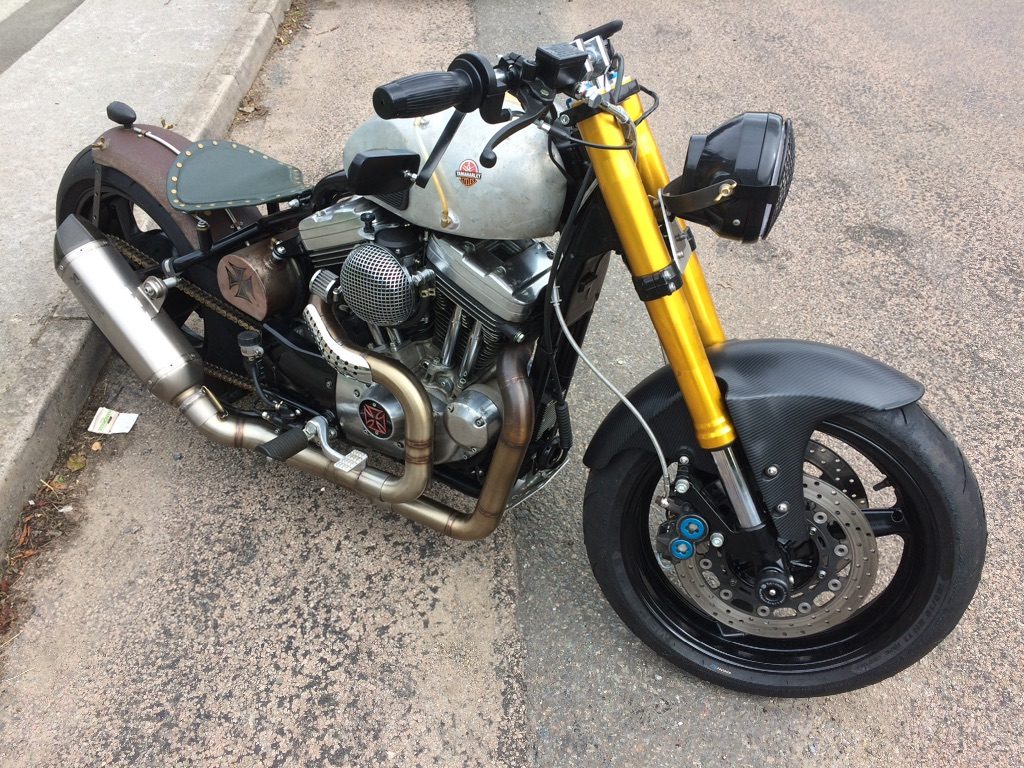
Finished the front end of the Harley with the more ‘back friendly’ bars , R1 forks and the indicators within the headlight (as I keep snapping the bar end ones off) …. but I’m not sure about the light. Unlike Heisenberg, I like small…. he gets his from light house bring and buy sales.
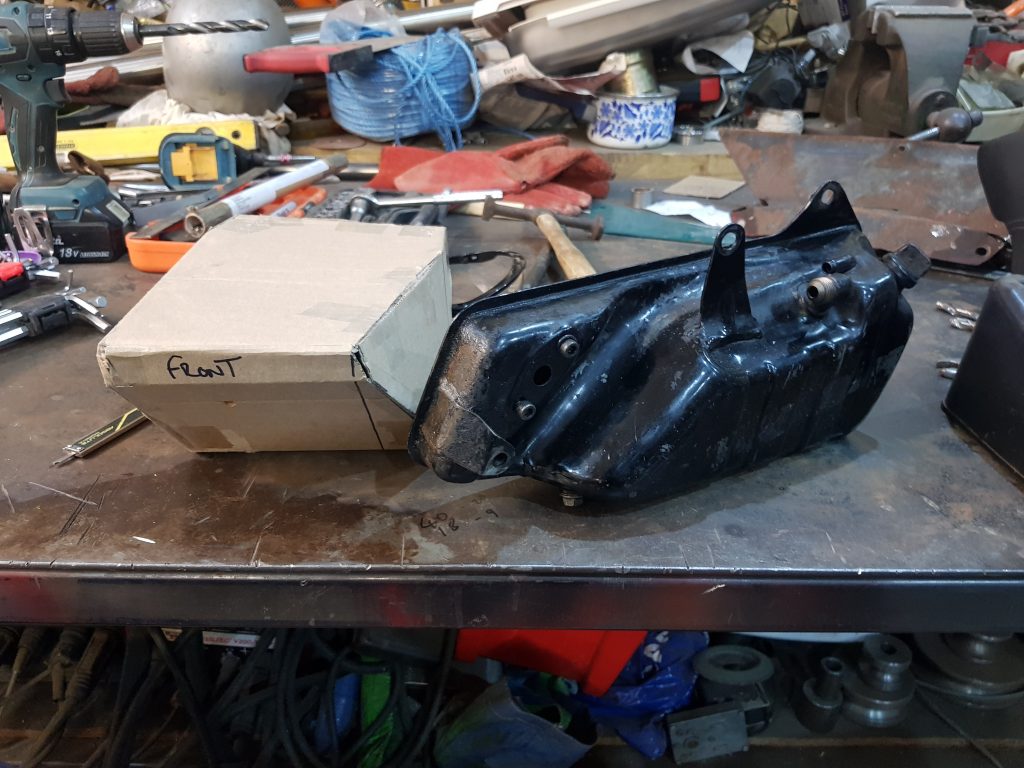
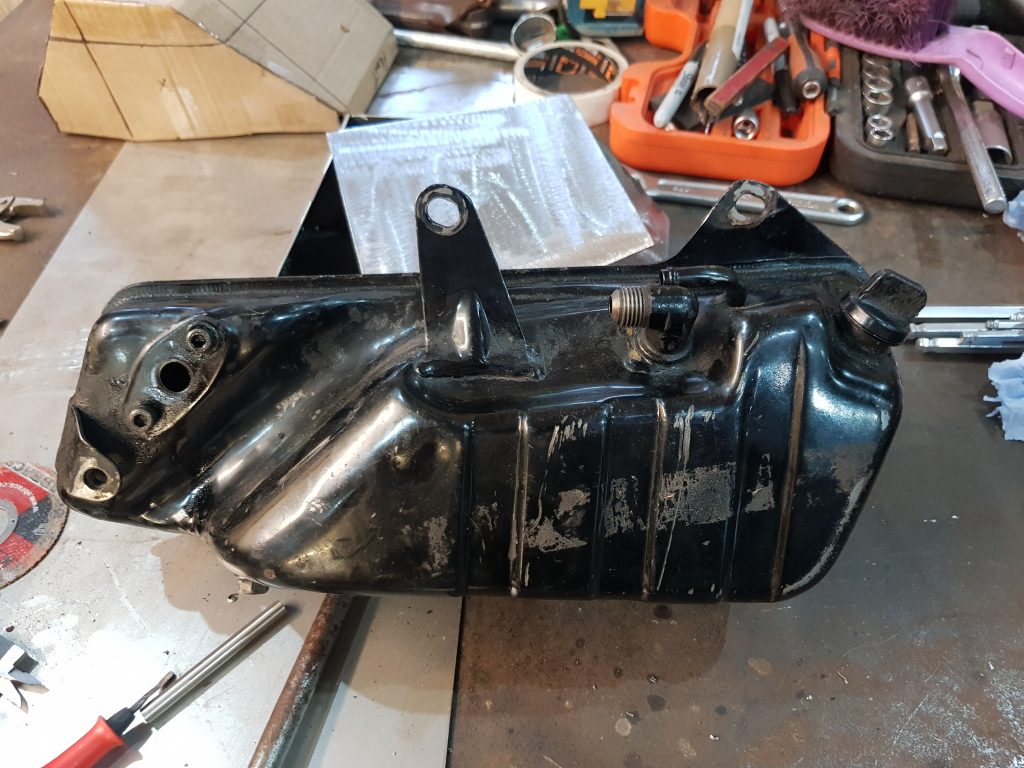
Dry sump so needs a tank FFS, not even thought about this, ordered an original from eBay to get me out of the doo-doo and it’s an ugly beast to say the least…, for some reason it does’nt fit perfectly with how I have changed the layout of the frame, back to the drawing board for me.
So, my thought are now I can make something that does not look so out of place, tucked up under the seat as best we can, space to mount the cdi on top and far enough away from the carbs not to get in the way when we build filters.
Time for some choppy choppy with cardboard and sticky tape, try to get a rough idea of how it might fit and try to get a similar volume or even a bit larger.
I’ve tried to work out volume and think this cardboard mock up is much bigger than it needs to be so I’ll chop it down a bit then make a metal version.
Looks a fair bit different to the original..
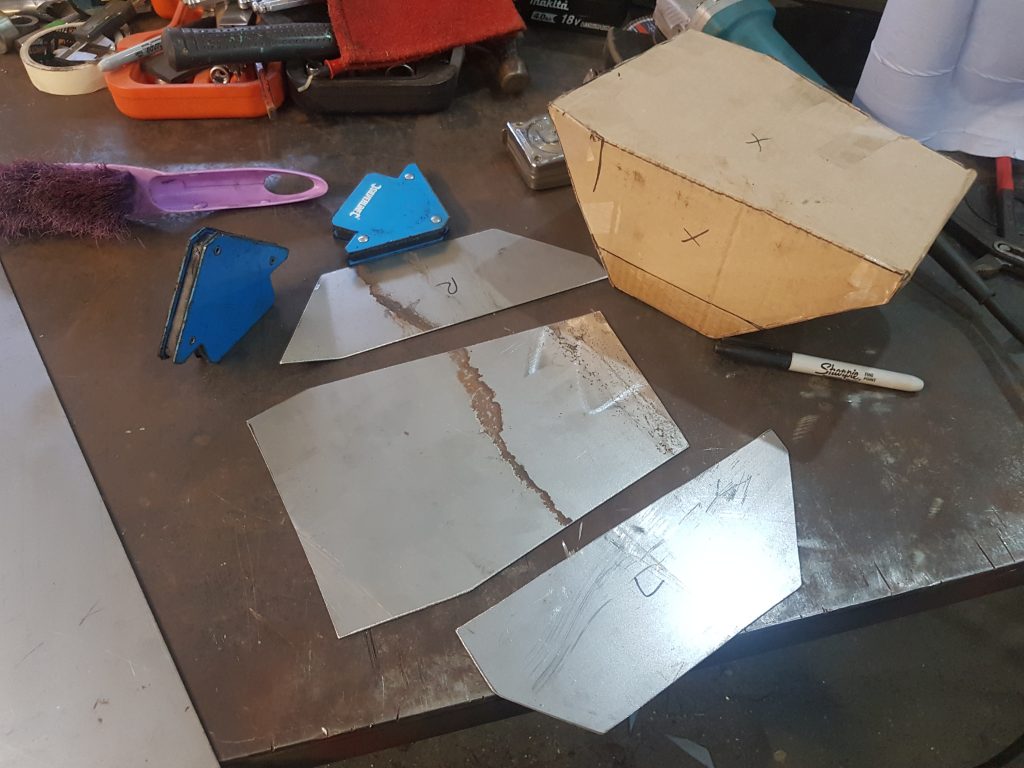
Draw around the box and transfer it to steel plate, I’m using 1.6mm as I have some in stock. I have reduced the size as per the line on the card box. Next we need to bend the plates prior to welding, we use a ‘state of the art’ bending machine to get exact bends.
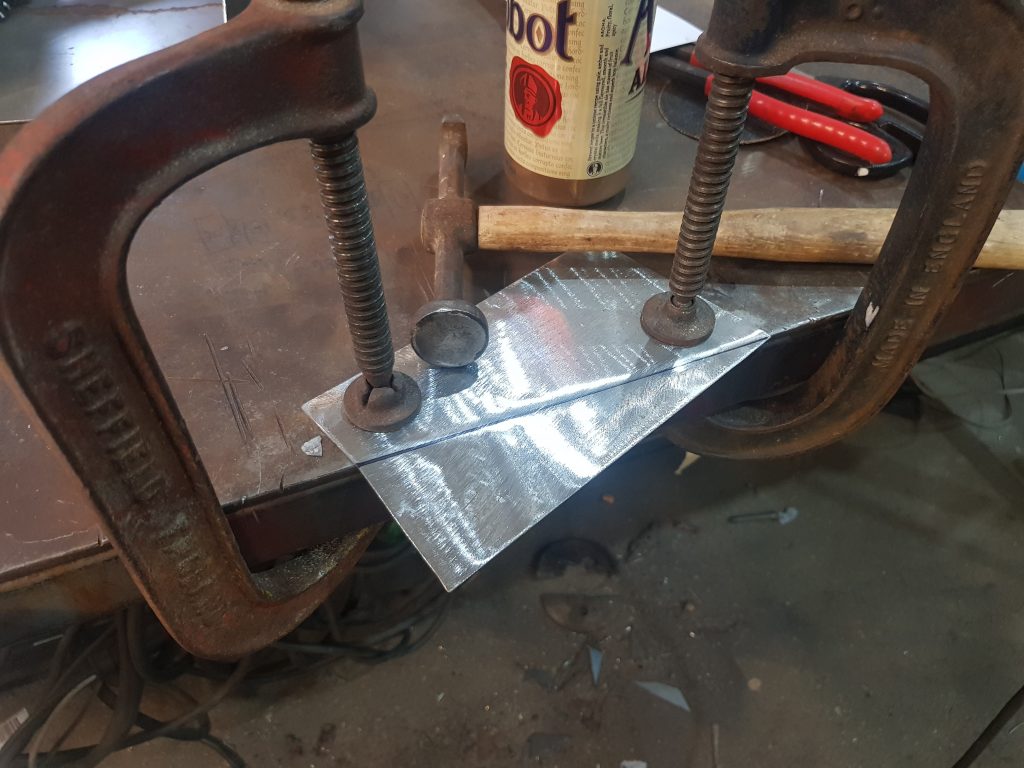
Ok, so the Scavengers have yet to get a bending machine so we just G-clamp stuff to the bench and whack it with a big hammer, similar results. Next we need to tack the parts together.
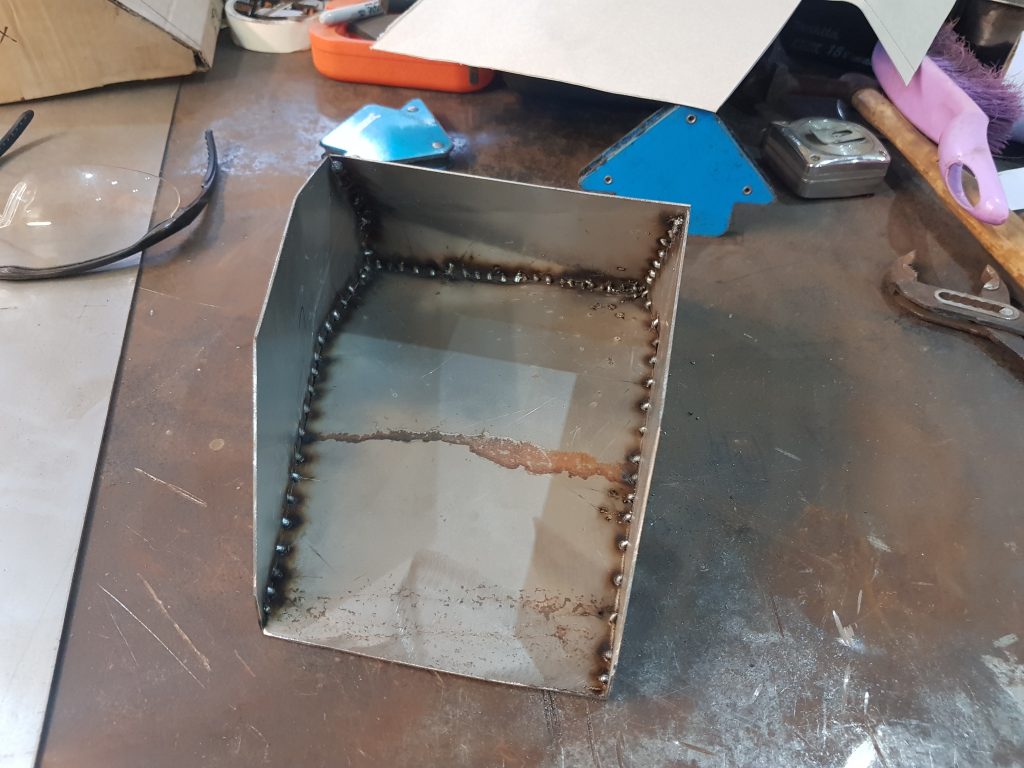
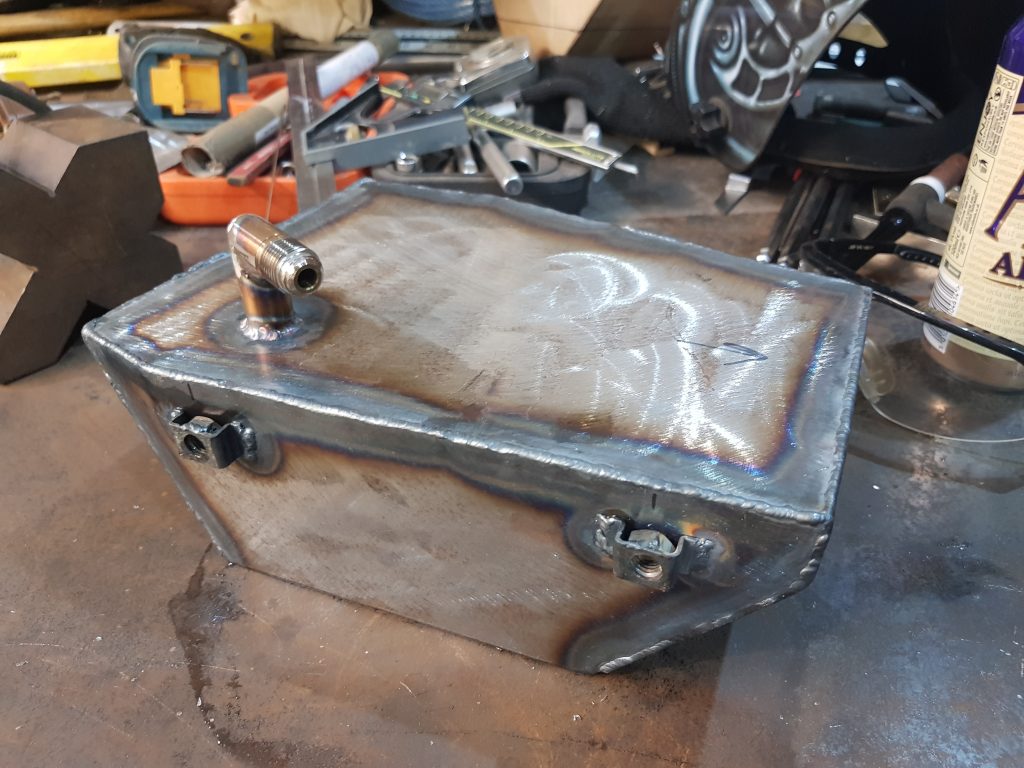
The plan is to tack on the inside with the mig welder as it’s quick and easy and when finished seam weld the outside with the tig welder to get an oil tight seal, failing that just get a really thick powder coat….JOKING
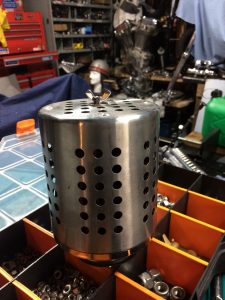
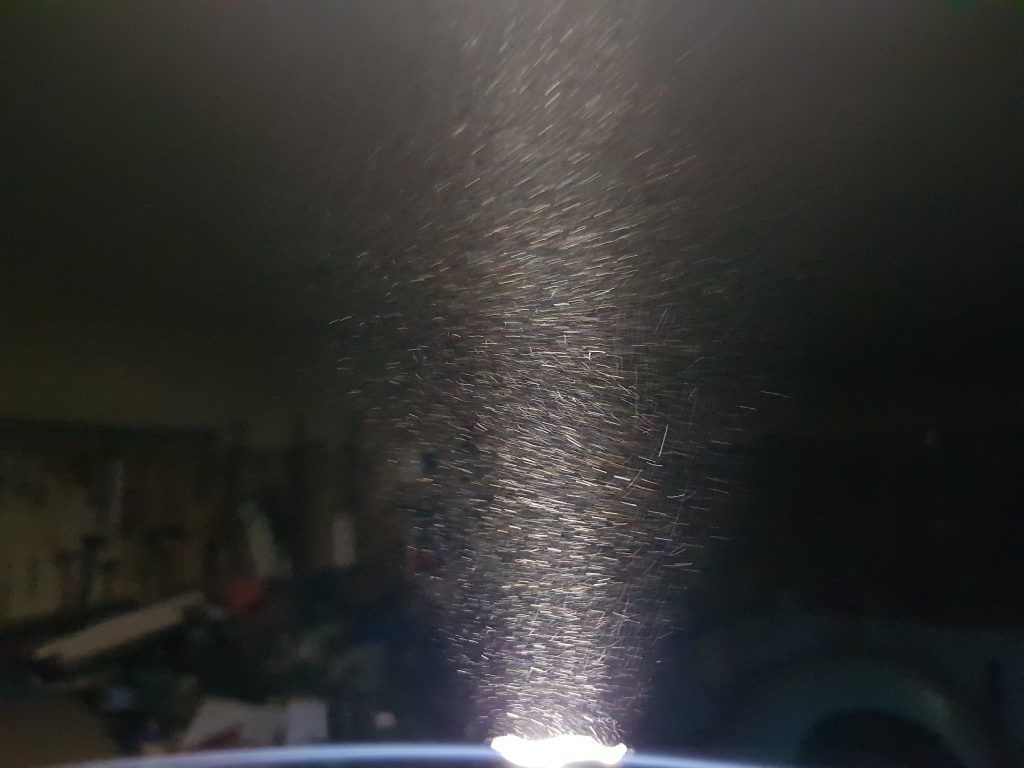
Finished up for the night and for some reason I shone my torch back in the workshop…WOW….I have been breathing this in all night, no wonder I get shed bogies.
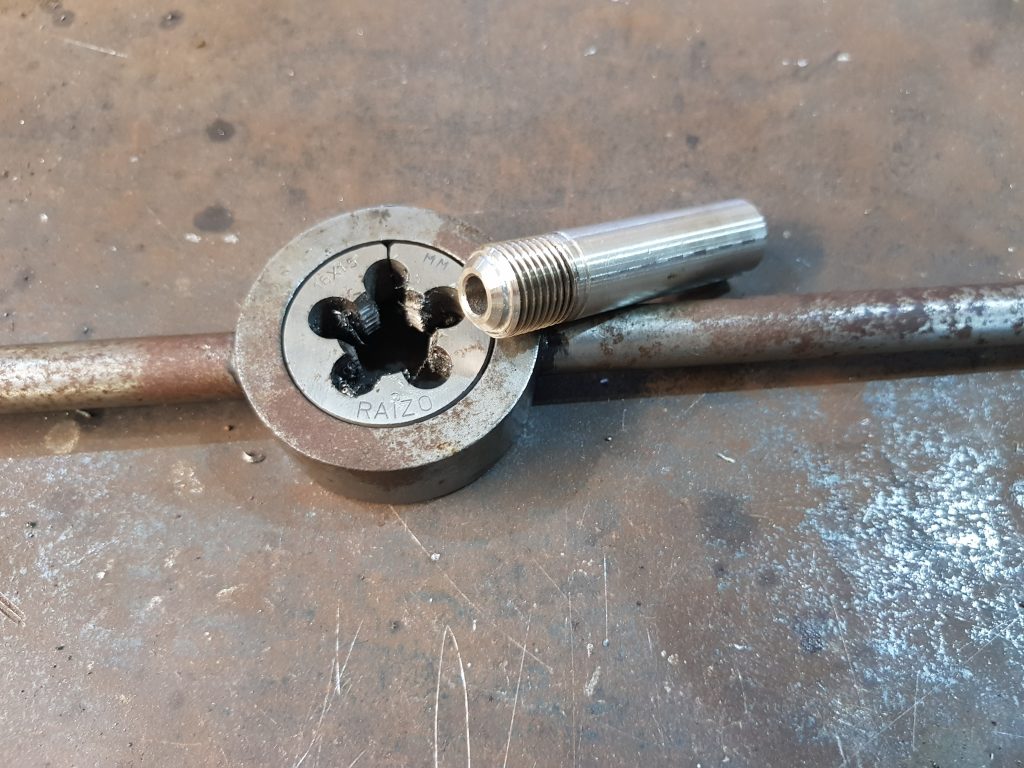
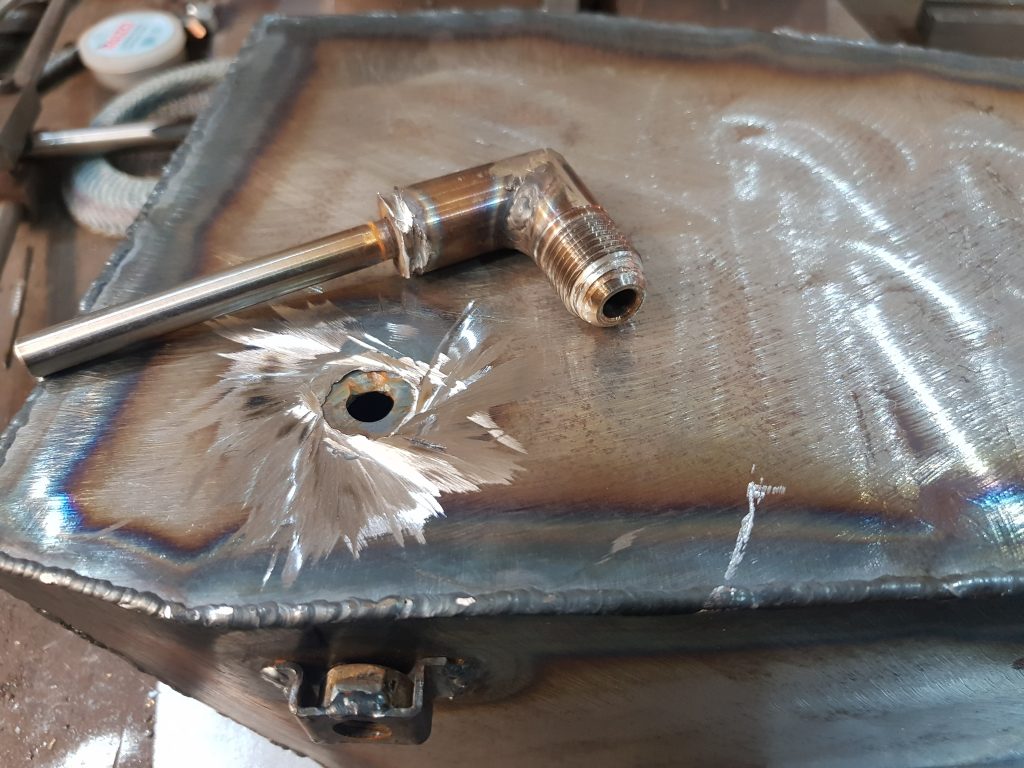
Next job is to procure an oil feed fitting, the threaded elbow you can see, I am lucky enough to live near some racing companies that stock this sort of thing so this should be easy! OK, not so easy as it turns out, it’s not a standard pipe thread, it’s metric…grrr
I’m loathed to cut up this tank just to get a fitting out and I’m struggling to buy one but… I have just found an M16x1.5 die in my drawer that I bought for some use on the XS project so I can now make one!!
I have bored a 6mm hole all the way through and added the thread just need to make the 45 degree angle.
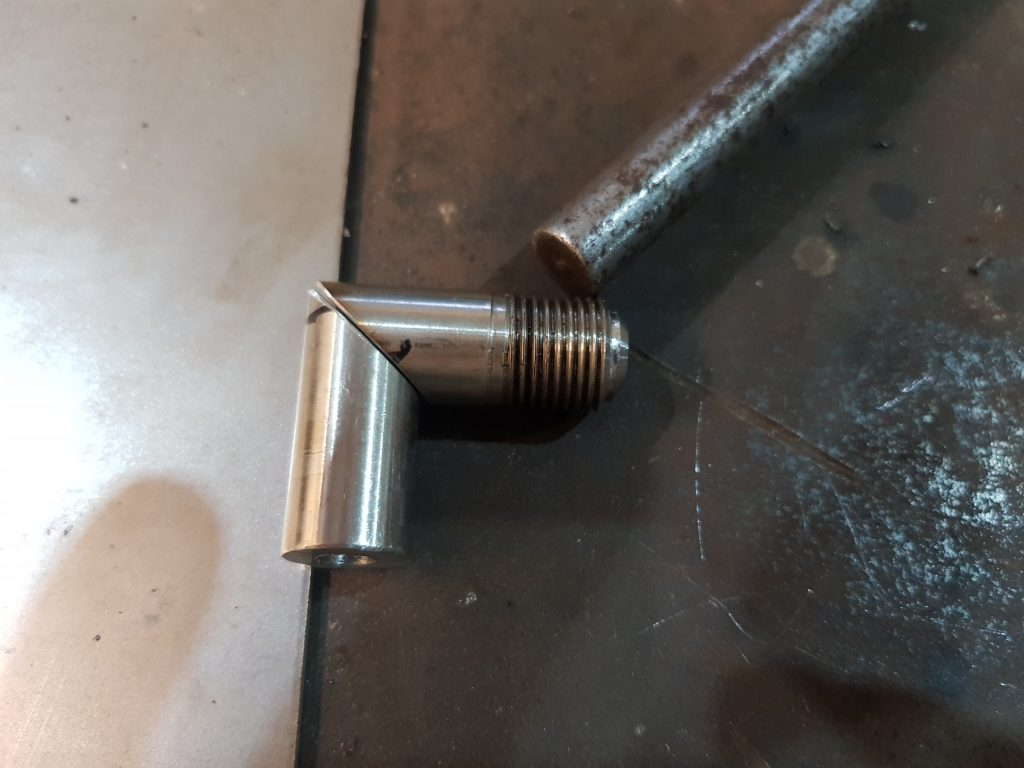
To make the cut I used the scavengers water jet cutting machine, the burn marks you see on the cut are from water and not where it was G-clamped to the bench and attacked with a grinder by eye in the hope the cut would be somewhere near where we needed it. Yee-Haw..
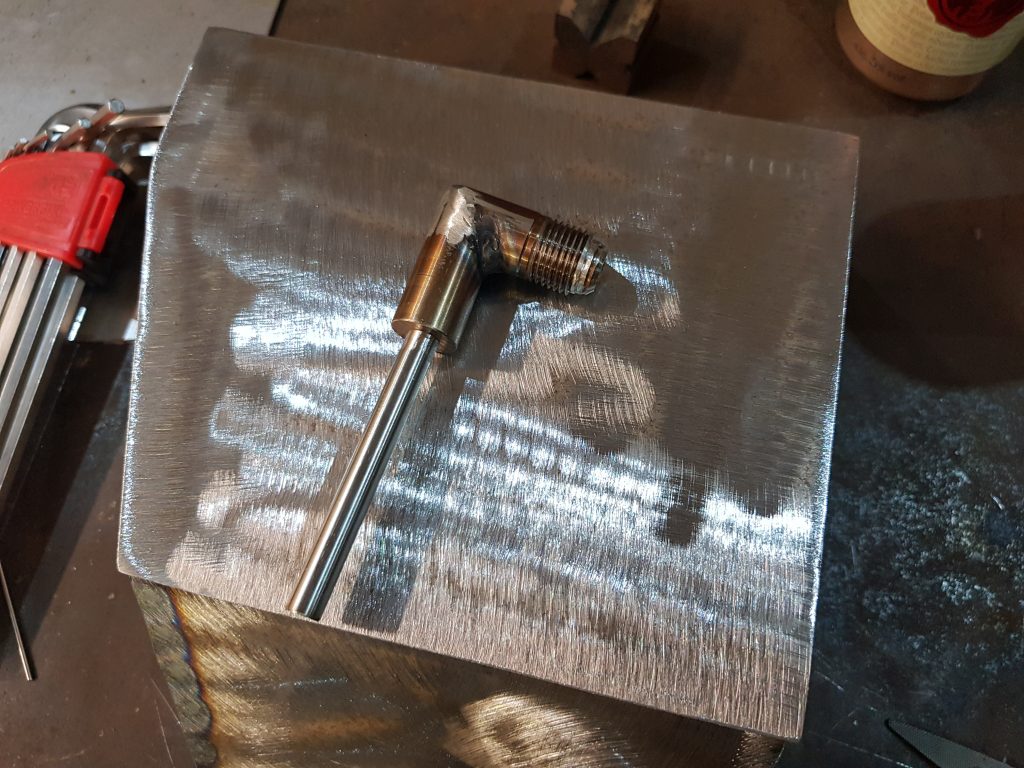
Once seam welded with the tig and ground off the excess bits it looks alright, need to weld this in place but I’m going to hang fire here a bit as there is some slack in the connecting pipe so I don’t need to commit just yet, I’ll wait untill the cdi is mounted and see how it looks.
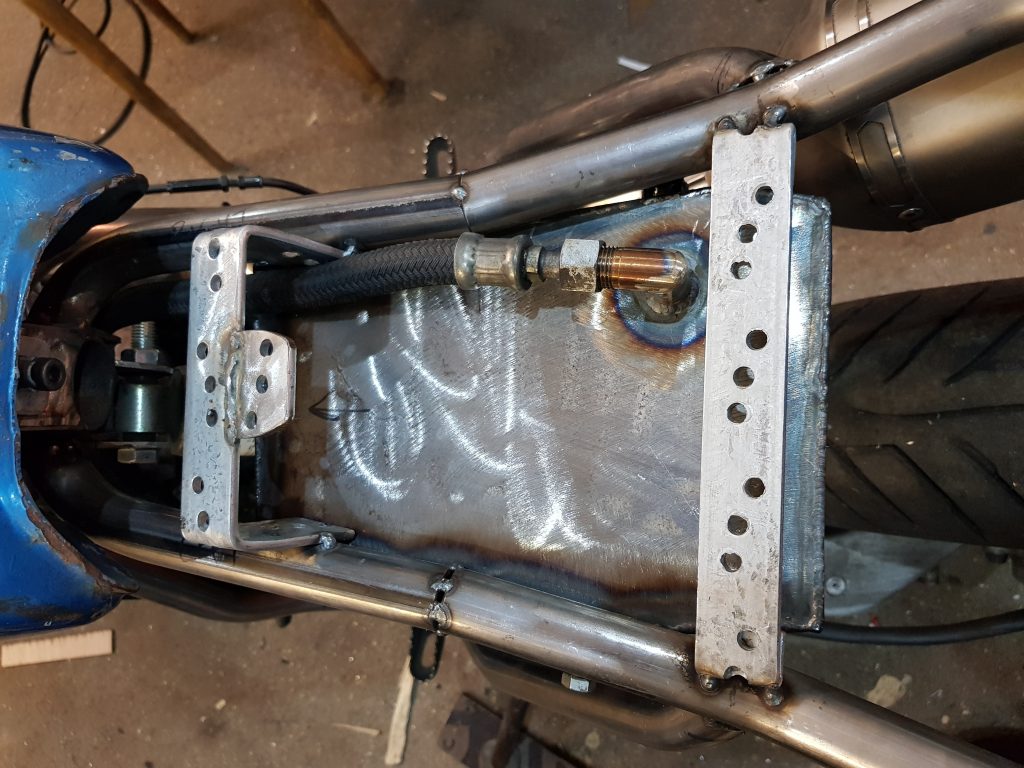
Update….so I, for some drunken unknown reason decided to go ahead and weld the elbow in place exactly where it looked like it should go from the bench rather than on the bike….
Looks alright, you can see the long weld closest to camera, this runs in line with the frame so even a stoned monkey could figure out when I add a fitting to the elbow it’s going to hit the bloody frame, one of those moments, all adds to experience though.
Interesting story/fact, when I went to night skool to learn about engineering one of the things that has stuck in my head over the years is something told to me by the tutor (Jack), ‘It’s not a problem making a mistake, it’s how you get out of it that counts.’ wise words from a very clever man.
There is not a lot of room but as it turns out a new 1mm slitting disc in the grinder can just about reach so I started to trim away the welds, went as deep as I dared and then used a large wrench to rotate the elbow to get it free.
Bit of a mess but fixable, thats the beauty of welding, just keep poking in filler wire to cover up your mess!
So we have missed the frame this time, much better, now we need a way to fill the tank, had a rummage around and I’ve found an oil bung from a car, looks new!
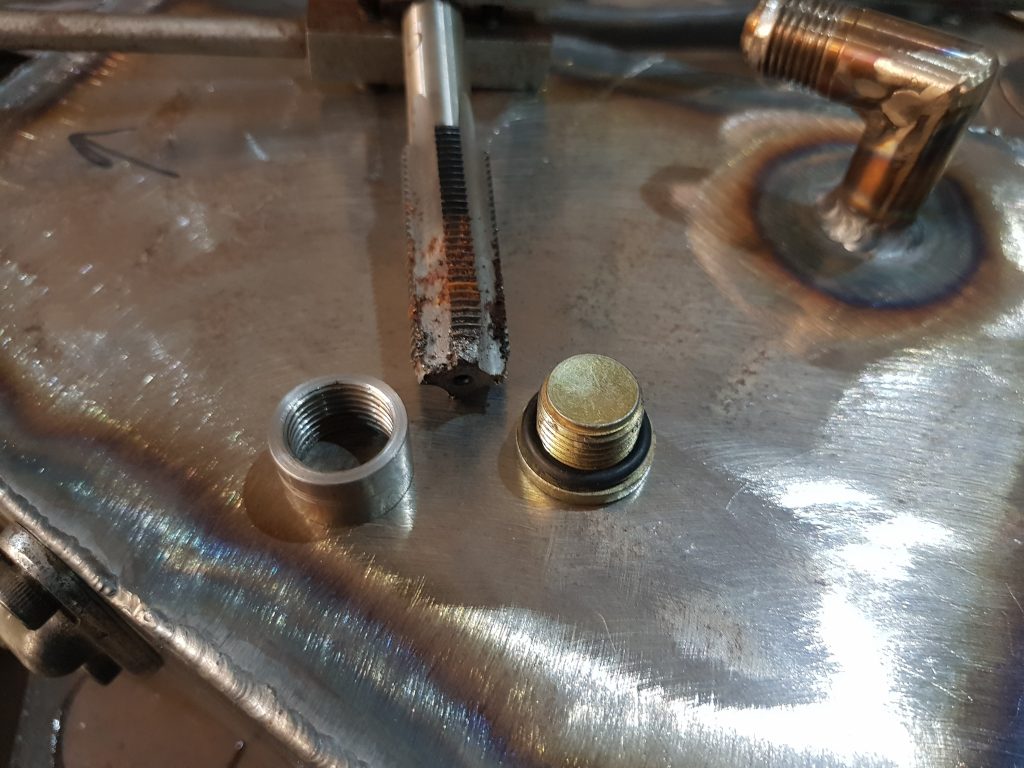
Found a rubber ring that fits and quickly whipped up a threaded jobbie on the lathe, turns out the thread is the same as the elbow so I already had a tap to suit, a little rusty but it worked fine.
I’ll weld it in place tomorrow, need to make some kind of drain plug then I can weld the bottom on the tank. I want to add a magnet to the drain plug as I think it’s a great way to get an early warning if something is letting go internaly.
I quite like making exhausts, I was given a crash course by ‘Wolfy’, friend of the Scavengers and an all round decent chap, very creative and tallented more than me, his work with stainless steel is world class but when it come to needlecraft or macrame I’m the boss OVER 60% of the time.
Unfortunately for me, stainless steel is the material of choice for exhausts, can be tricky to get in the size you want and the bends used must be formed using the mandrel proccess. I am in lockdown, mail order is very limited so I am aiming to use whatever I can get my grubby little mitts on, I have a few leftovers and managed to order some bends, it will be fine.
First things first, we need some flange’s, we, the Scavengers love a nice flange, not oversized or rough to look at, a nice tidy flange.
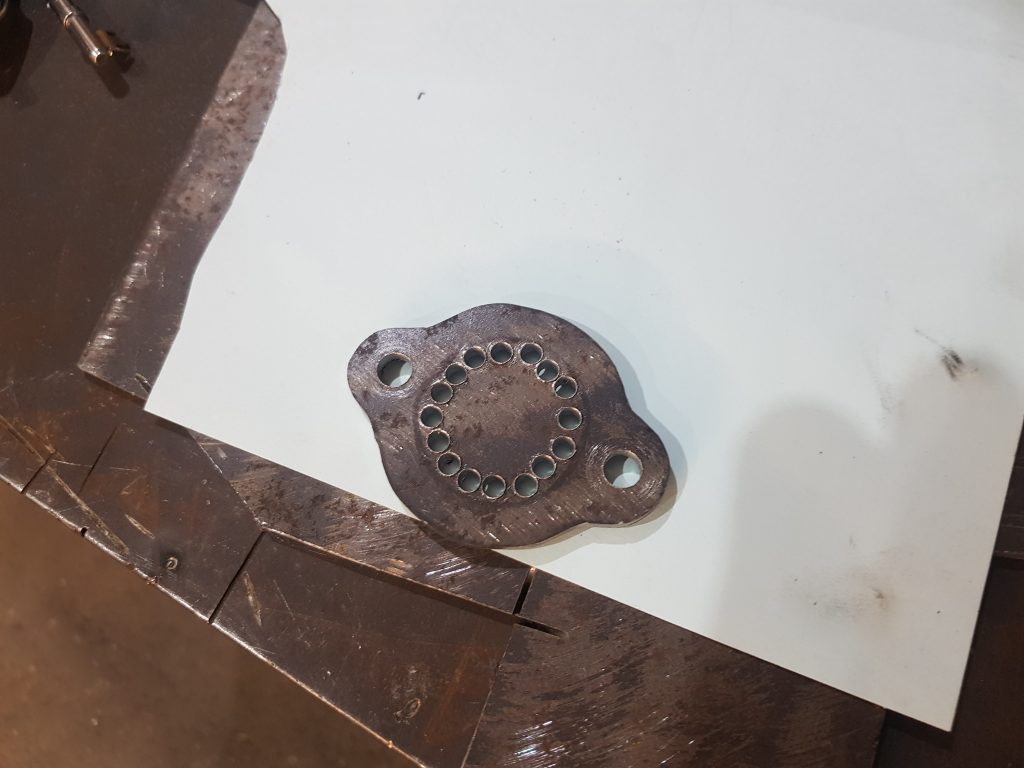
I dont have a way of cutting the middle out so chain drilling holes will do, you just drill in a circle and use a small chisel to join the holes then finish up with a file.
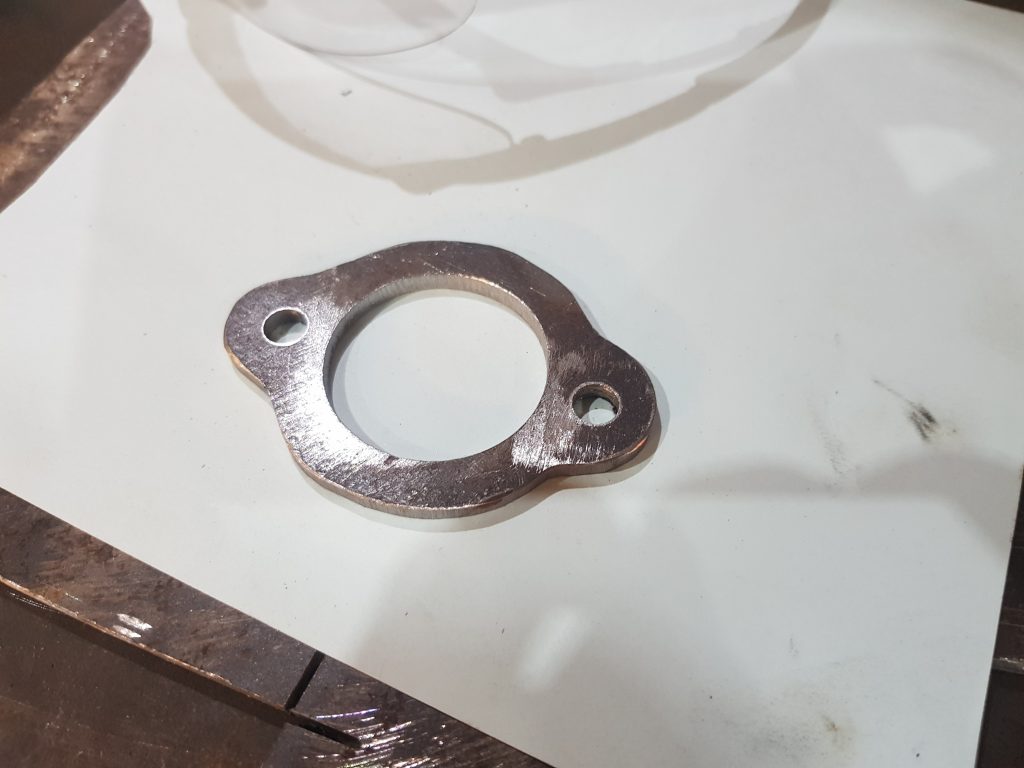
Thats not too bad, I made a pair as for some reason this single cyliner engine needs to outlets.. Could have got a pair of these en eBay for 16 quid but thats not our way!
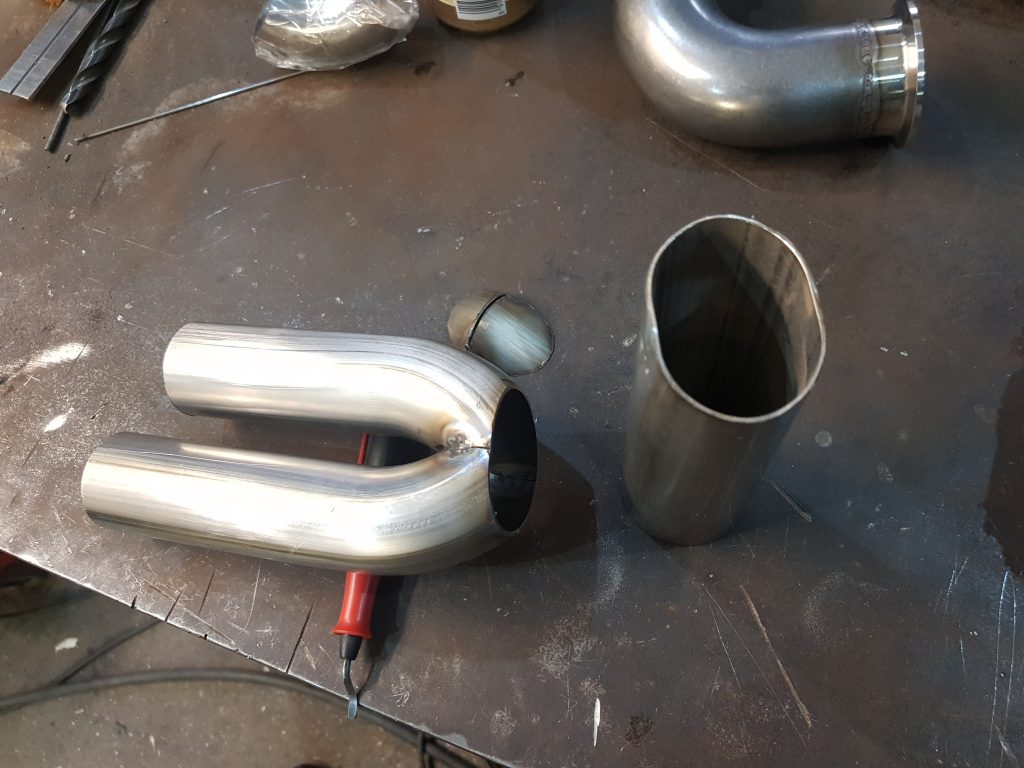
Next I need to work out how to make a tidy job of bringing together the two pipes in to one, I need to buy something so I bought a 180 degree bend.
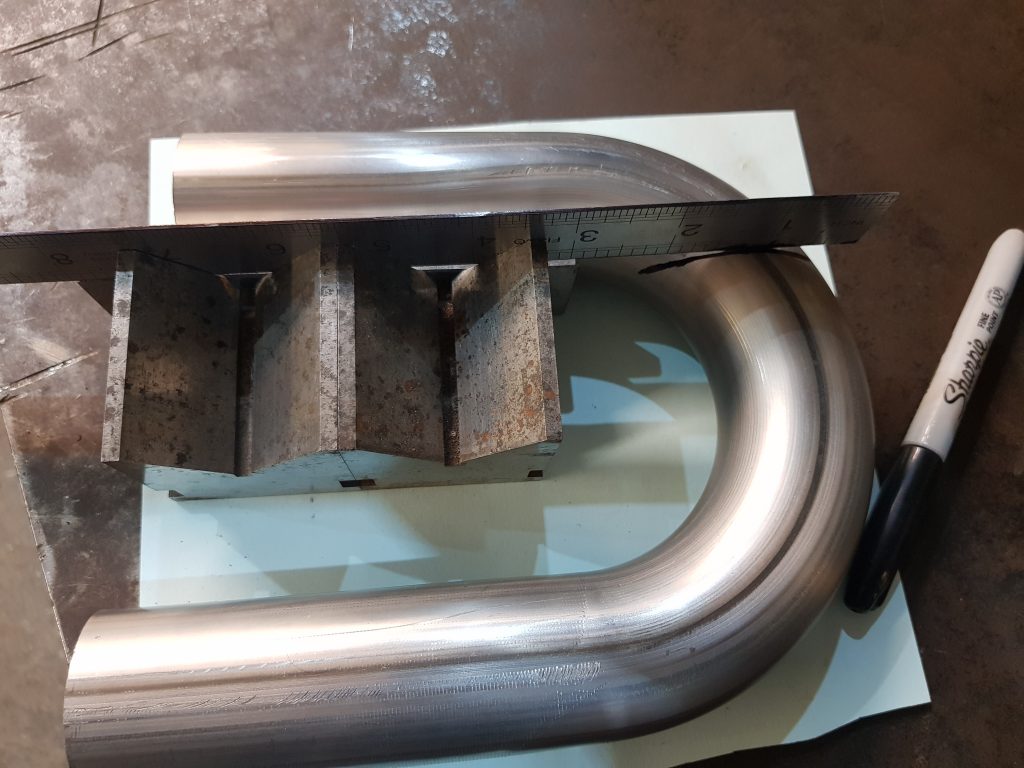
This cost eleven quid delivered. I used a spacer to stand away from the pipe, you can see this under the ruler and balenced it against some blocks to keep it straight, marked with a sharpie and started cutting.
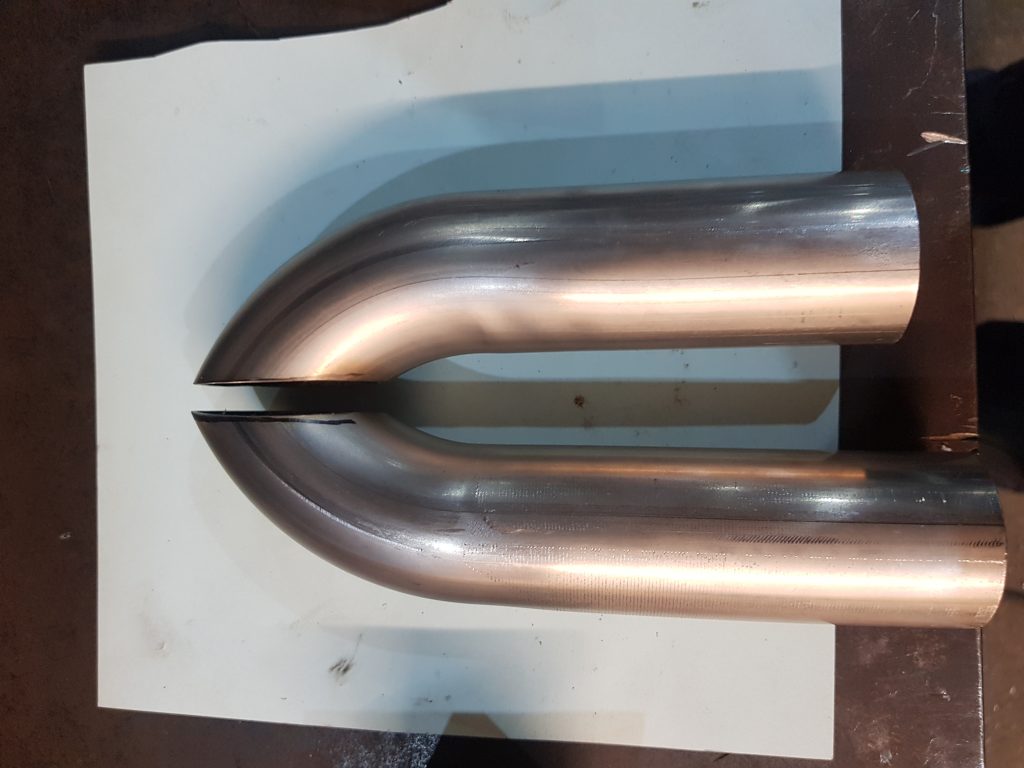
I can now weld these together to make a collector, these are a bigger size than the tube I will use to come from the manifold, they slip together nicely, time to get a move on with the manifolds.
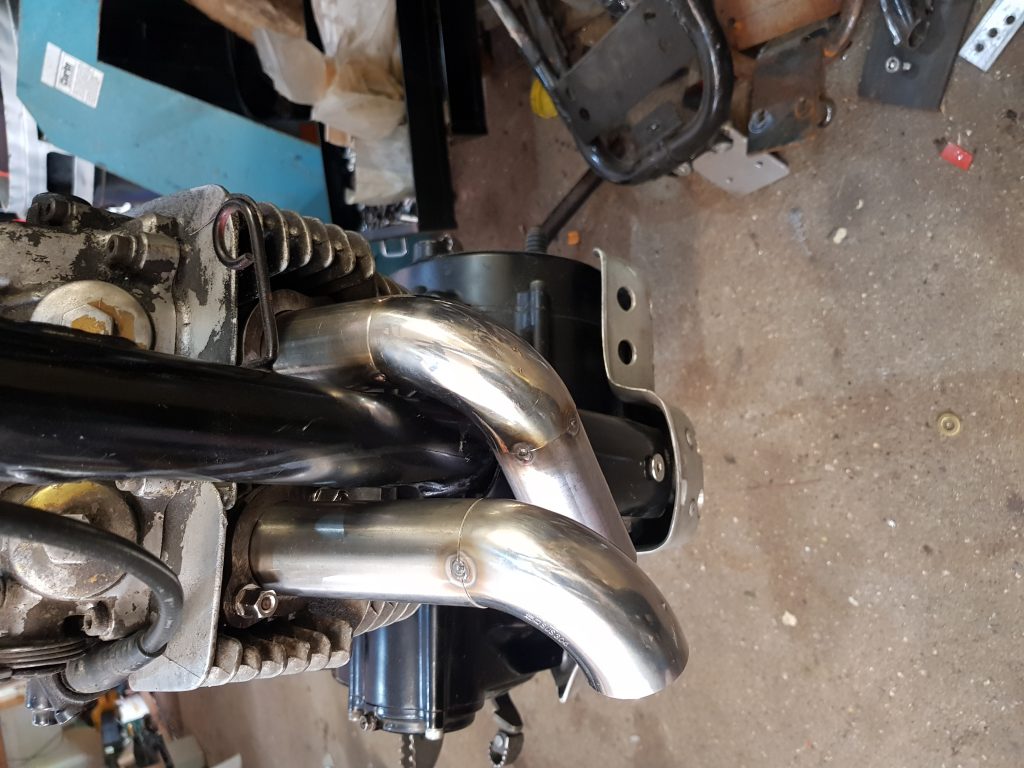
Added the first parts, can’t go too far wrong here as long as they dont foul each other.
That all fits ok, slips nicely in to the collector we made earlier.
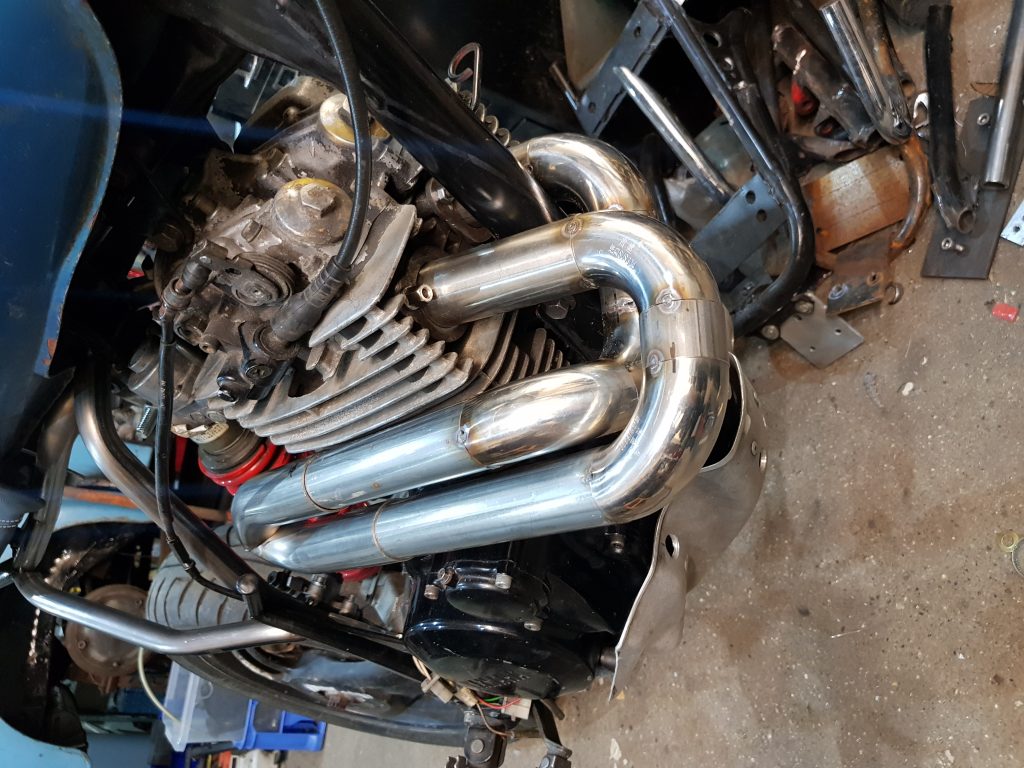
Needed to bring the 2″ pipe down to 38mm so I just squashed it in the vice, lined it up on the collector and drew round it then took the grinder to it and hey presto they did’nt fit, spent ages tinkering with my grinder to get a good fit but got there in the end.
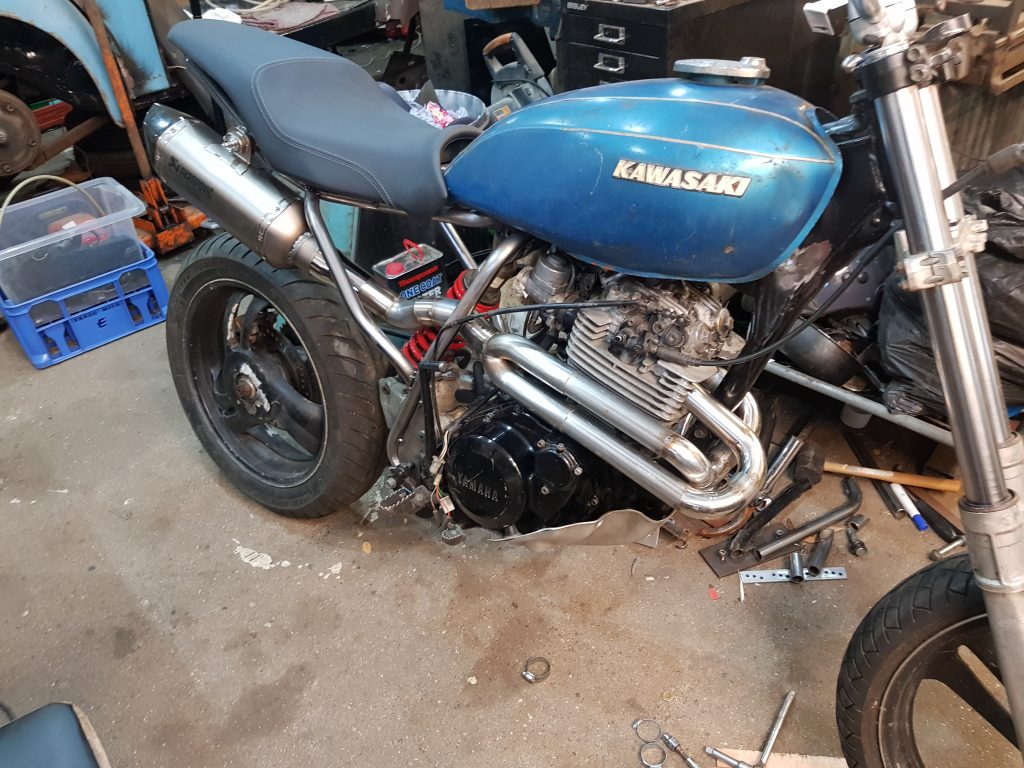
There were a couple of other bends to play with to route it around the frame but you get the gist of it, none of it matches but I’m not bothered. Check out the sexy end can, it’s from a superduke 1290, it came from Mac’s Harley project and was very easy to unbolt whilst my daughter distracted him by throwing rocks at the front of his house.