Finally got started on the frame for my entry in to this years Brackley festival of motorcycling, got a good couple of months to complete the project so no pressure there…, Mac’s is almots done, just waiting for it to return from the ‘jewel embedder’ with a spattering of precious stones glued all over it to ‘give it the edge’ whatever that means.
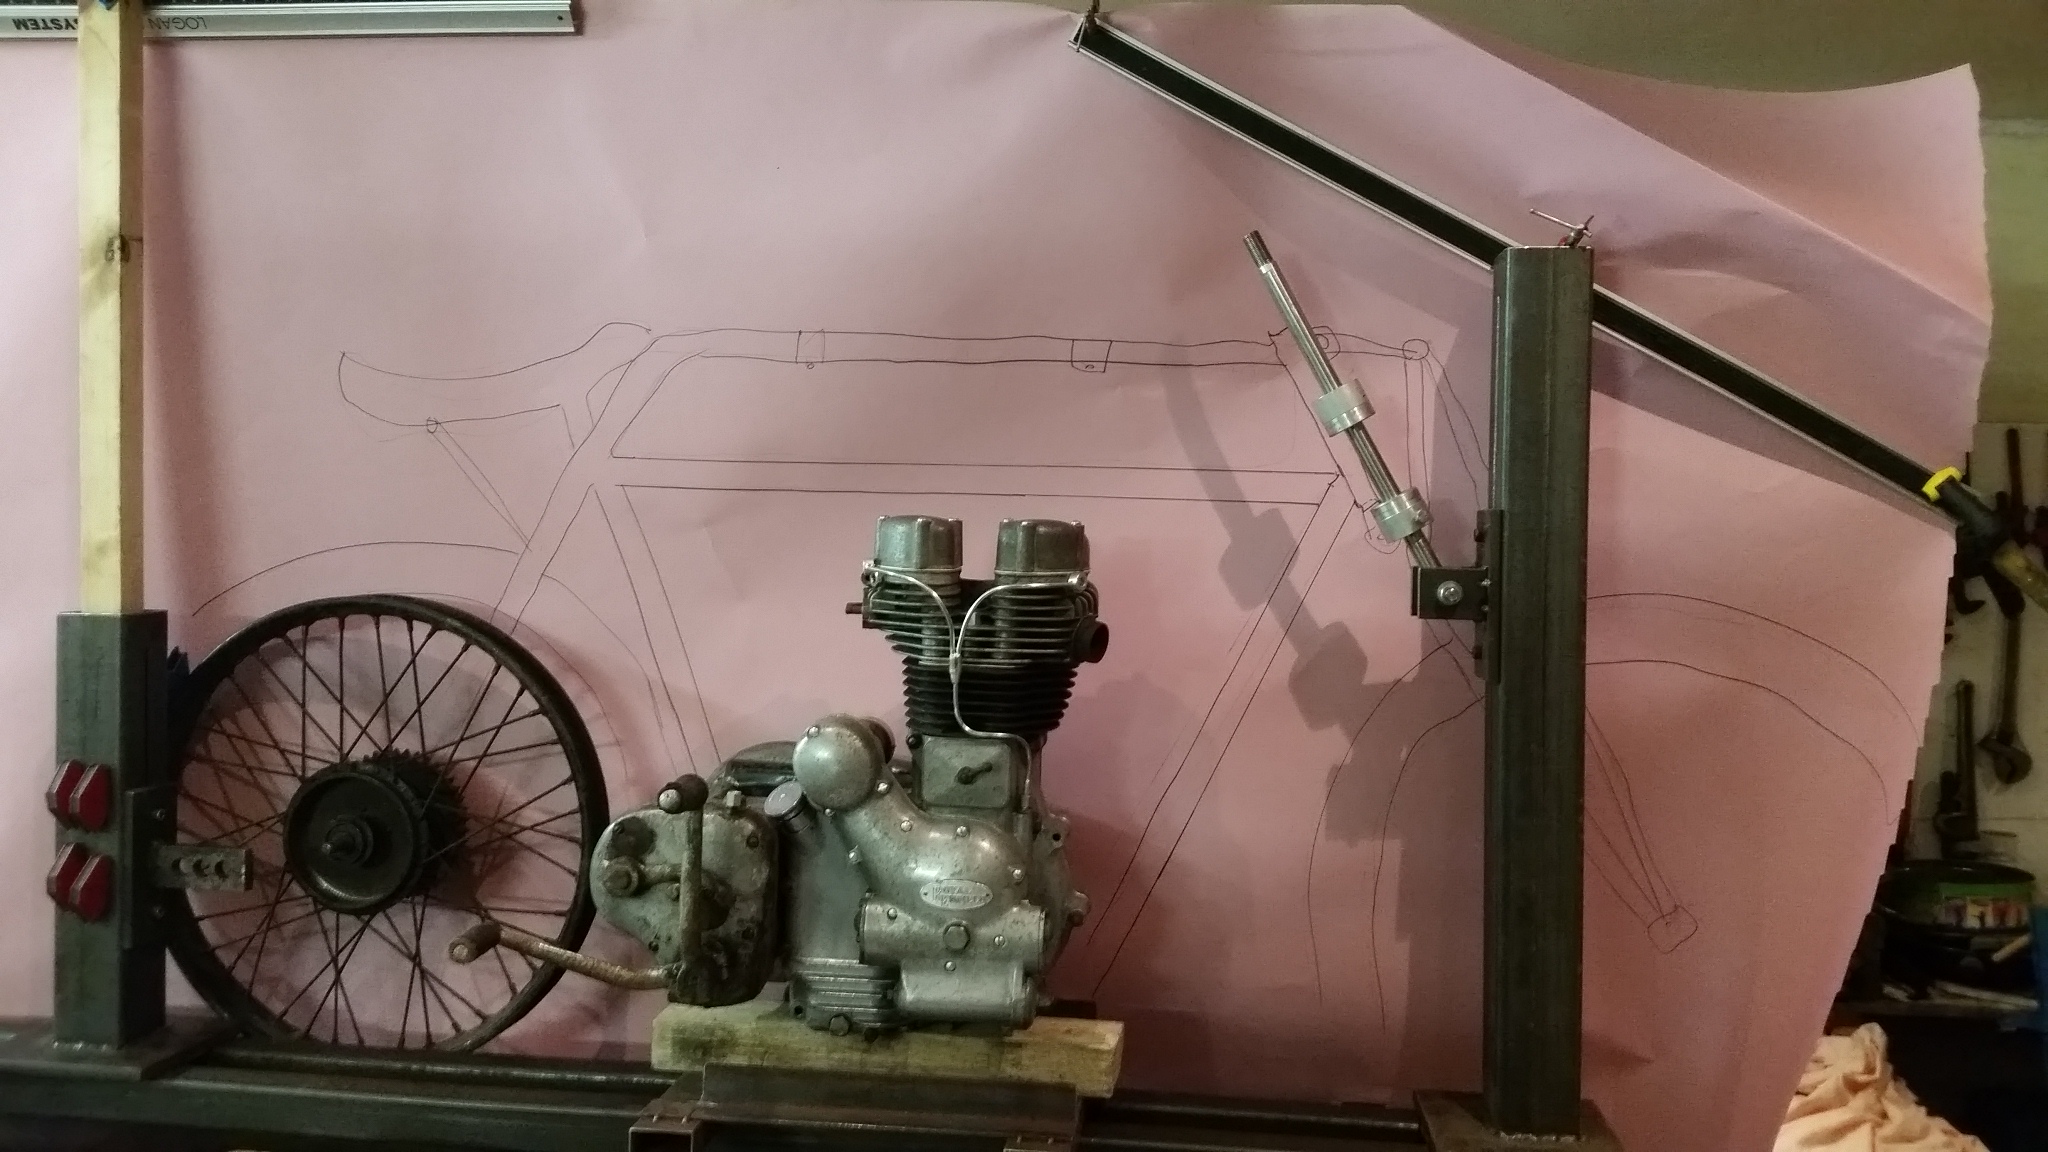
Here’s a picture before the frame was started, I got the paper form a draw in Mac’s workshop, it was labeled ‘Mac’s macho-macho draw’. Tring to get an idea on the size of the bike so added a wheel and got playing with a sharpie..
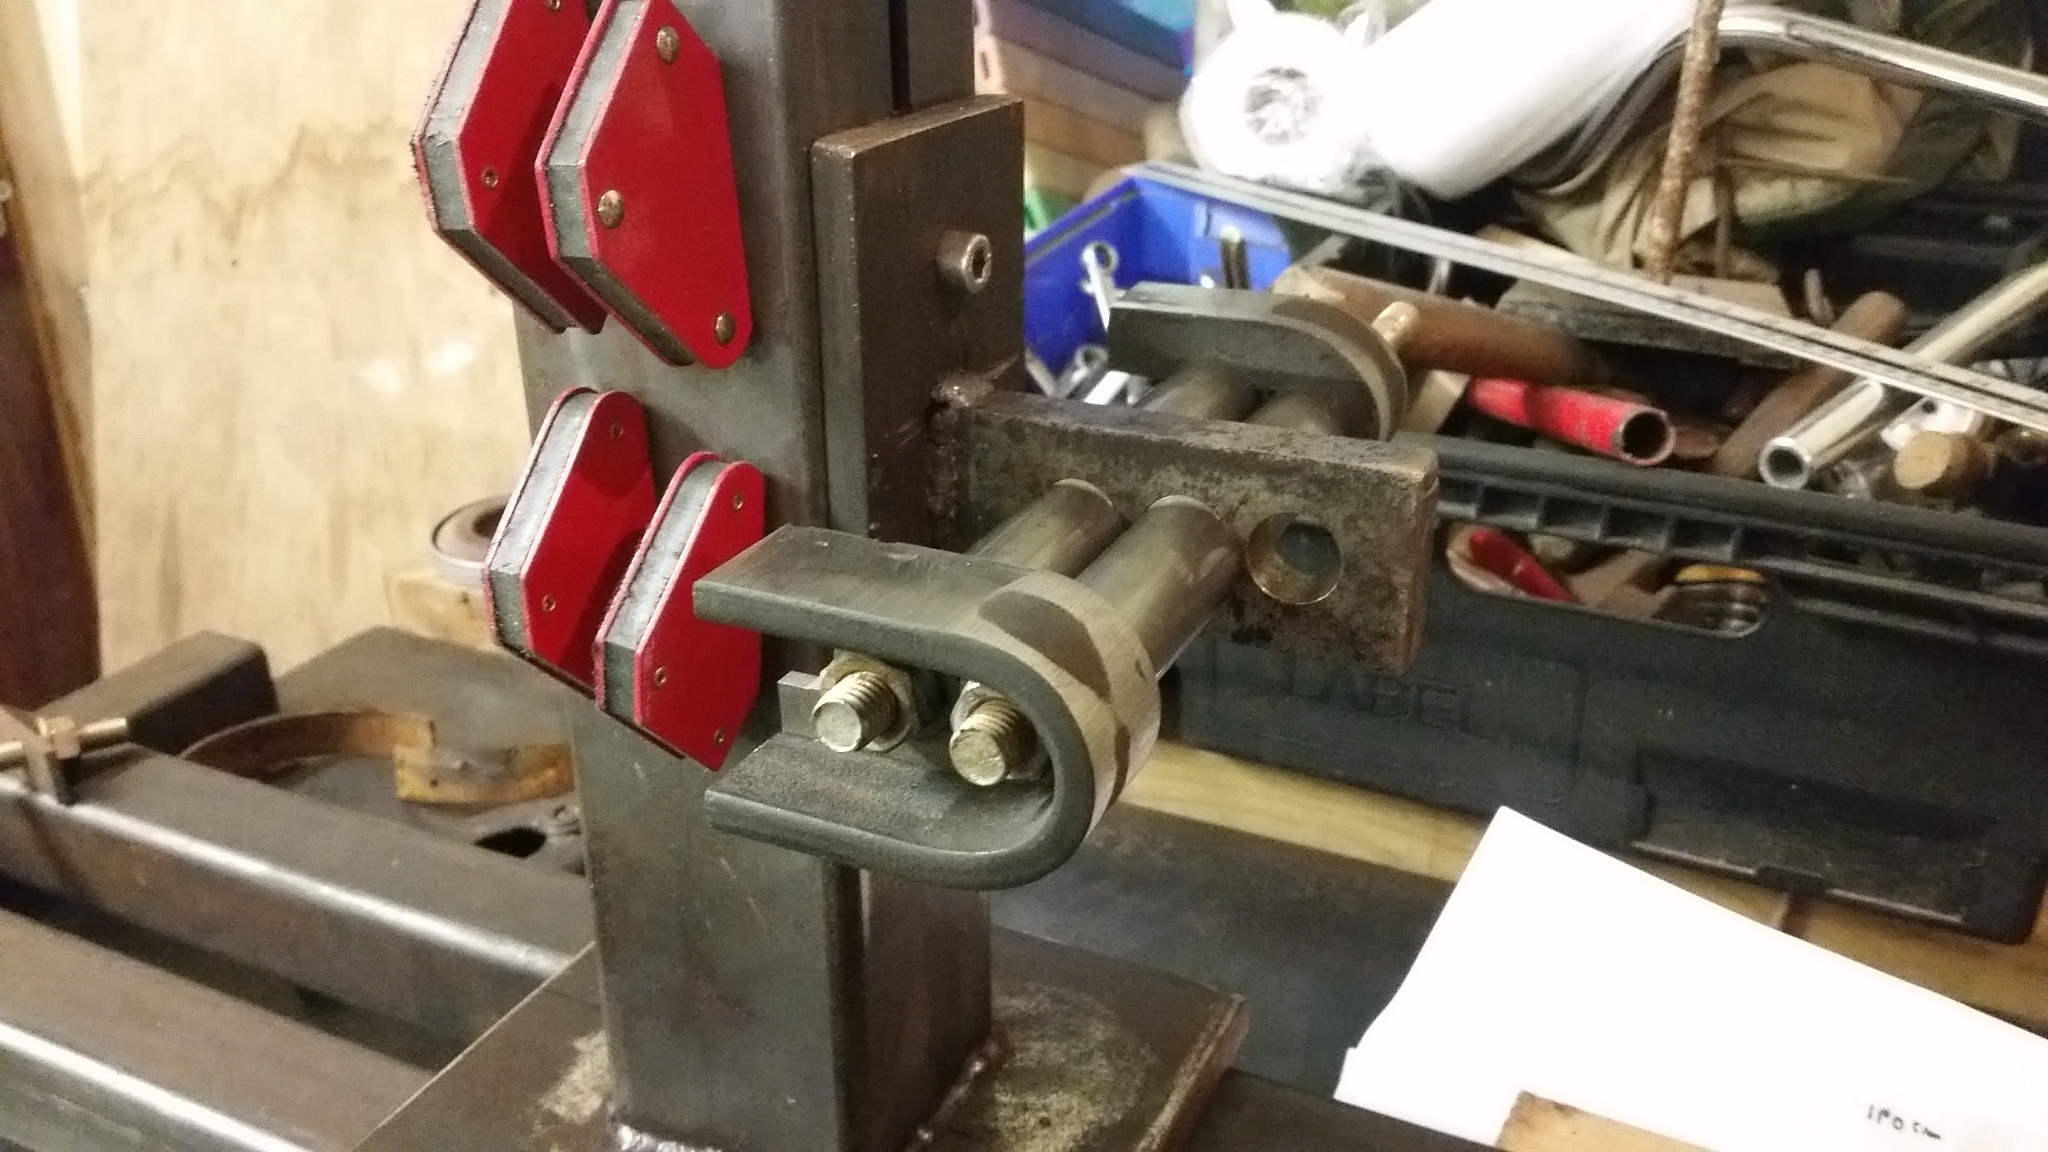
Knocked up a pair of axle plates

Fitted them to the jig
Started bending tube and fixing it to the headstock we made earlier.
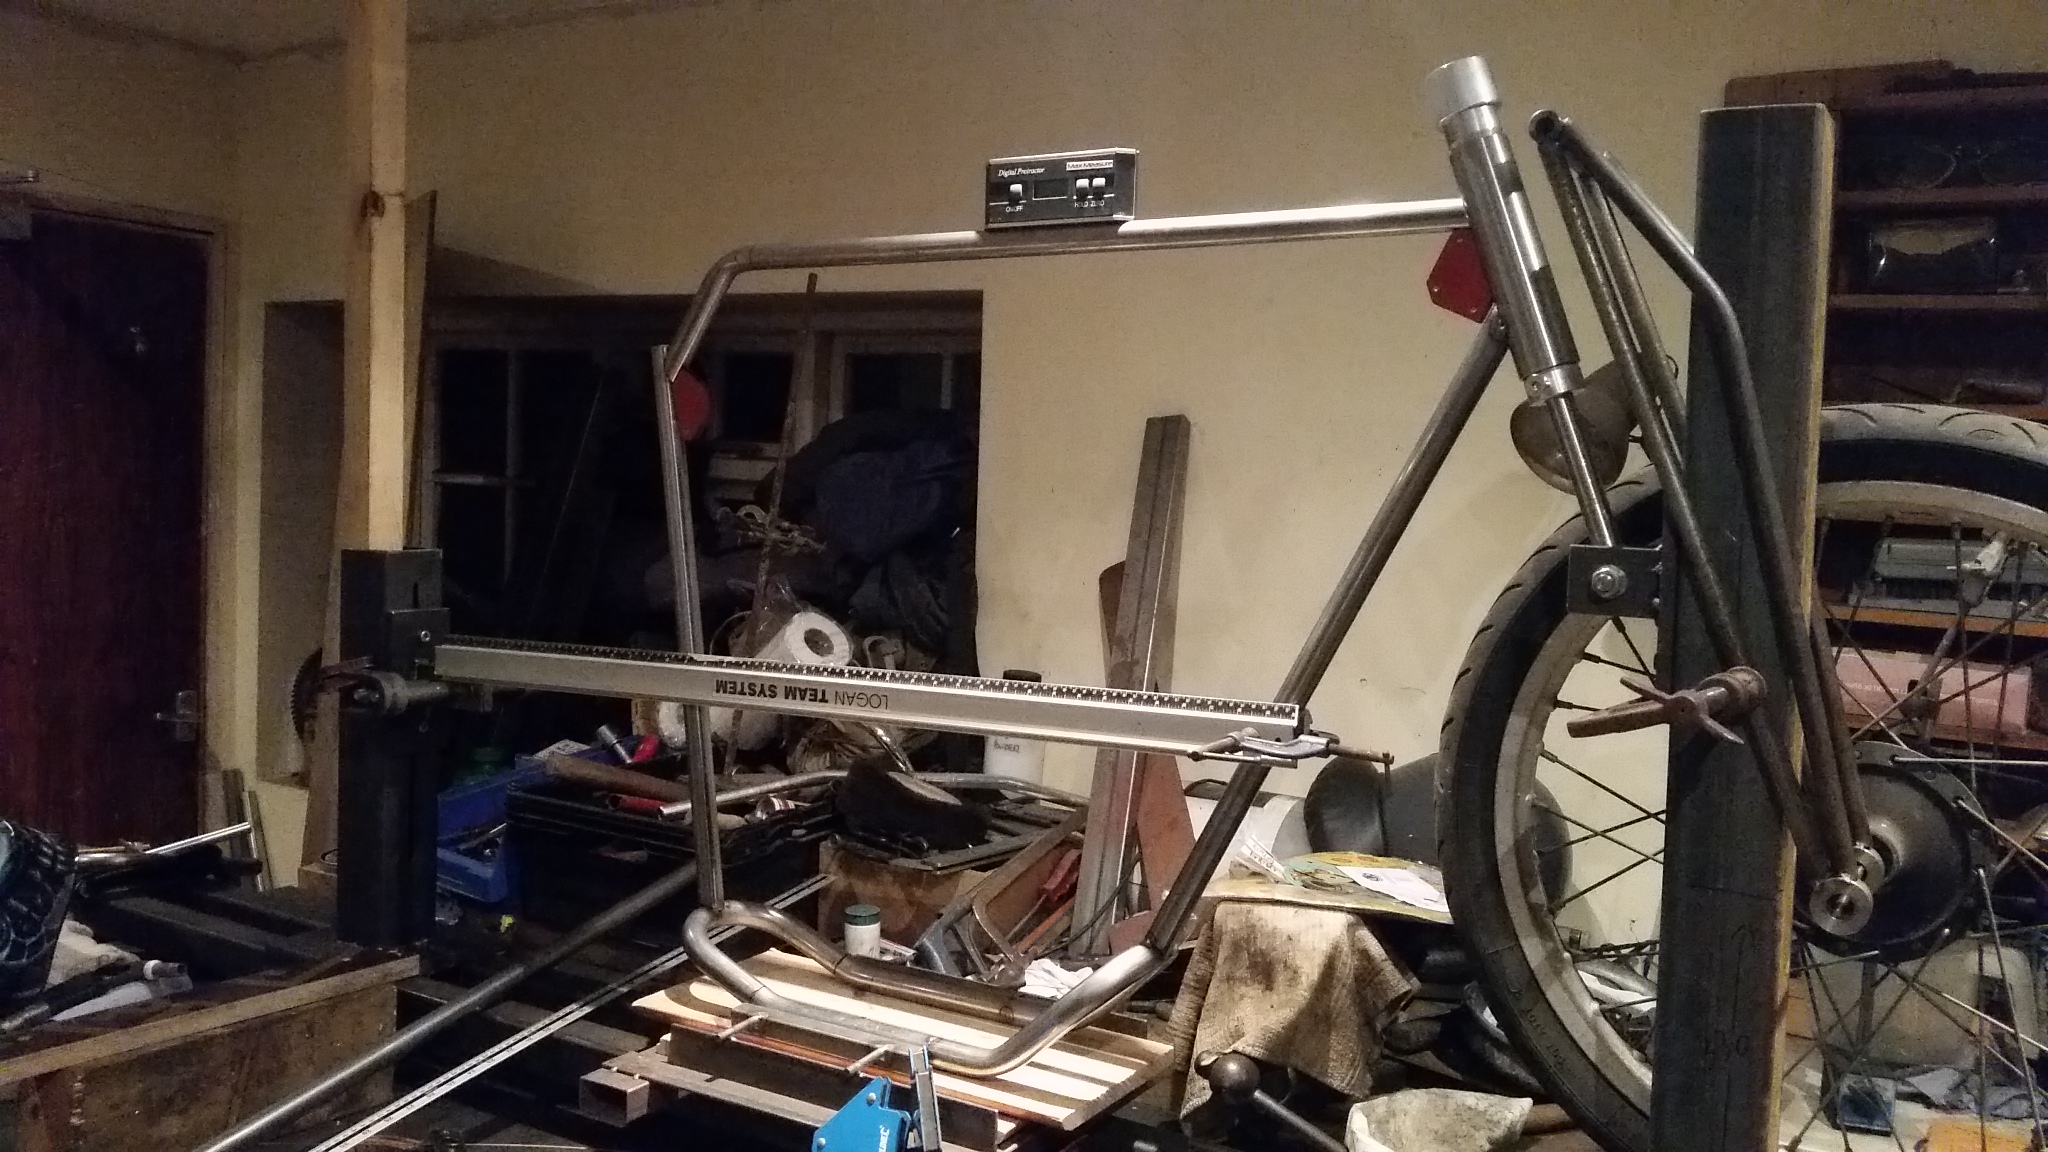
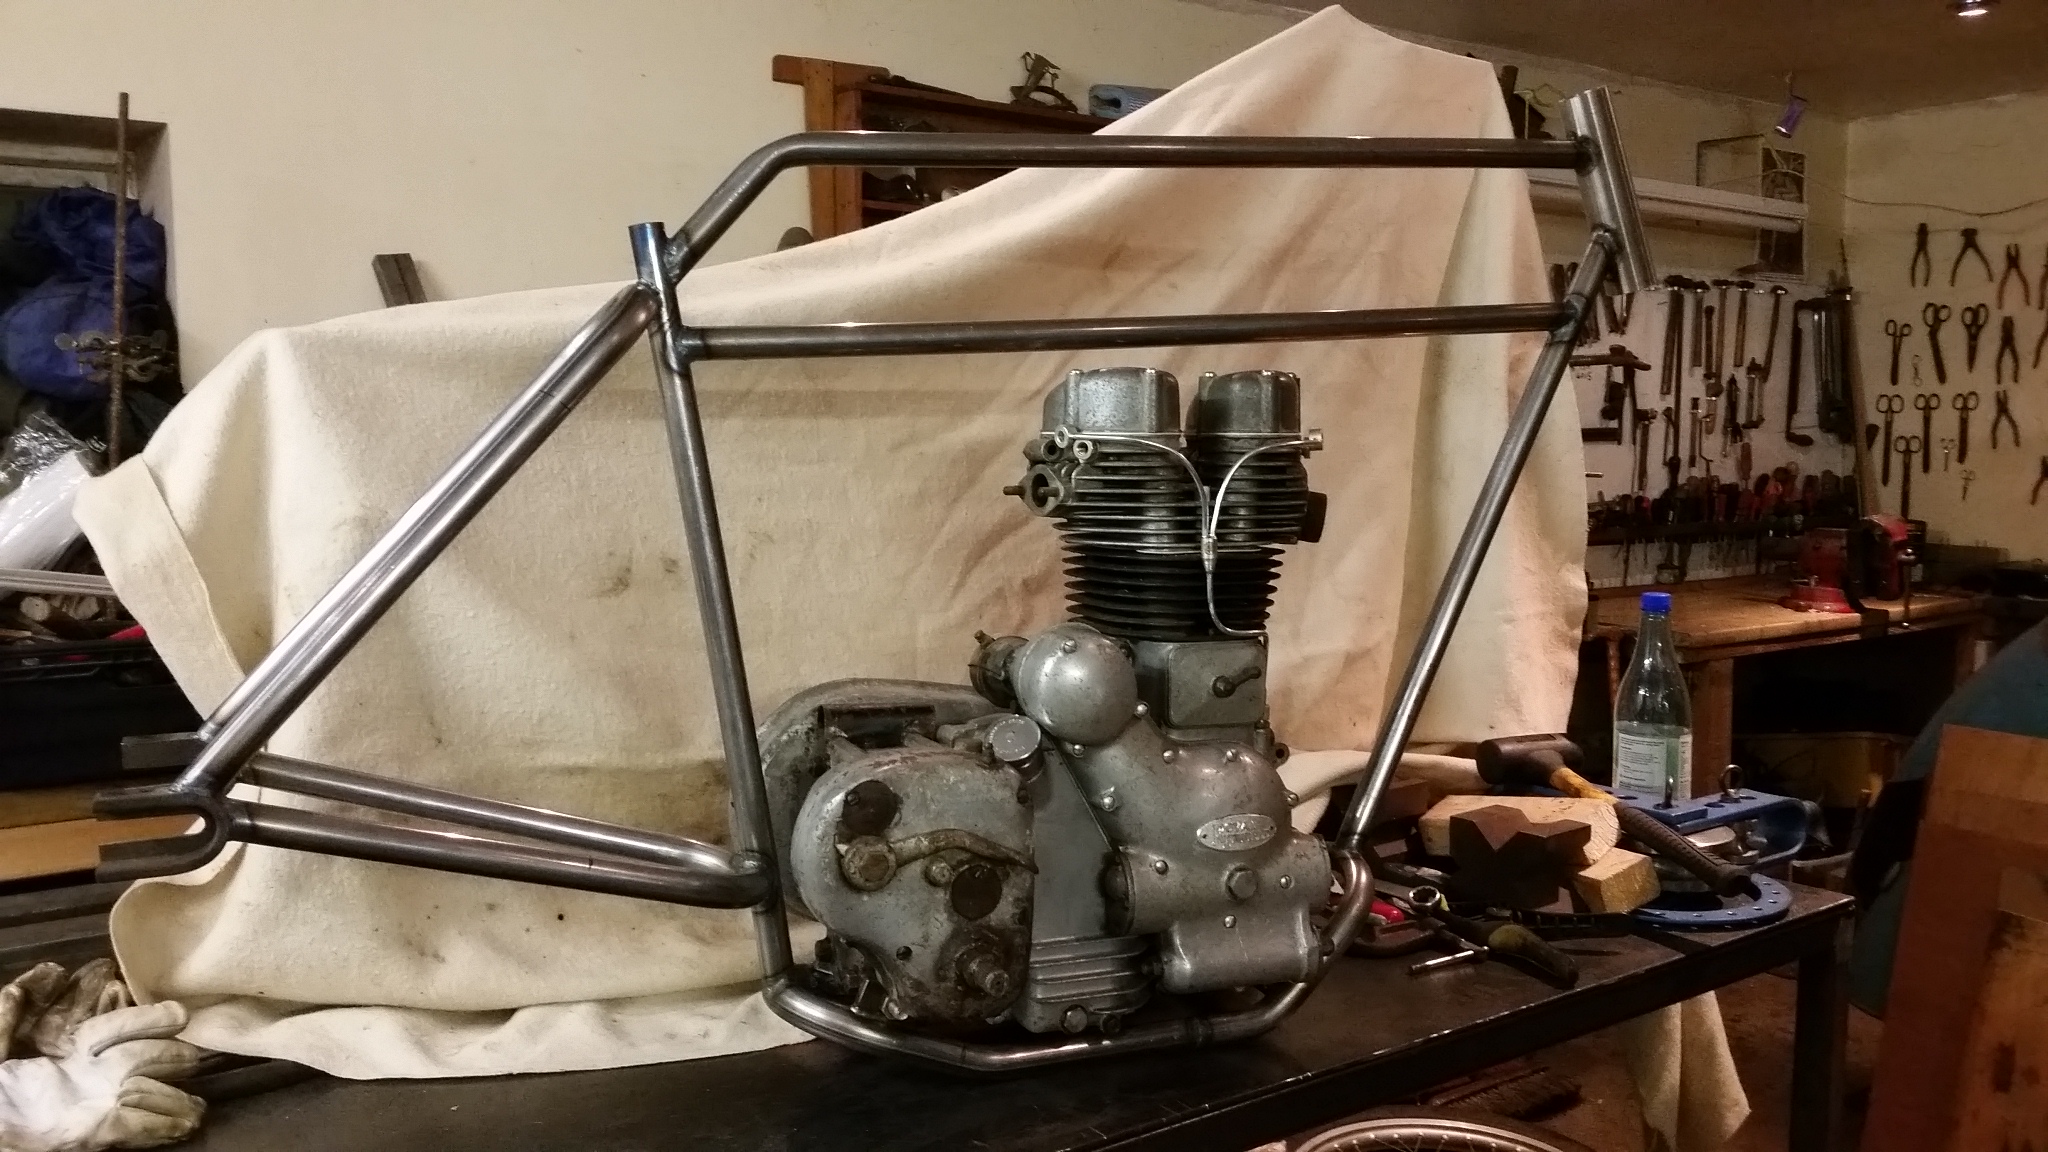
Joined the pipes up to the axle plates, staring to look like a motorcycle, kind of….if you squint.
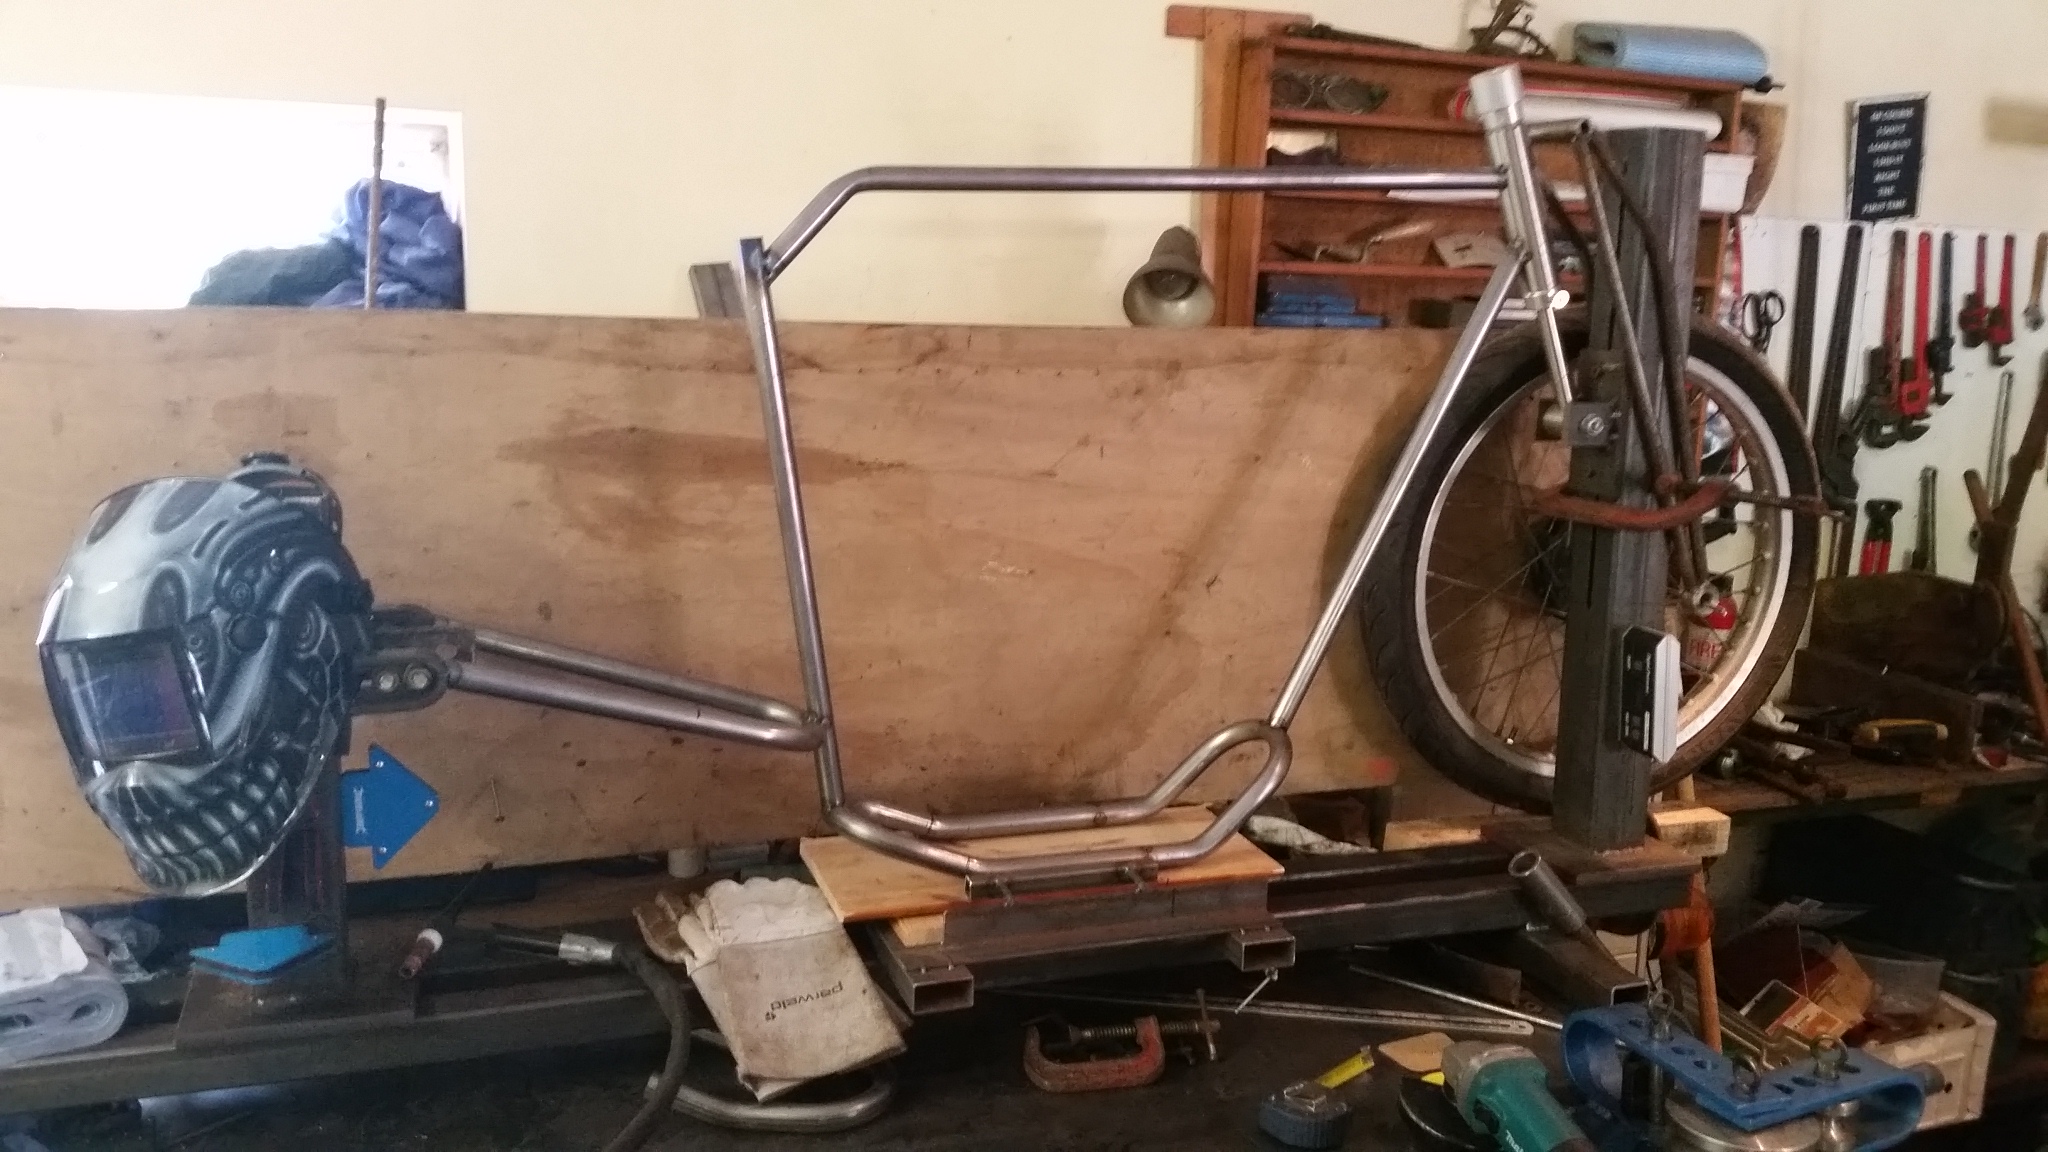
Engine mounts done, well bottom mounts..
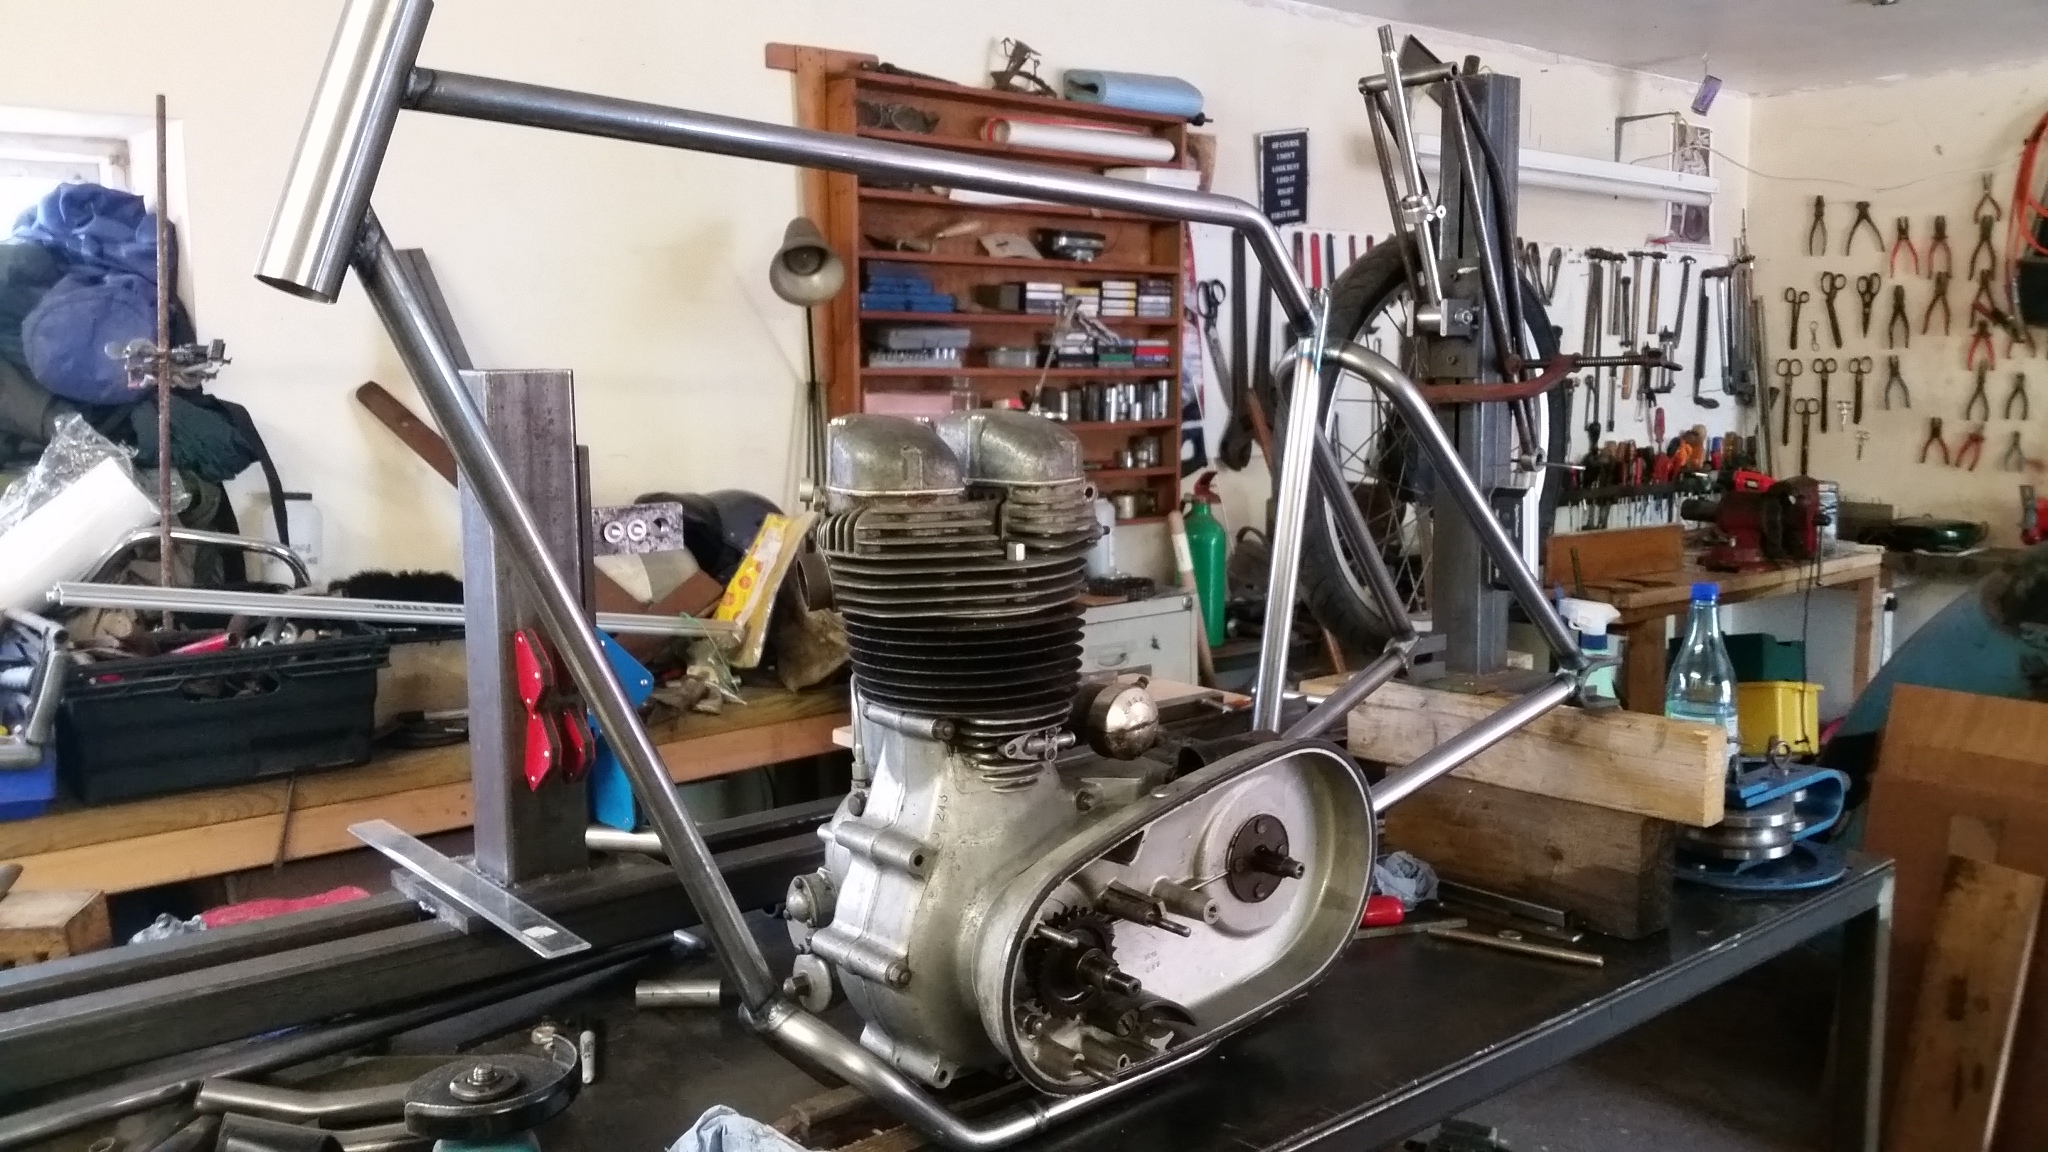
Final brace tube fitted, need to make a top engine mount first and then I guess we should start the petrol tank, or as Macly-davidson calls it…a gas tank
I’ve been a bit quiet after the BFOM show due to a methamphetamine addiction and an unavoidable compultion to steal high powered cars and perform public stunts that border on insane.
Ok, so I’ve been busy with work, I just wanted to sound a bit more rock and roll, it impresses the ladies or so I’m told.
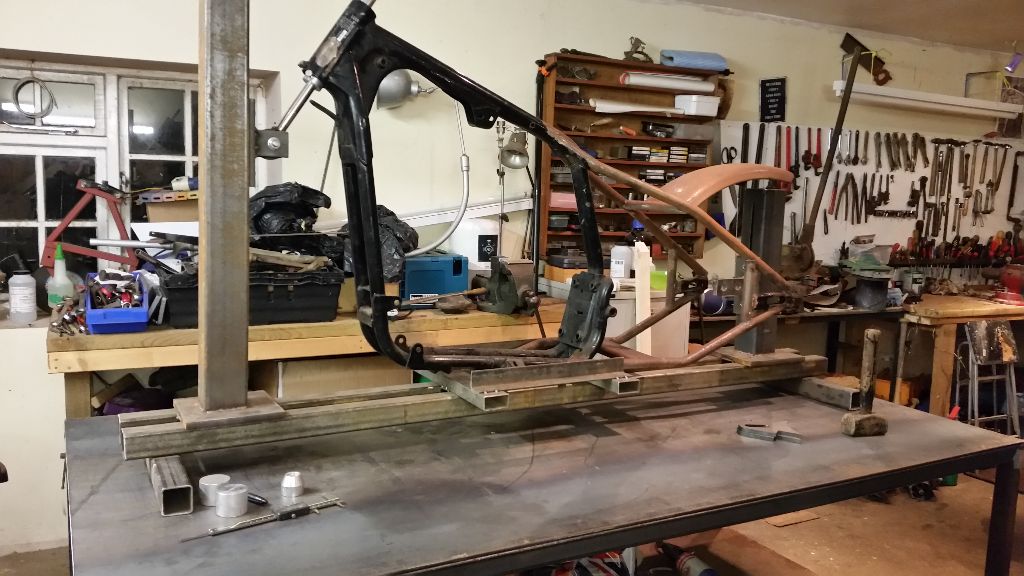
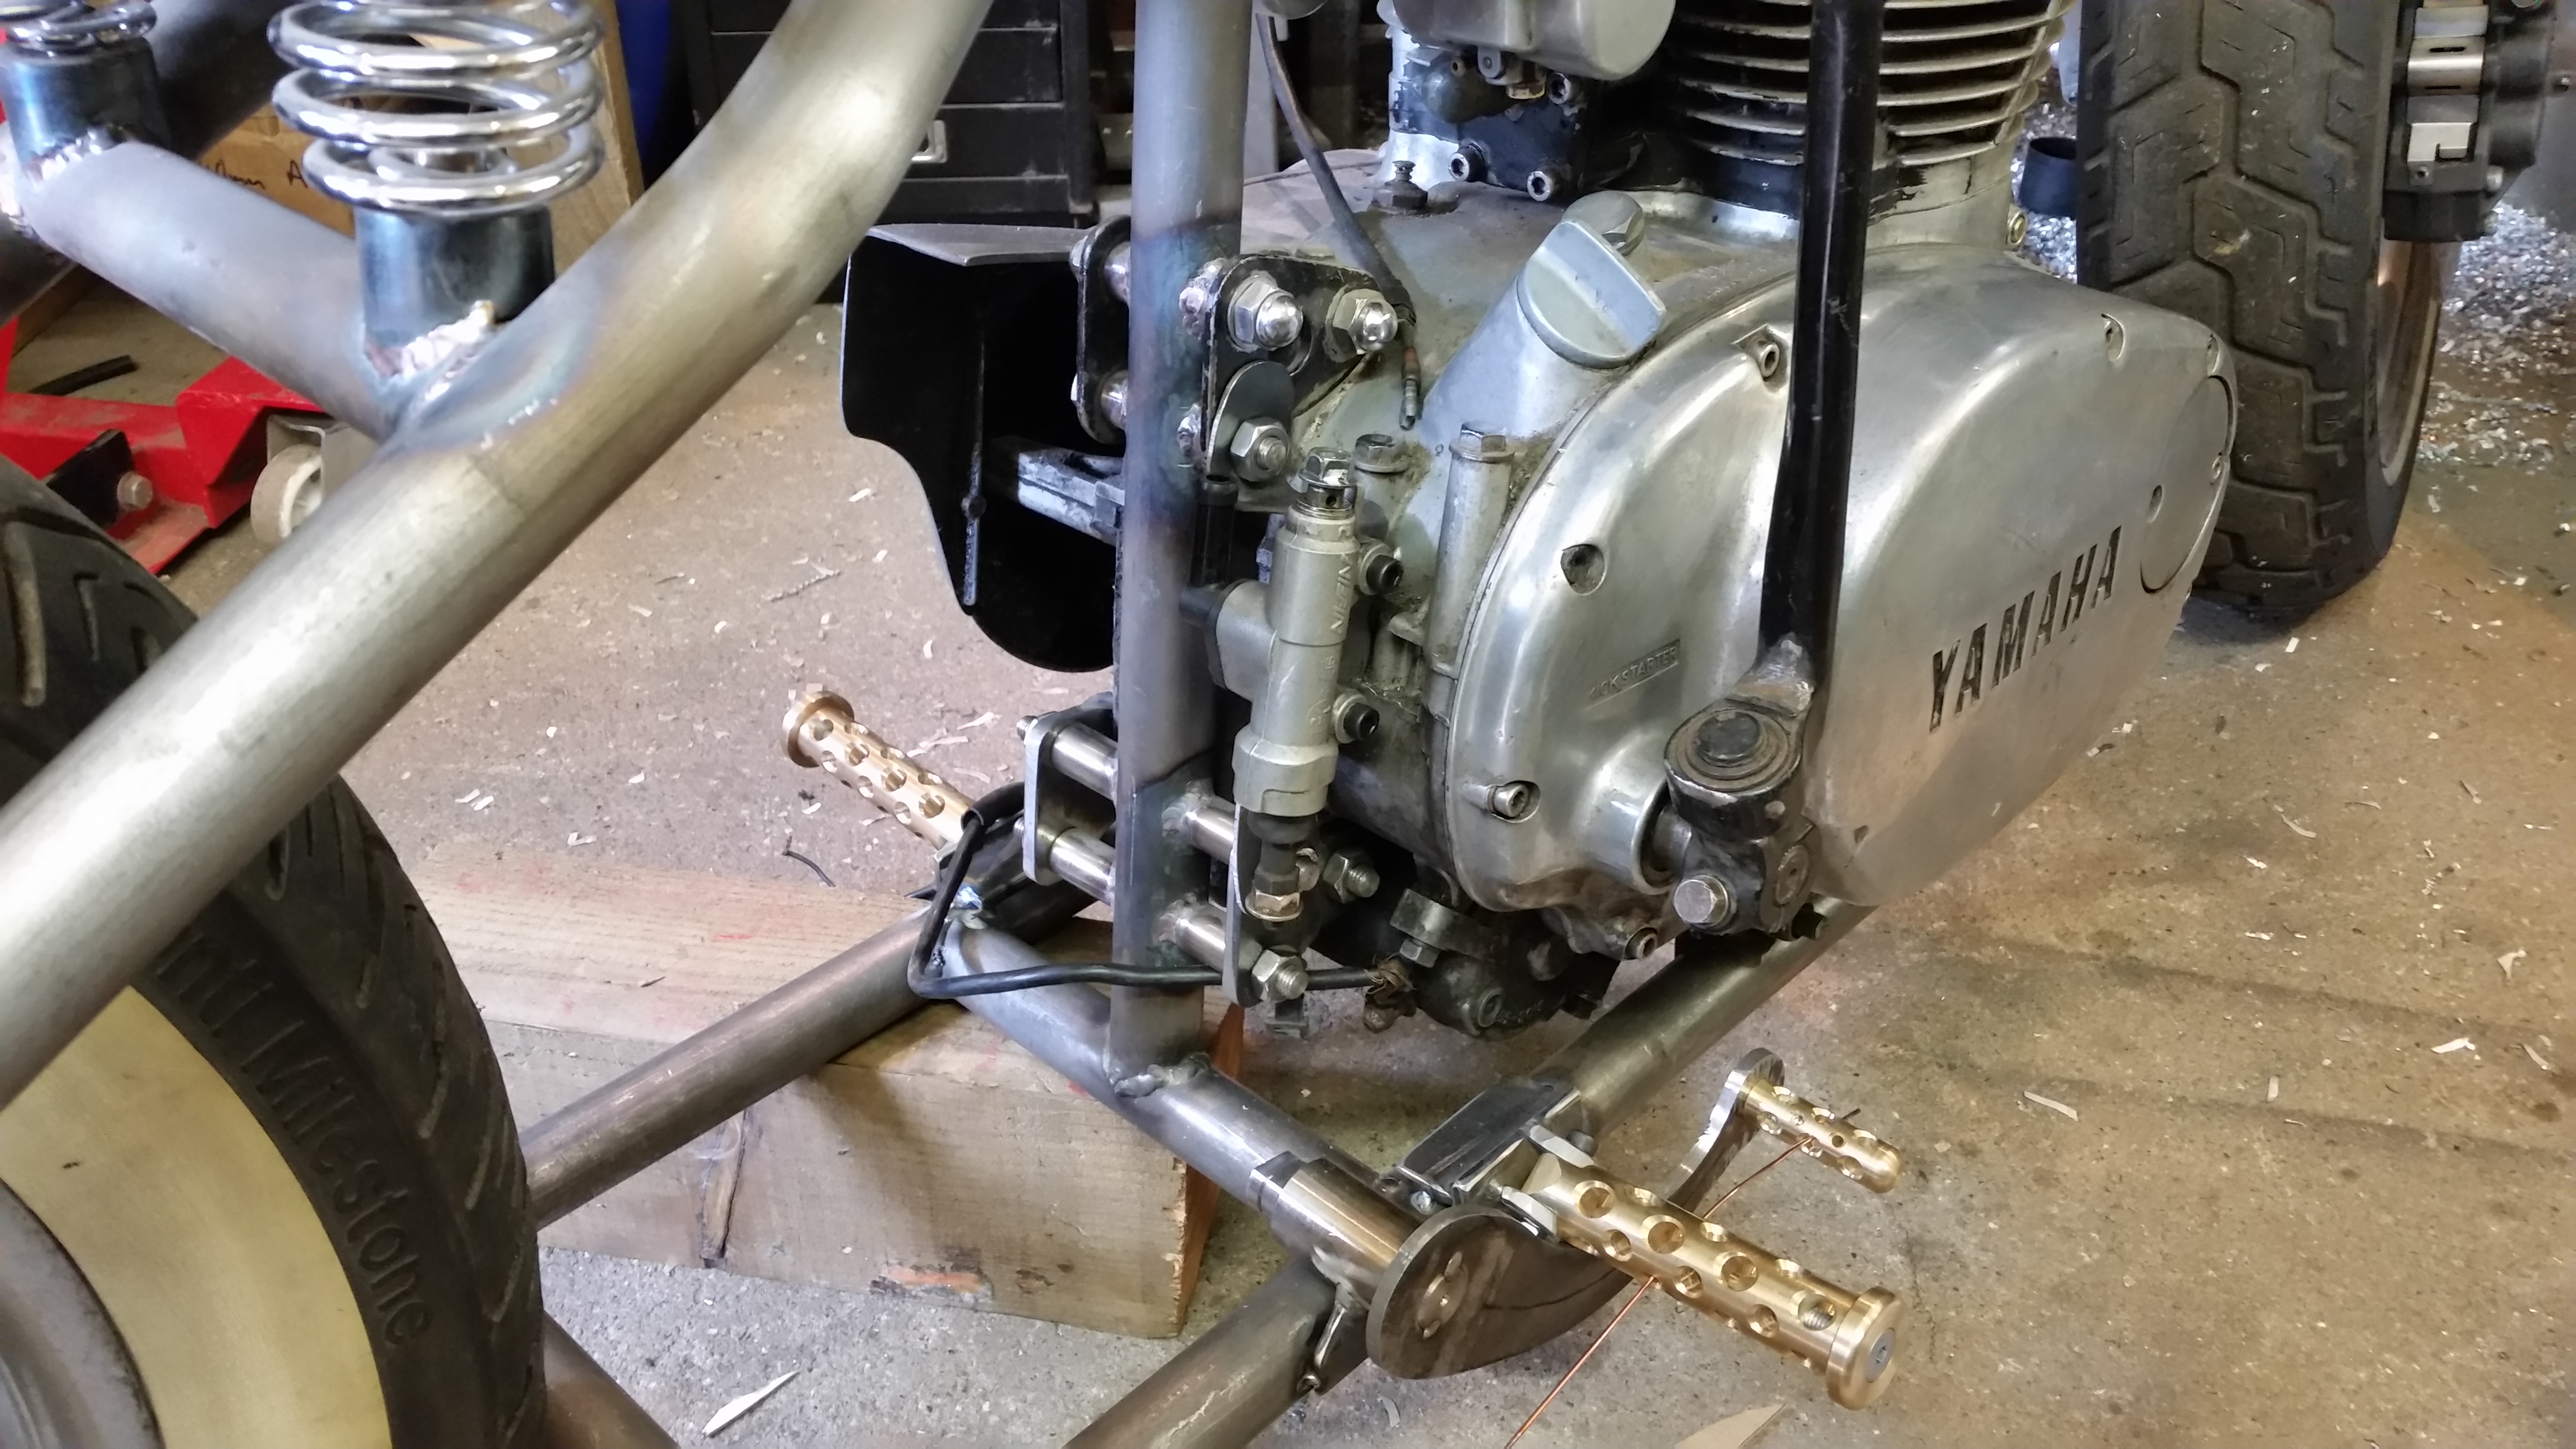
So…. I promised Mac a whille back that I would have a butchas at this new Yamarley thing he’s working on, seems quite an interesting project although a bit off the norm but what the hell I’m sure it will be fine.
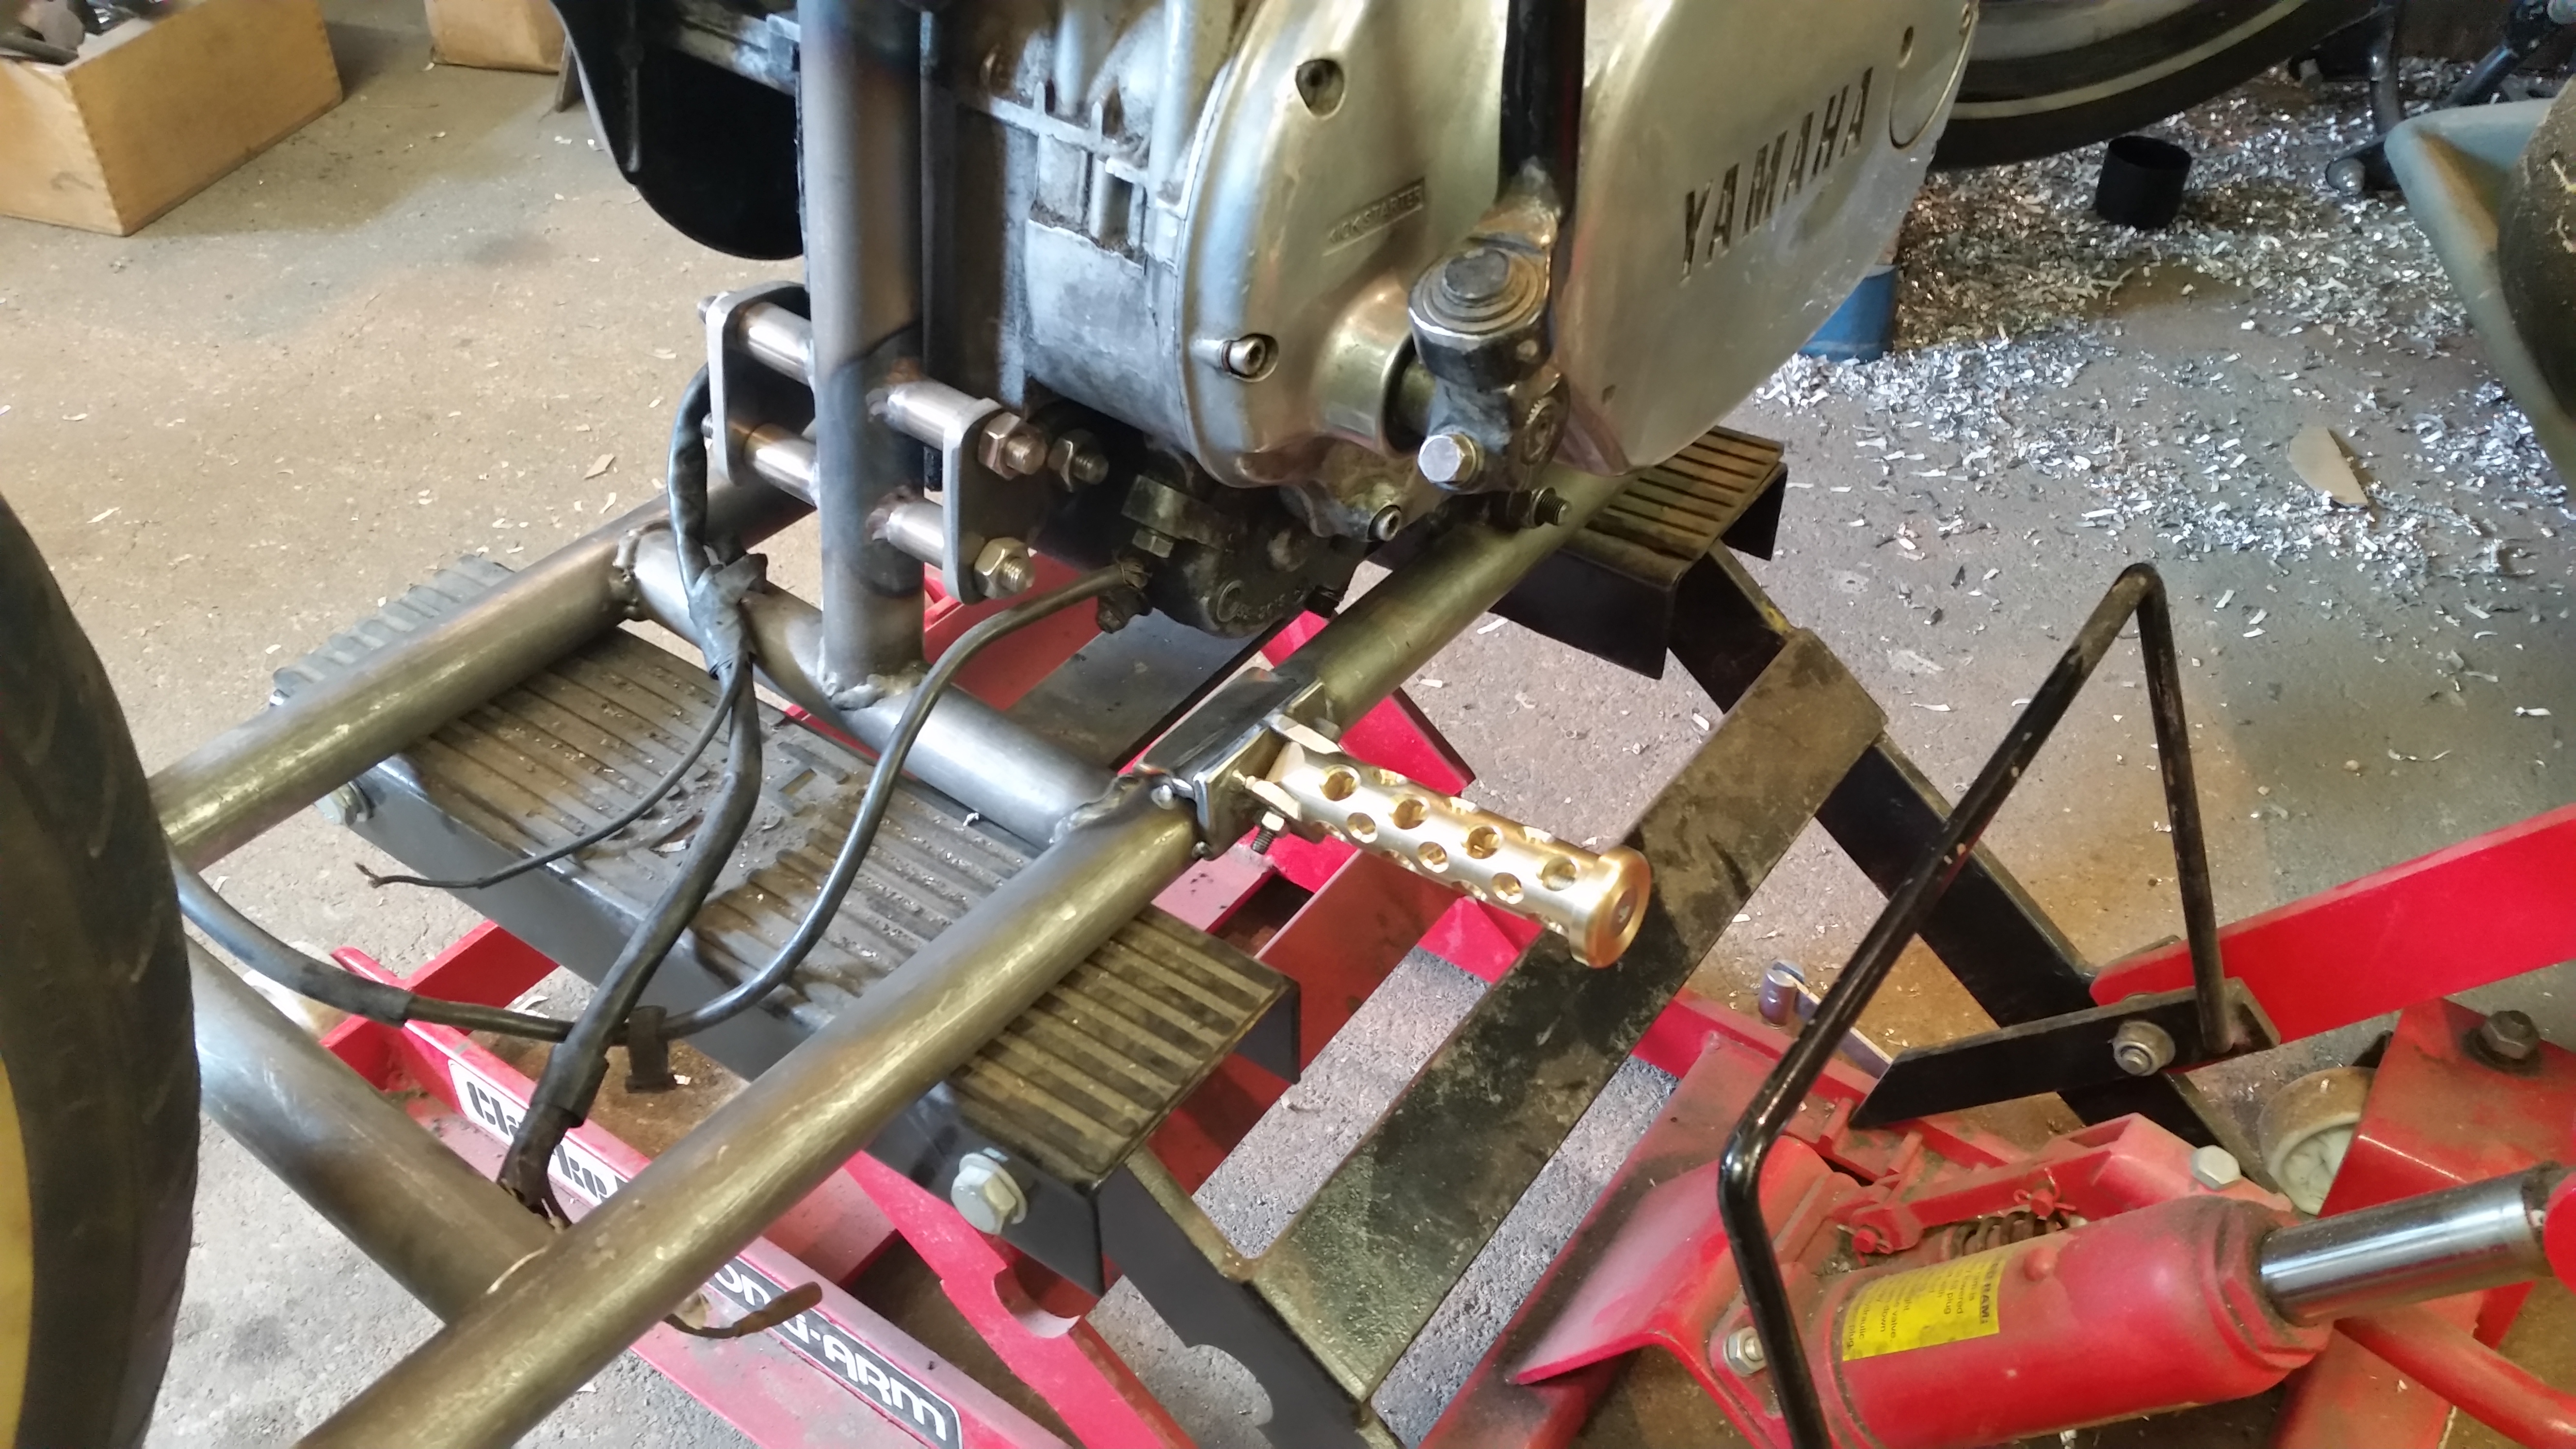
Got it back to my cave and rough mounted it on the jig to see what needs to be done to rescue it, so it needs a little touch of love and a few minutes with my grinder to rip off the whole back end, it all sucks.
The main issue I have is it’s all made from inch seamed tube that is thin walled and stitched together with not enough penetration, see how I managed to get ‘rough mounted’ and ‘penetration’ in the last two paragraphs, thats how ‘rock and roll’ I am, lock up your wives….!
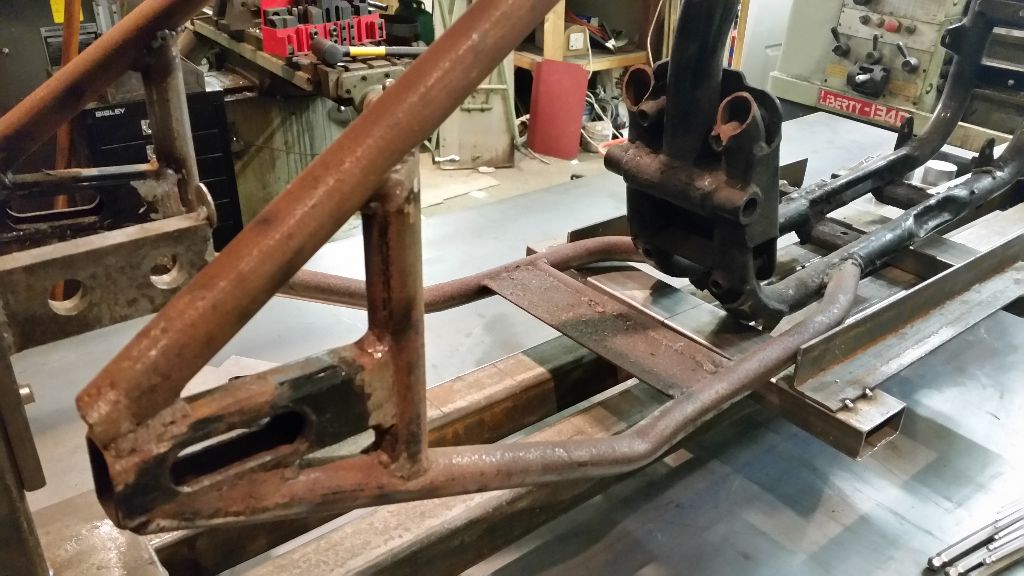
Close up of the offending tubes, more to follow.
Well, it’s finally here, one of the reason’s I built my bike but more importantly the big day of the year for the Scavengers, the Brackley festival of motorcycling.
I’m not going to try to explain the content as there are two great websites and plenty of youtube footage to watch, fill your boots!
http://www.brackleyfestivalofmotorcycling.co.uk/
https://www.facebook.com/BFoMC
Starts about 10am and finishes about 5pm, £5 for the whole day.
There will be at least two of the scavengers bikes in the custom show, hopefully more….
Myself and Mac shall be attending the ‘First Friday of the month’ meet at Jacks hill cafe just outside of Towcester on the A5 if any of you fancy having a look at the bikes before the Brackley show, we will be arriving at around 7:15 – 7:30, you should be able to hear us coming from some way away as we have been accused of sounding like a pair of poorly working Messerschmitt’s, I think I’m mostly to blame as there is some issues with fueling and it pop’s and bangs a bit, but then so does Mac’s…….!!
There will be plenty of decent bikes to look at aswell so you won’t be disapointed.
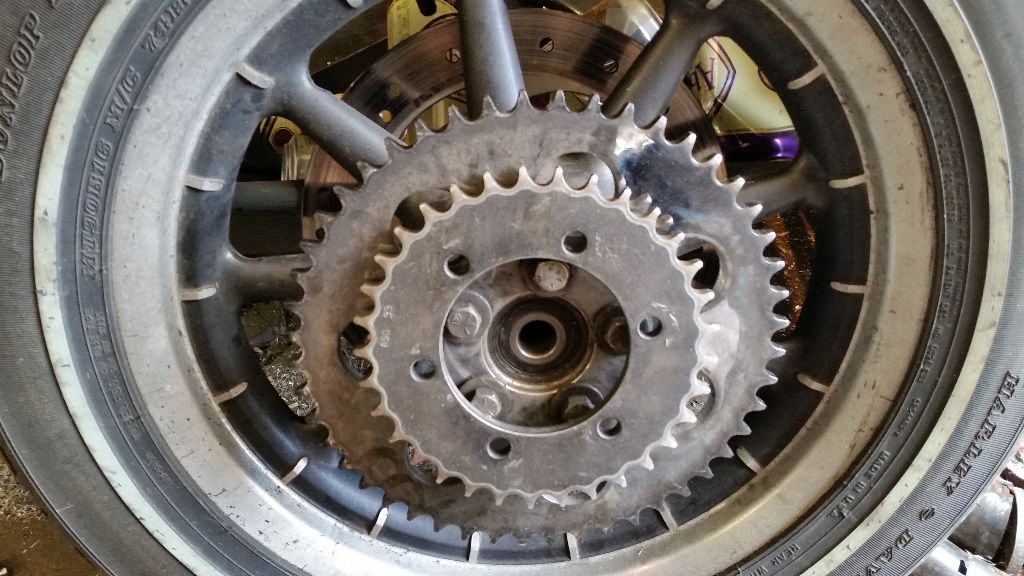
Turns out my choice of rear sprocket was not so smart.
I chose a 49 tooth chrome sprocket as this was the smallest I could find to fit the Harley wheel, I thought it would be alright, a bit low geared but I’d manage, well I was wrong…..I can only get to about 50mph and it’s so high revving that the handle bars shake so much I find it painfull to hang on.
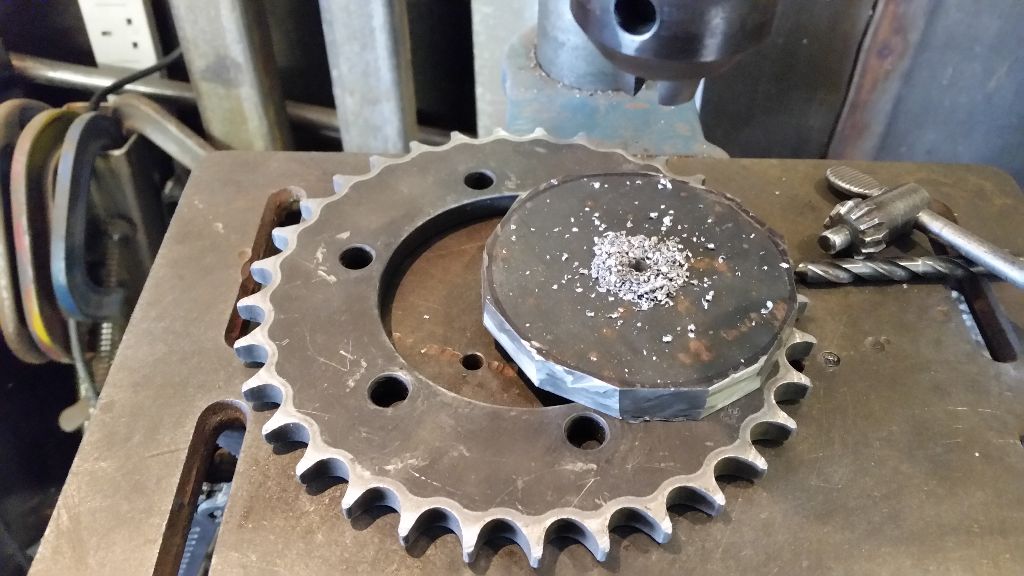
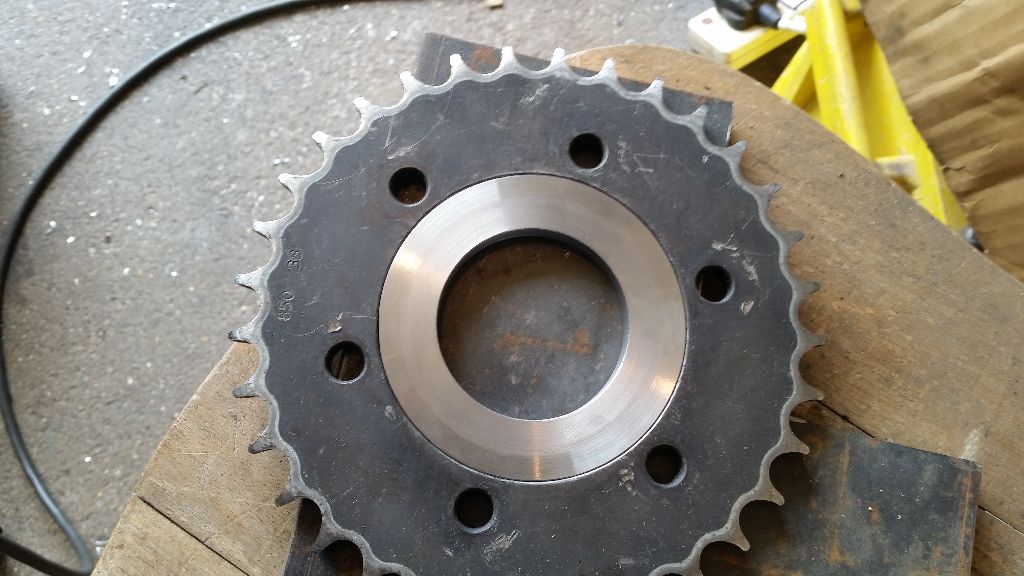
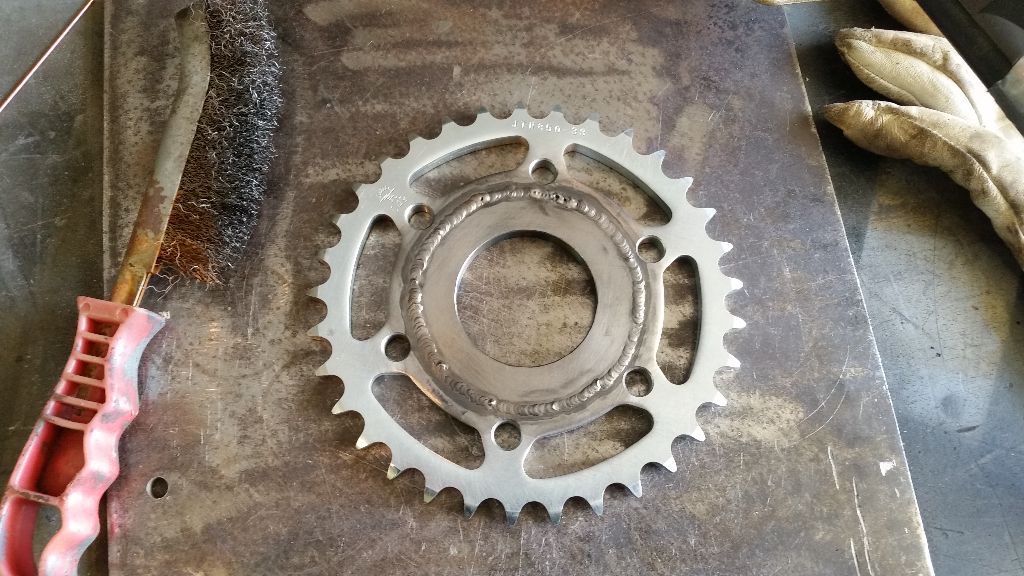
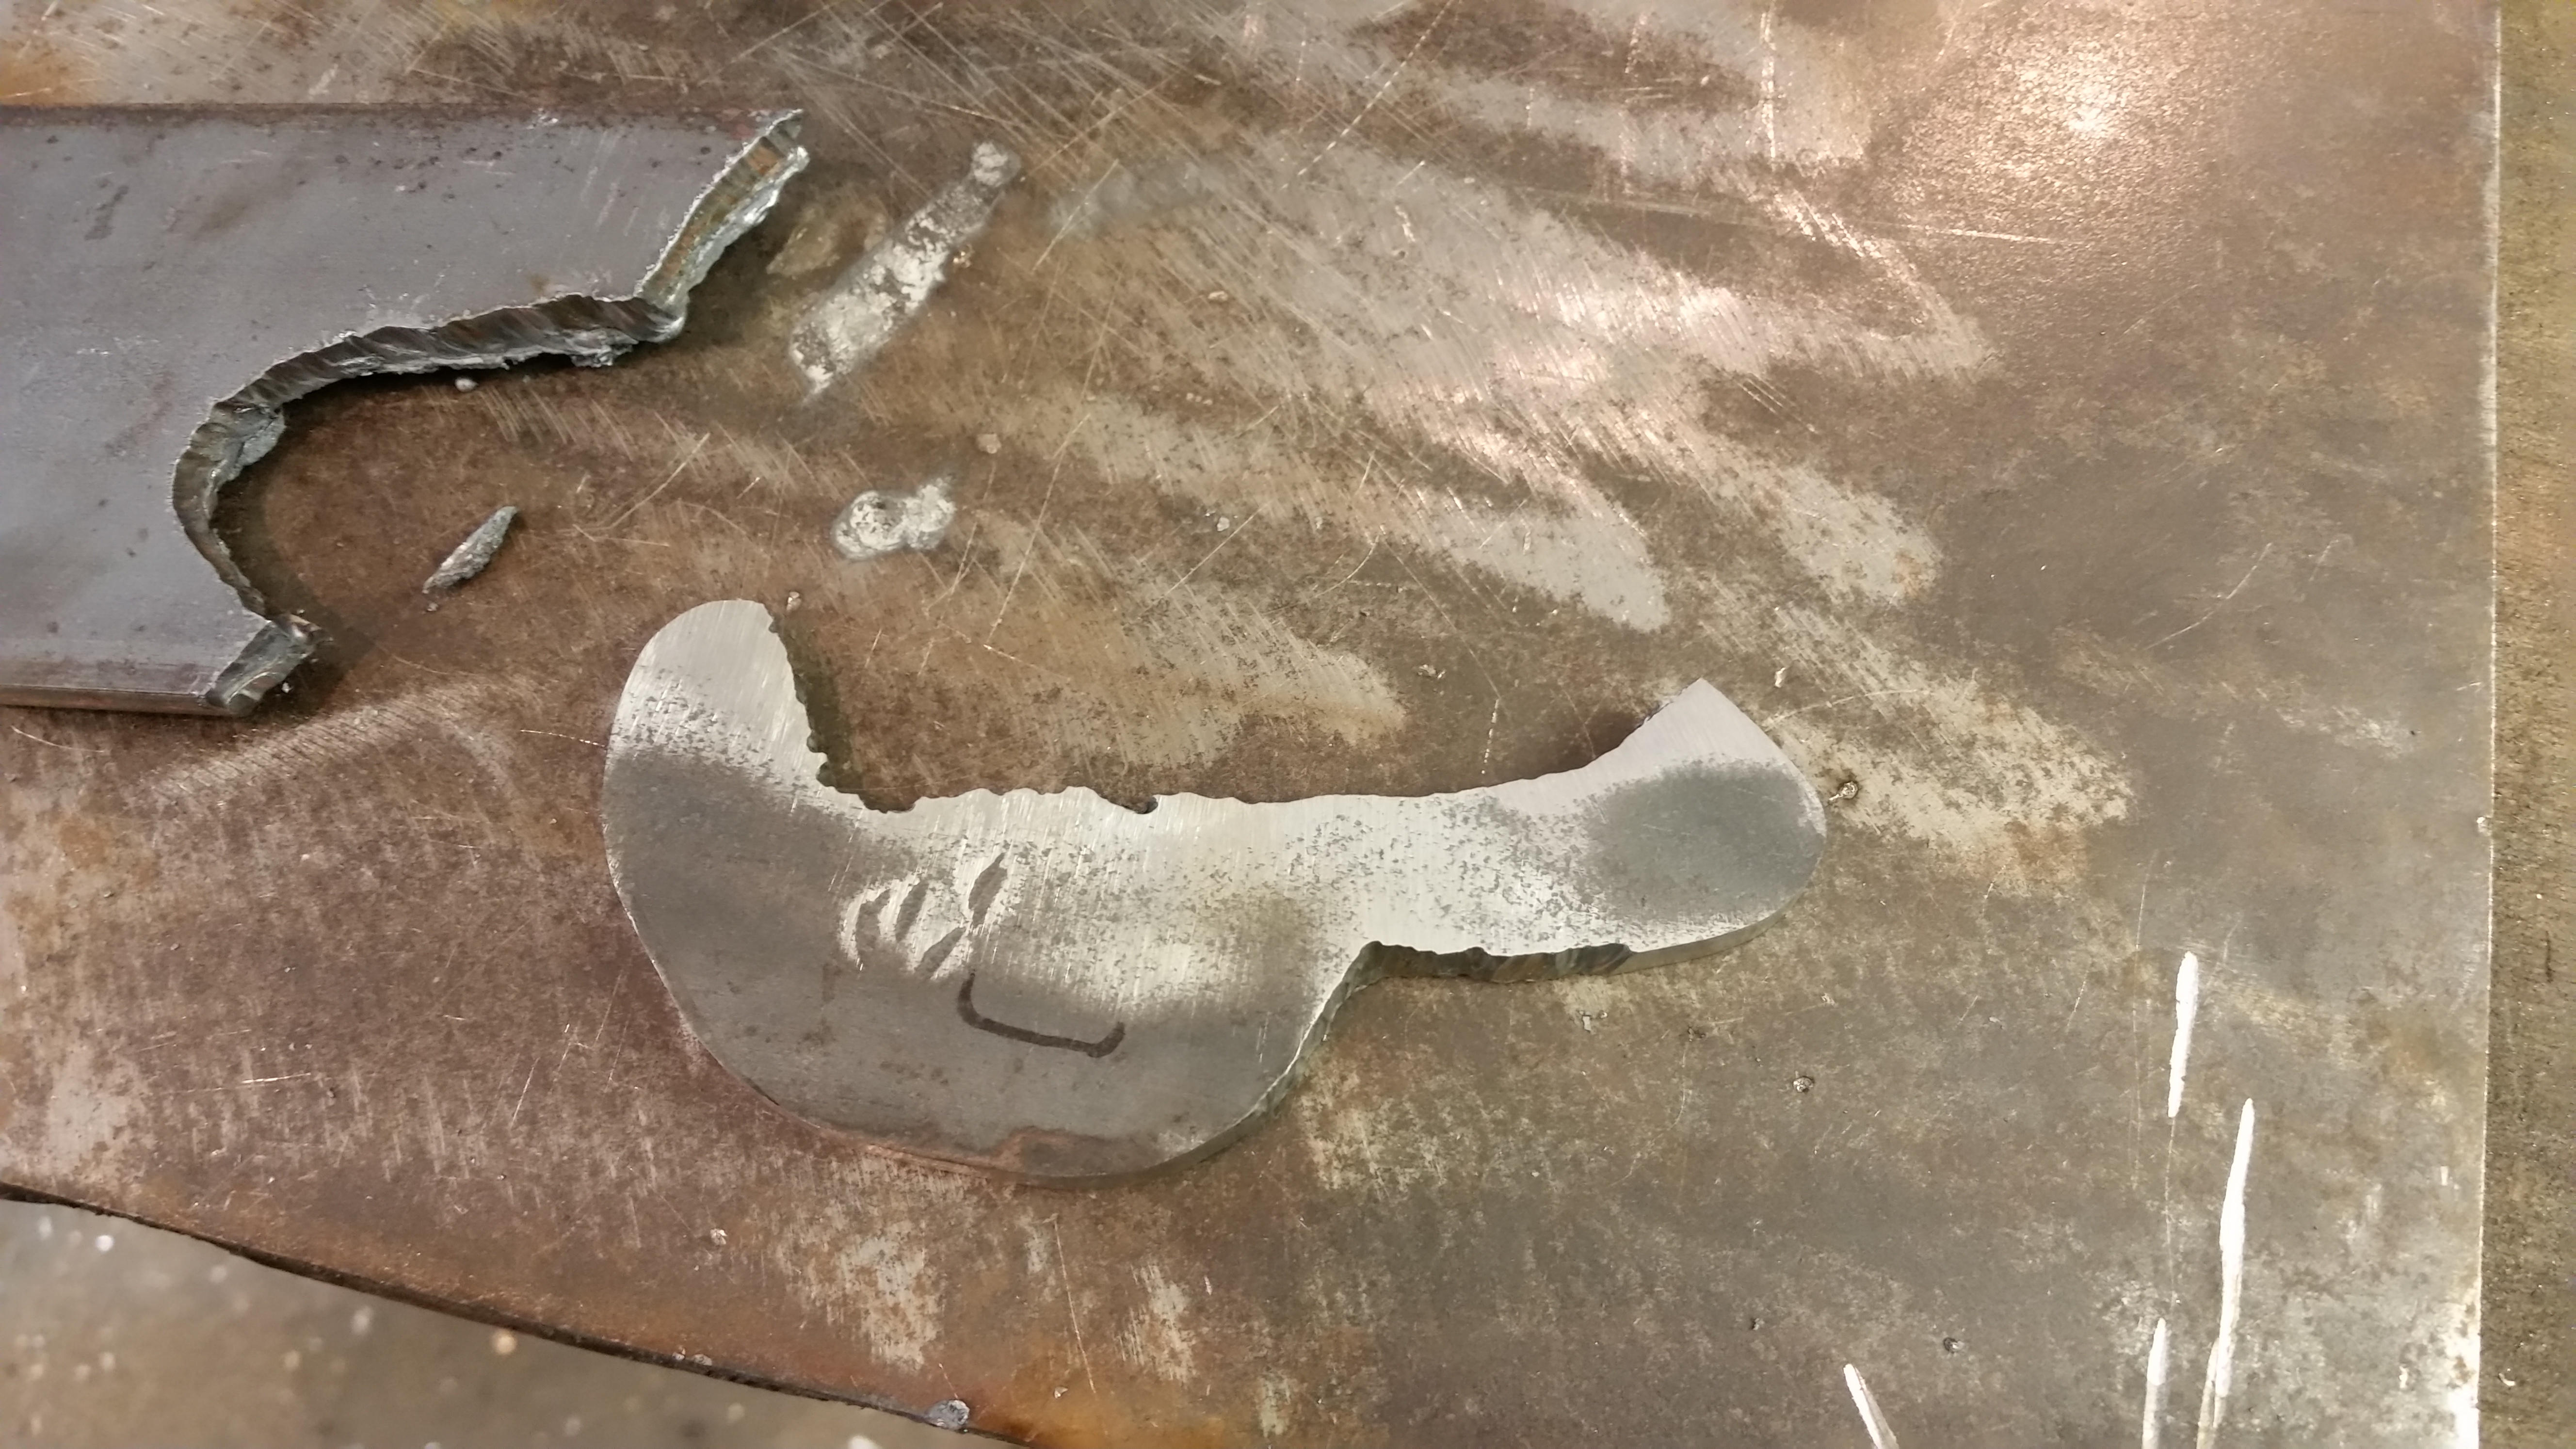
As you can see there is quite a difference, the standard XS sprocket is 33 tooth, now the problem occurs as you can’t buy an off the shelf solution (there is one available in the US but it’s very pricey) so I’d have to make something fit. I used the inner of the XS sprocket as a template and marked it out on a bit of 12mm plate I had in stock, set to with the angle grinder and chopped out a rough blank to start work on.
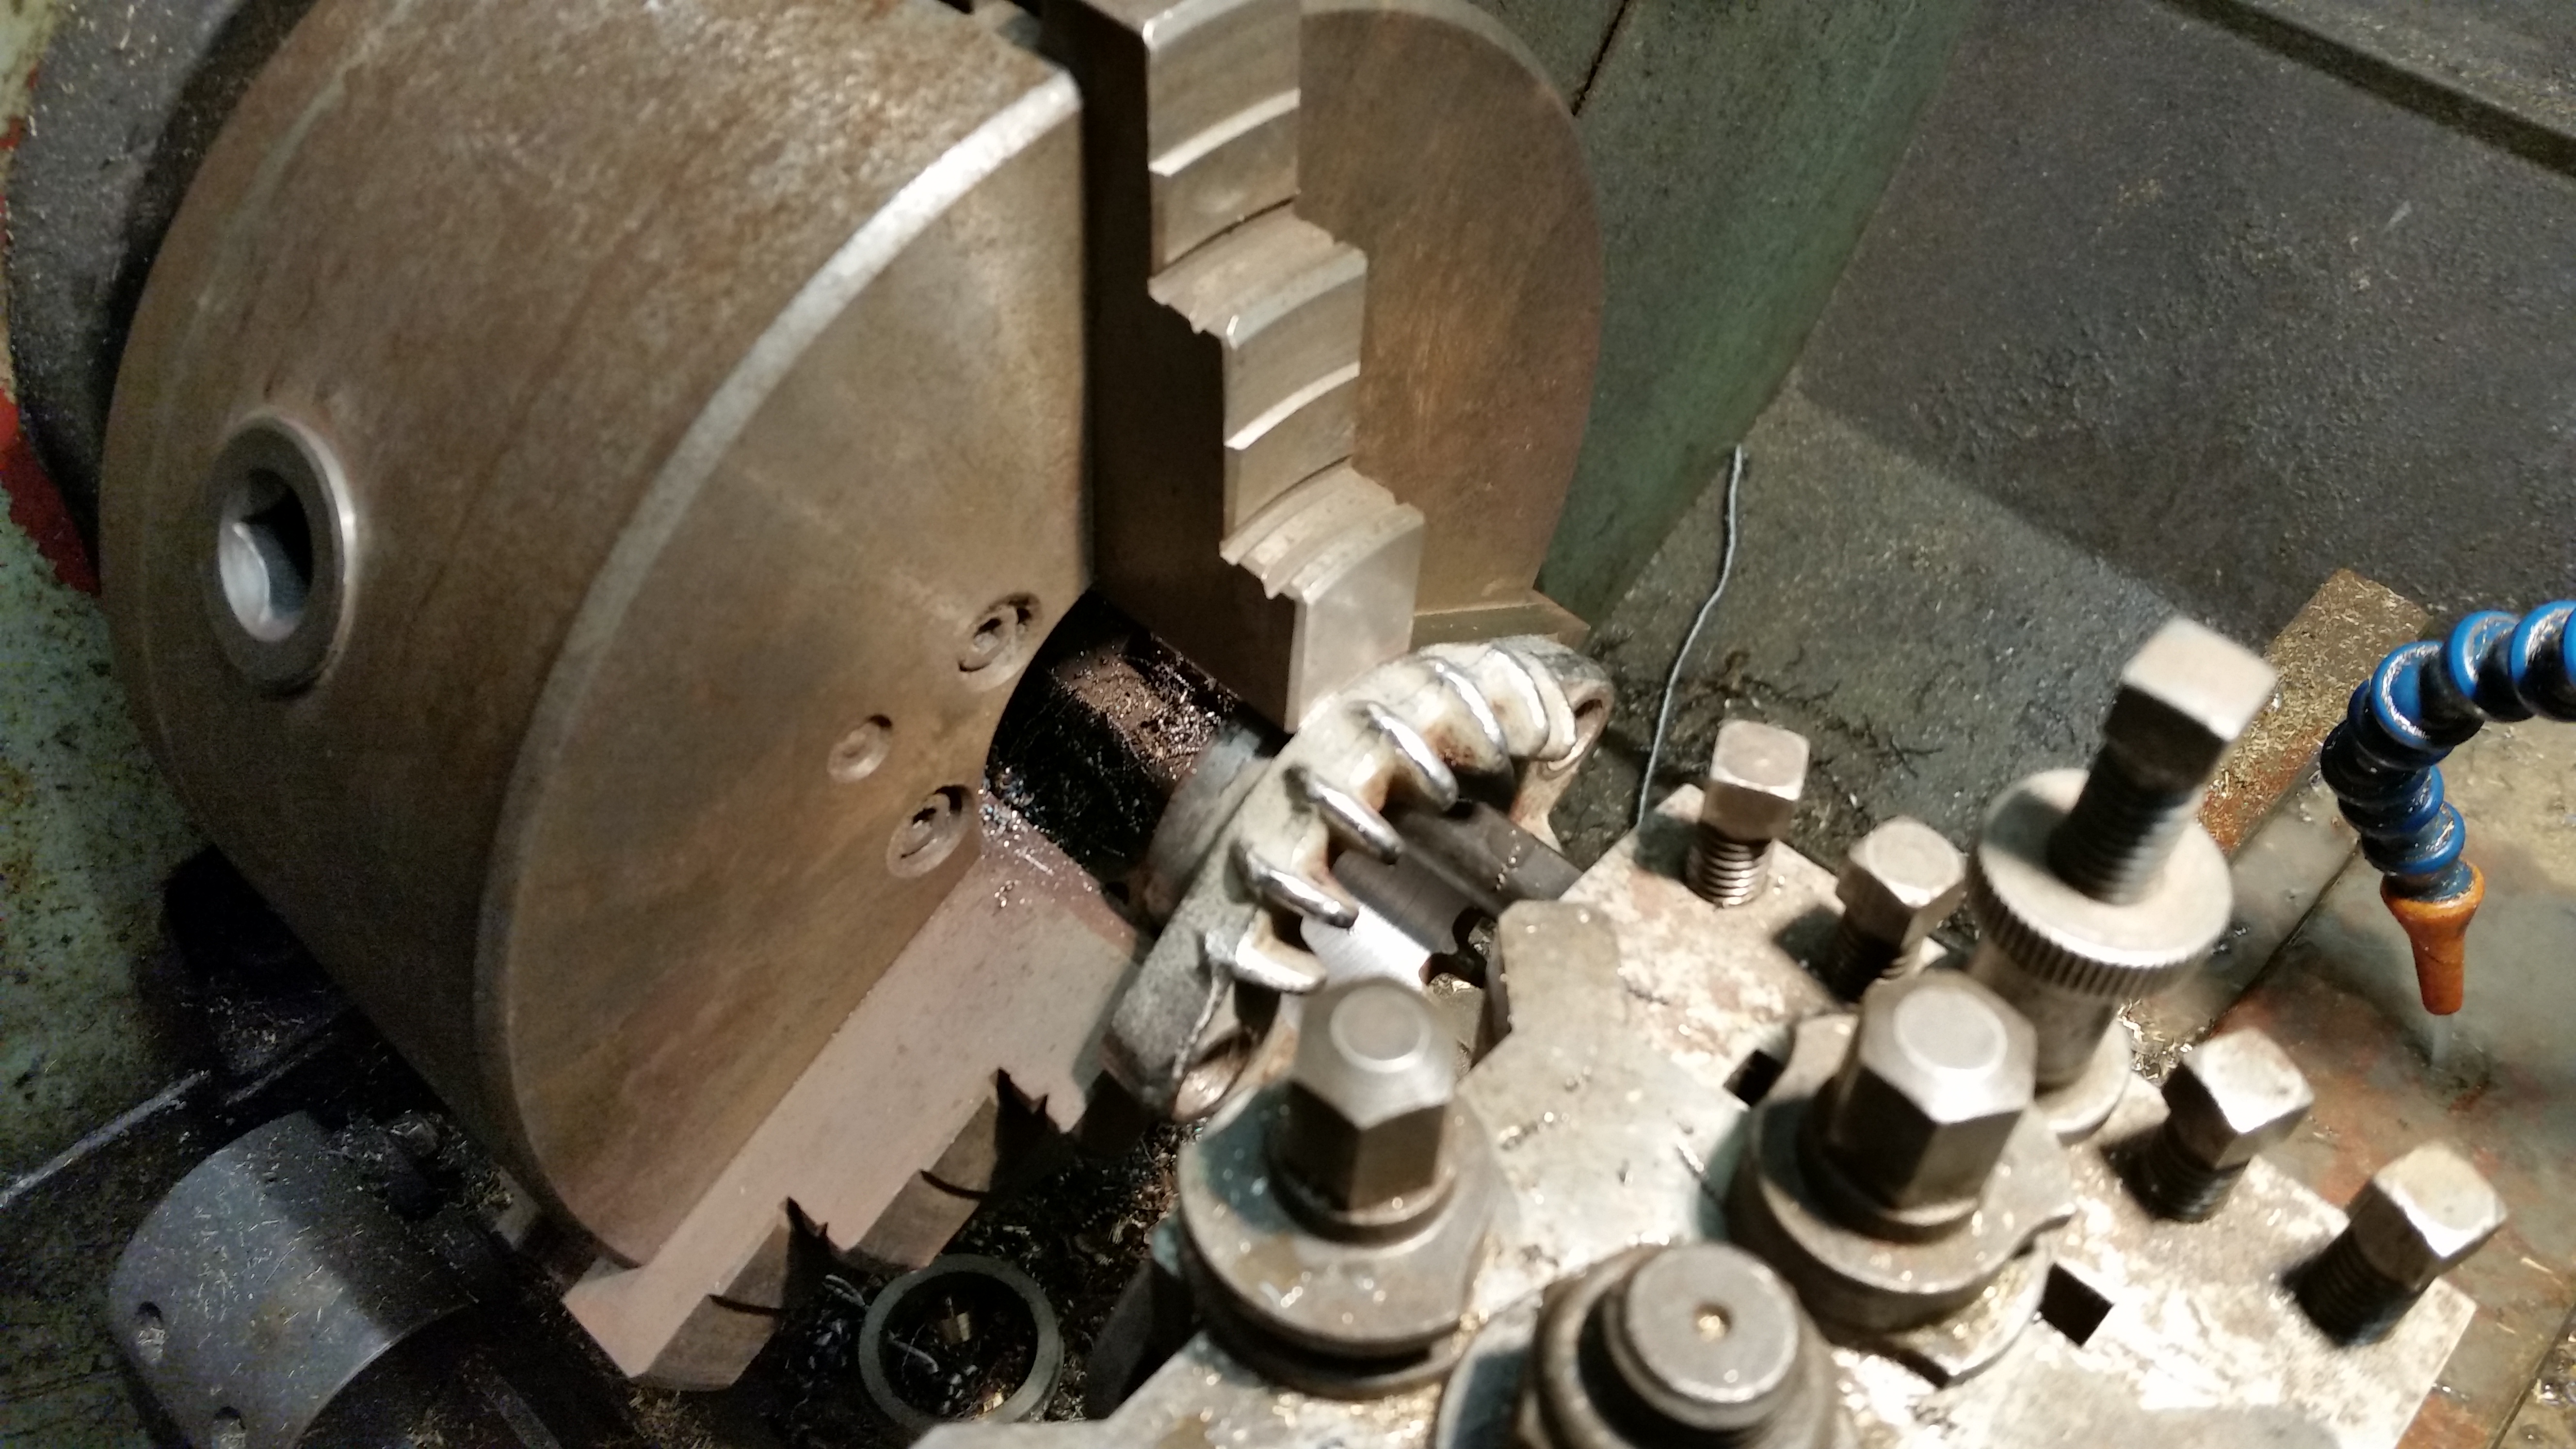
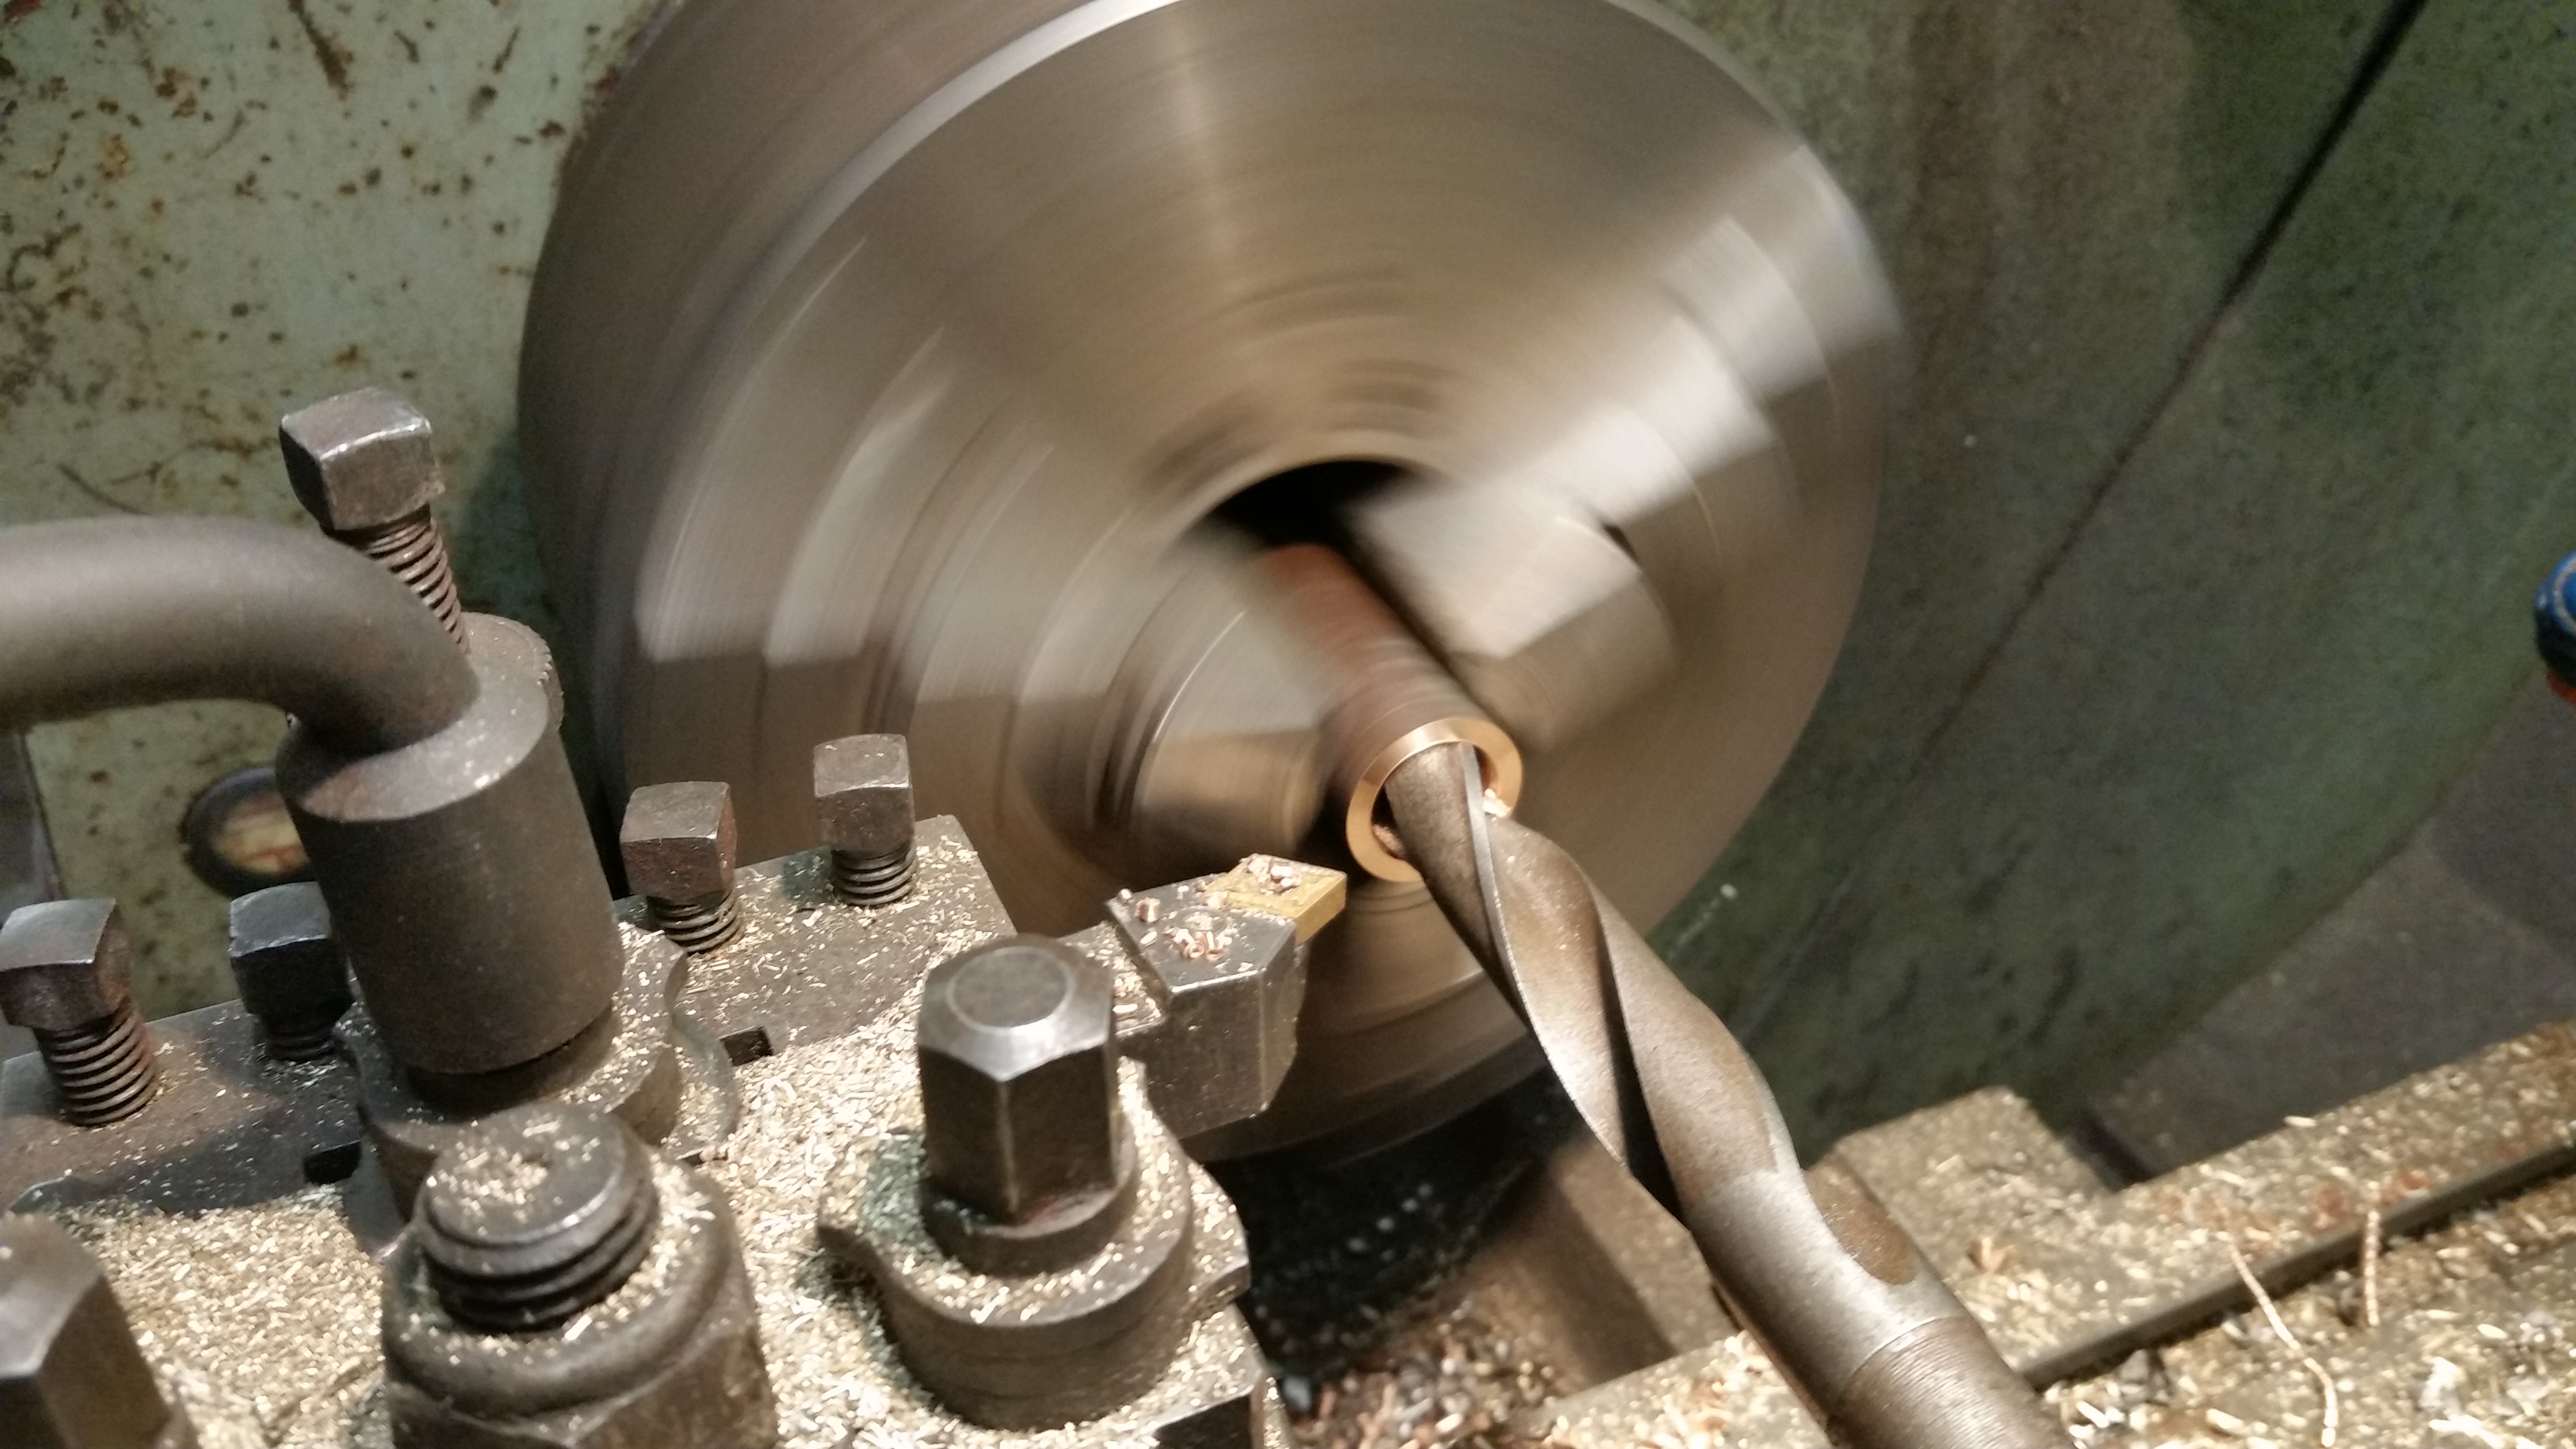
I drilled a hole through the middle and kept drilling until I reached half an inch, this happens to be the same size as a bit of bar I had with a nut already attached, lazy boy. I then set the bar in the lathe and attached the new blank, then proceeded to shape the outside to fit the XS sprocket.
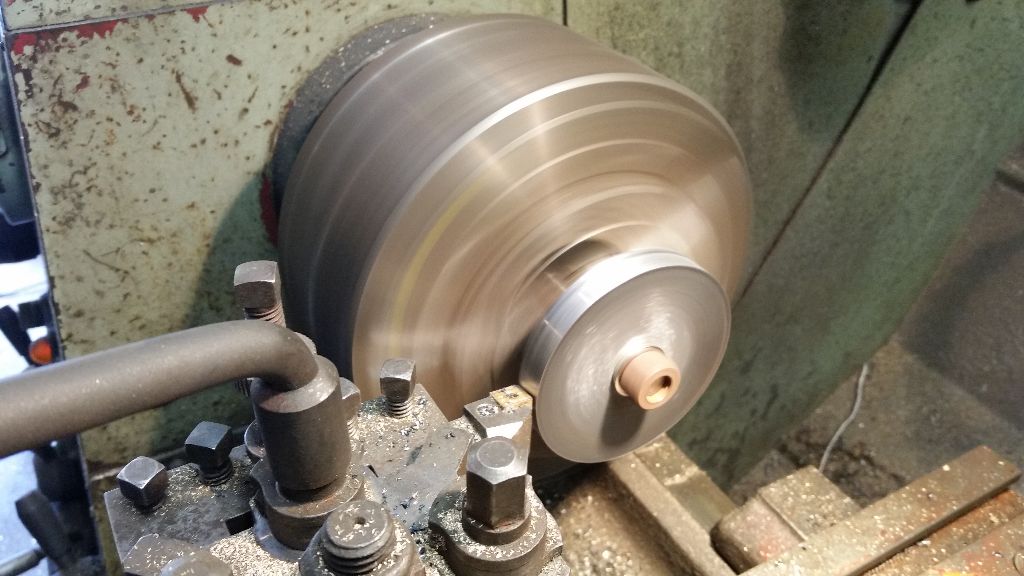
Next I faced the blank to the same thickness as the XS sprocket, (9.3mm).
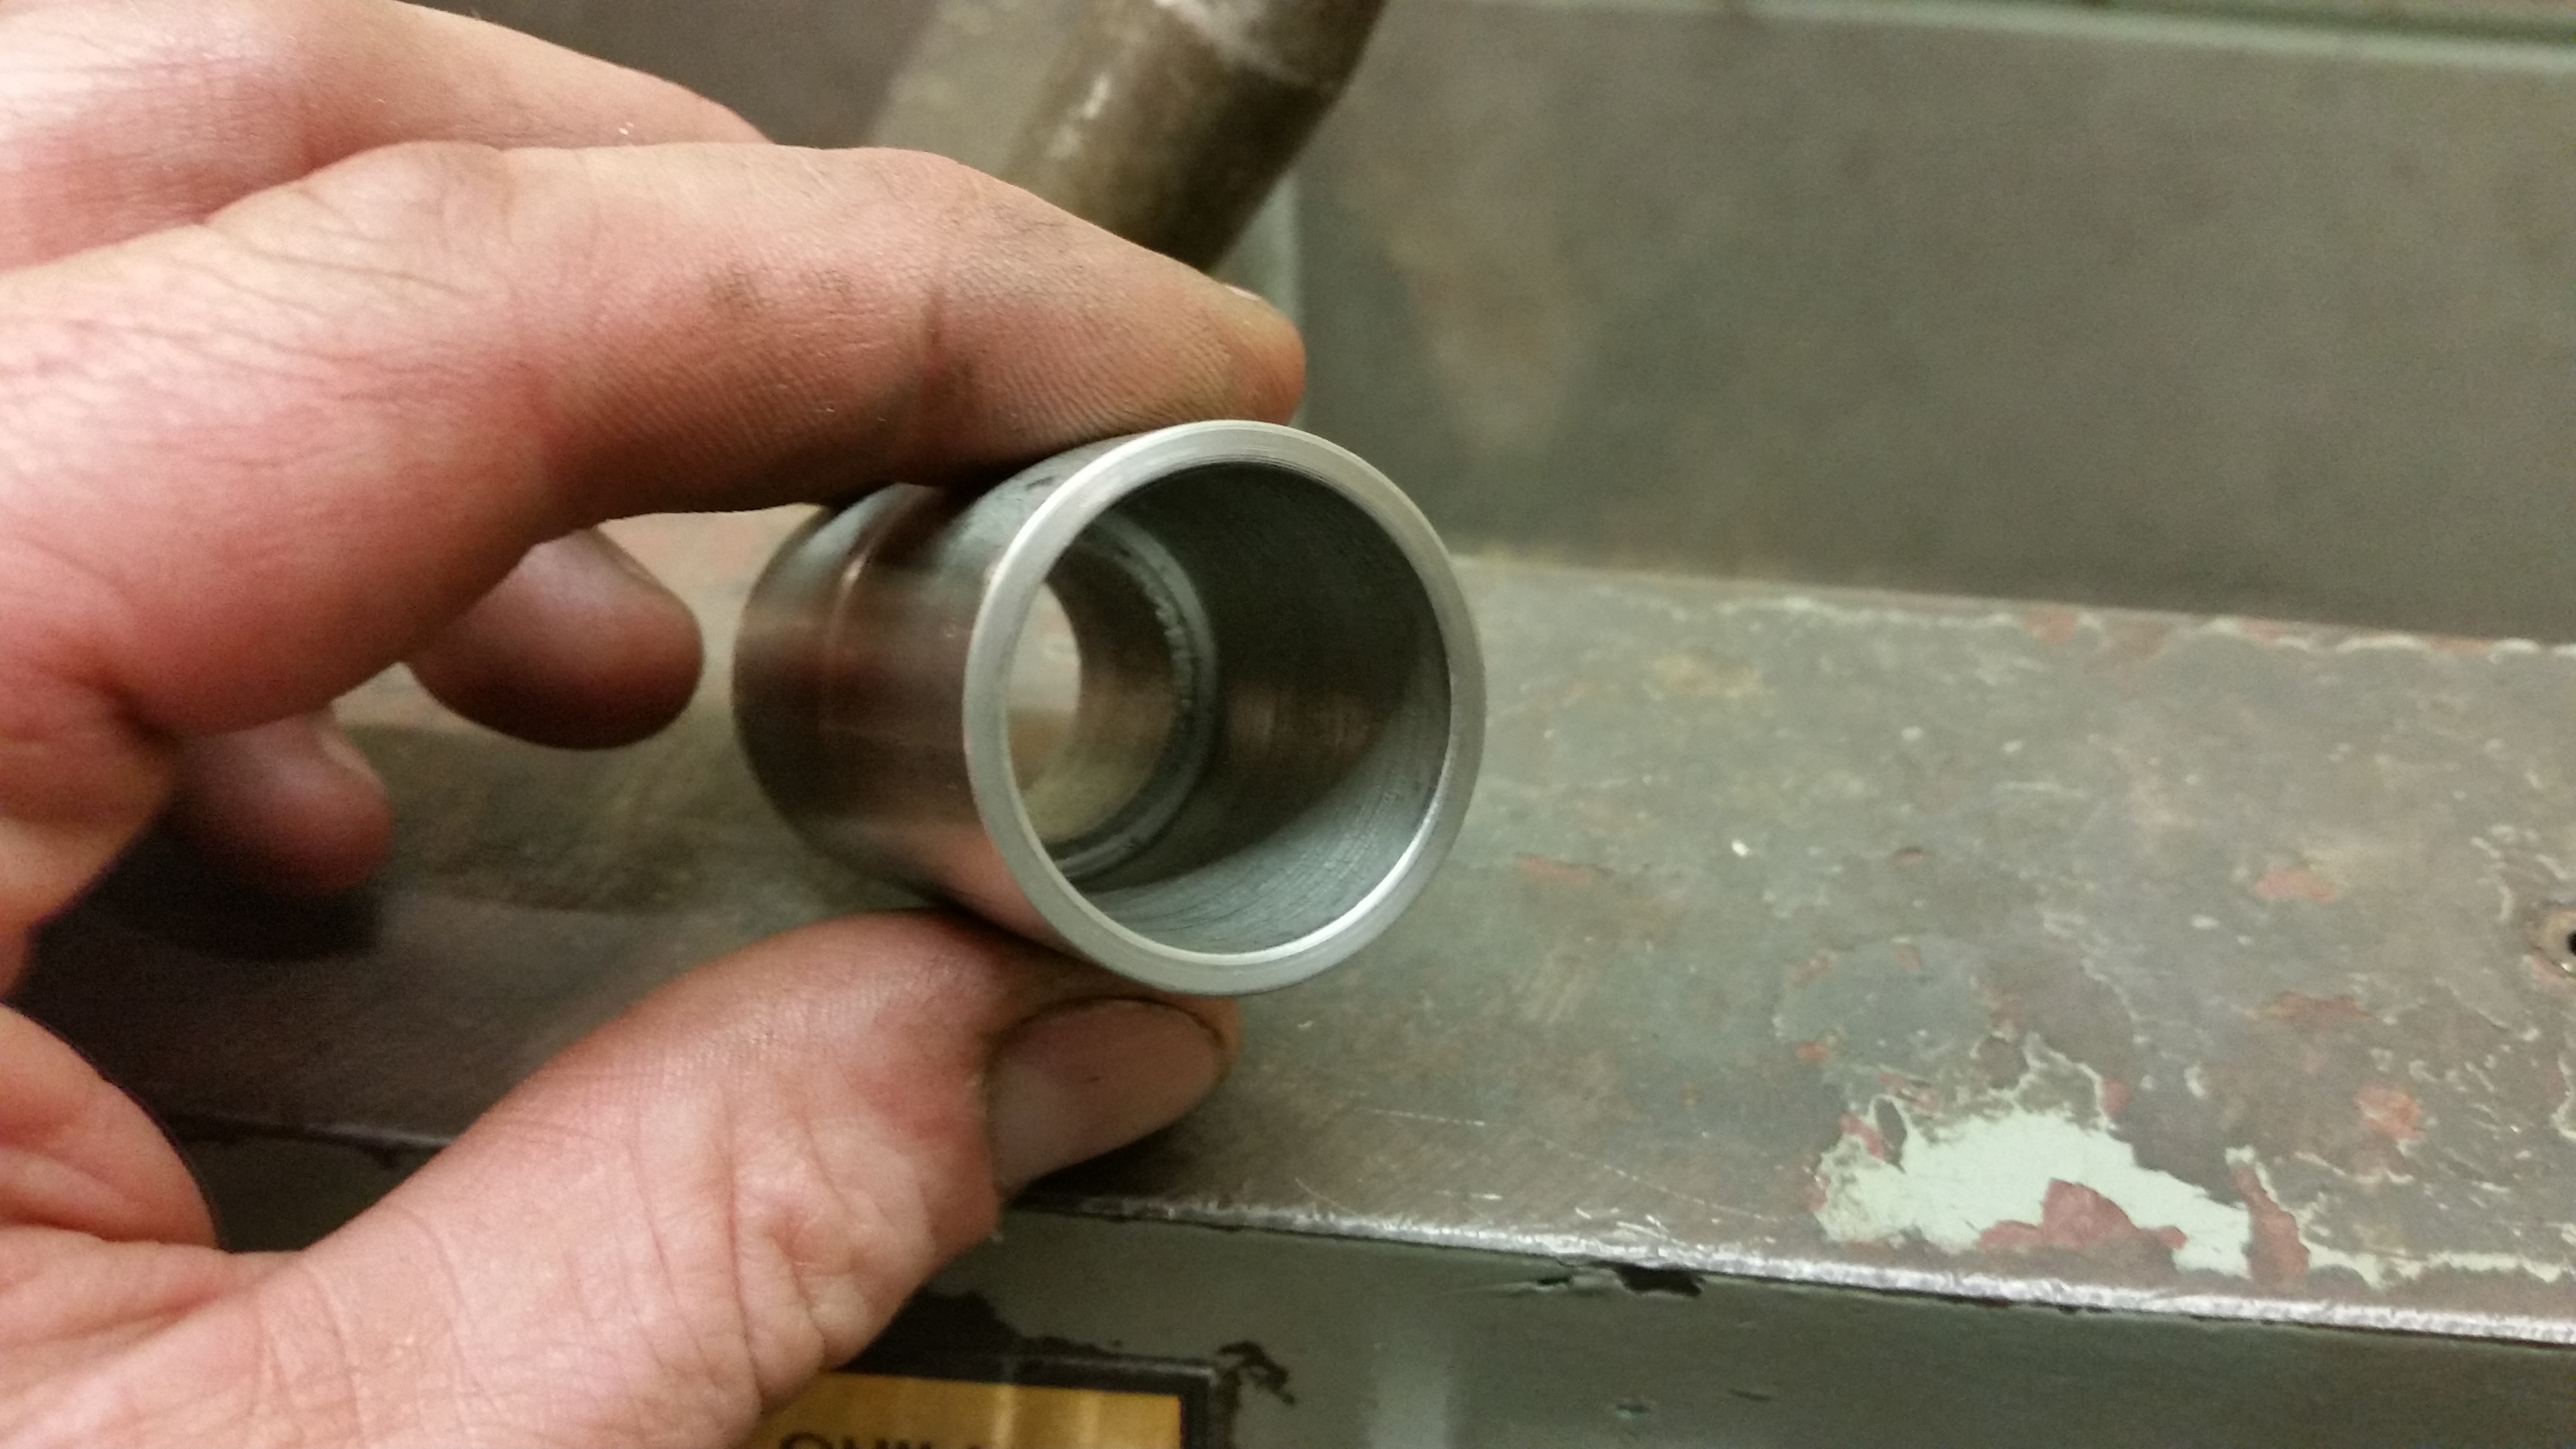
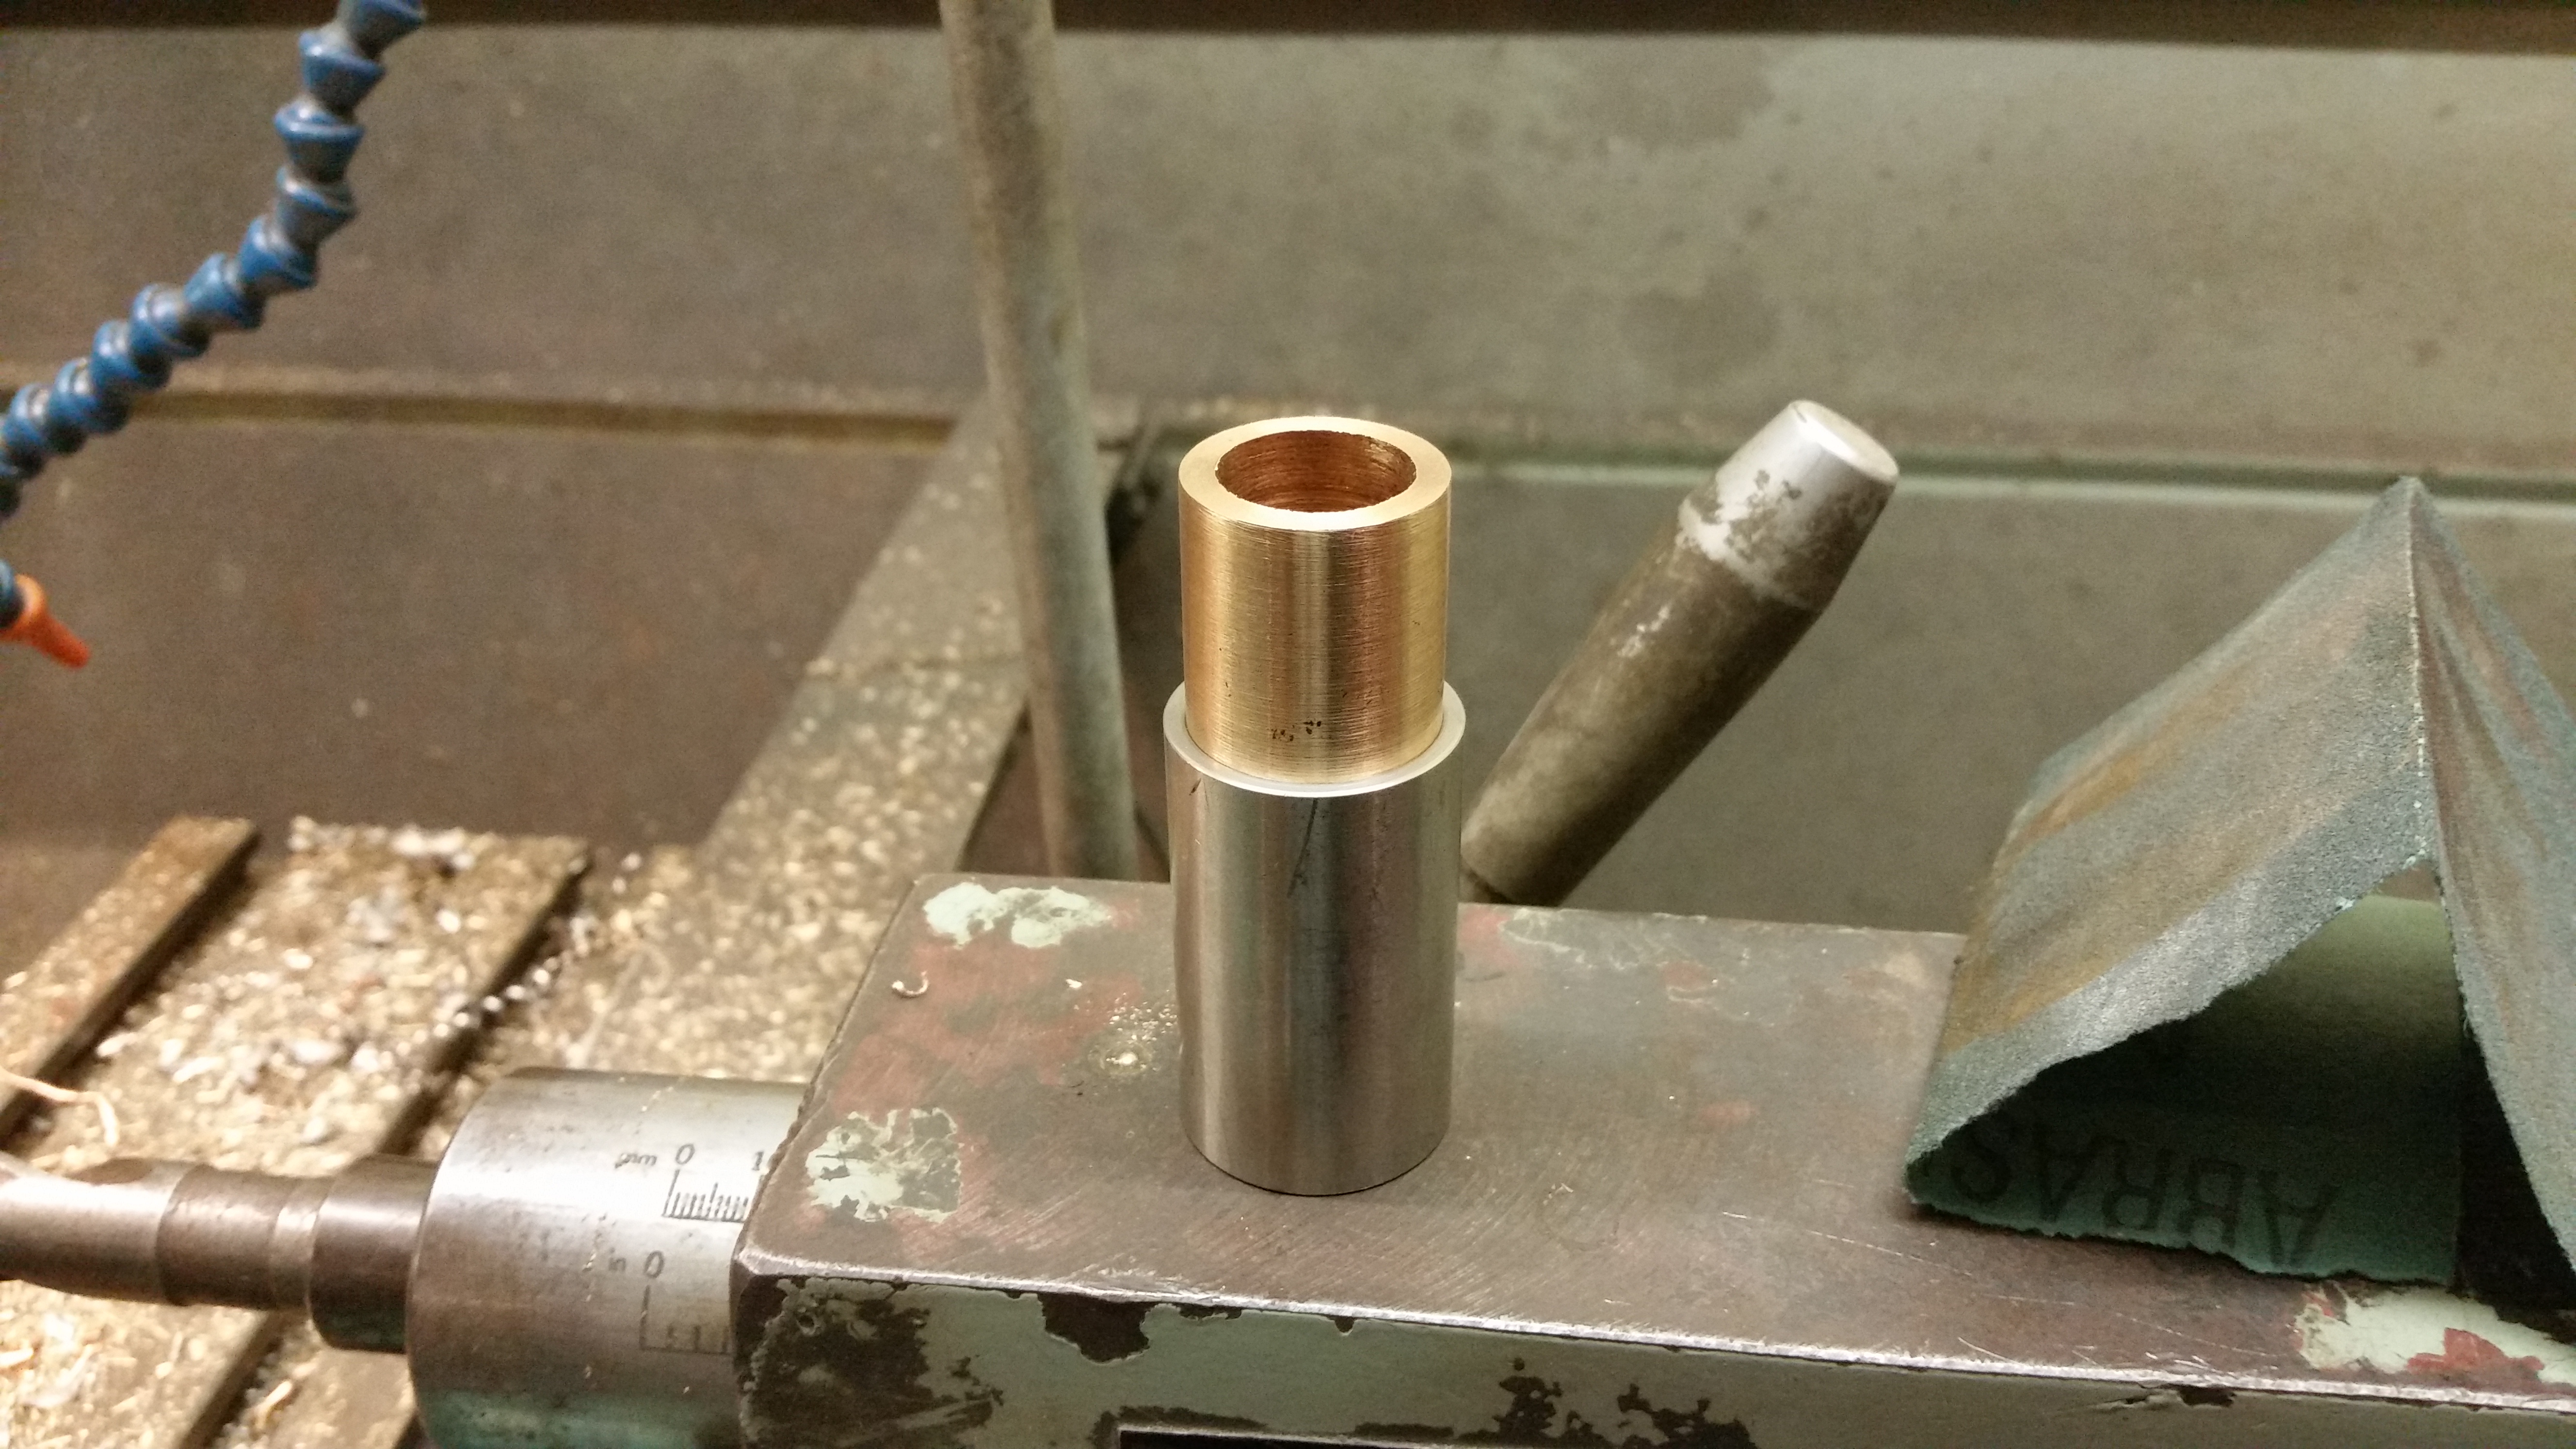
I now needed to bore the centre out to 56.4mm so I roughed it out with a Starrett hole saw, the closest I had was 32mm that I used for the frame if you can remember back that far! I trimmed out the remainder with a boring bar and got a pretty good fit.
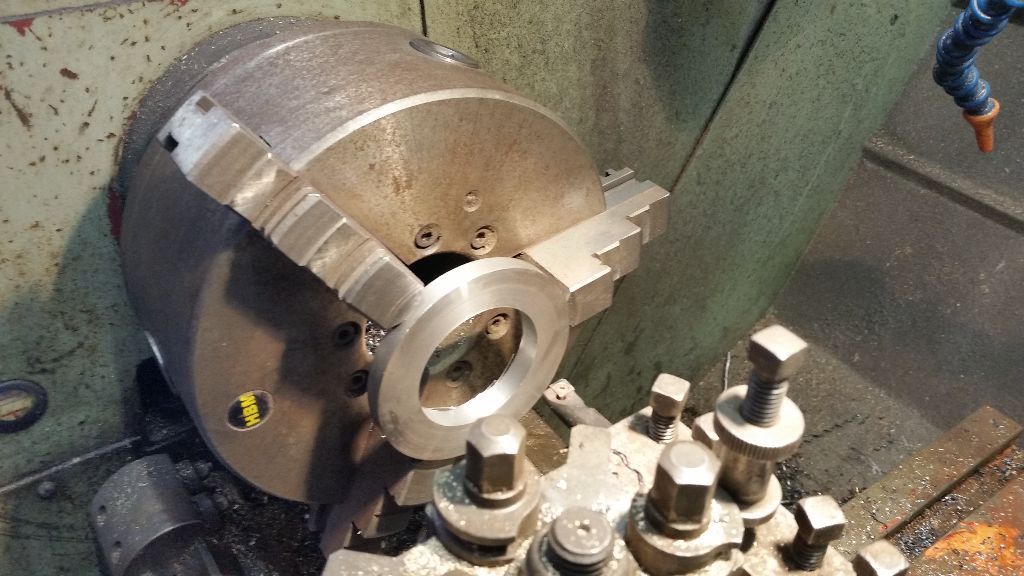
Here you can see the fit in the XS sprocket, fits very well.
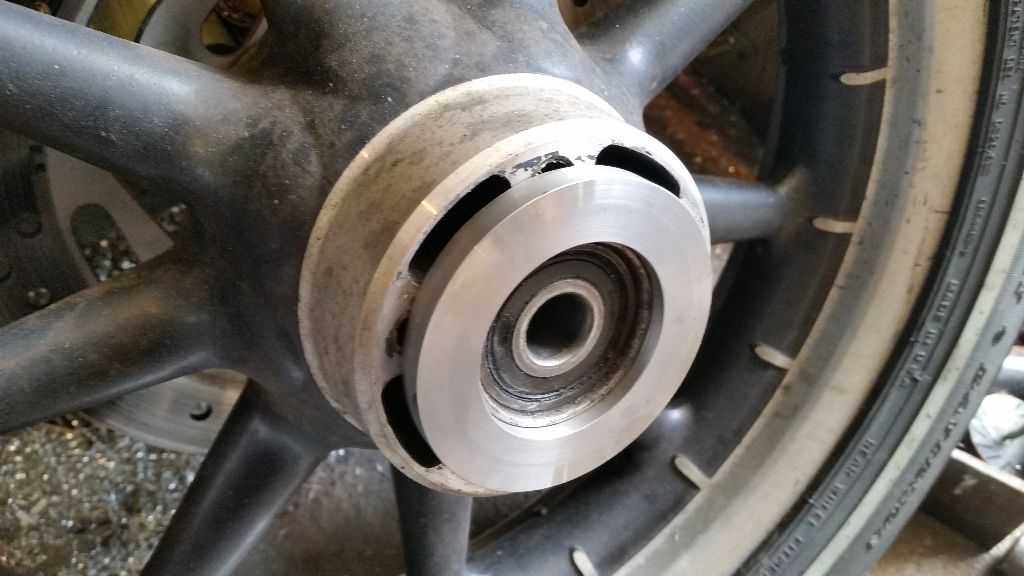
It also sits well on the Harley wheel.
I would have welded it all up tonight and drilled it but I have ordered a new sprocket from M&P and paid for quick delivery so it should be here Wednesday morning so I can finish, pictures to follow.
———————————————————————————
Well much to my suprise M&P did deliver on time, happy days.
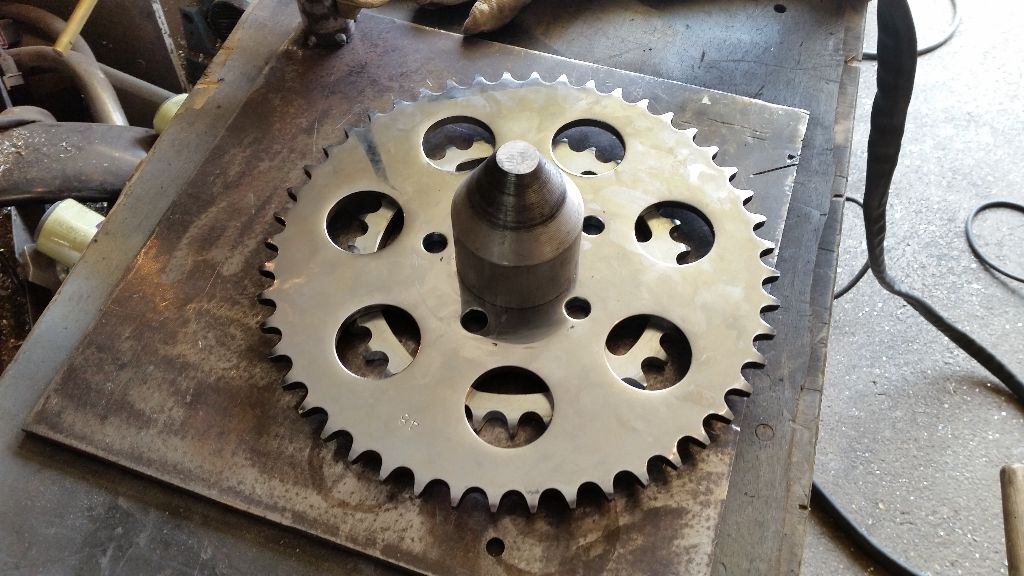
Now armed with my new sprocket and it’s dodgy coating that doesn’t get on with my welder I got stuck in and nailed the two halves together.
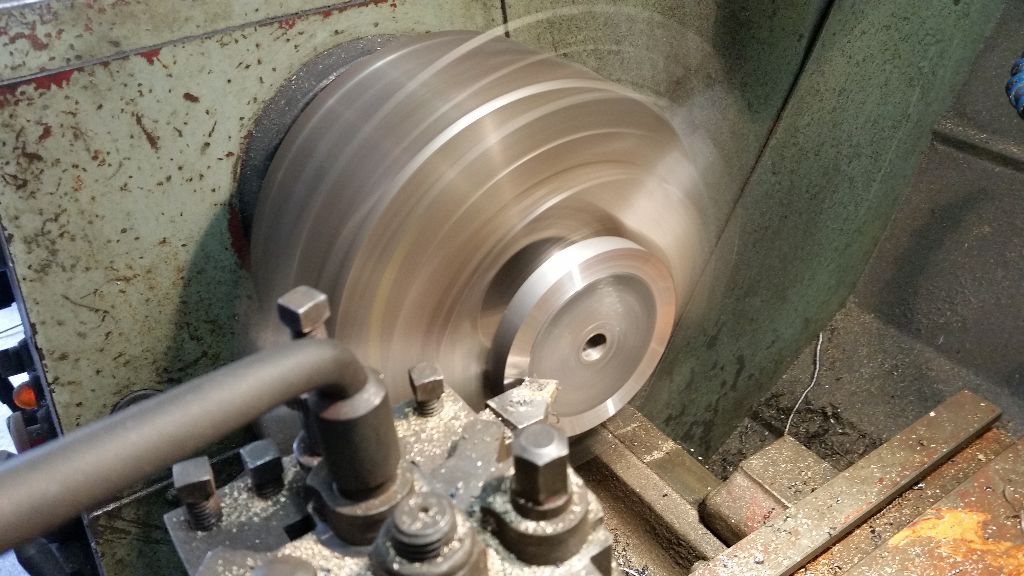
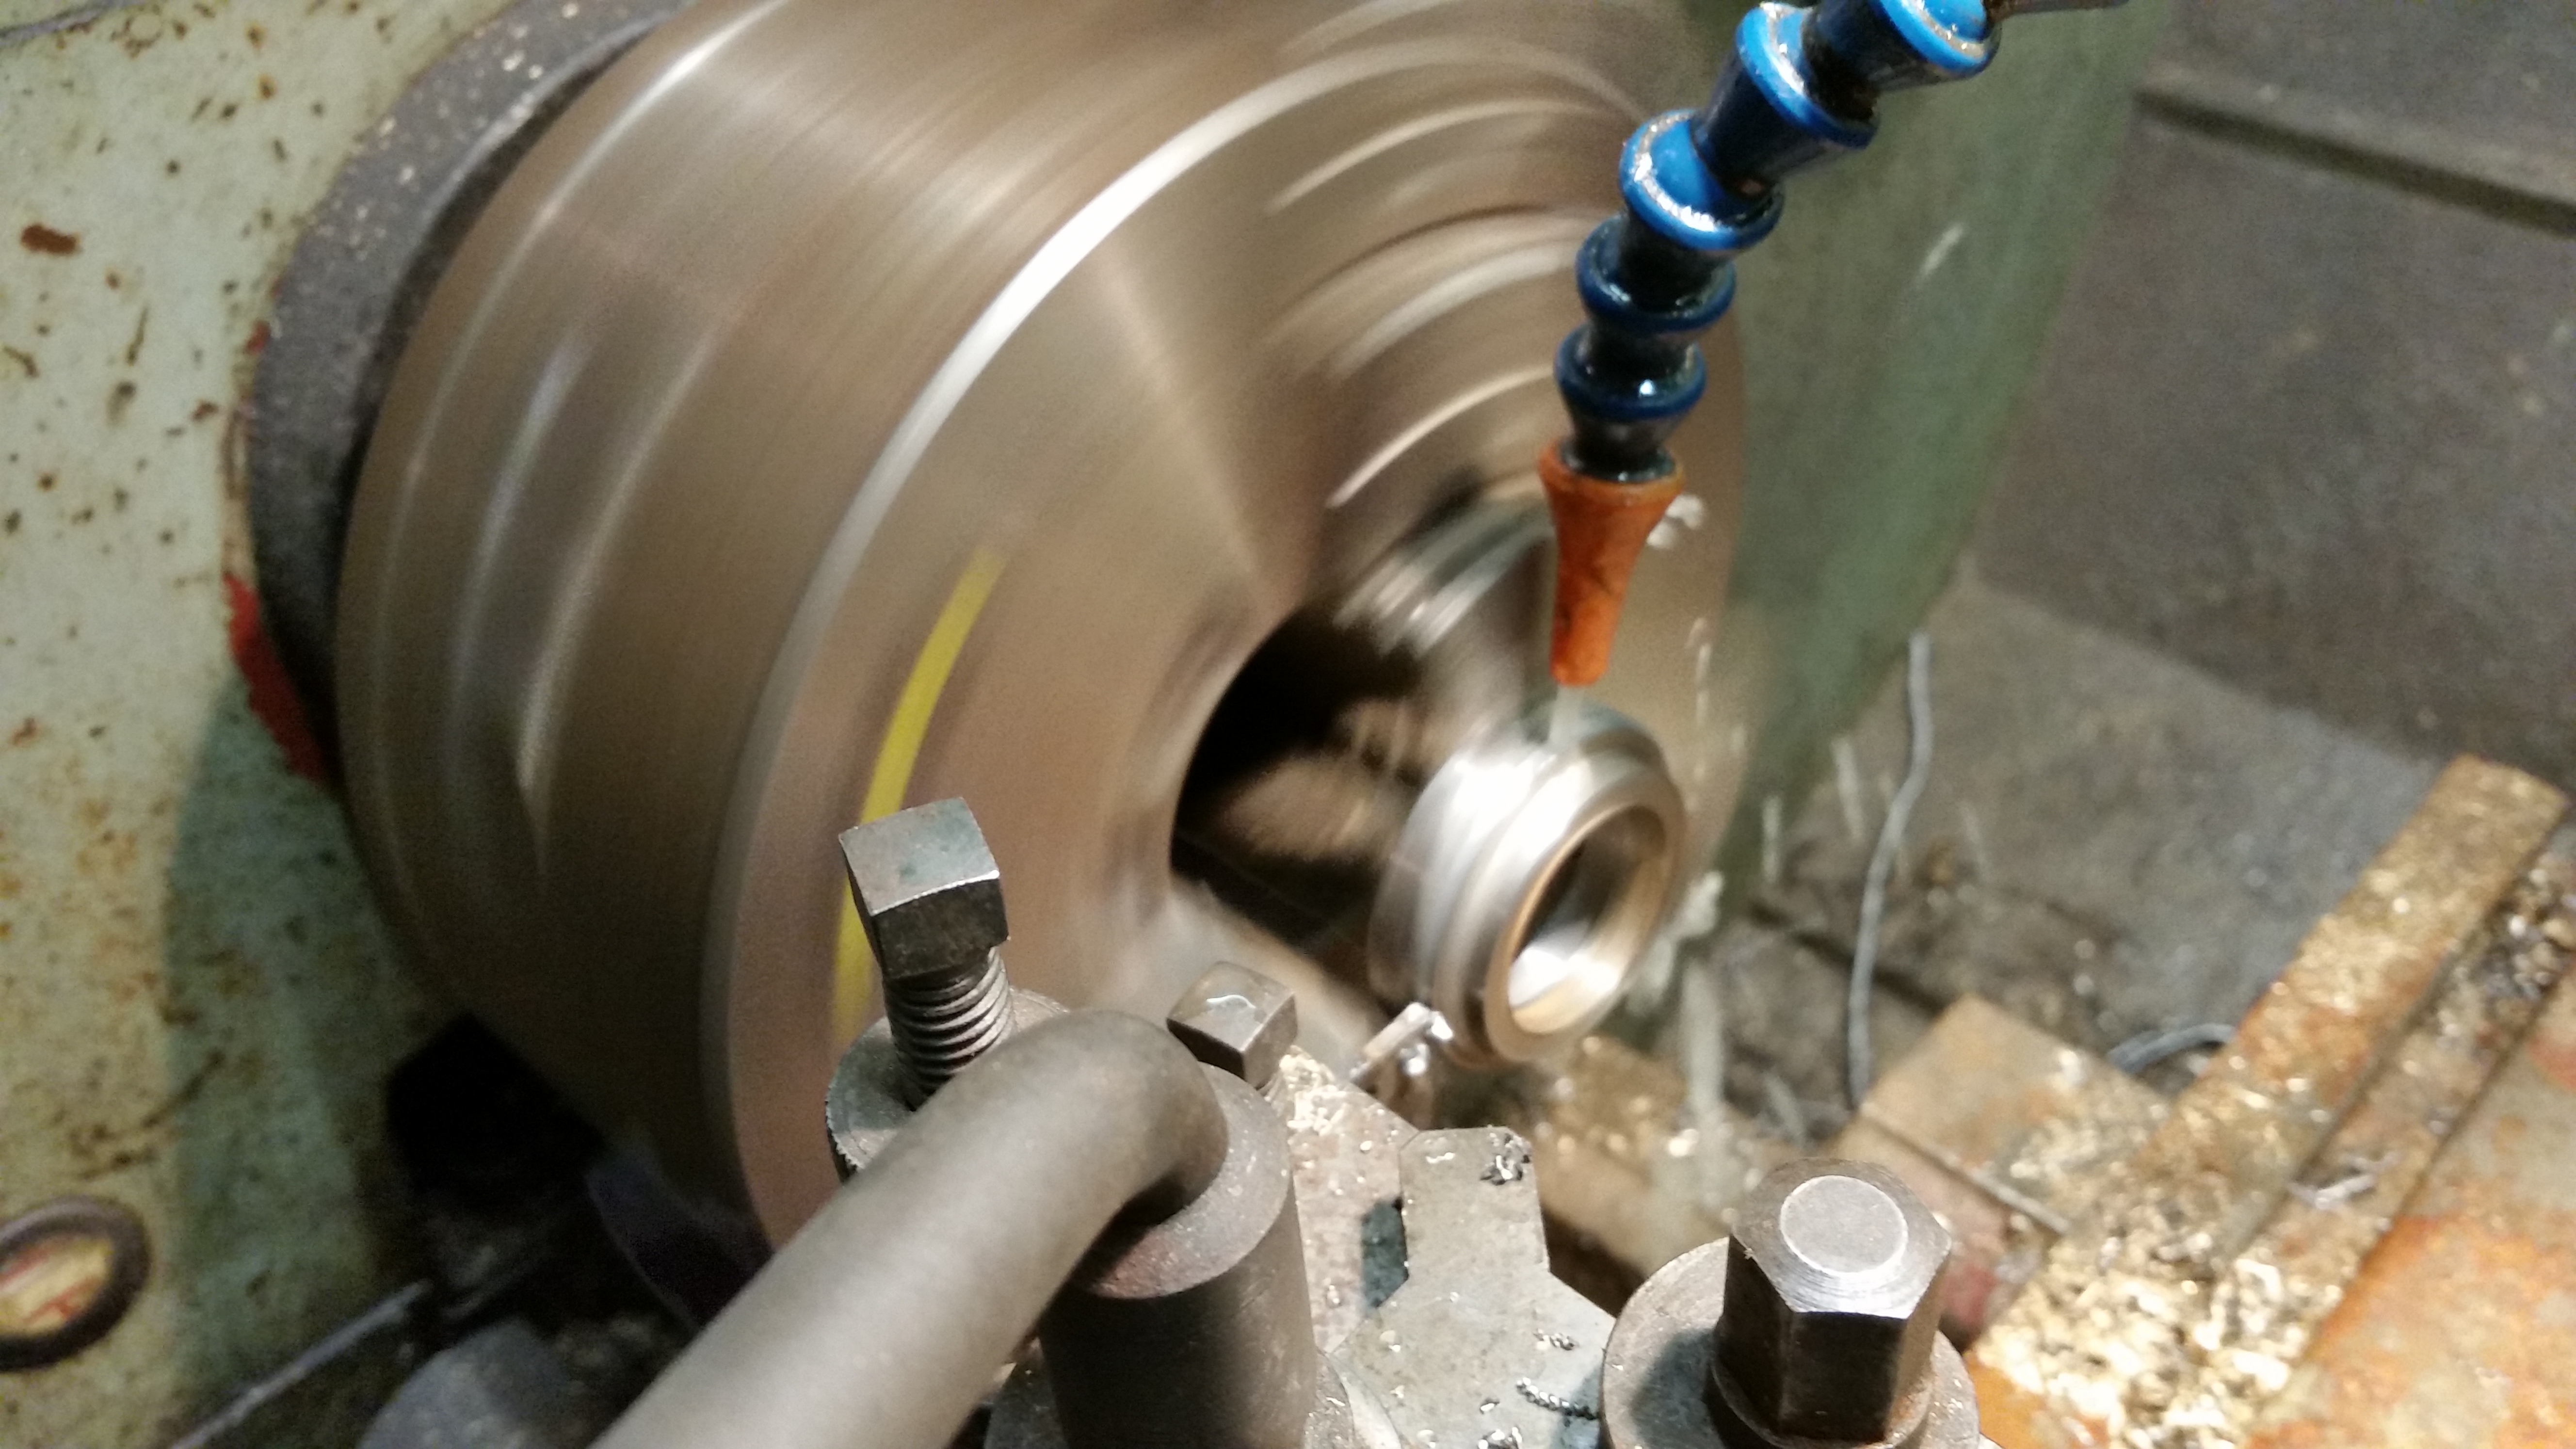
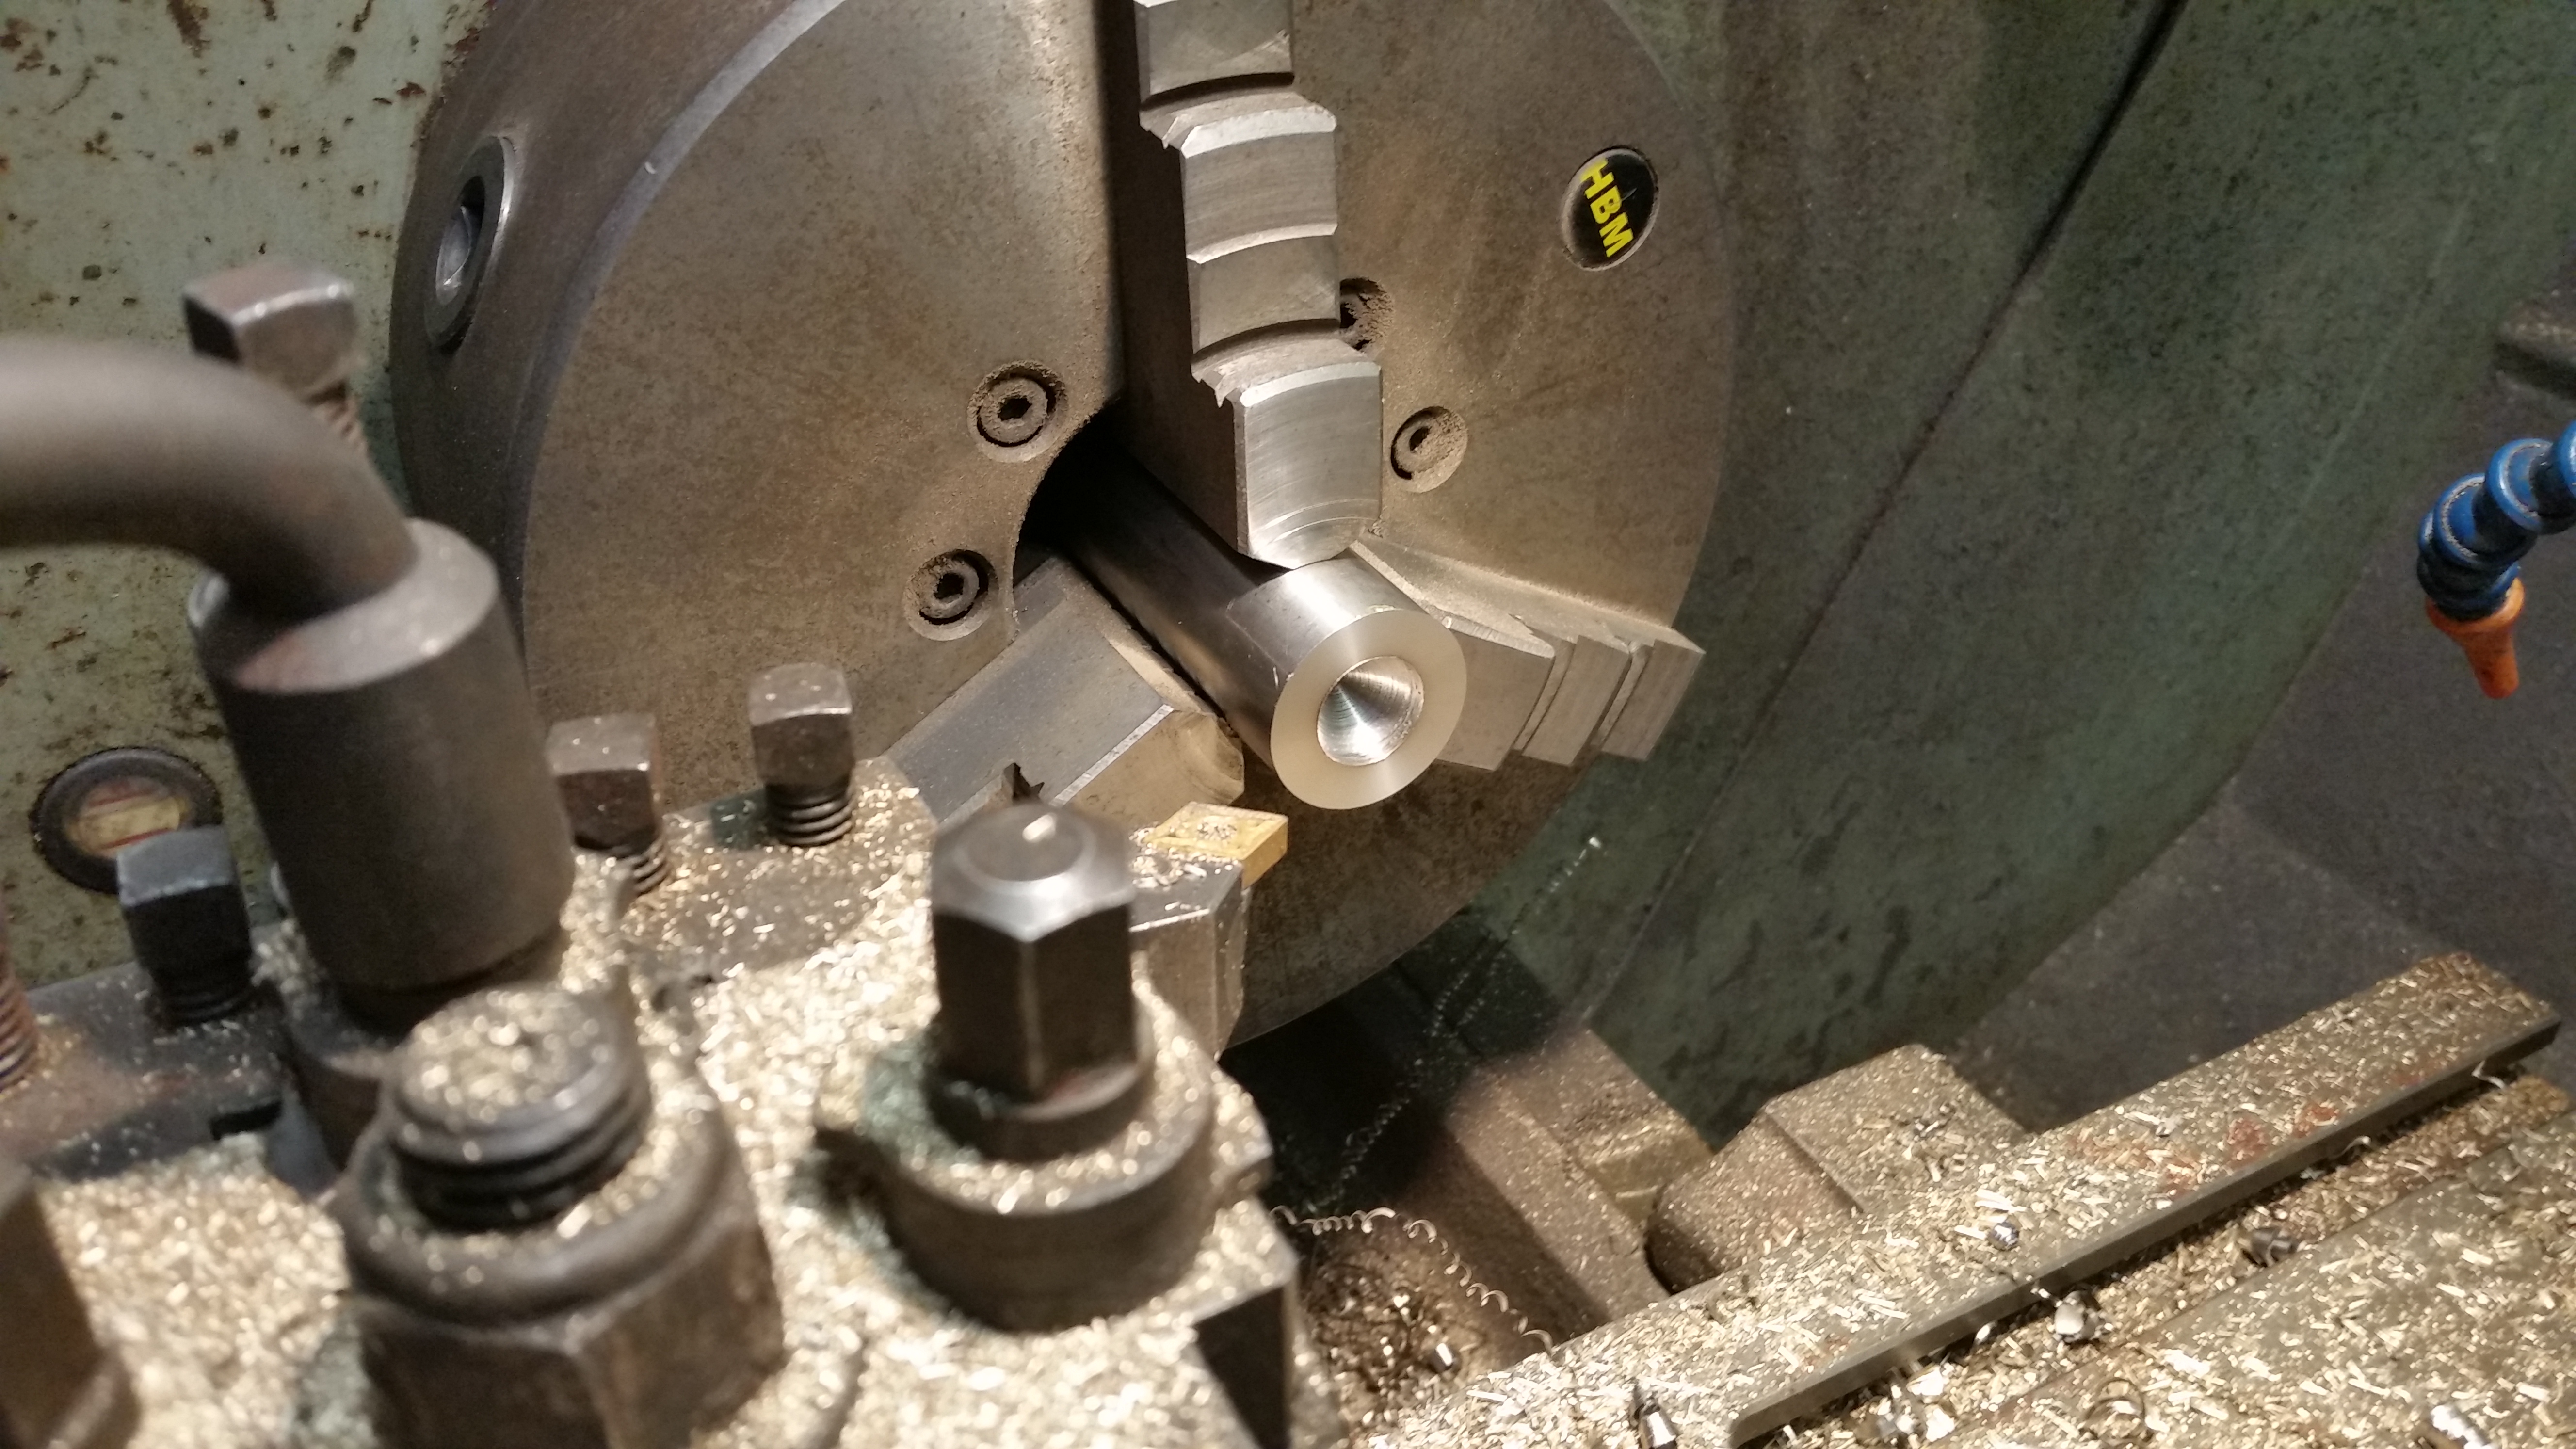
I needed to make sure it all ran true so I decided to turn an aly spigot before I drilled the bolt holes, need to get this bit right or it’s all been a bit pointless, fingers crossed…
I drilled through the original chrome sprocket in to my new custom sprocket and it all went well.
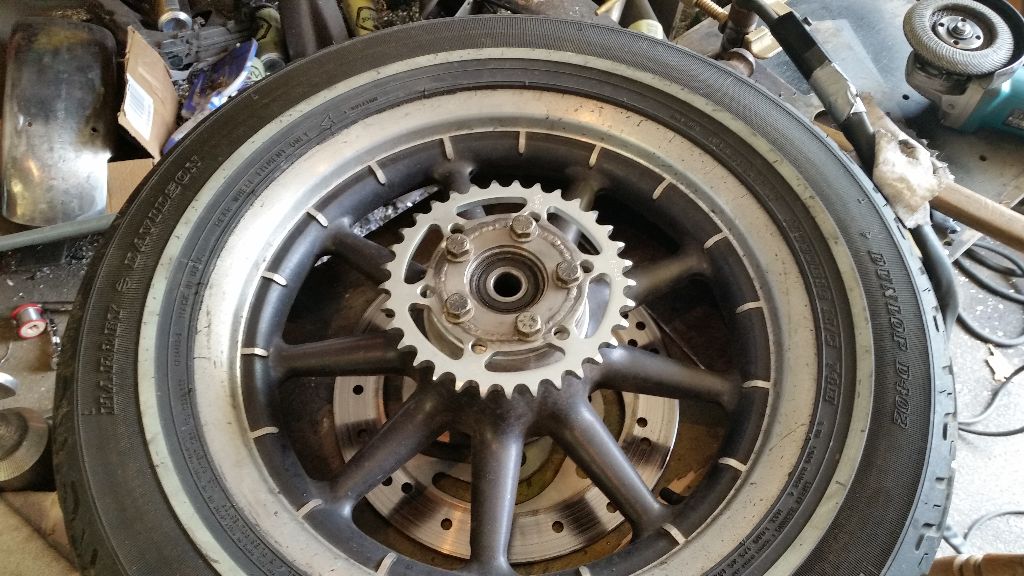
Don’t look too bad, I wanted to ditch the Harley bolts as they suck but the bolts I had lined up were too short so Harley bolts it is for now.
I took it out for a test ride Wednesday night and again today and it’s much improved, I can cruise at I guess over 50, maybe even 60, who knows, the speedo is in a drawer in my workshop, probably.
The XS was finally dragged kicking and screaming in to the world of the living a few nights ago, turned out the spitting and banging was split inlet rubbers and the lack of a battery, seems they don’t like a weak spark, got it running pretty well now, stopped all the fuel from ending up on the floor due to gummed up carbs and a poor choice of fuel tap…..yeah right, it’s a great choice, just needs a little lovin’.
Managed to ride it up my lane and the brakes work, it steers and seems pretty good actually, heres a vid of it running for the first time in quite a whille and in new dress as a custom rather than a big green bogie.
I’ve been looking forward to making the exhaust system since I saw how nice Mac’s ‘zorst’ was, bit of pipe jealousy, work of art and he knows it. He has name dropped ‘Wolfy’ for ages but as usual I had glossed over it and missed the obvious, my bad once again……
Ok, so it came to the day to buy some bits of exhaust from this mystical figure I have heard so much about, in my head and looking at the website this outfit was going to be something very professional and probably would not spare much time for an idiot like me that likes to make everything himself, turns out I was a little way from the truth.
He’s got a beard, thats a pretty good start, you know you can trust a chap with a beard, it’s a sign of honesty. The workshop was not as expected, I think the broom may have been stolen a while ago, just the sort of place I like! It turns out wolfy is actualy pretty keen to assist ‘wanna be’ bike builder such as myself and soon hooked my up with a few bends of stainless and was happy to share tig welder settings whilst stiring his cup of tea with a rusty spanner, classy.
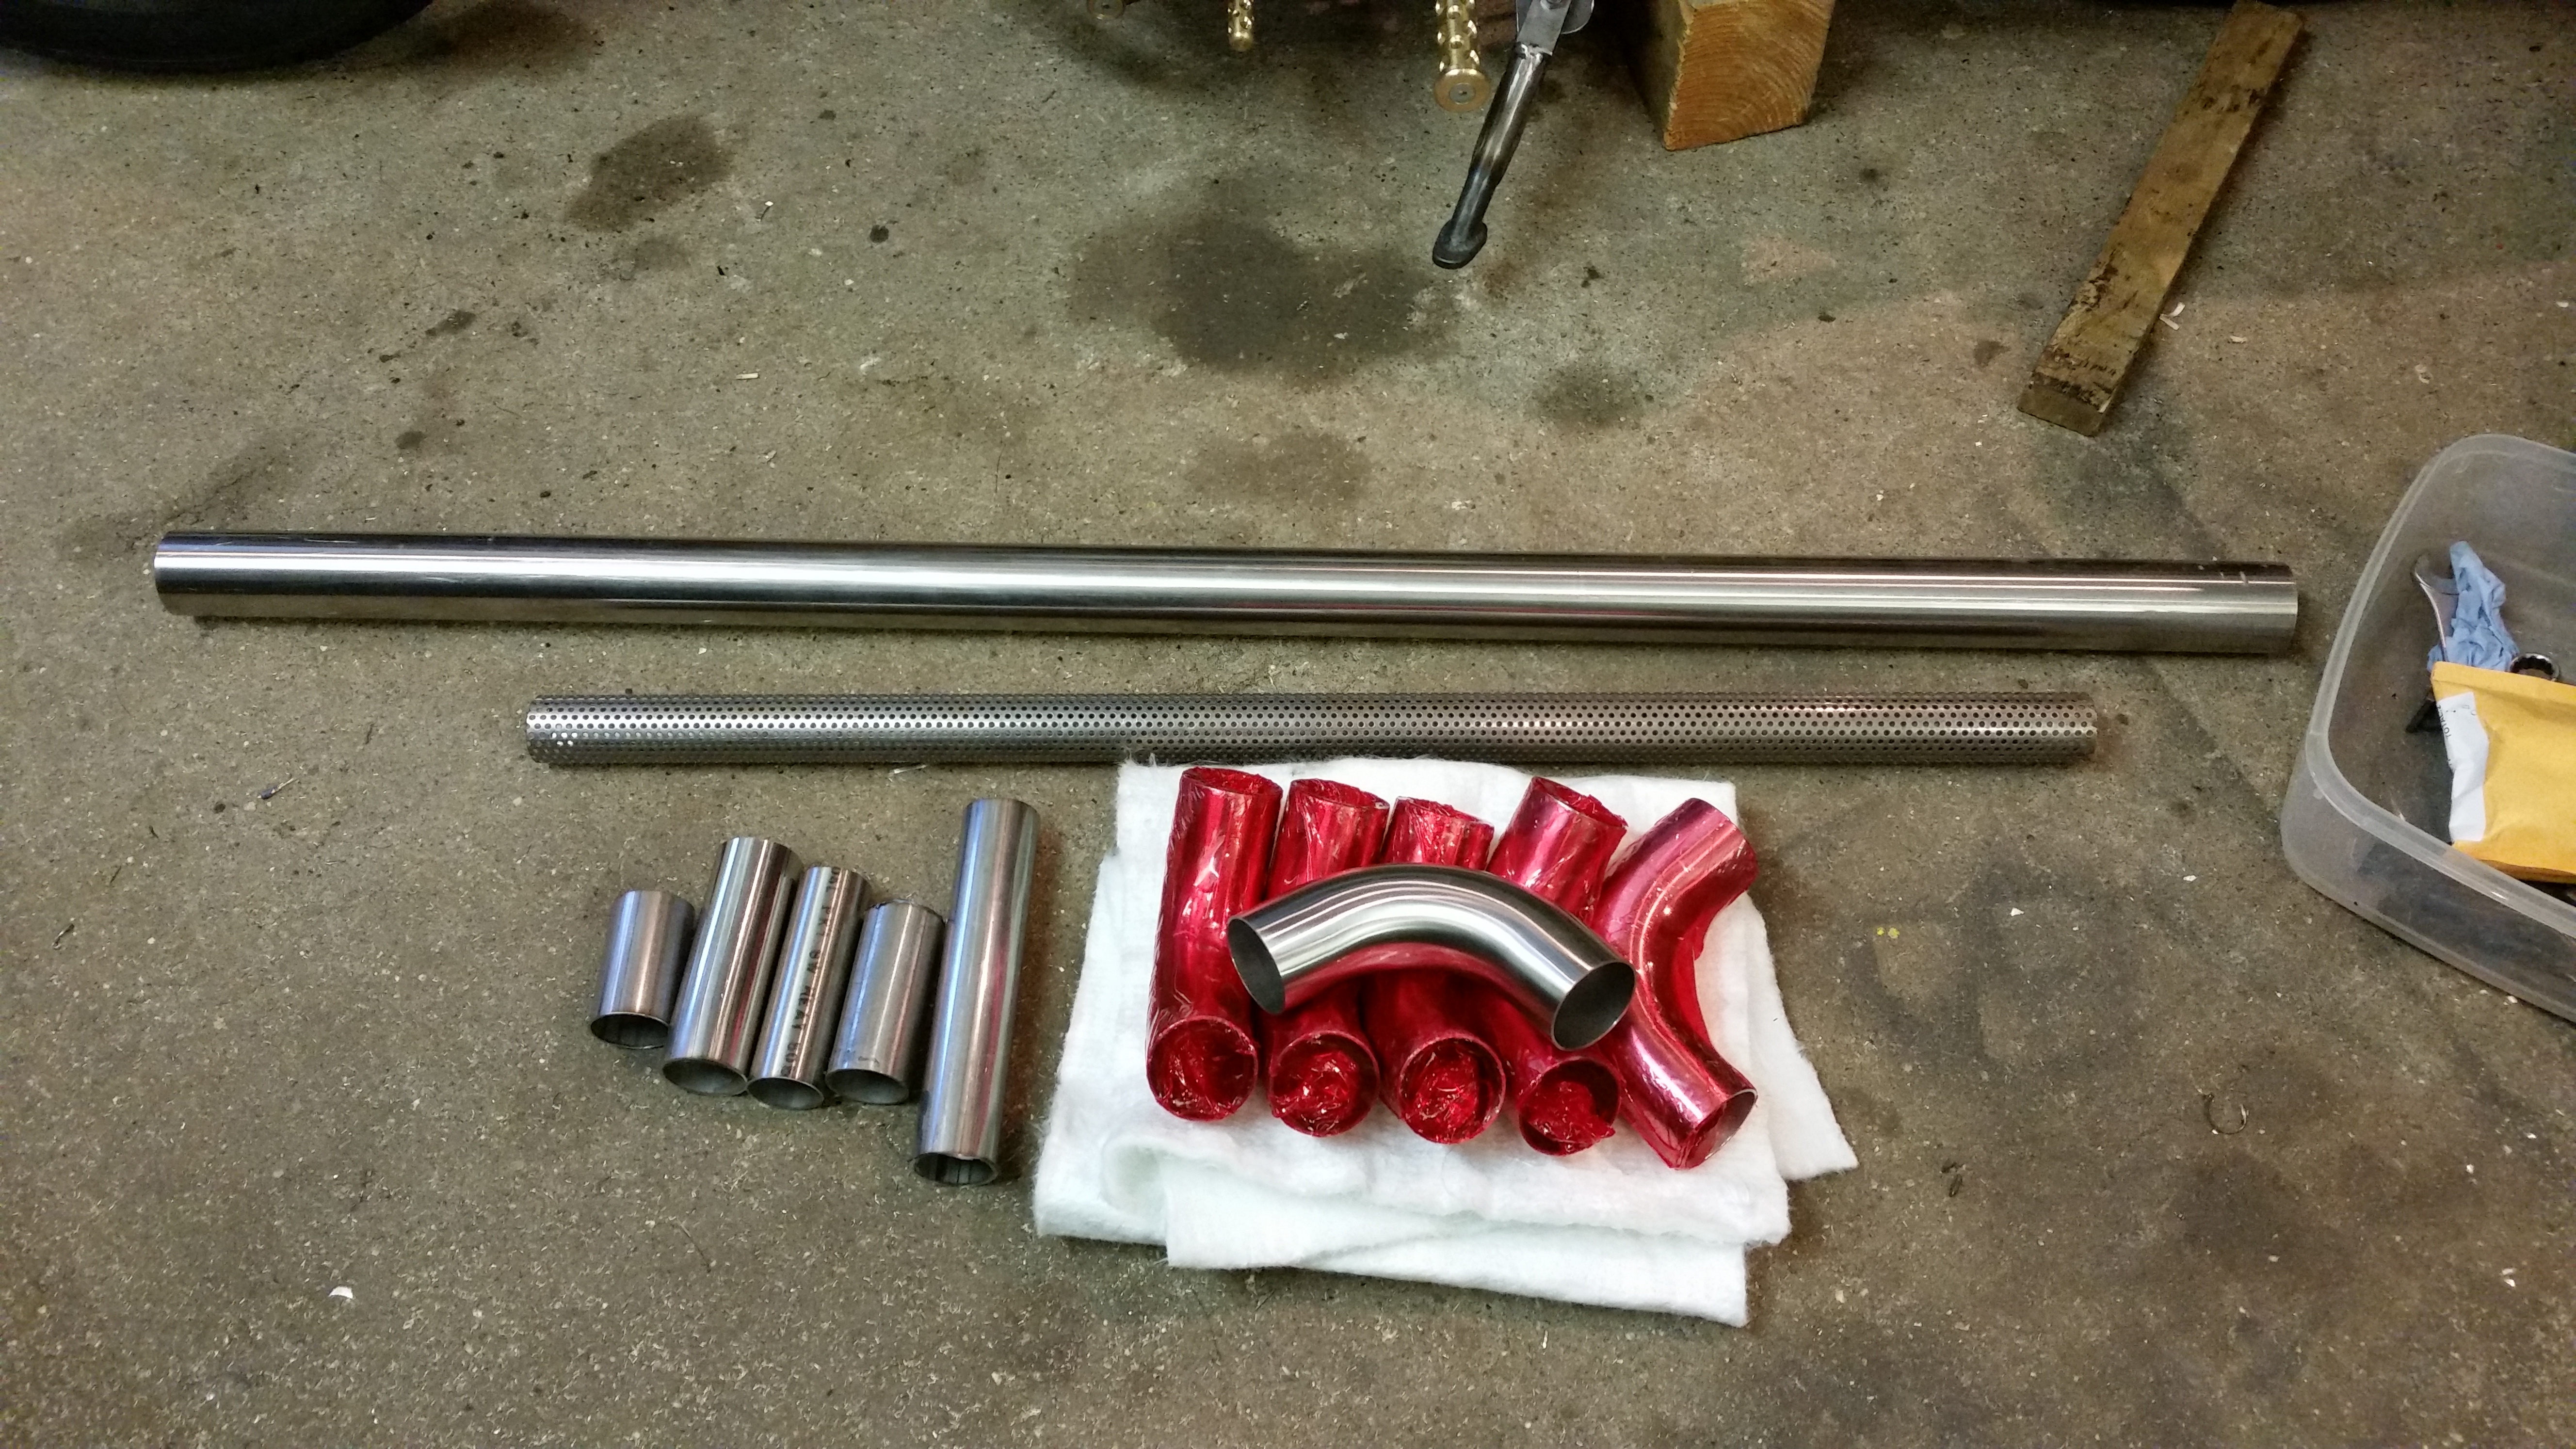
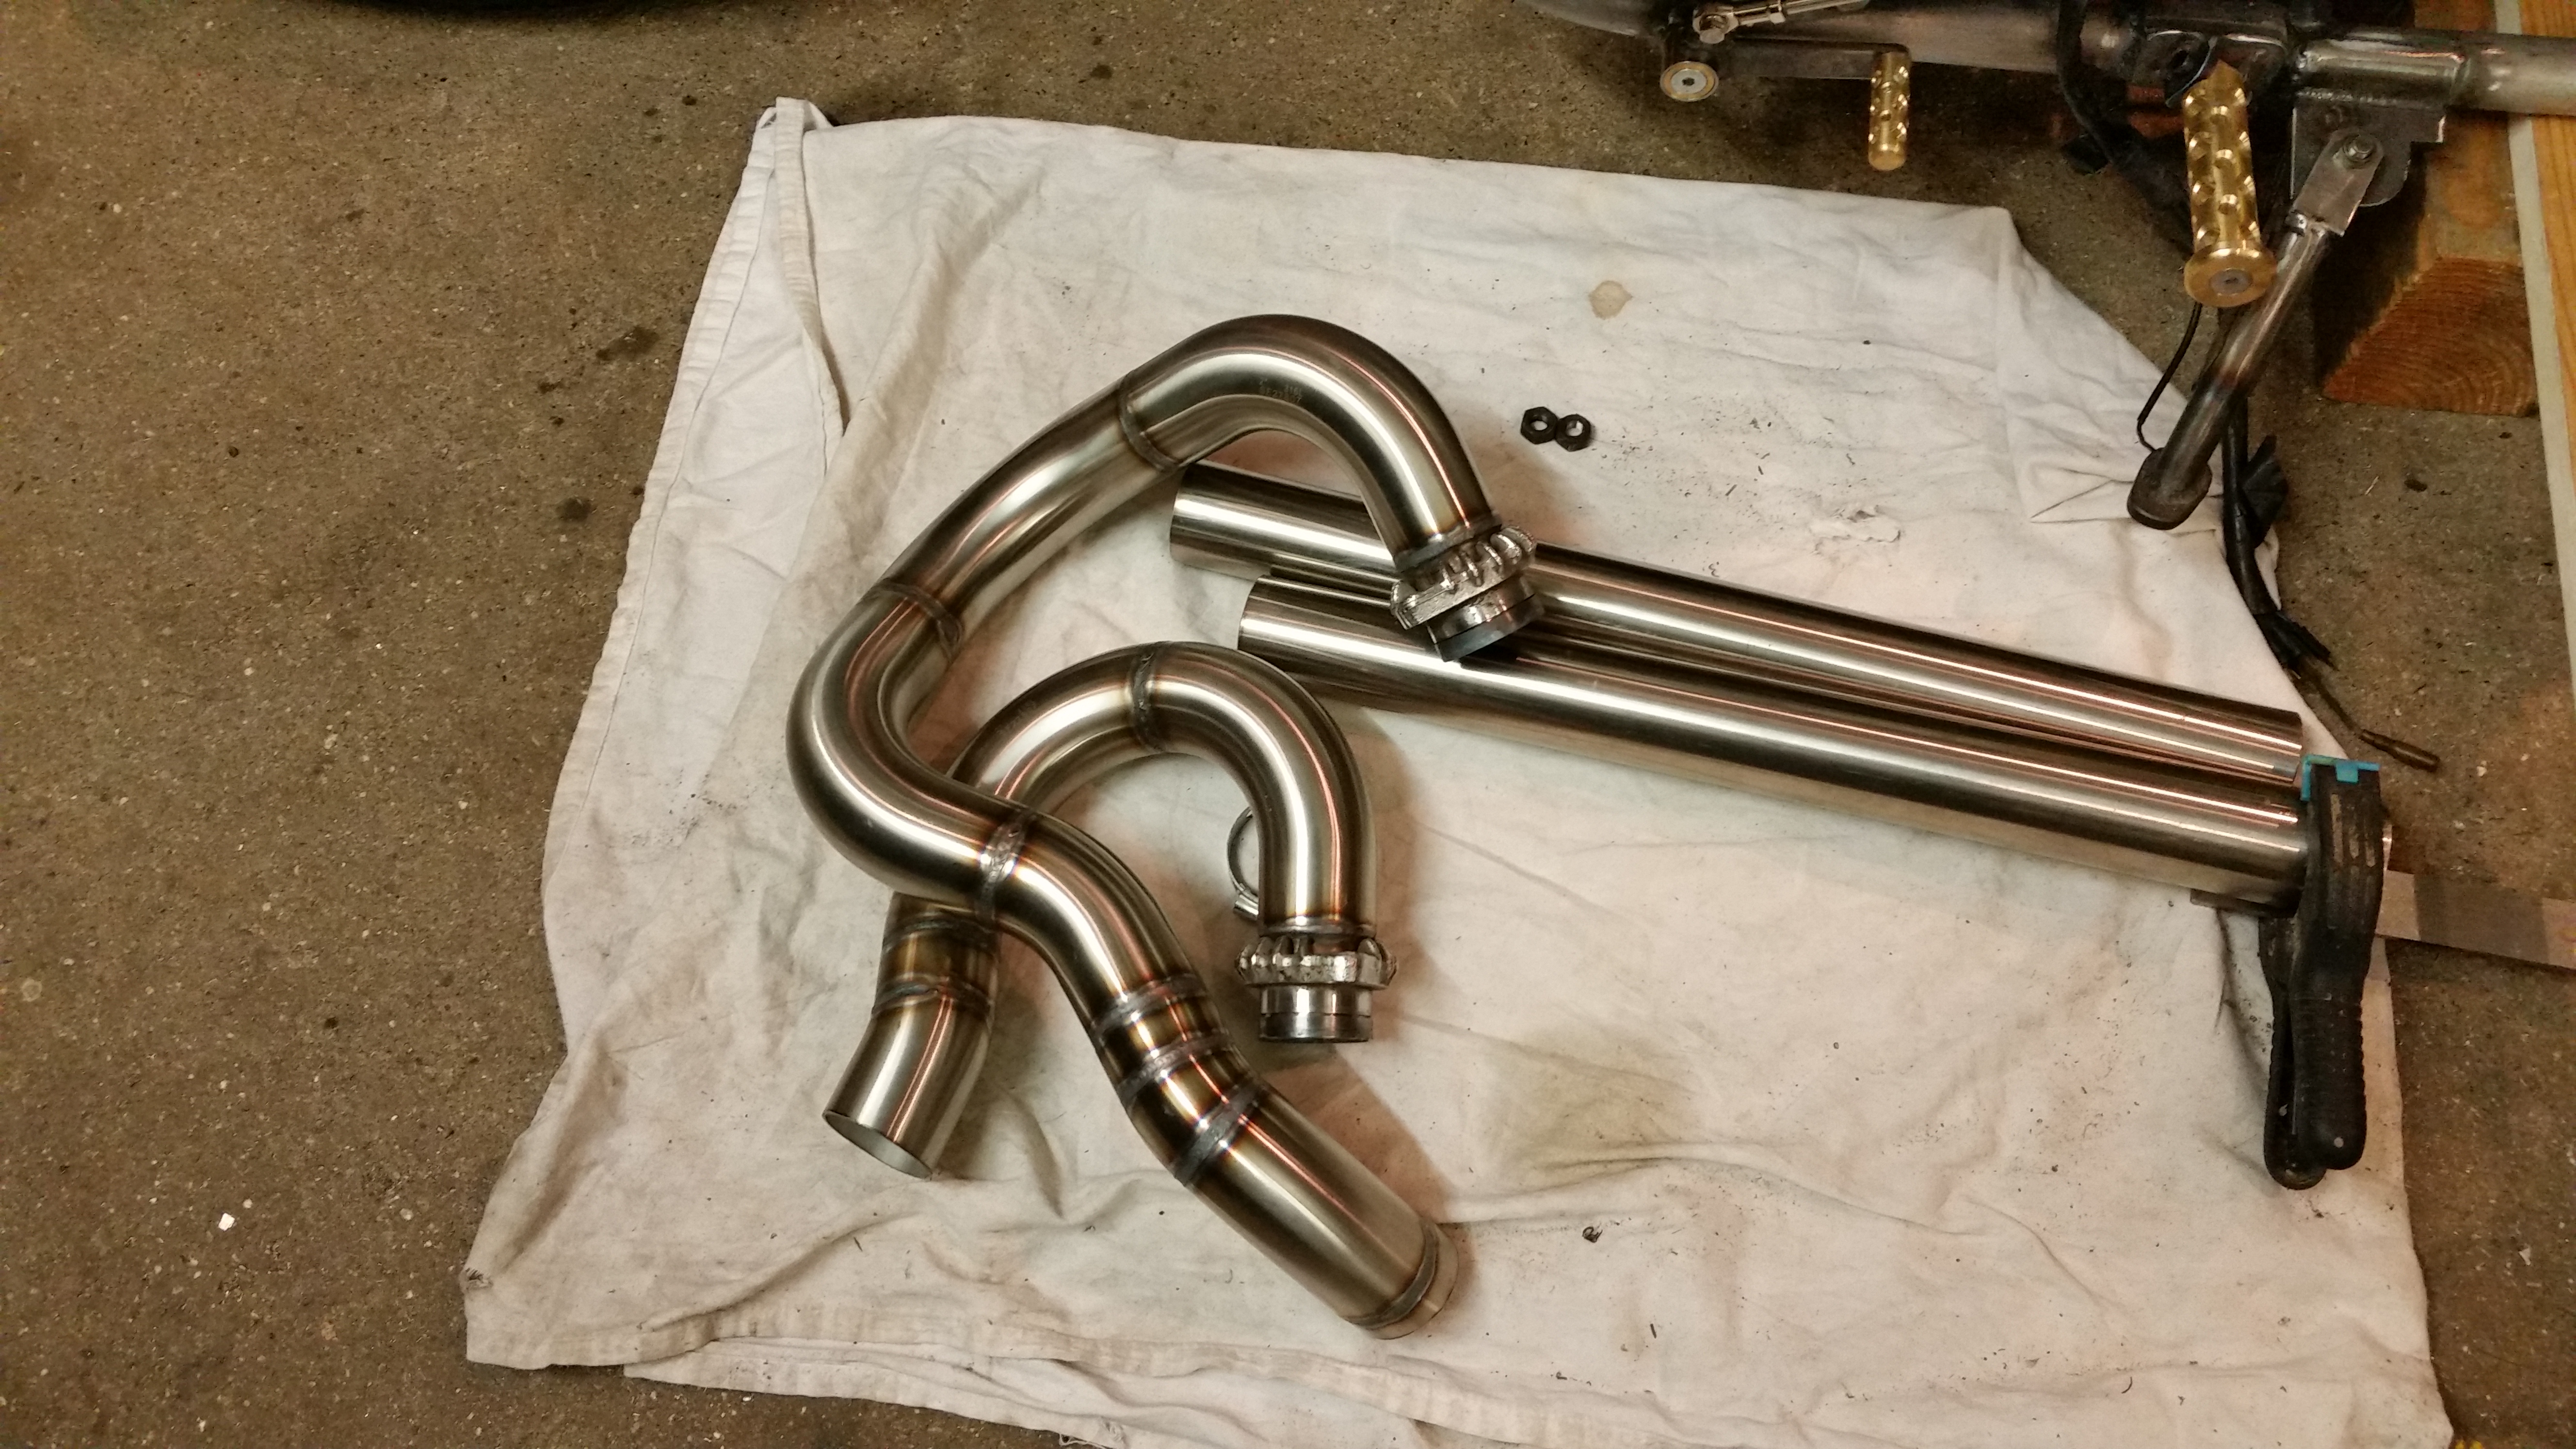
This is what I was sent away with, top quality bends that are mandrel bent so the diameter stays the same wherever you cut / join, reduces the chance of needing filler welds.
I started at the manifold and made up a couple of rings to push against the exhaust gaskets to make the seal so it diddn’t blow.
Next I machined out the flanges to accept the new tube, I’d be suprised if the judges didn’t mark me up a few points for a pair of freshly reamed tidy flanges. Fnar Fnar.
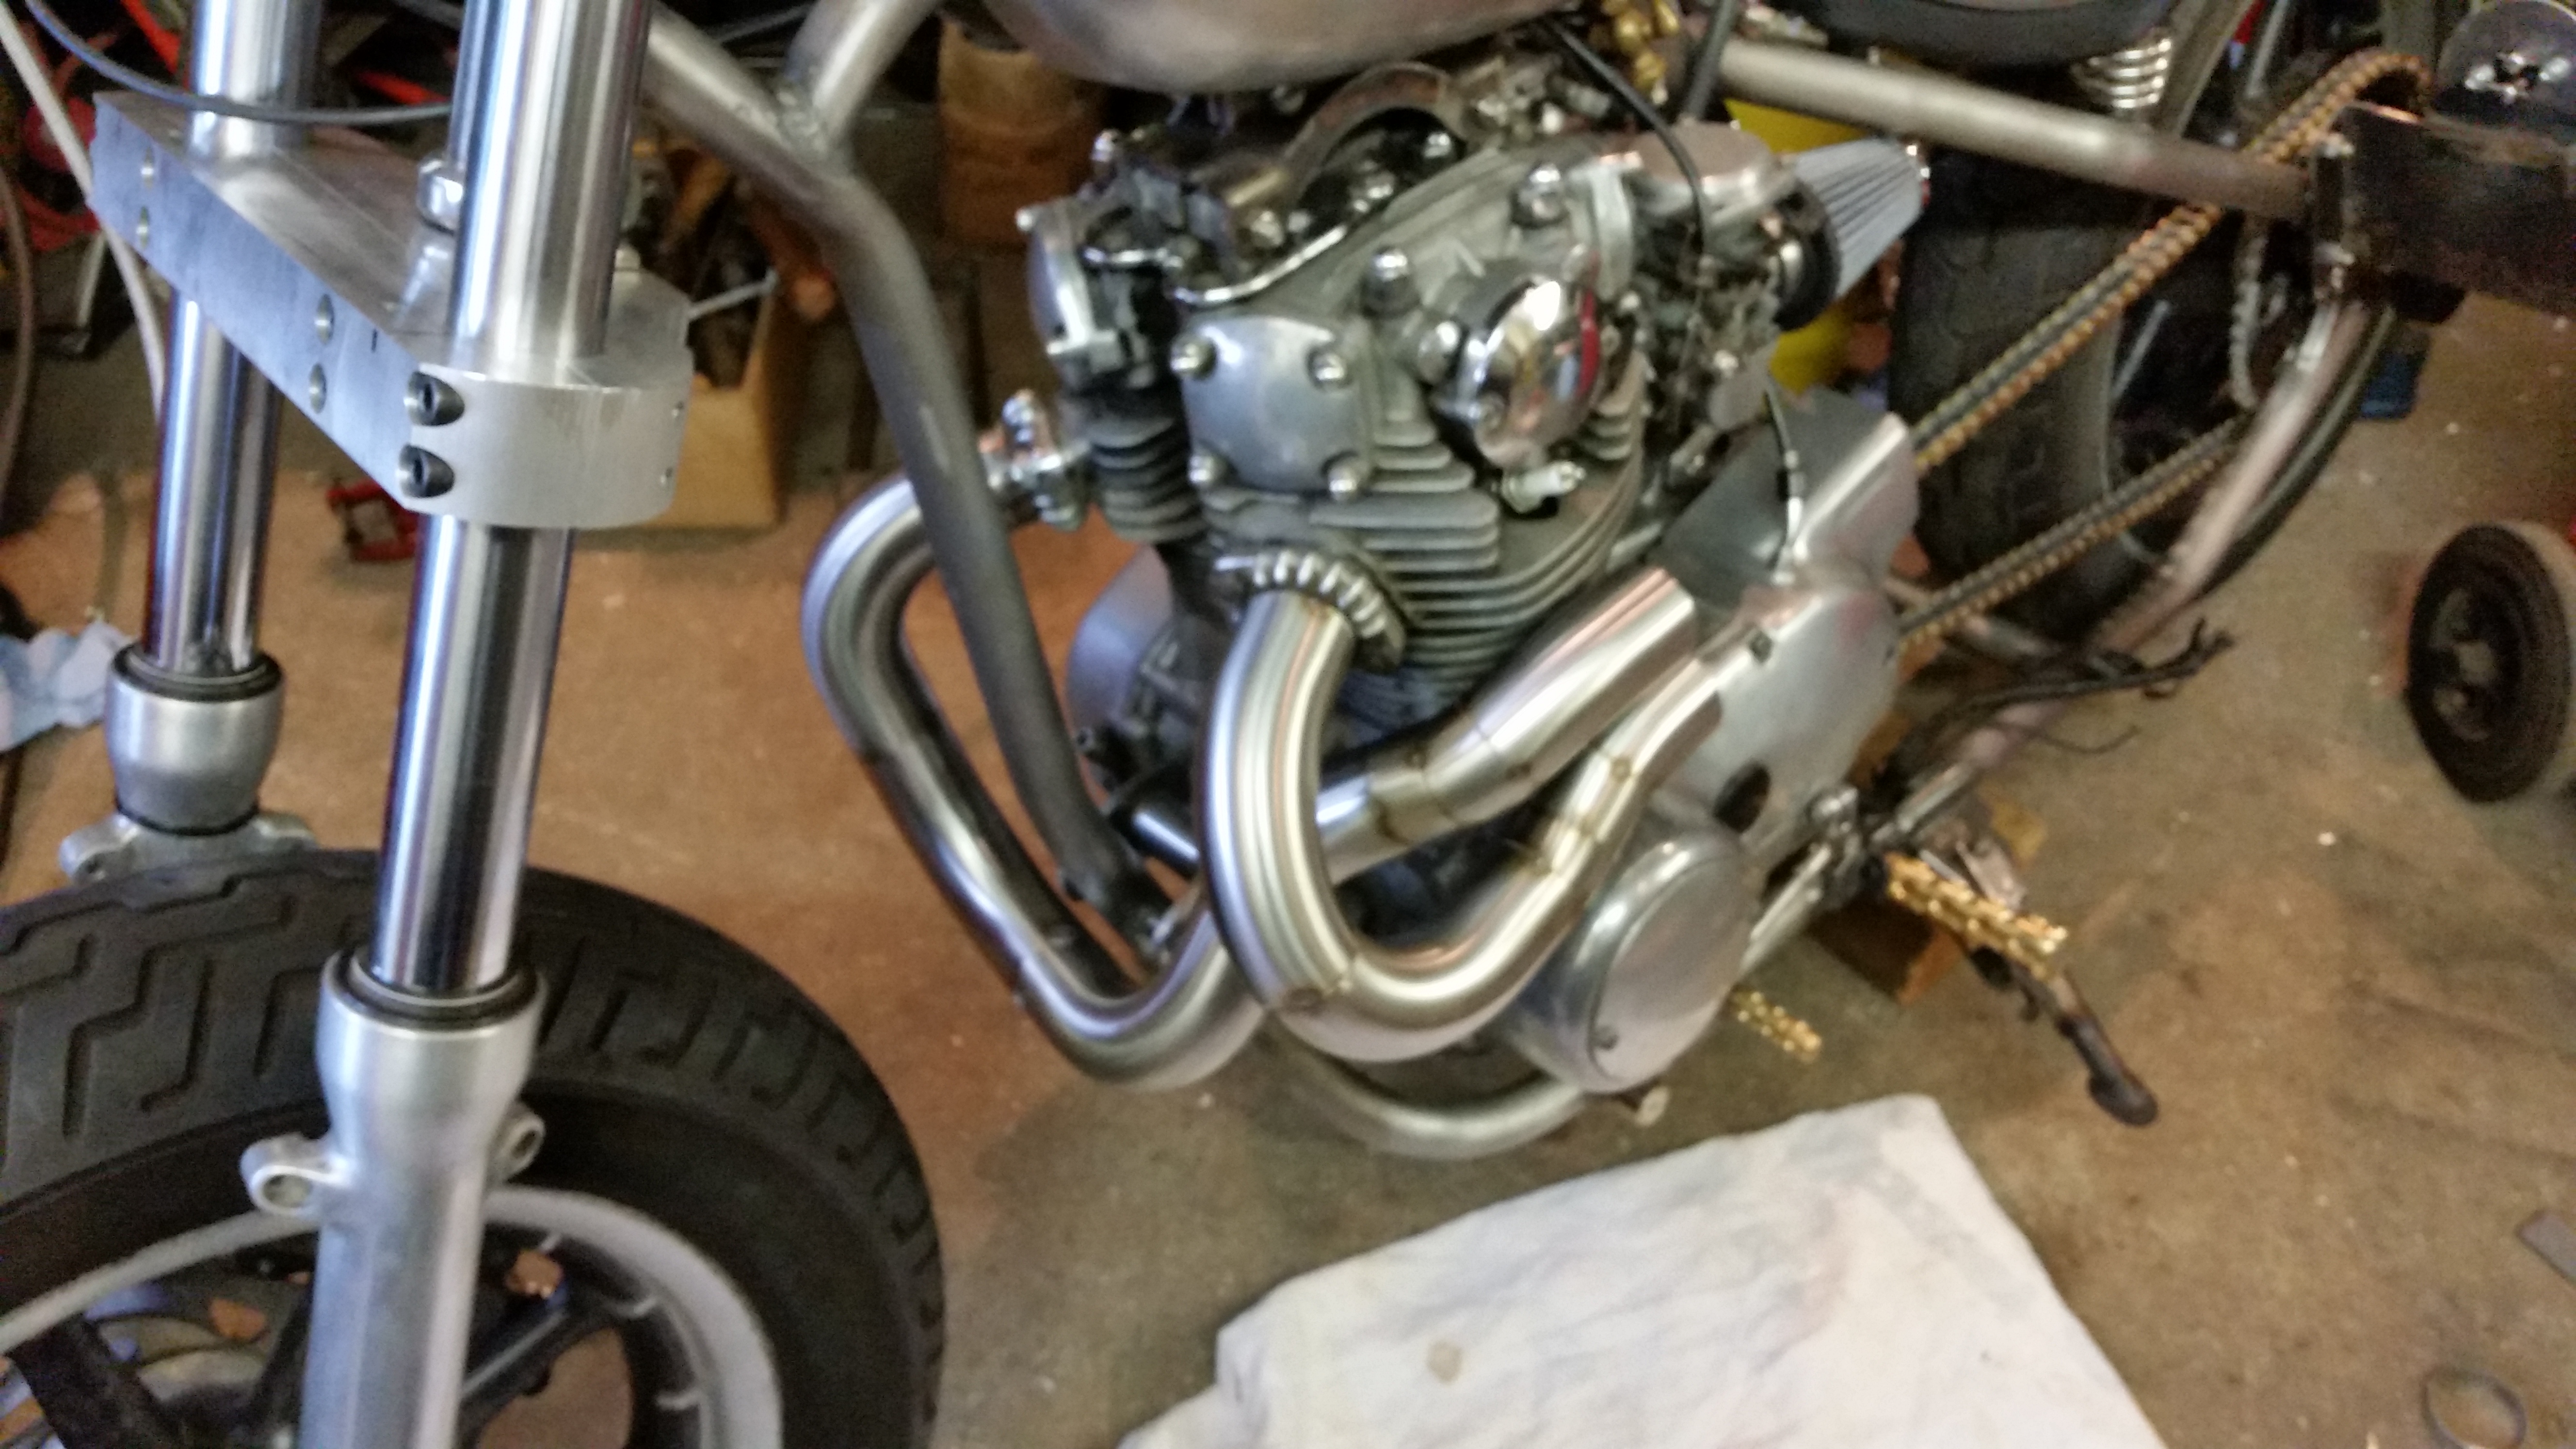
So I started to add a few bends together with some jubilee clips and get an idea of a posible route, first thoughts were to go for one pipe each side but I soon realised that the oil filler plug would be covered if I used the right side of the engine.
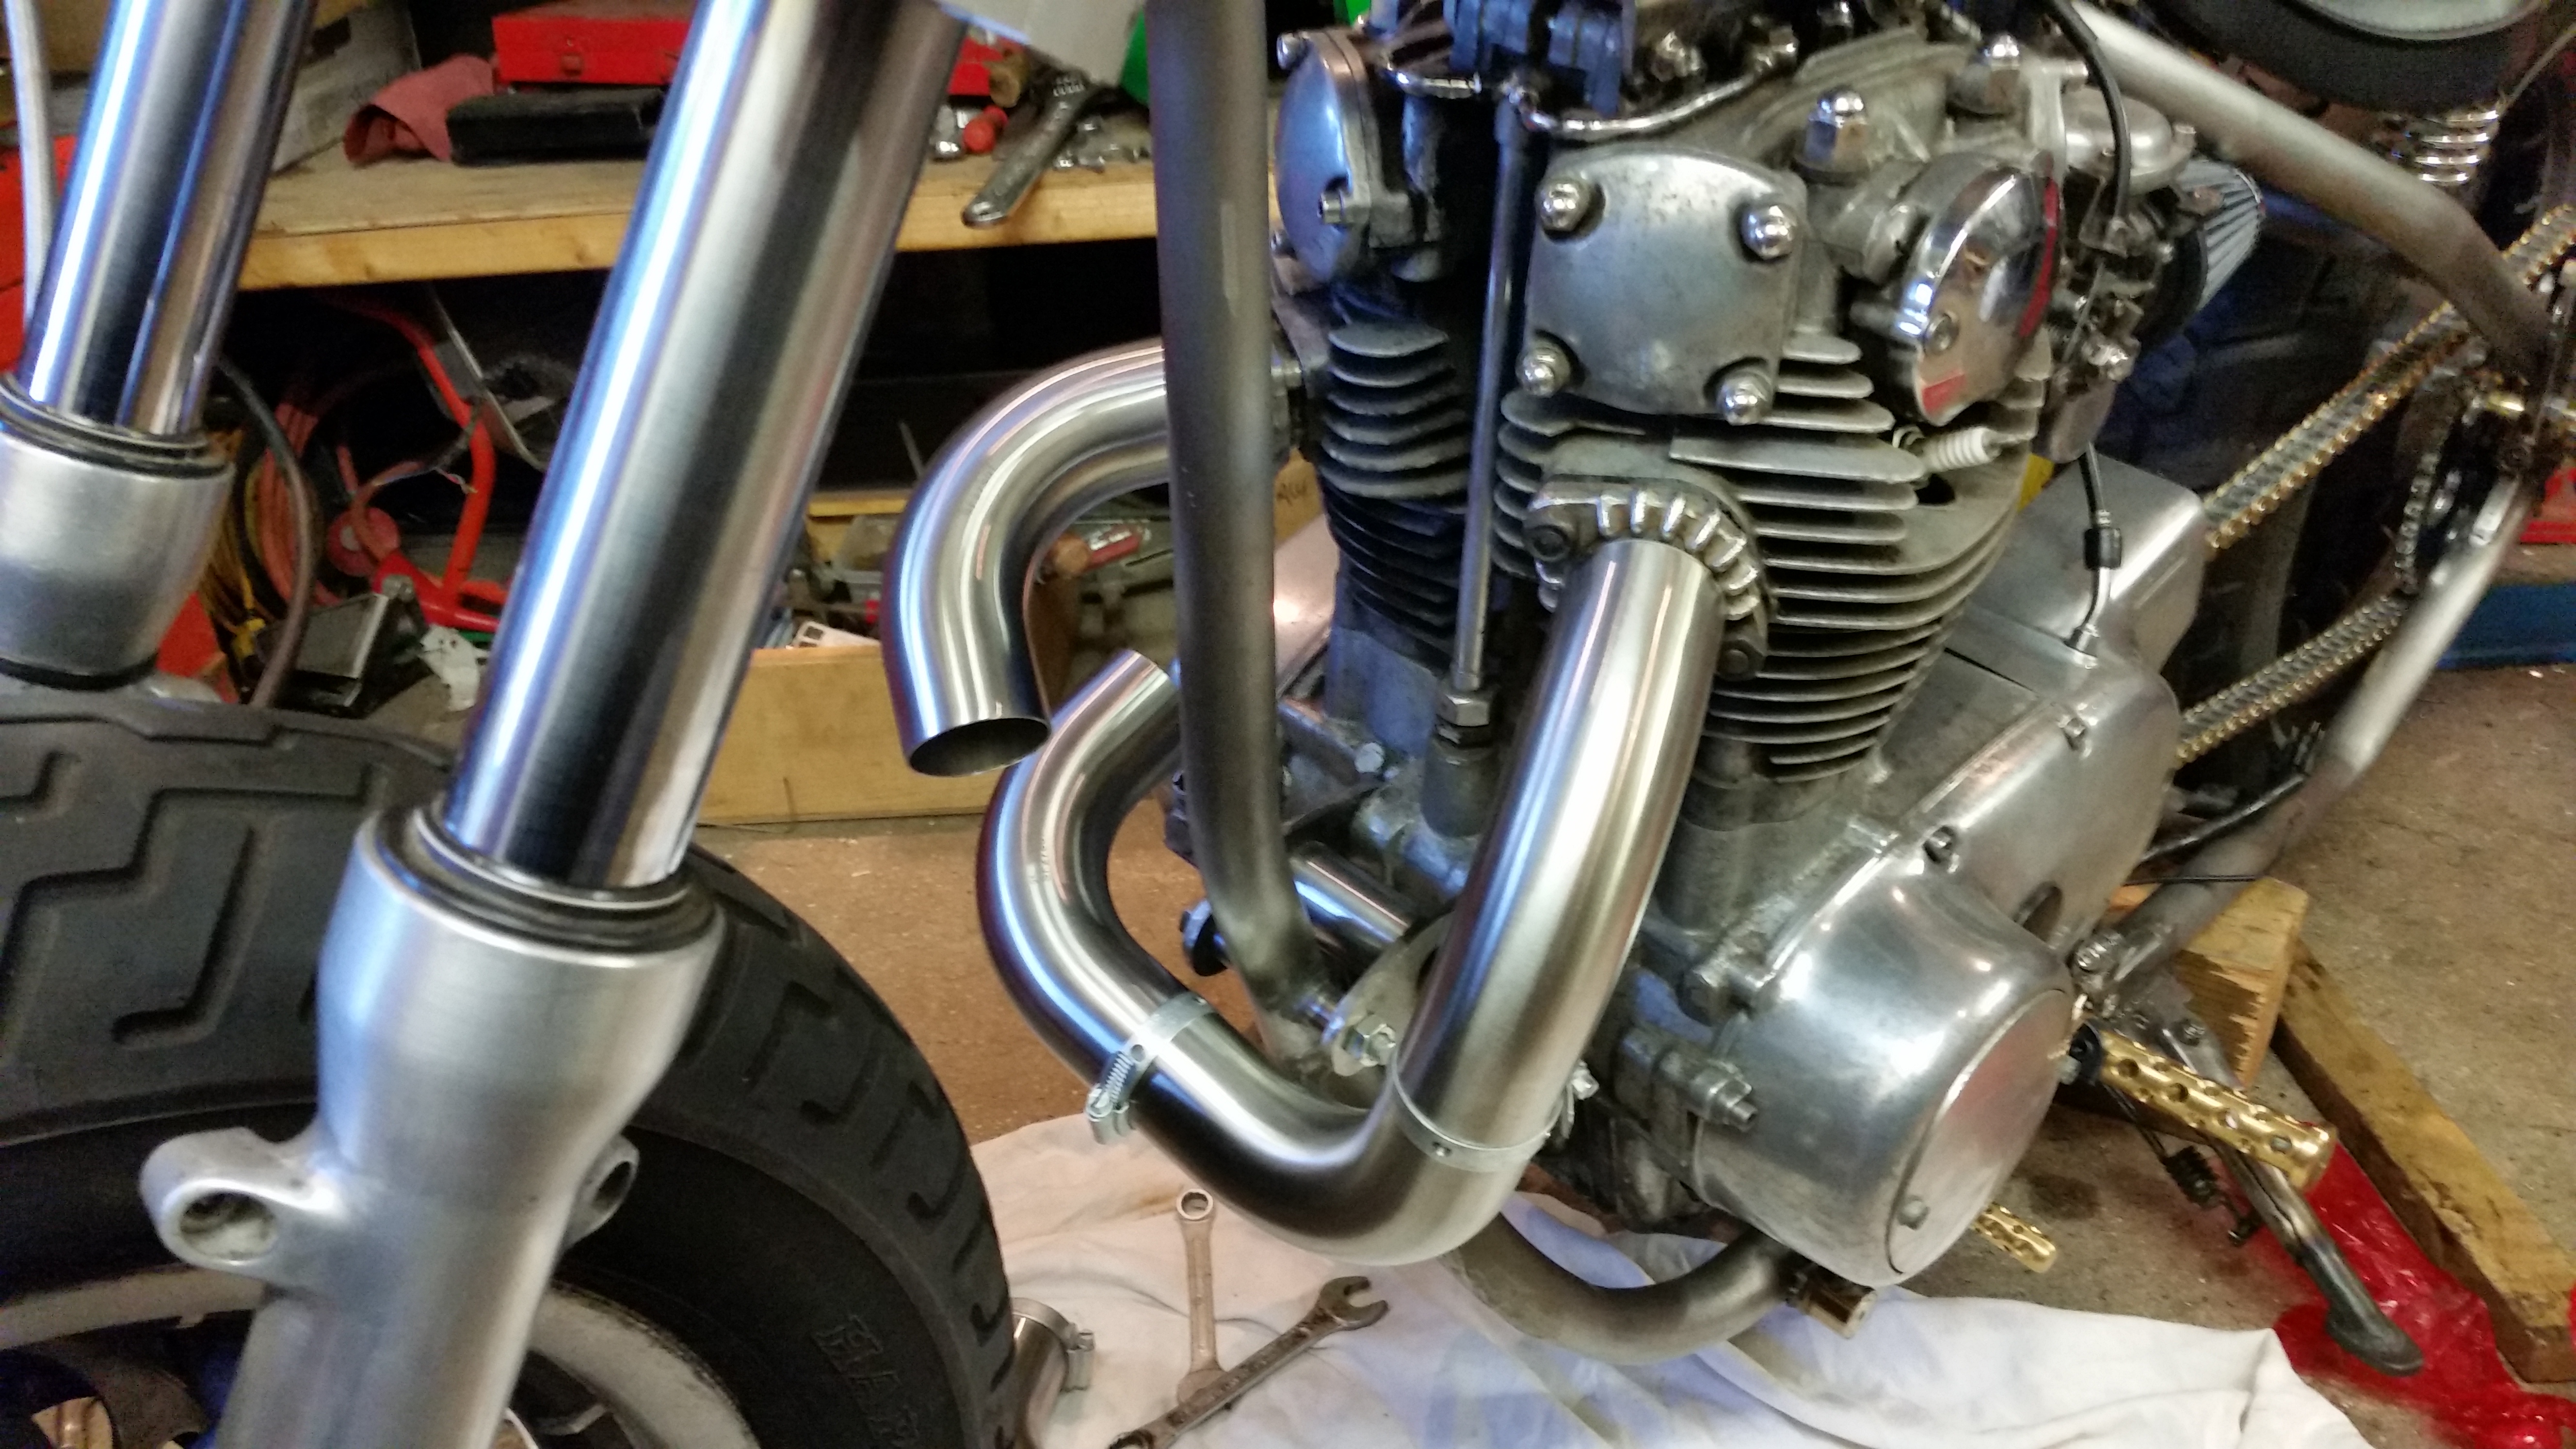
I now concentrated on bringing both pipes up the left side but soon realised it must be kept close to the frame or the front wheel will hit it when the suspension compresses, looks easy but theres actualy not much room.
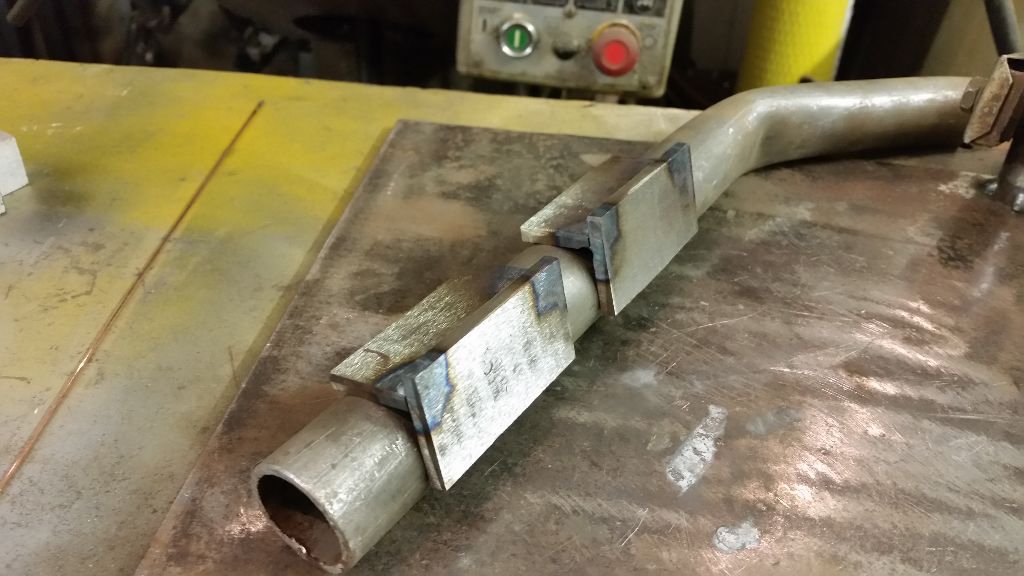
Reasonably happy with progress I decided to tack weld the tubes, as long as the two exits were pointing roughly right I was confident I could finish.
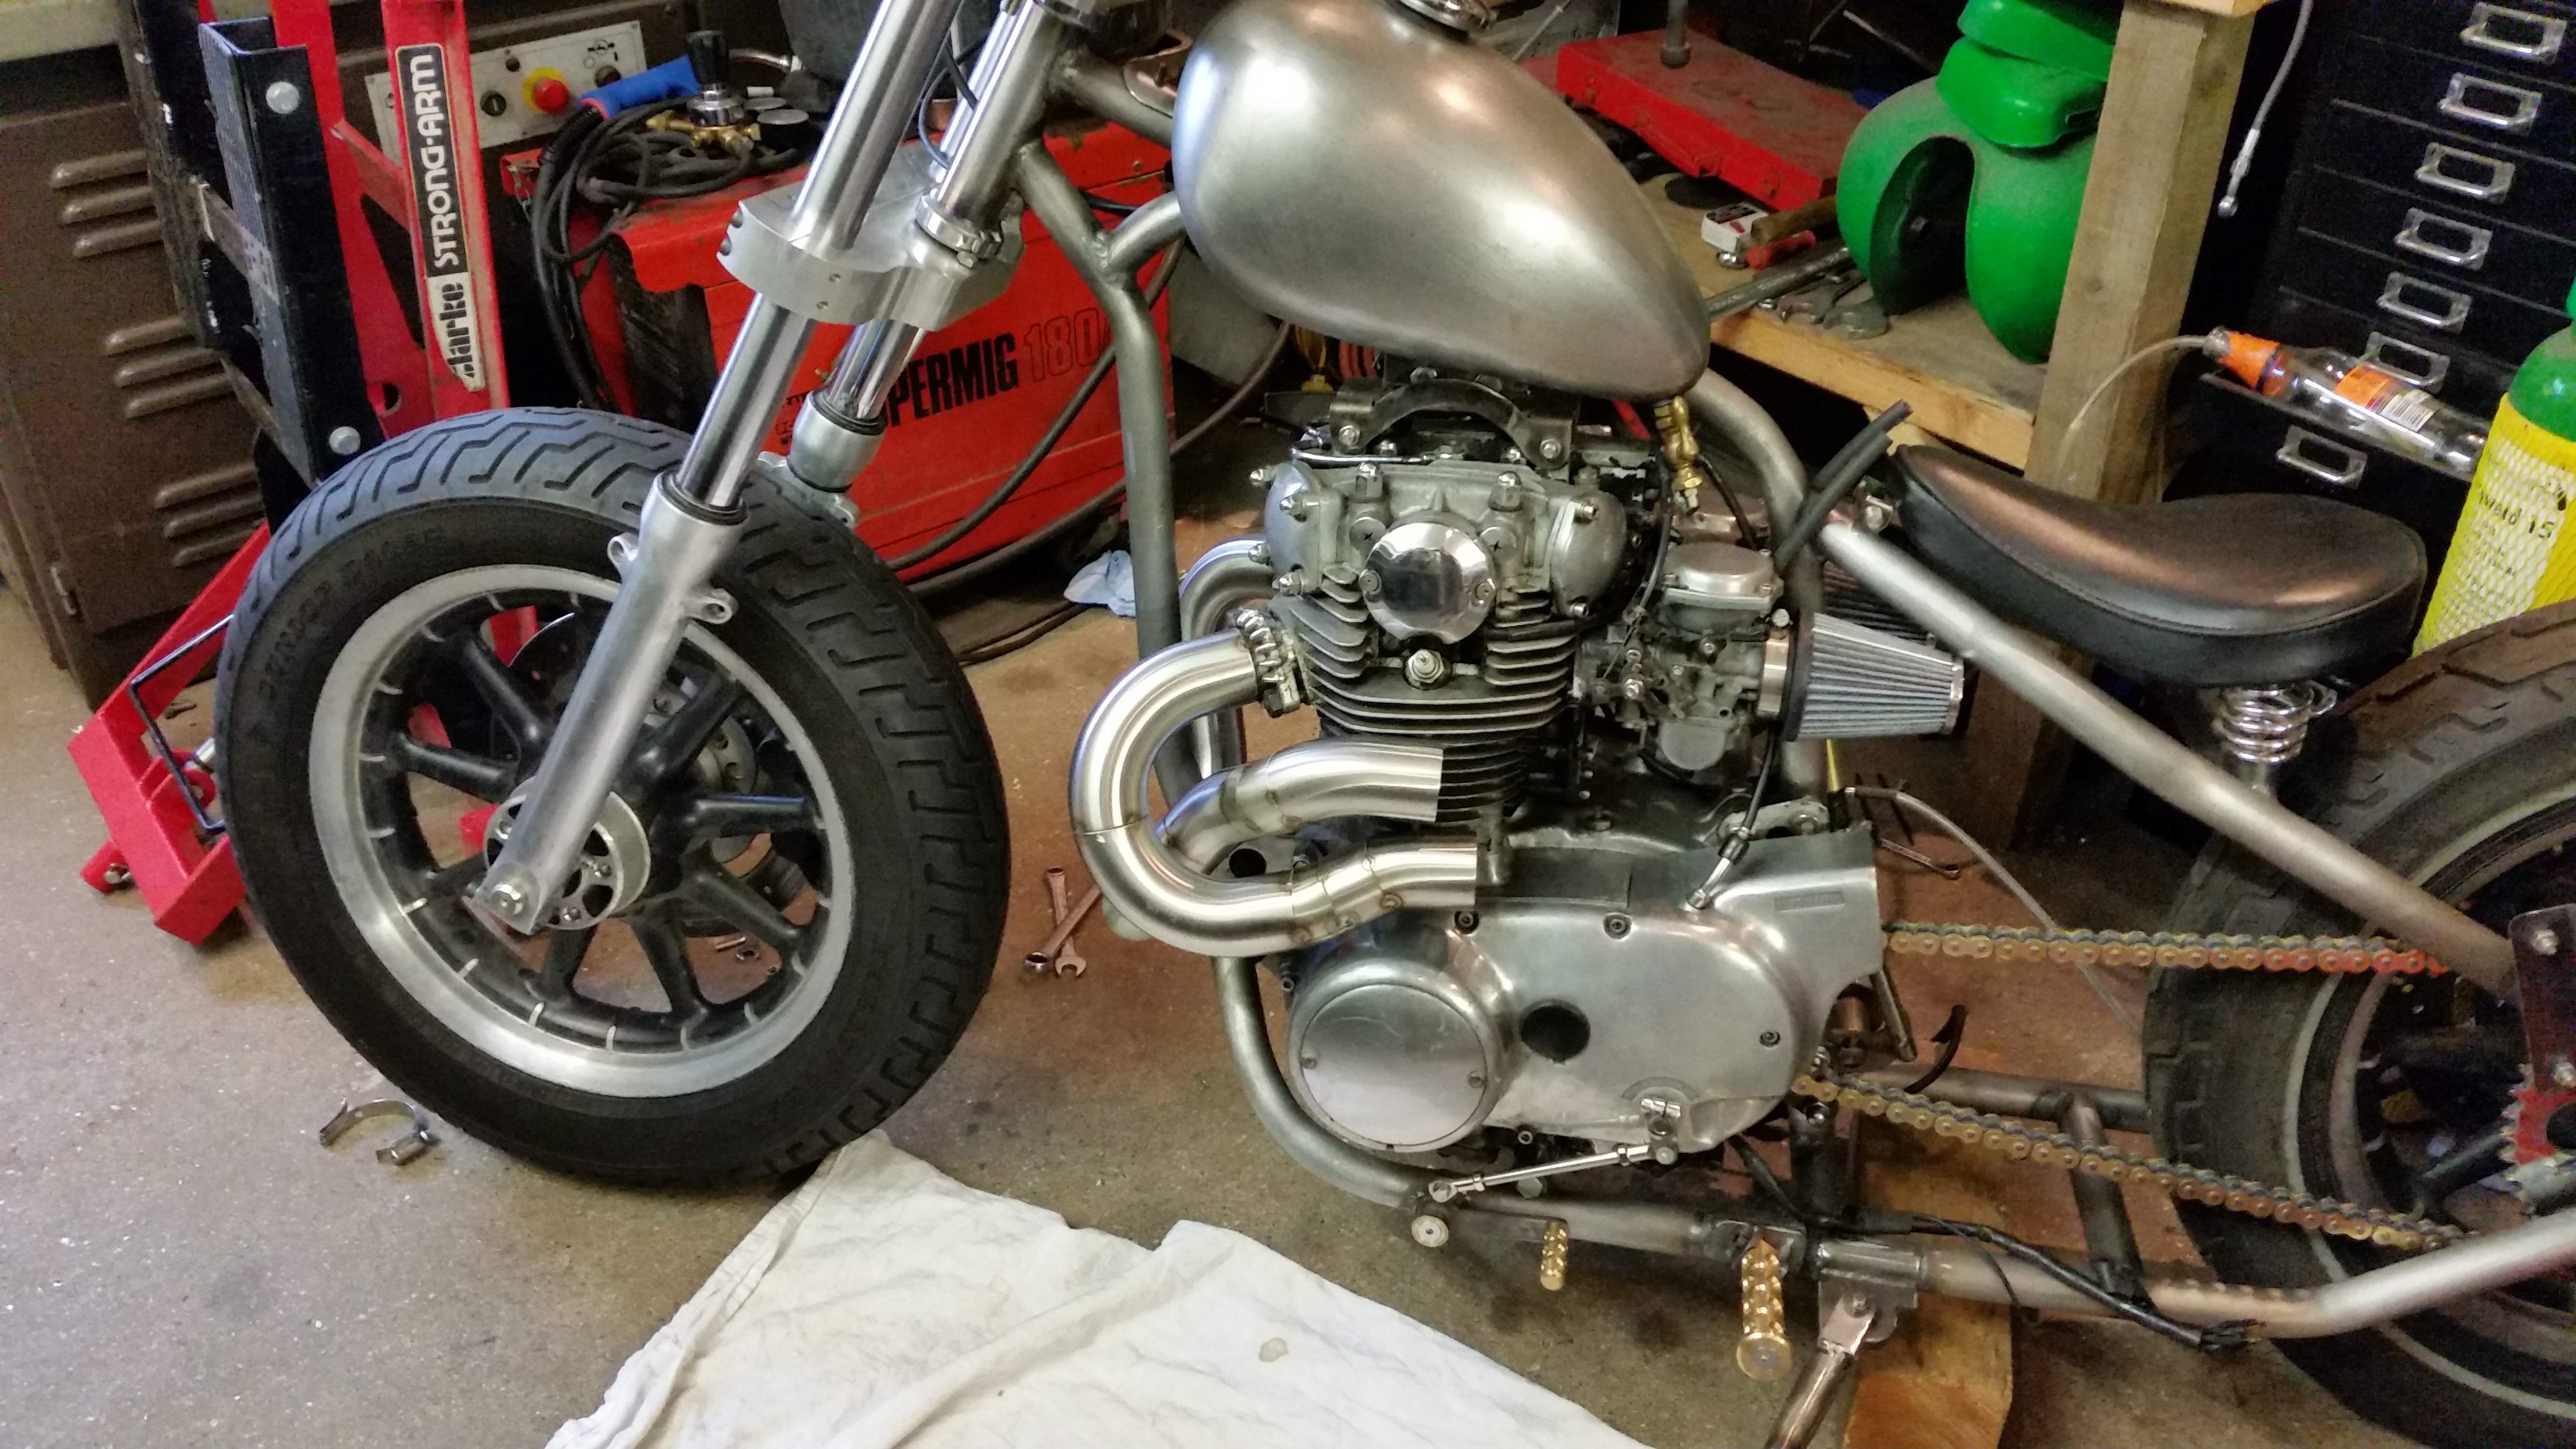
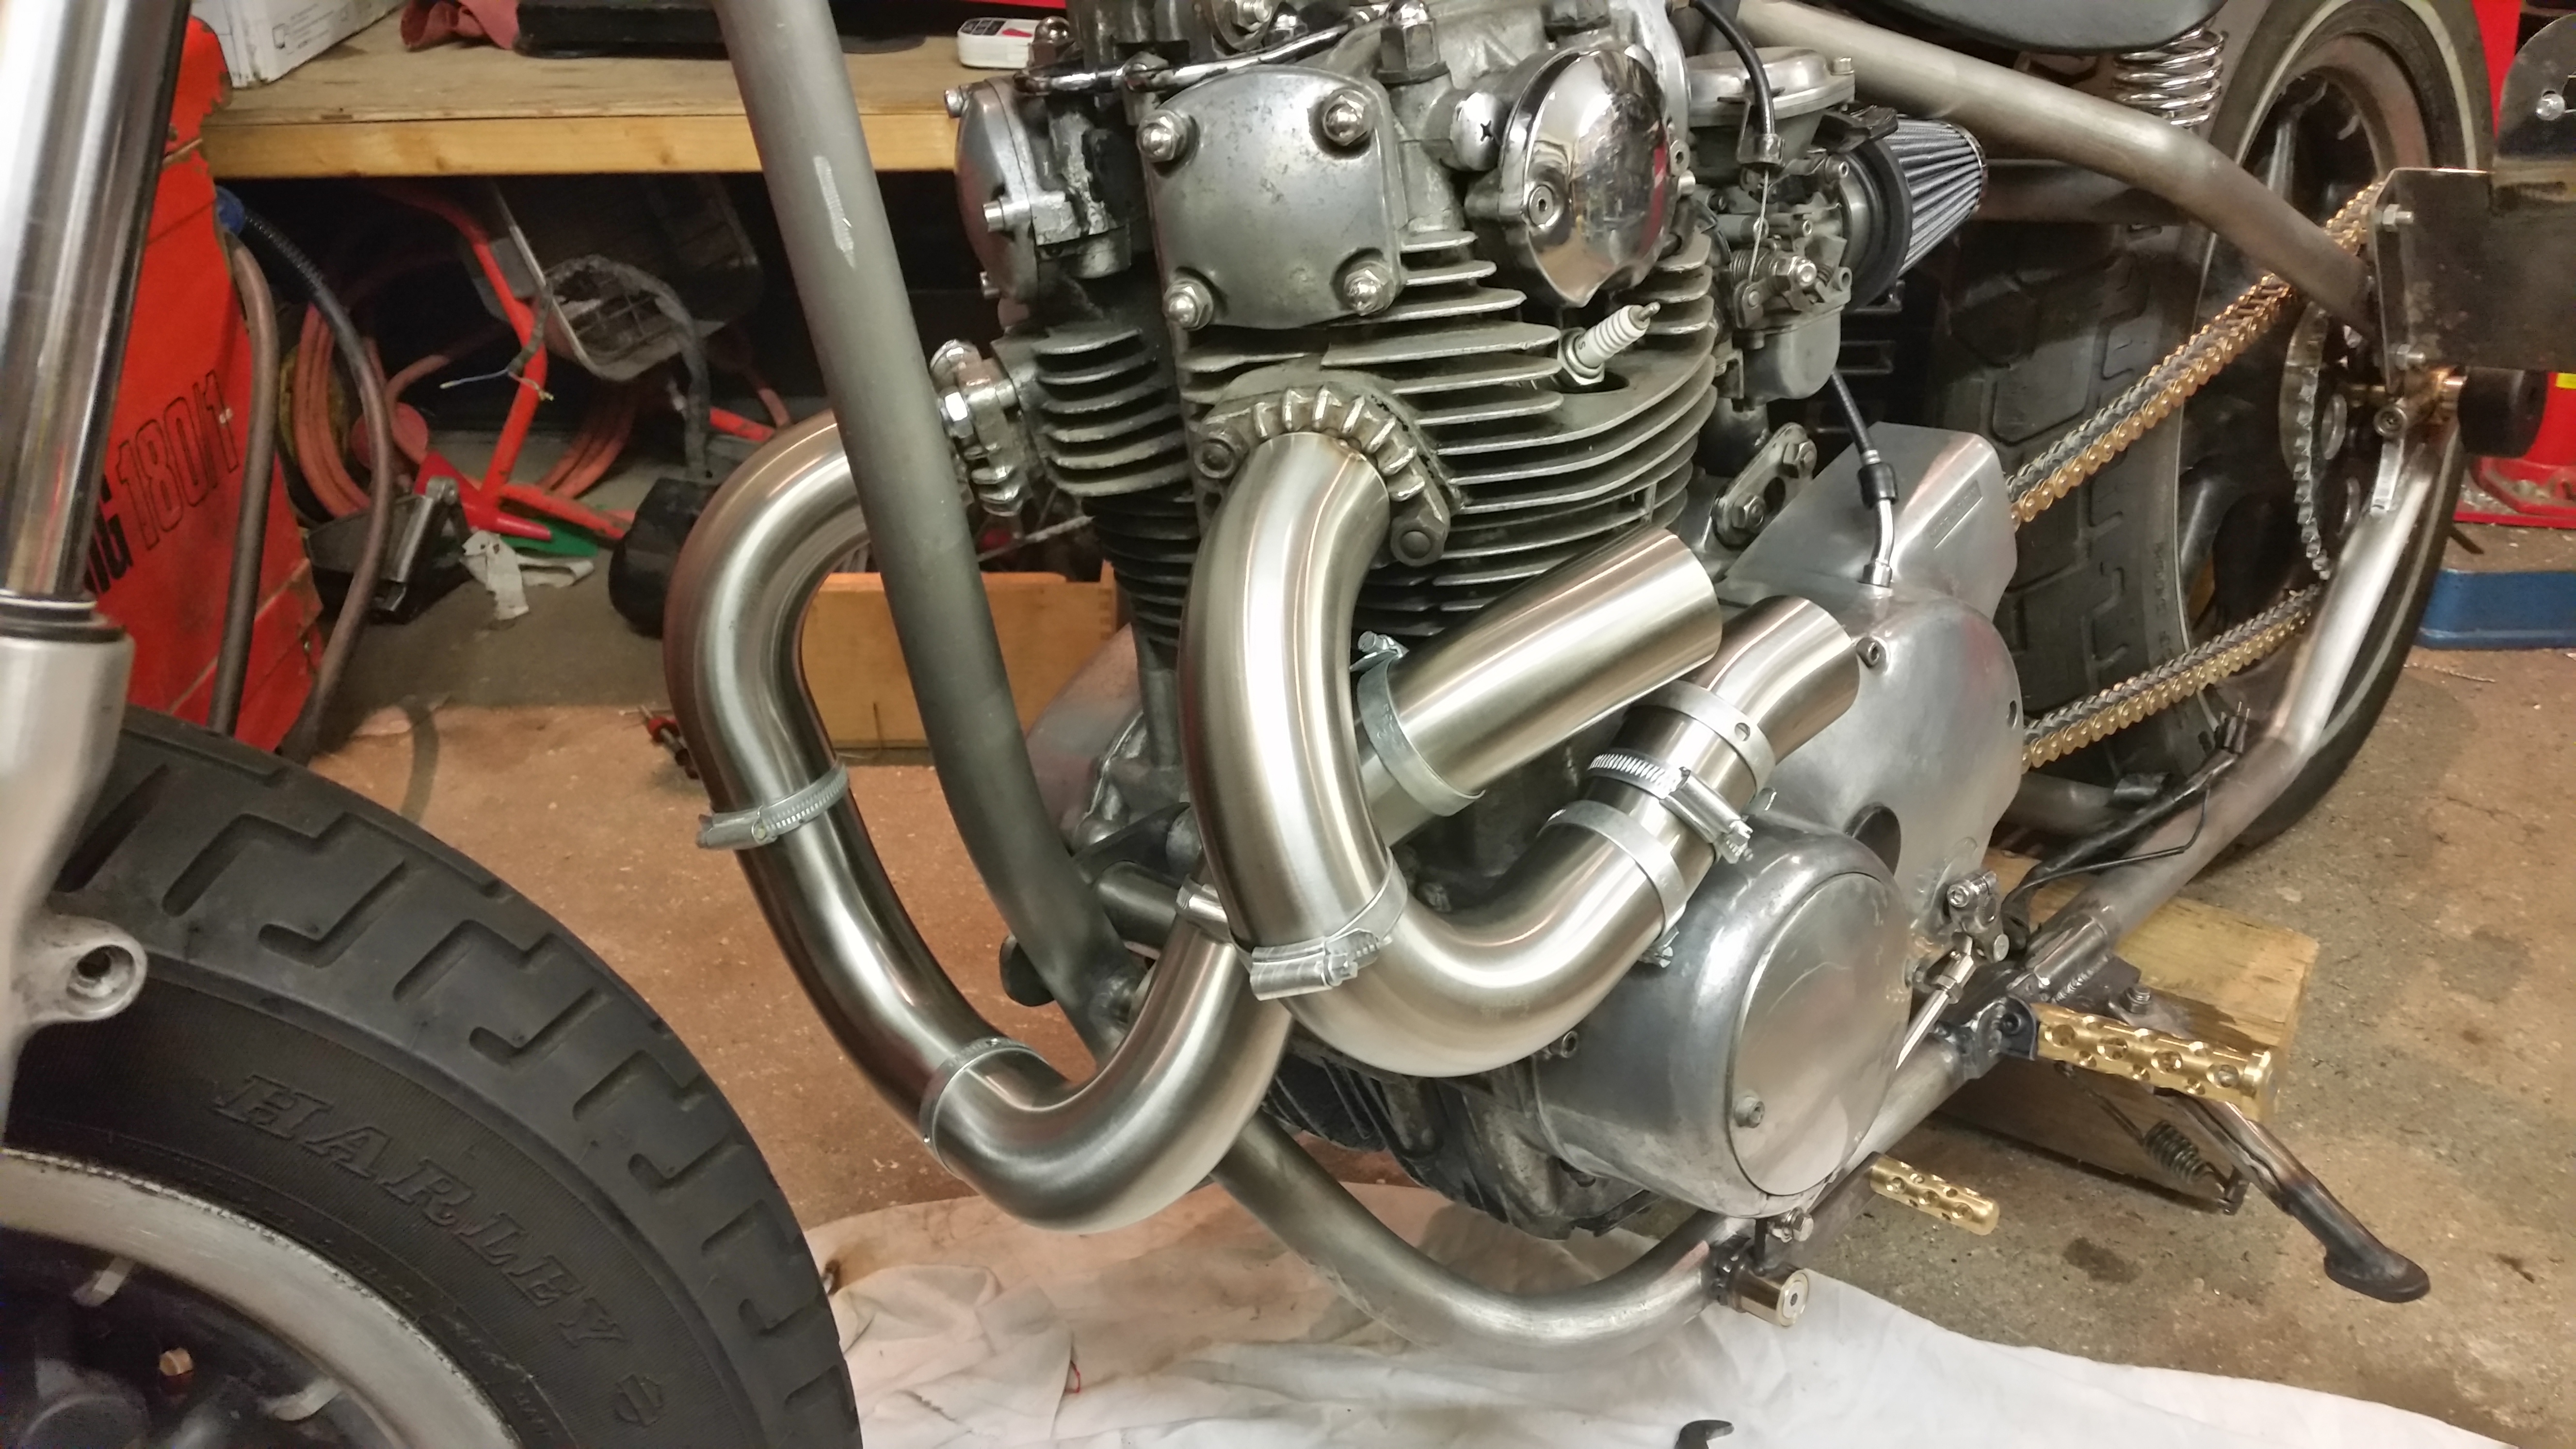
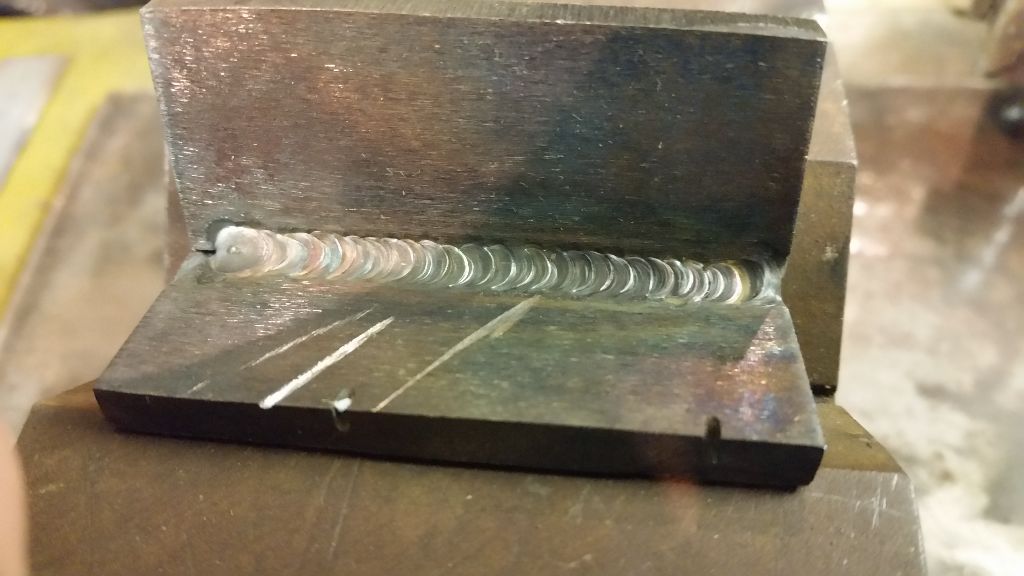
Fairly happy so far so I decided to seam weld the tubes.
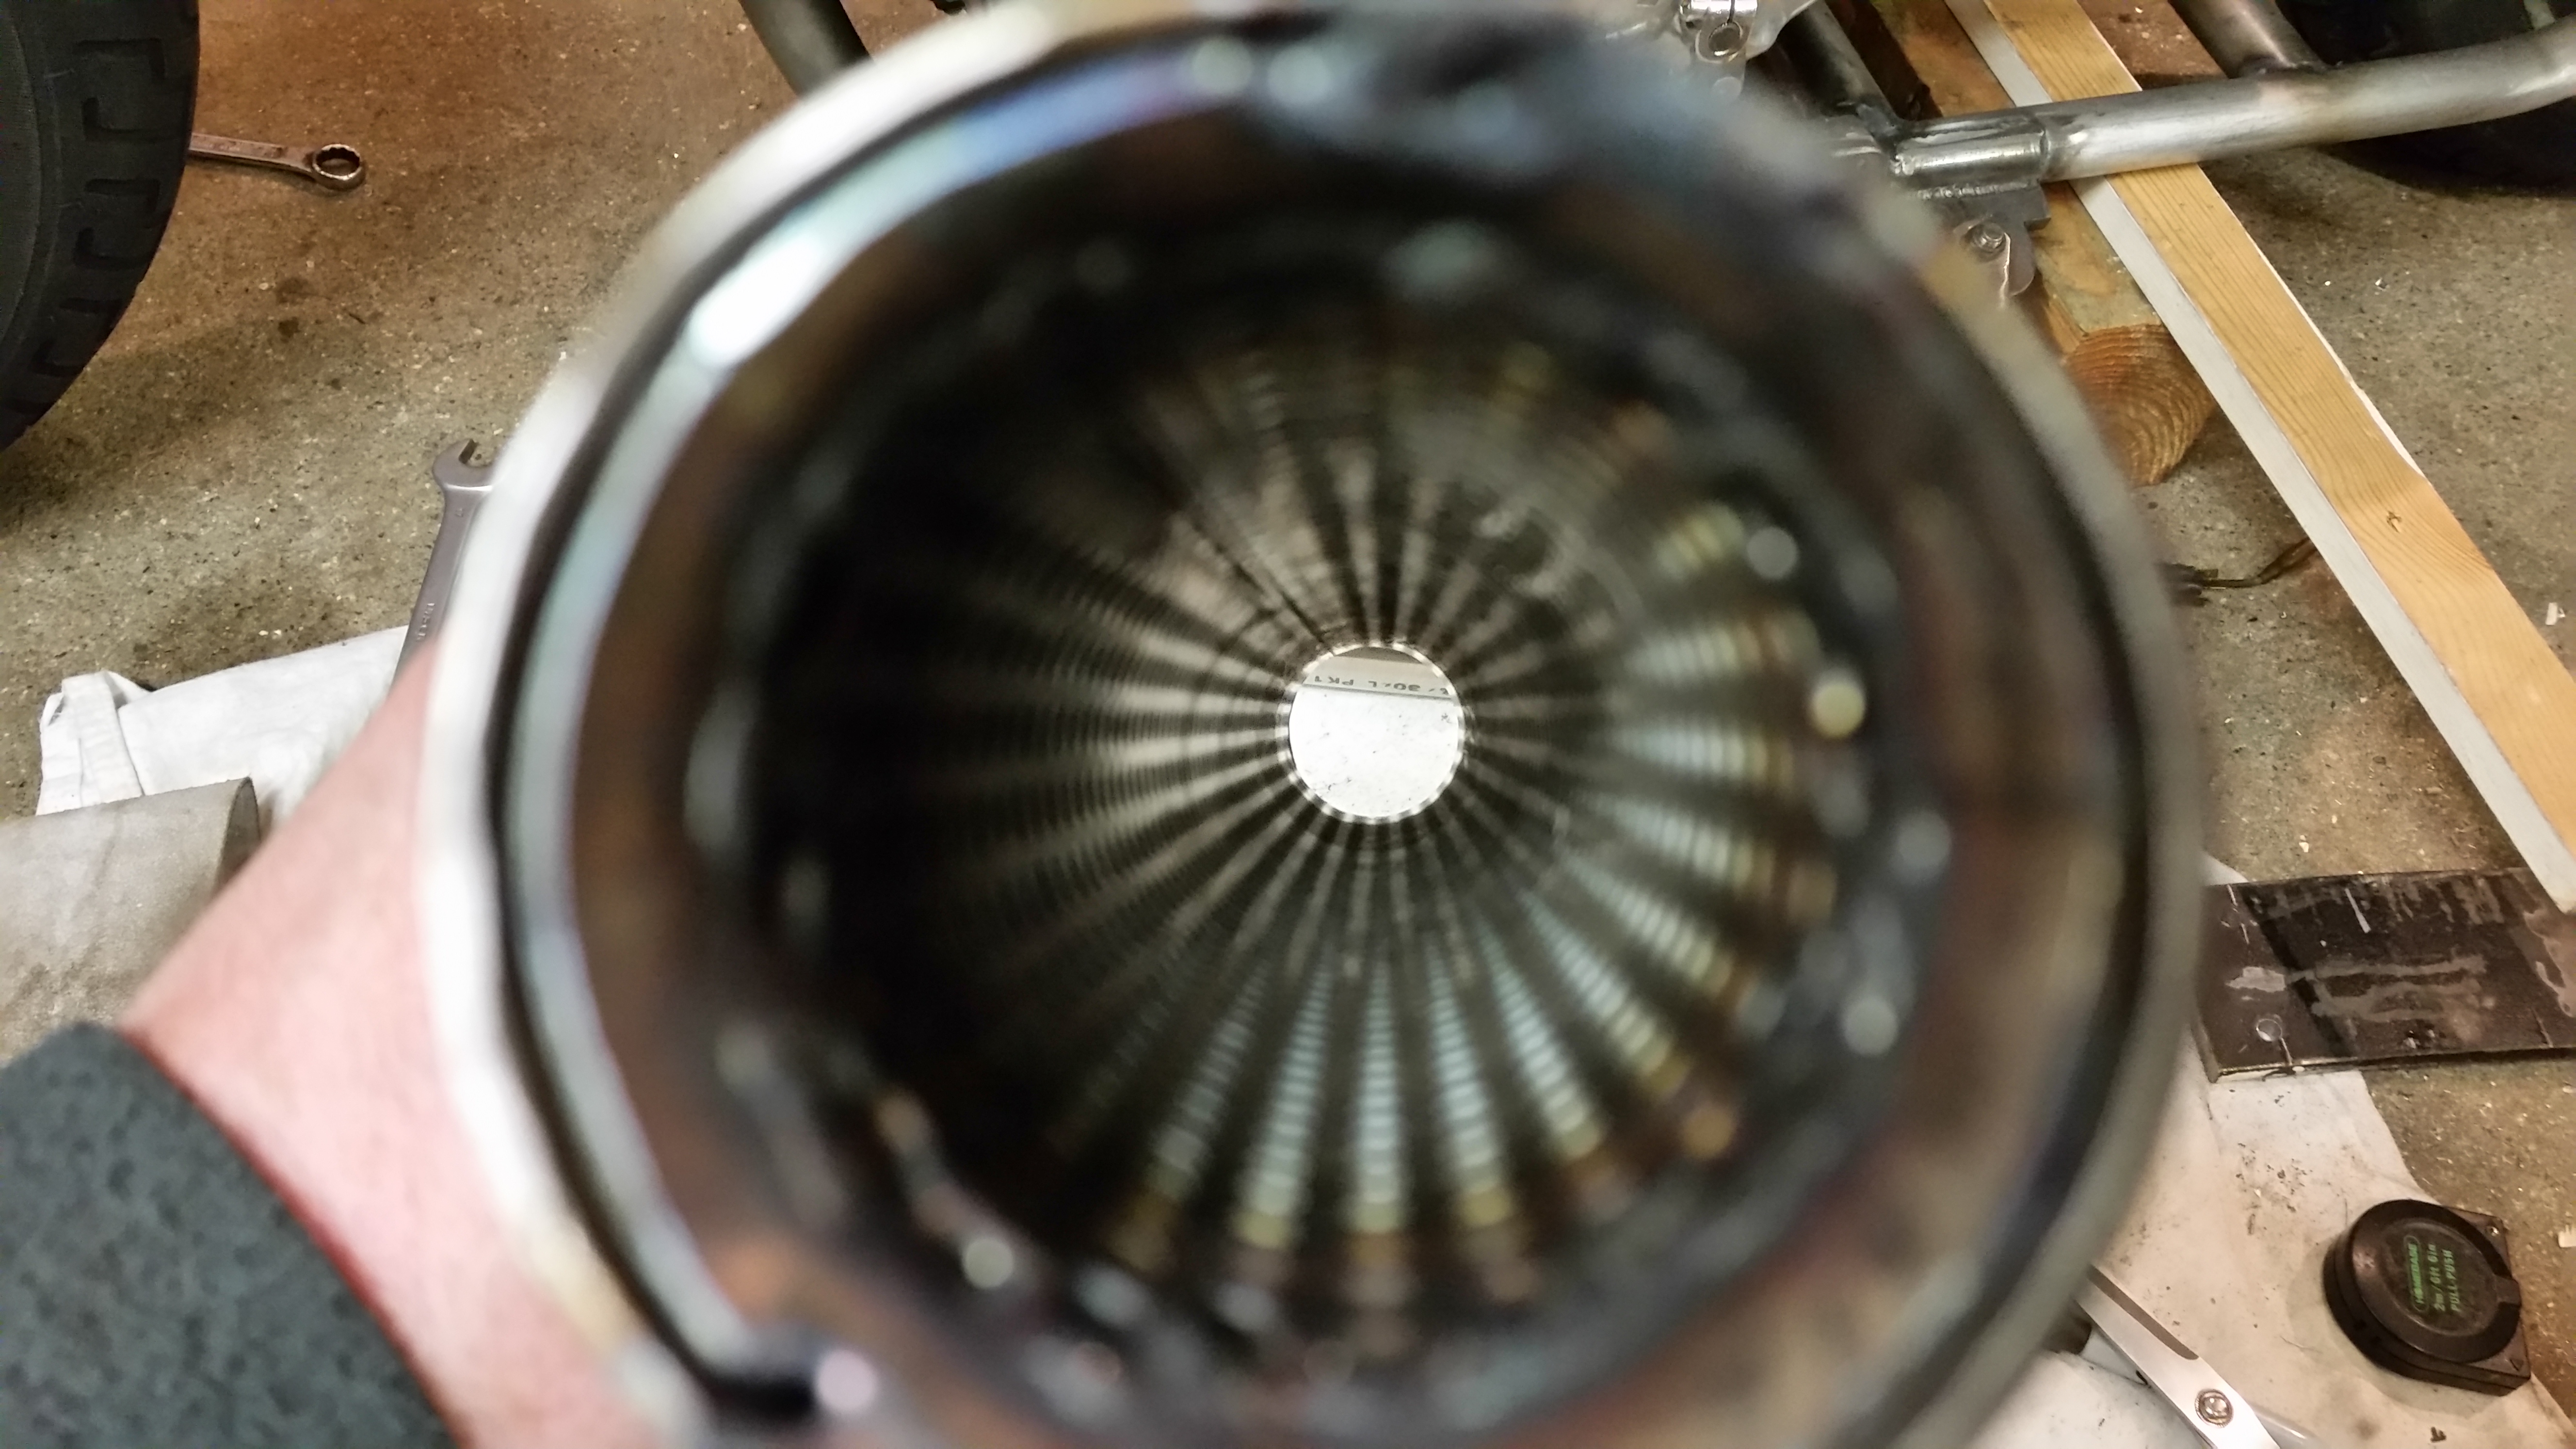
I now need to concentrate on the muffler construction, all pretty simple, flared tubes to seal each end and perforated tube with fiberglass matting.
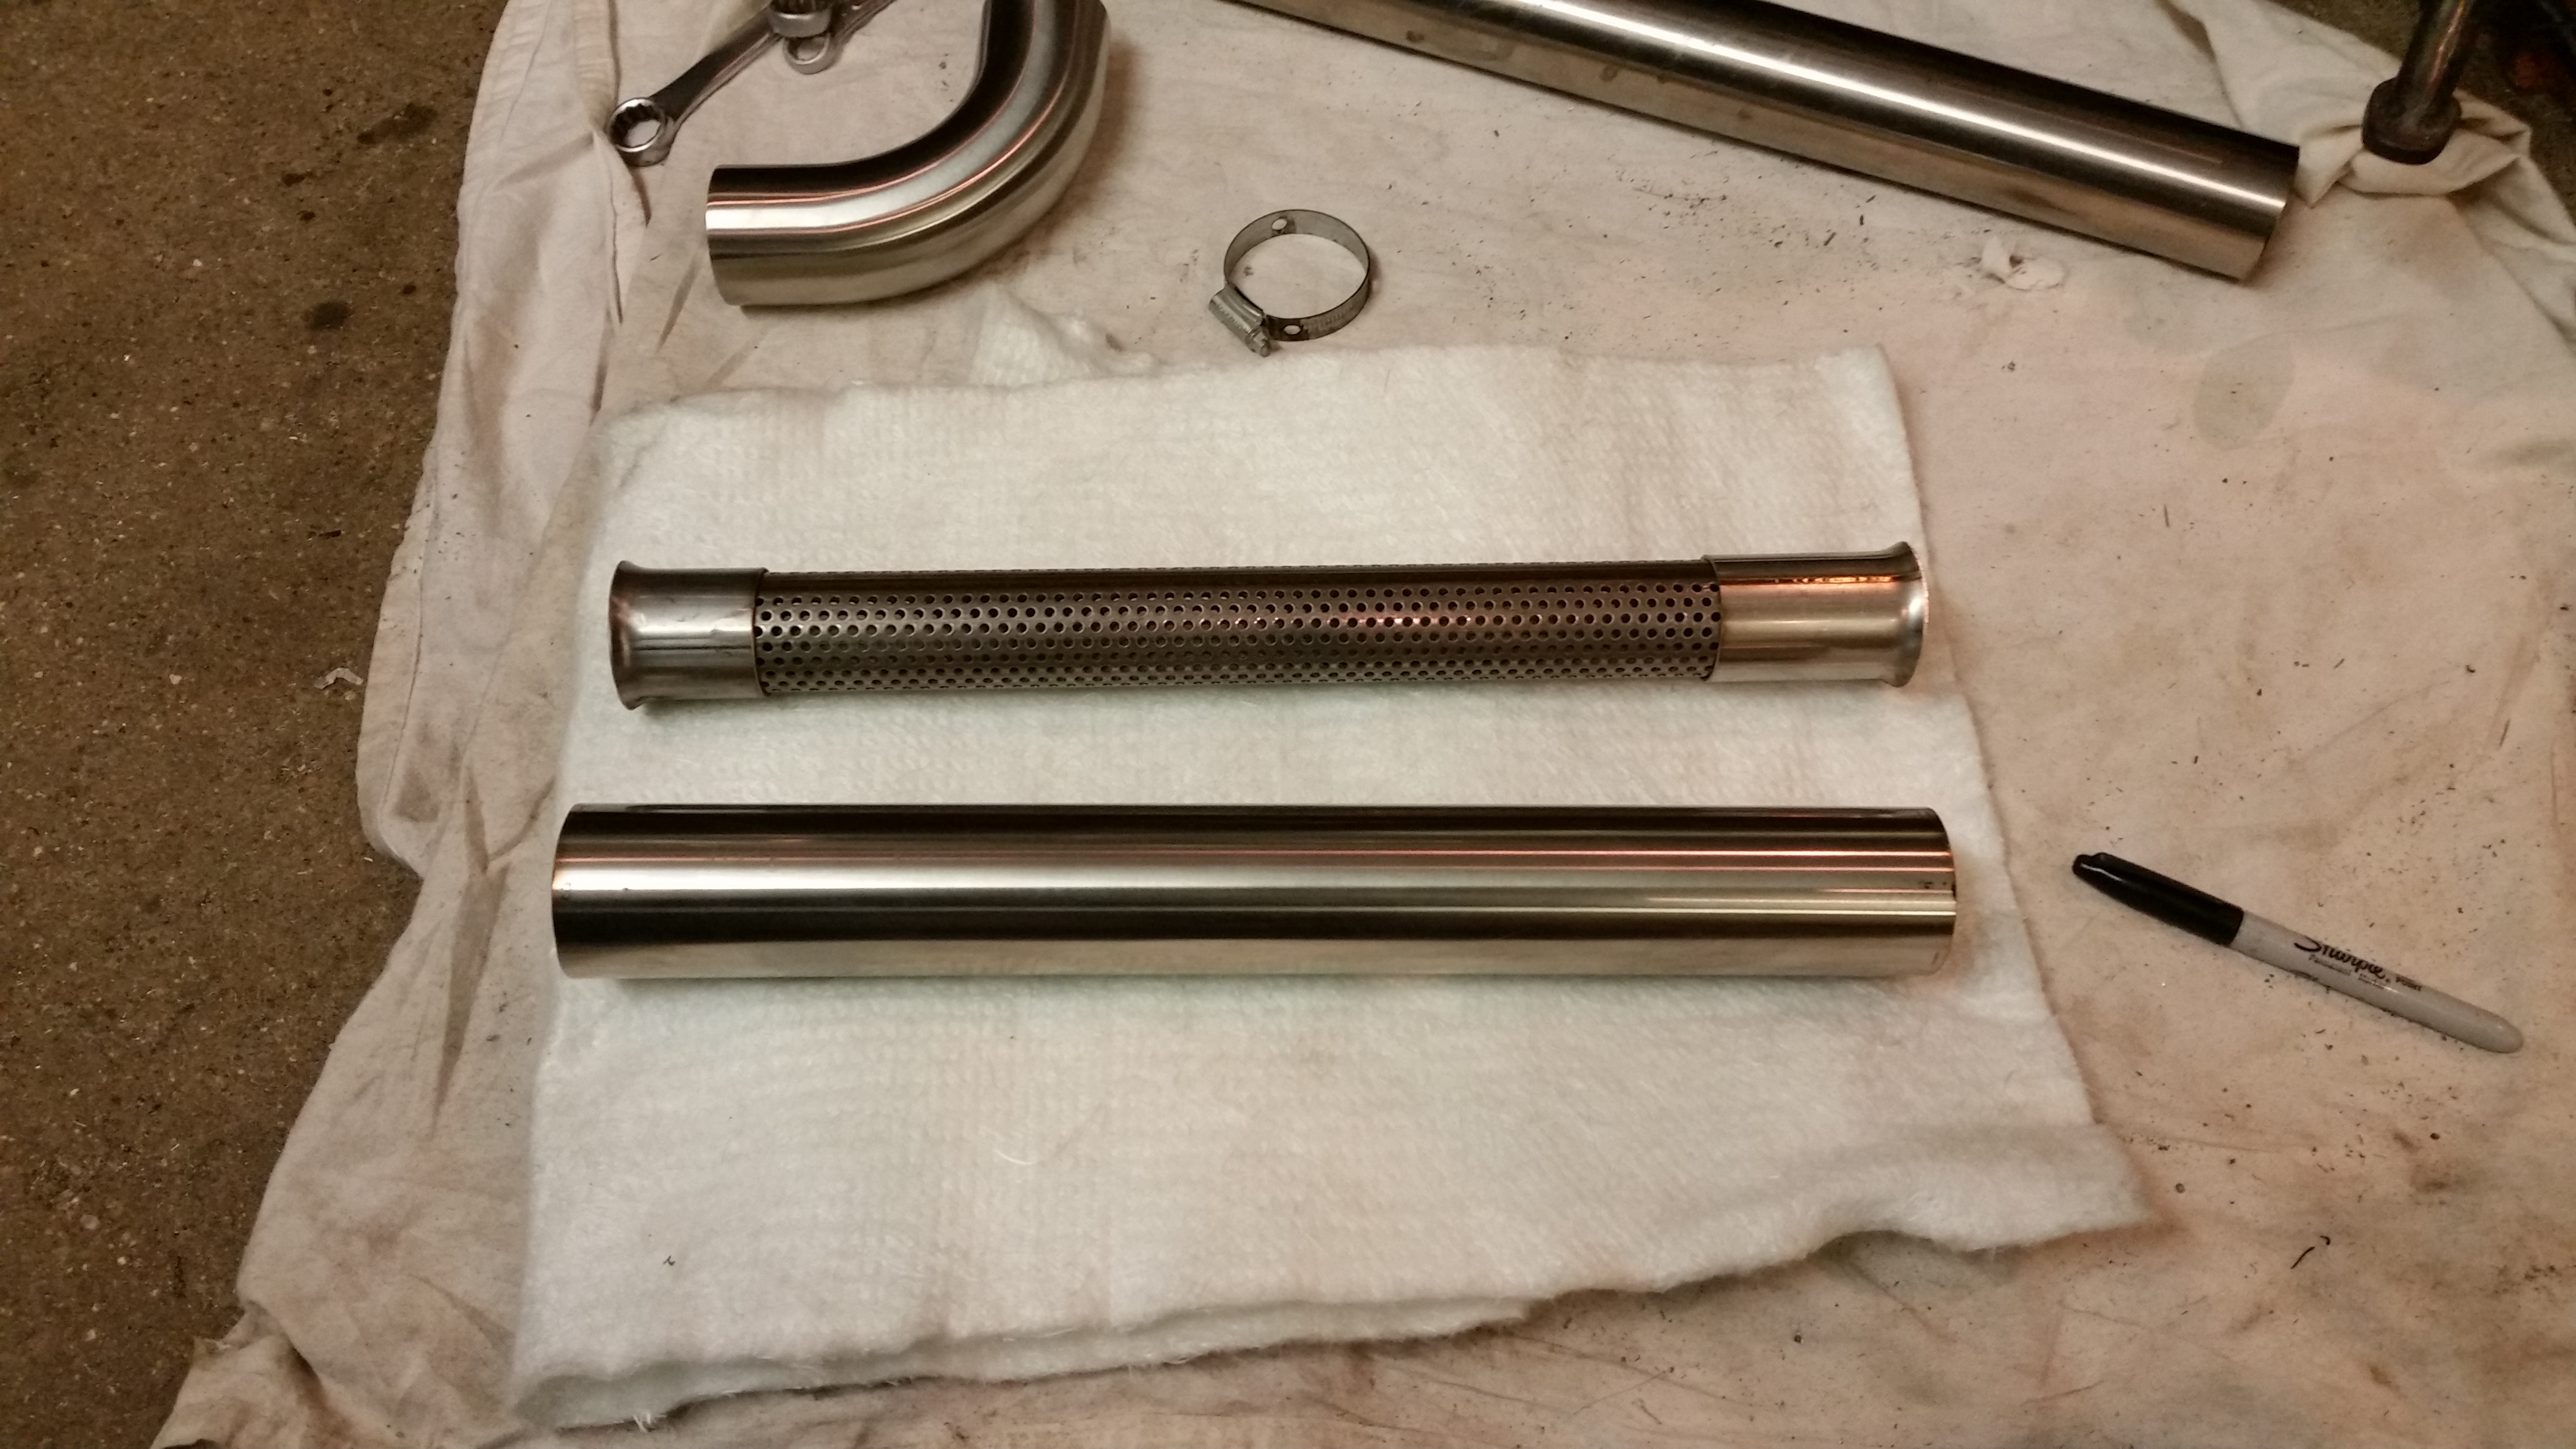
An arty look down the new muffler.
A mock up of how I want the tube to sit, nice and flat so I used the digital protractor, pretty happy so I welded it.
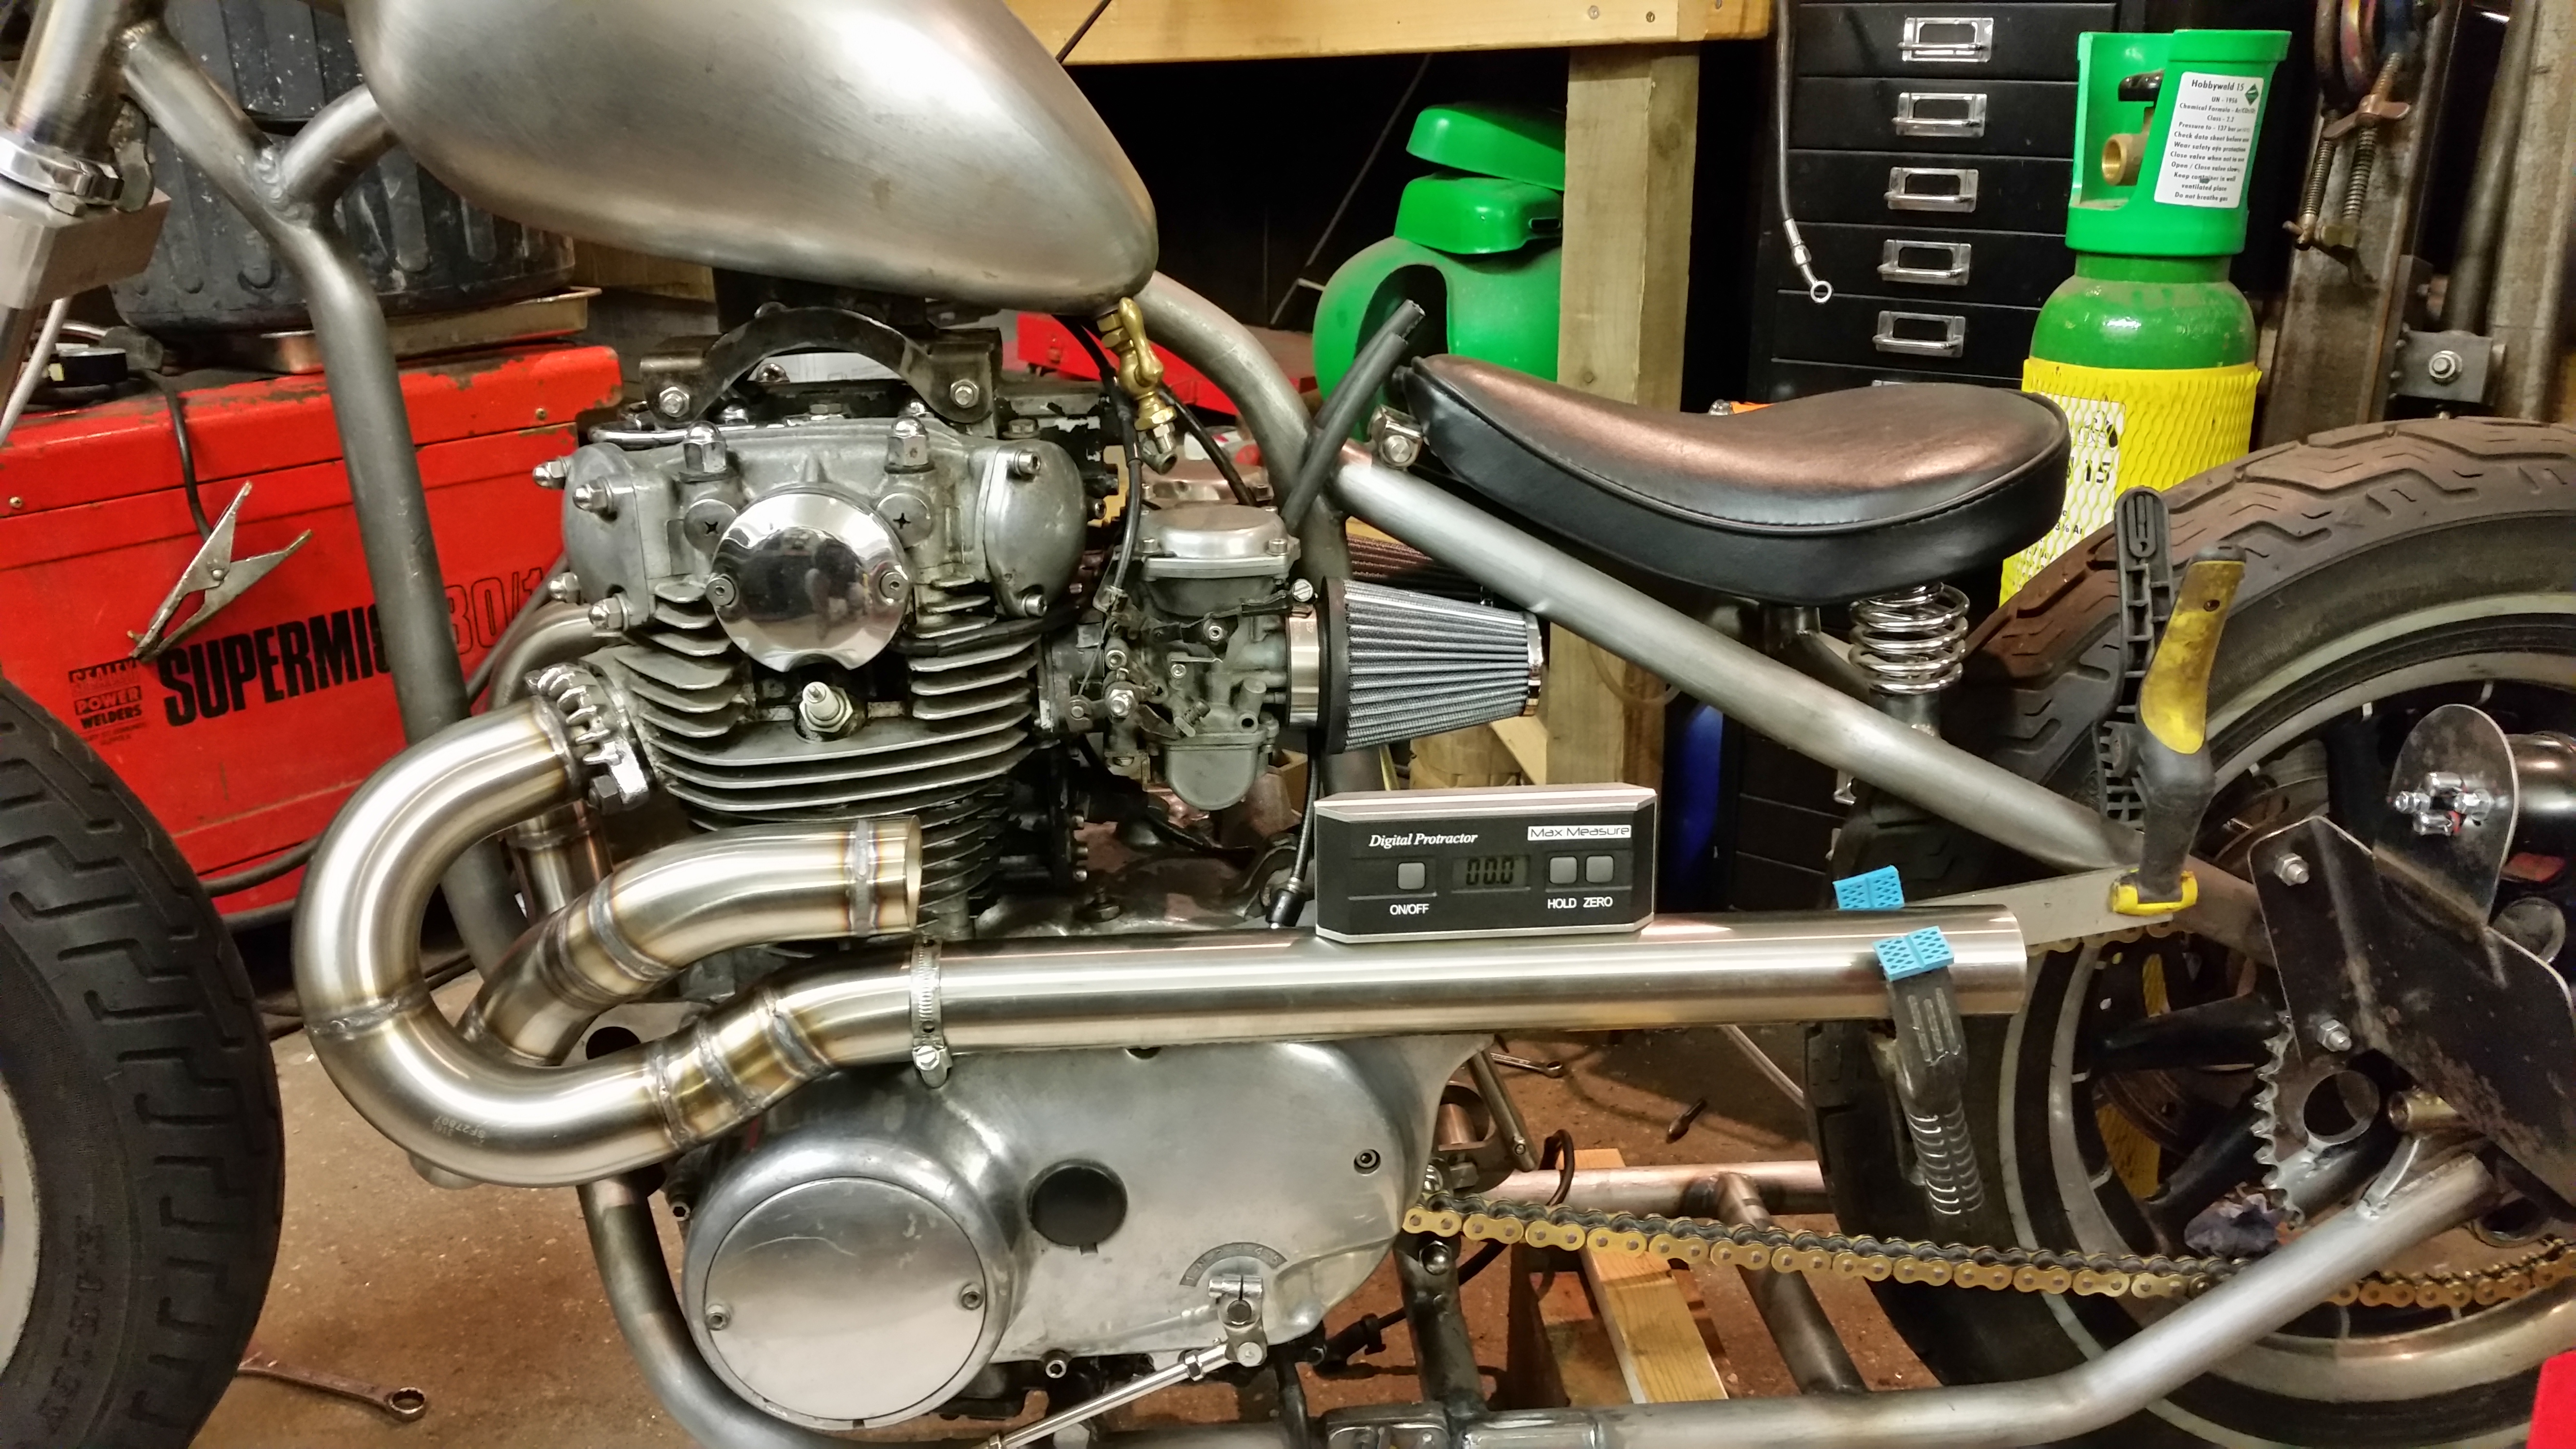
Here’s the finished tube, welded in place with the 45 degree exit bend, looks pretty good I think.
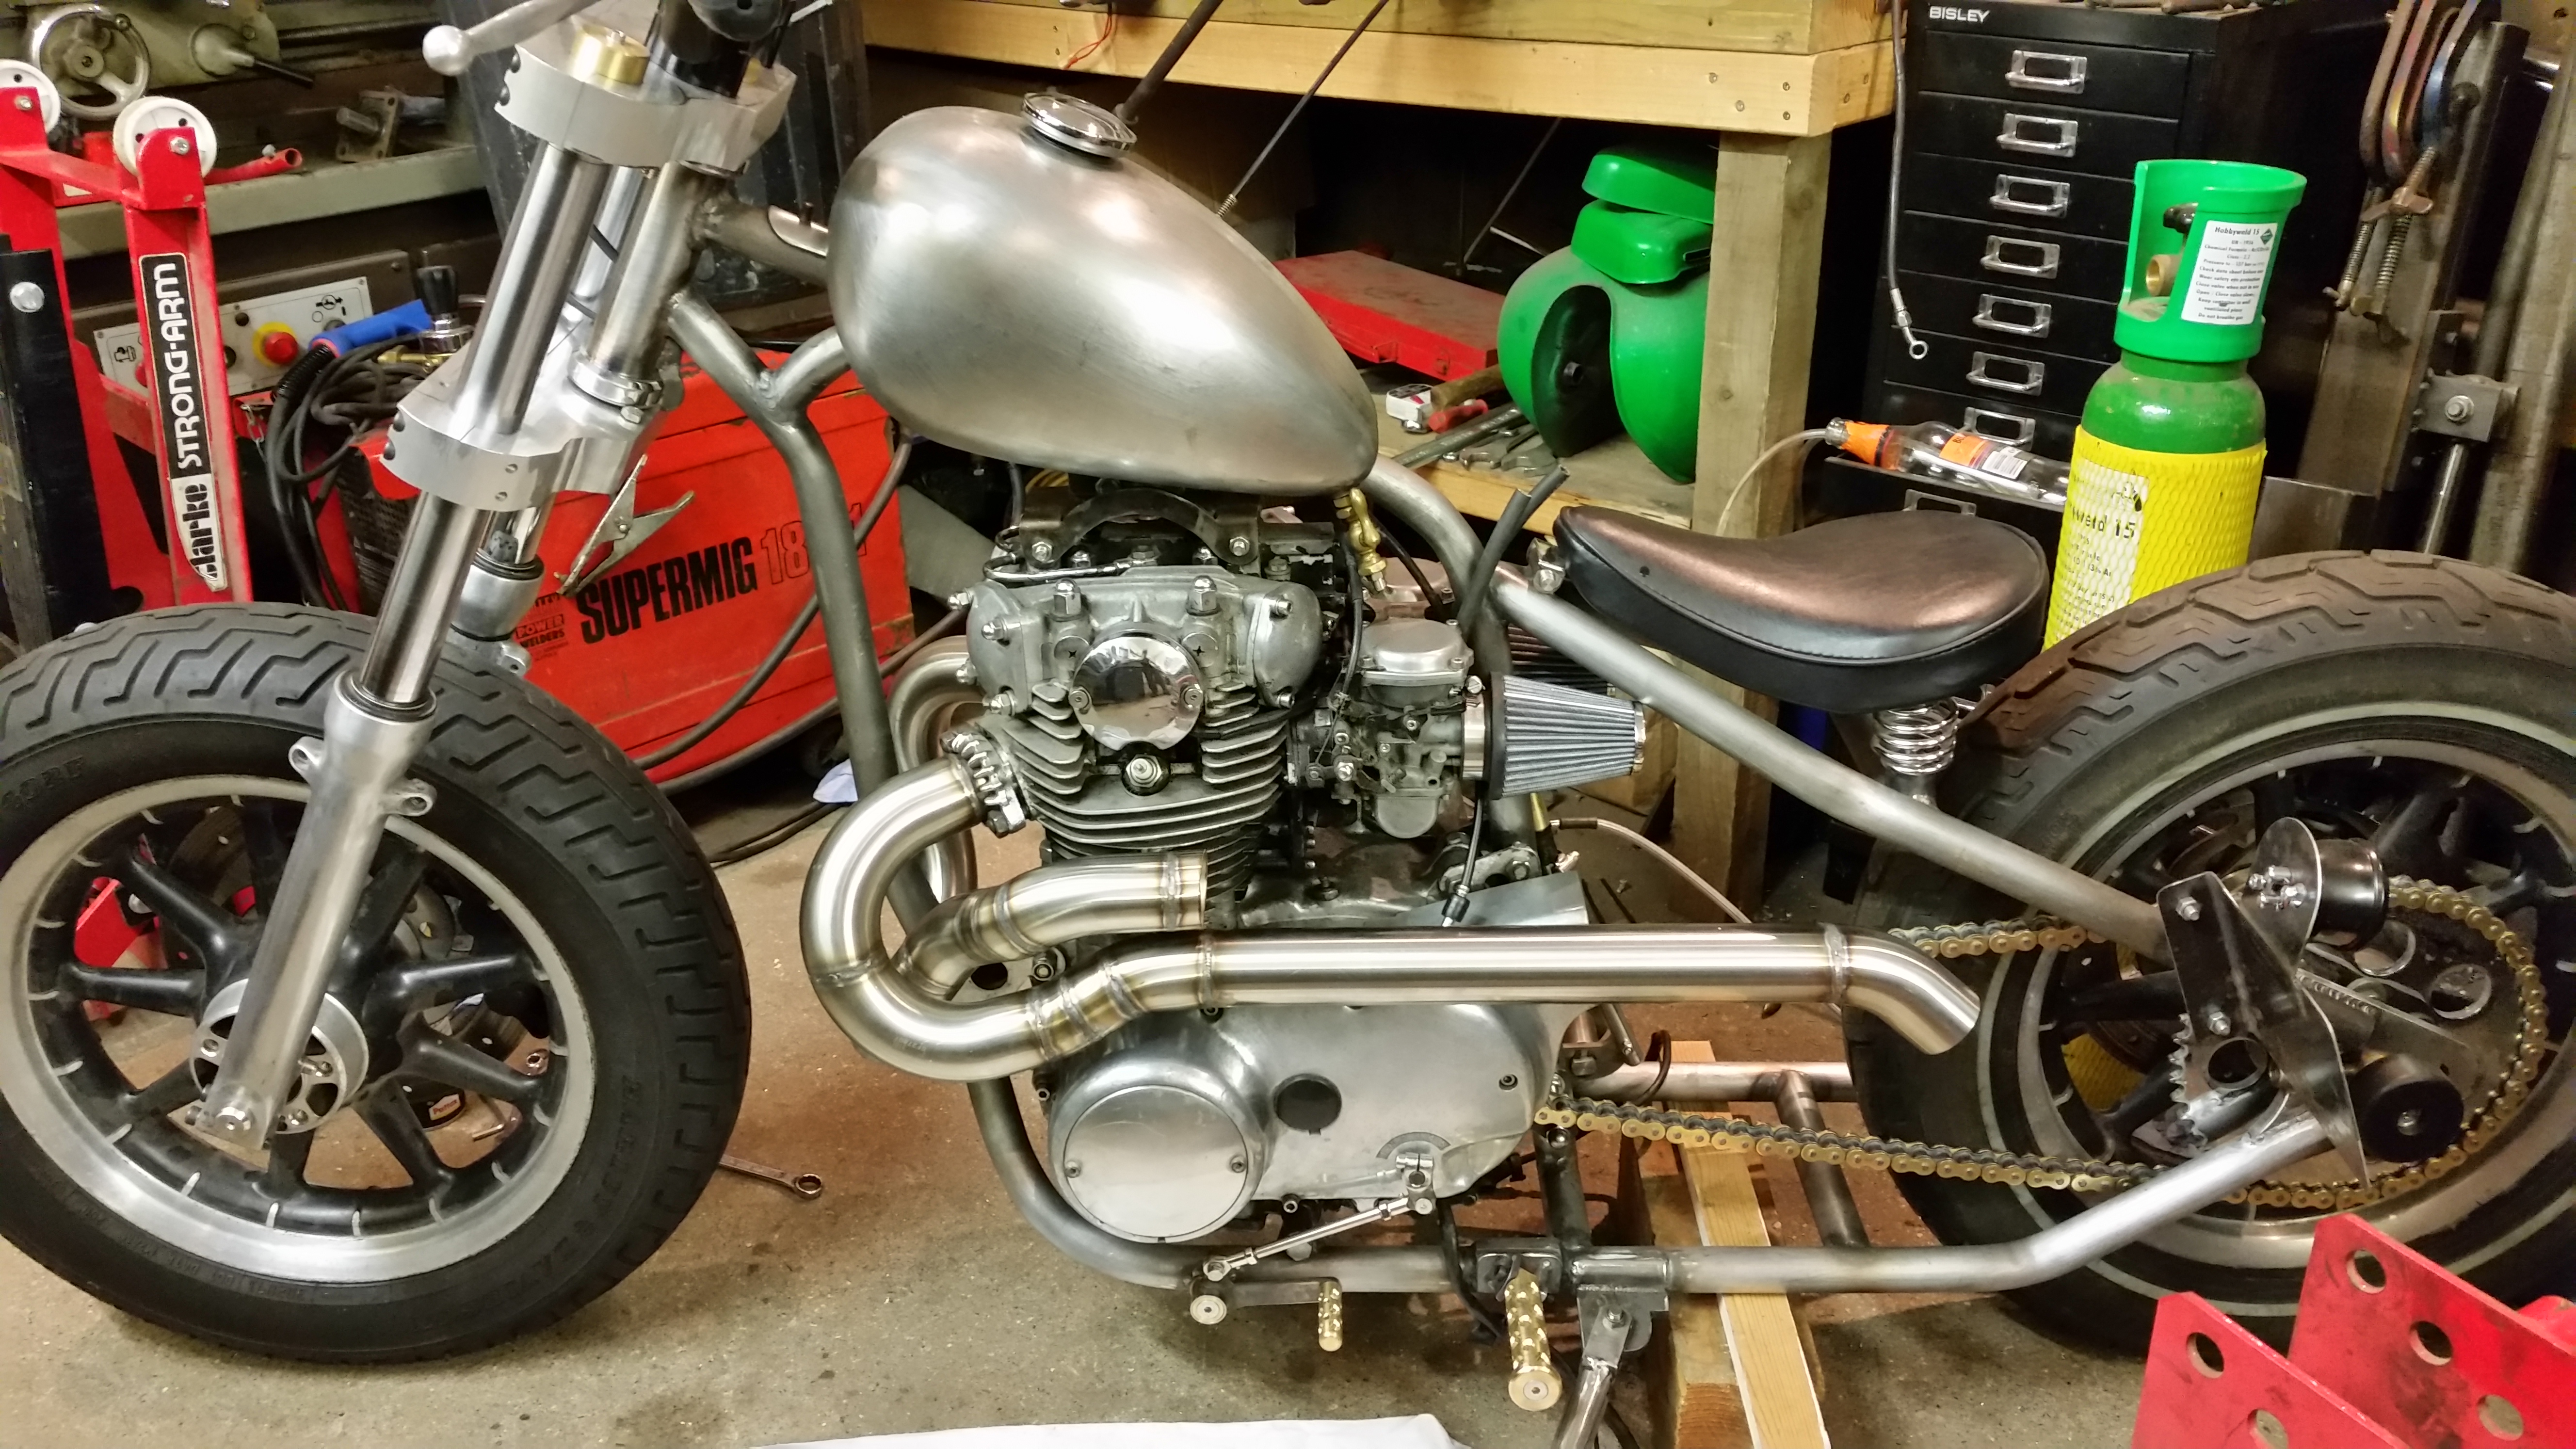
To finish I repeated the process and made another muffler and added a stainless mount just under the seat to tie both tubes in tight.
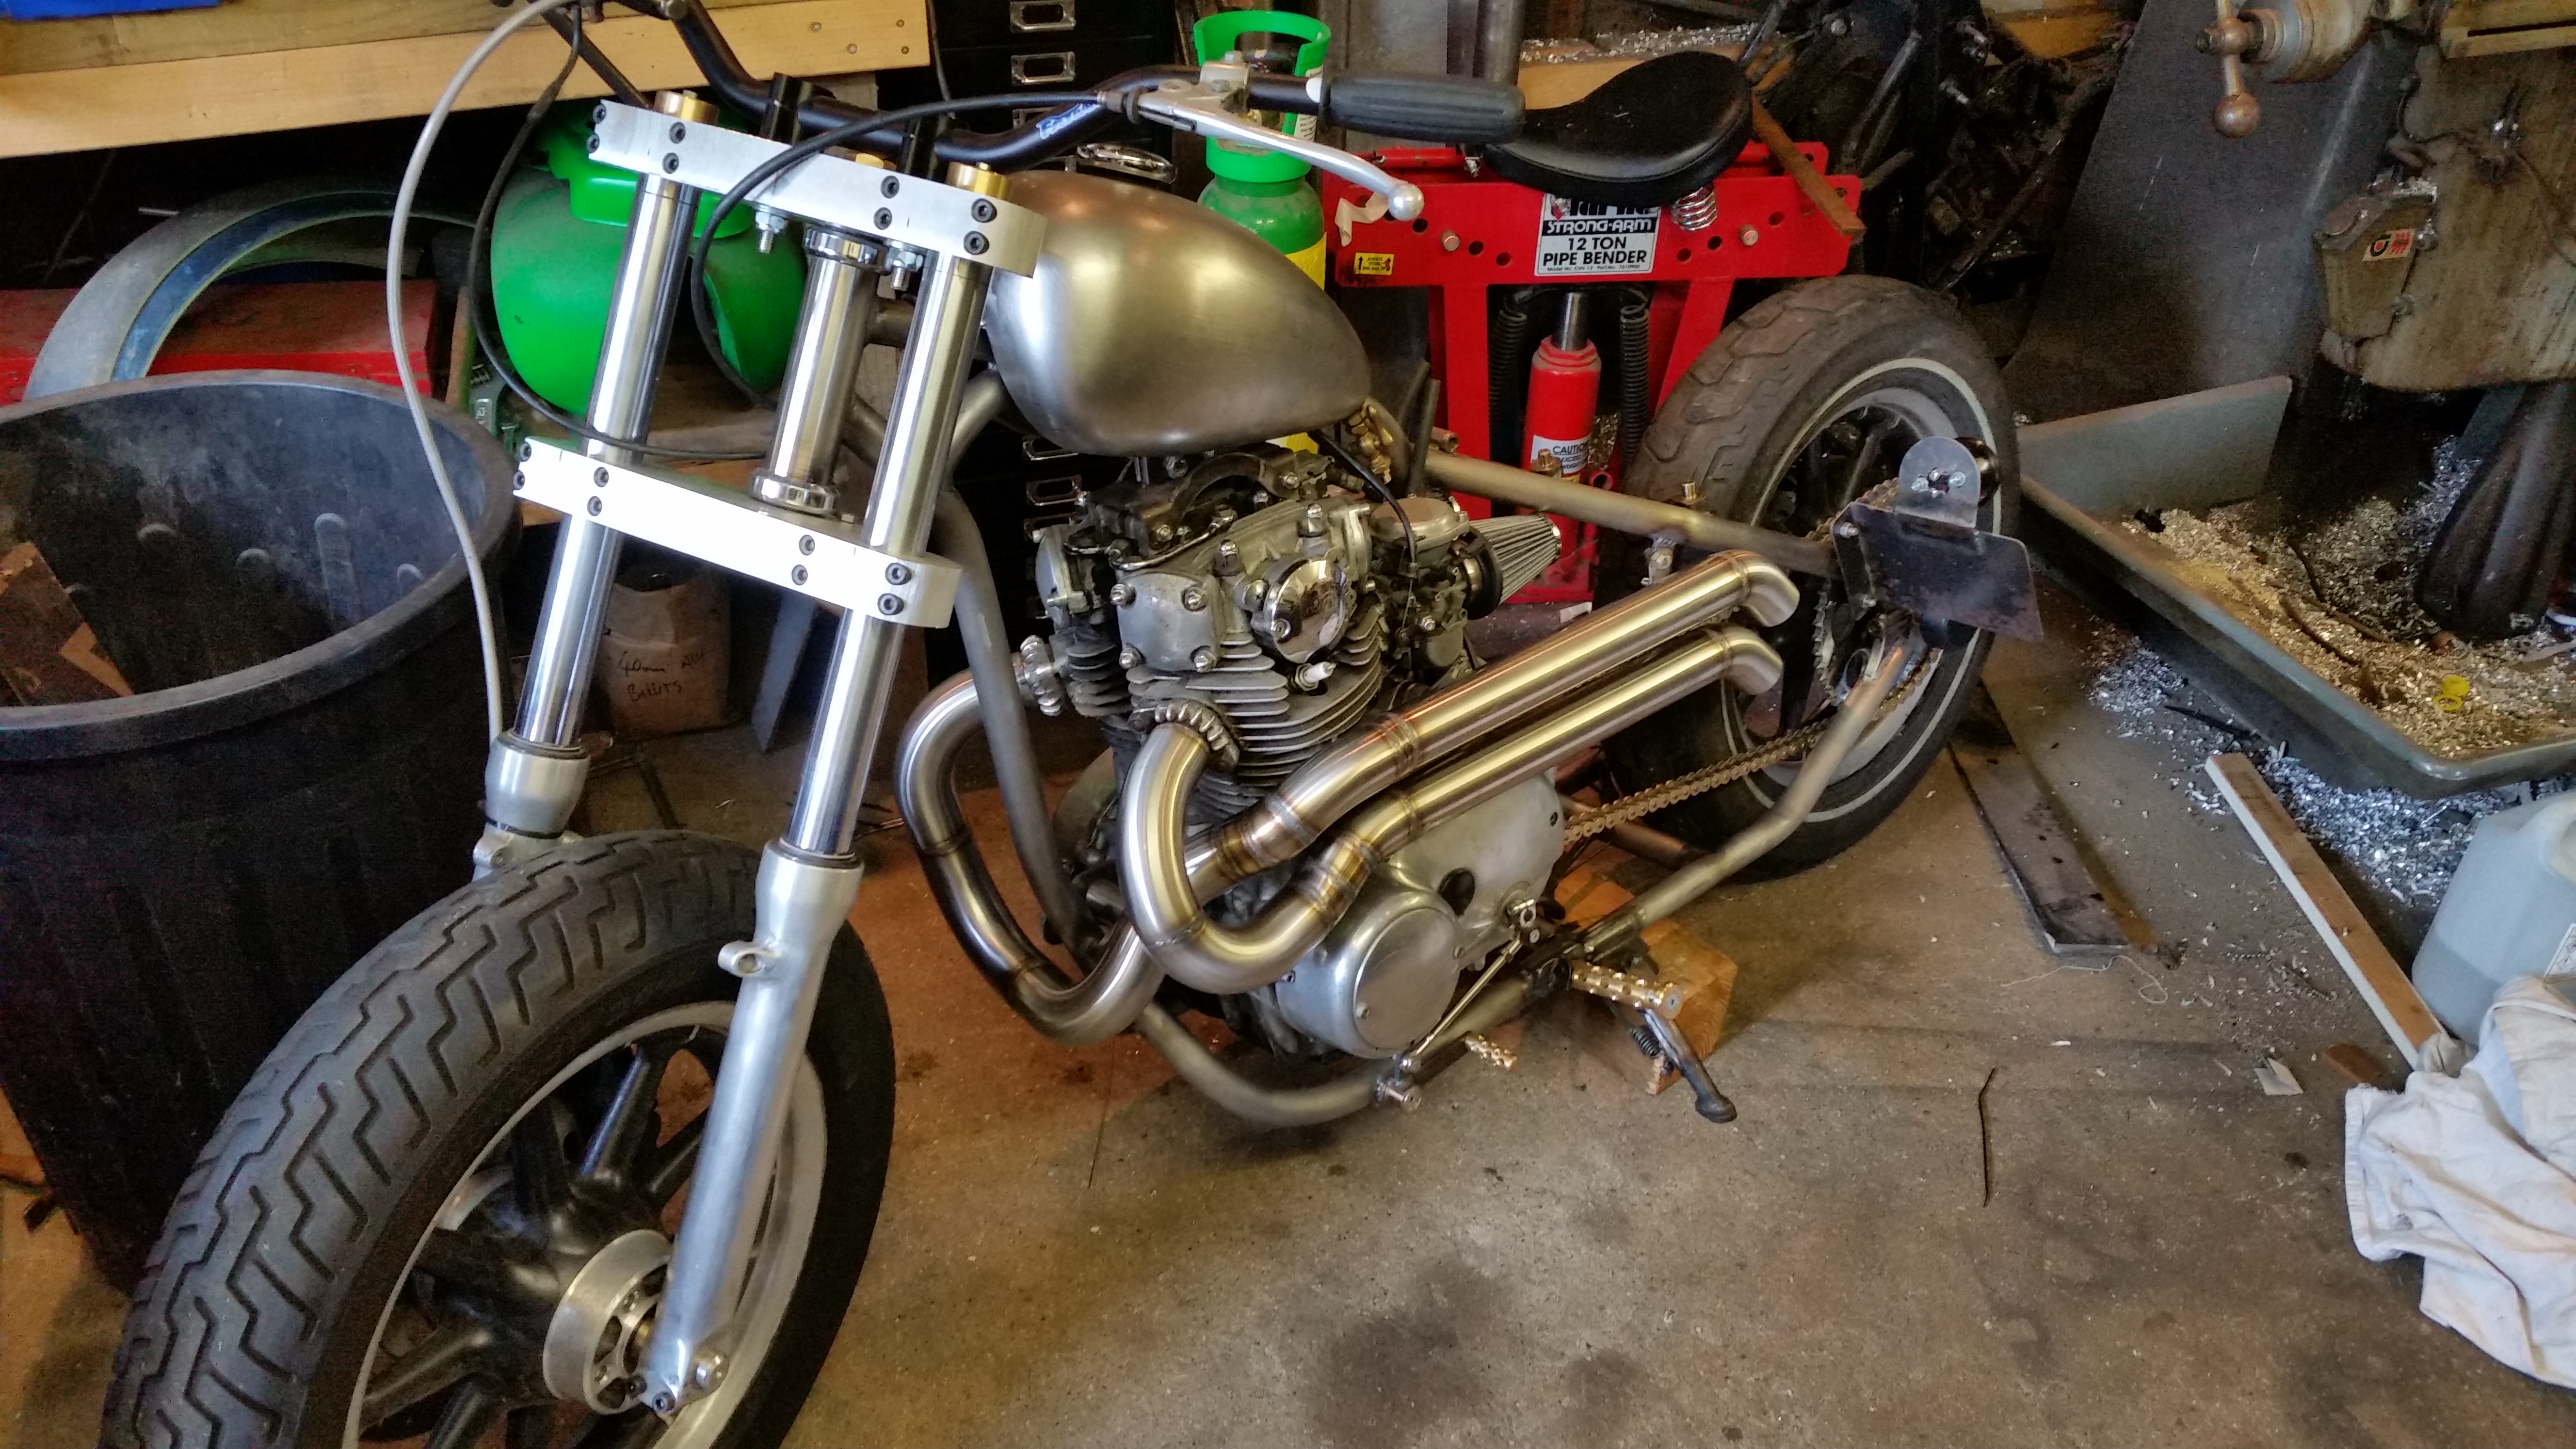
Pretty happy with the end result, certainly couldn’t have done this without the help of Wolfy, top chap, very helpfull and patient with all my silly questions.
If you want a custom system making I’d suggest rattling wolfy’s cage, he can make pretty much anything and his prices are very reasonable, it looks easy but it really isn’t.
We have had a major incident, a set back that we may never fully recover from, I can’t put it in to words but it feels like I have lost a friend, a tasty hop based friend who was always there for me in my times of need or boredom, always ready to help drone out the ramblings of an angry wife or snotty faced children with nothing sensible to talk about. Mr Abbot was minding his own business when tragedy struck, sitting quietly on the edge of the bench and without warning was punted by a rouge angle grinder and fell to his death.
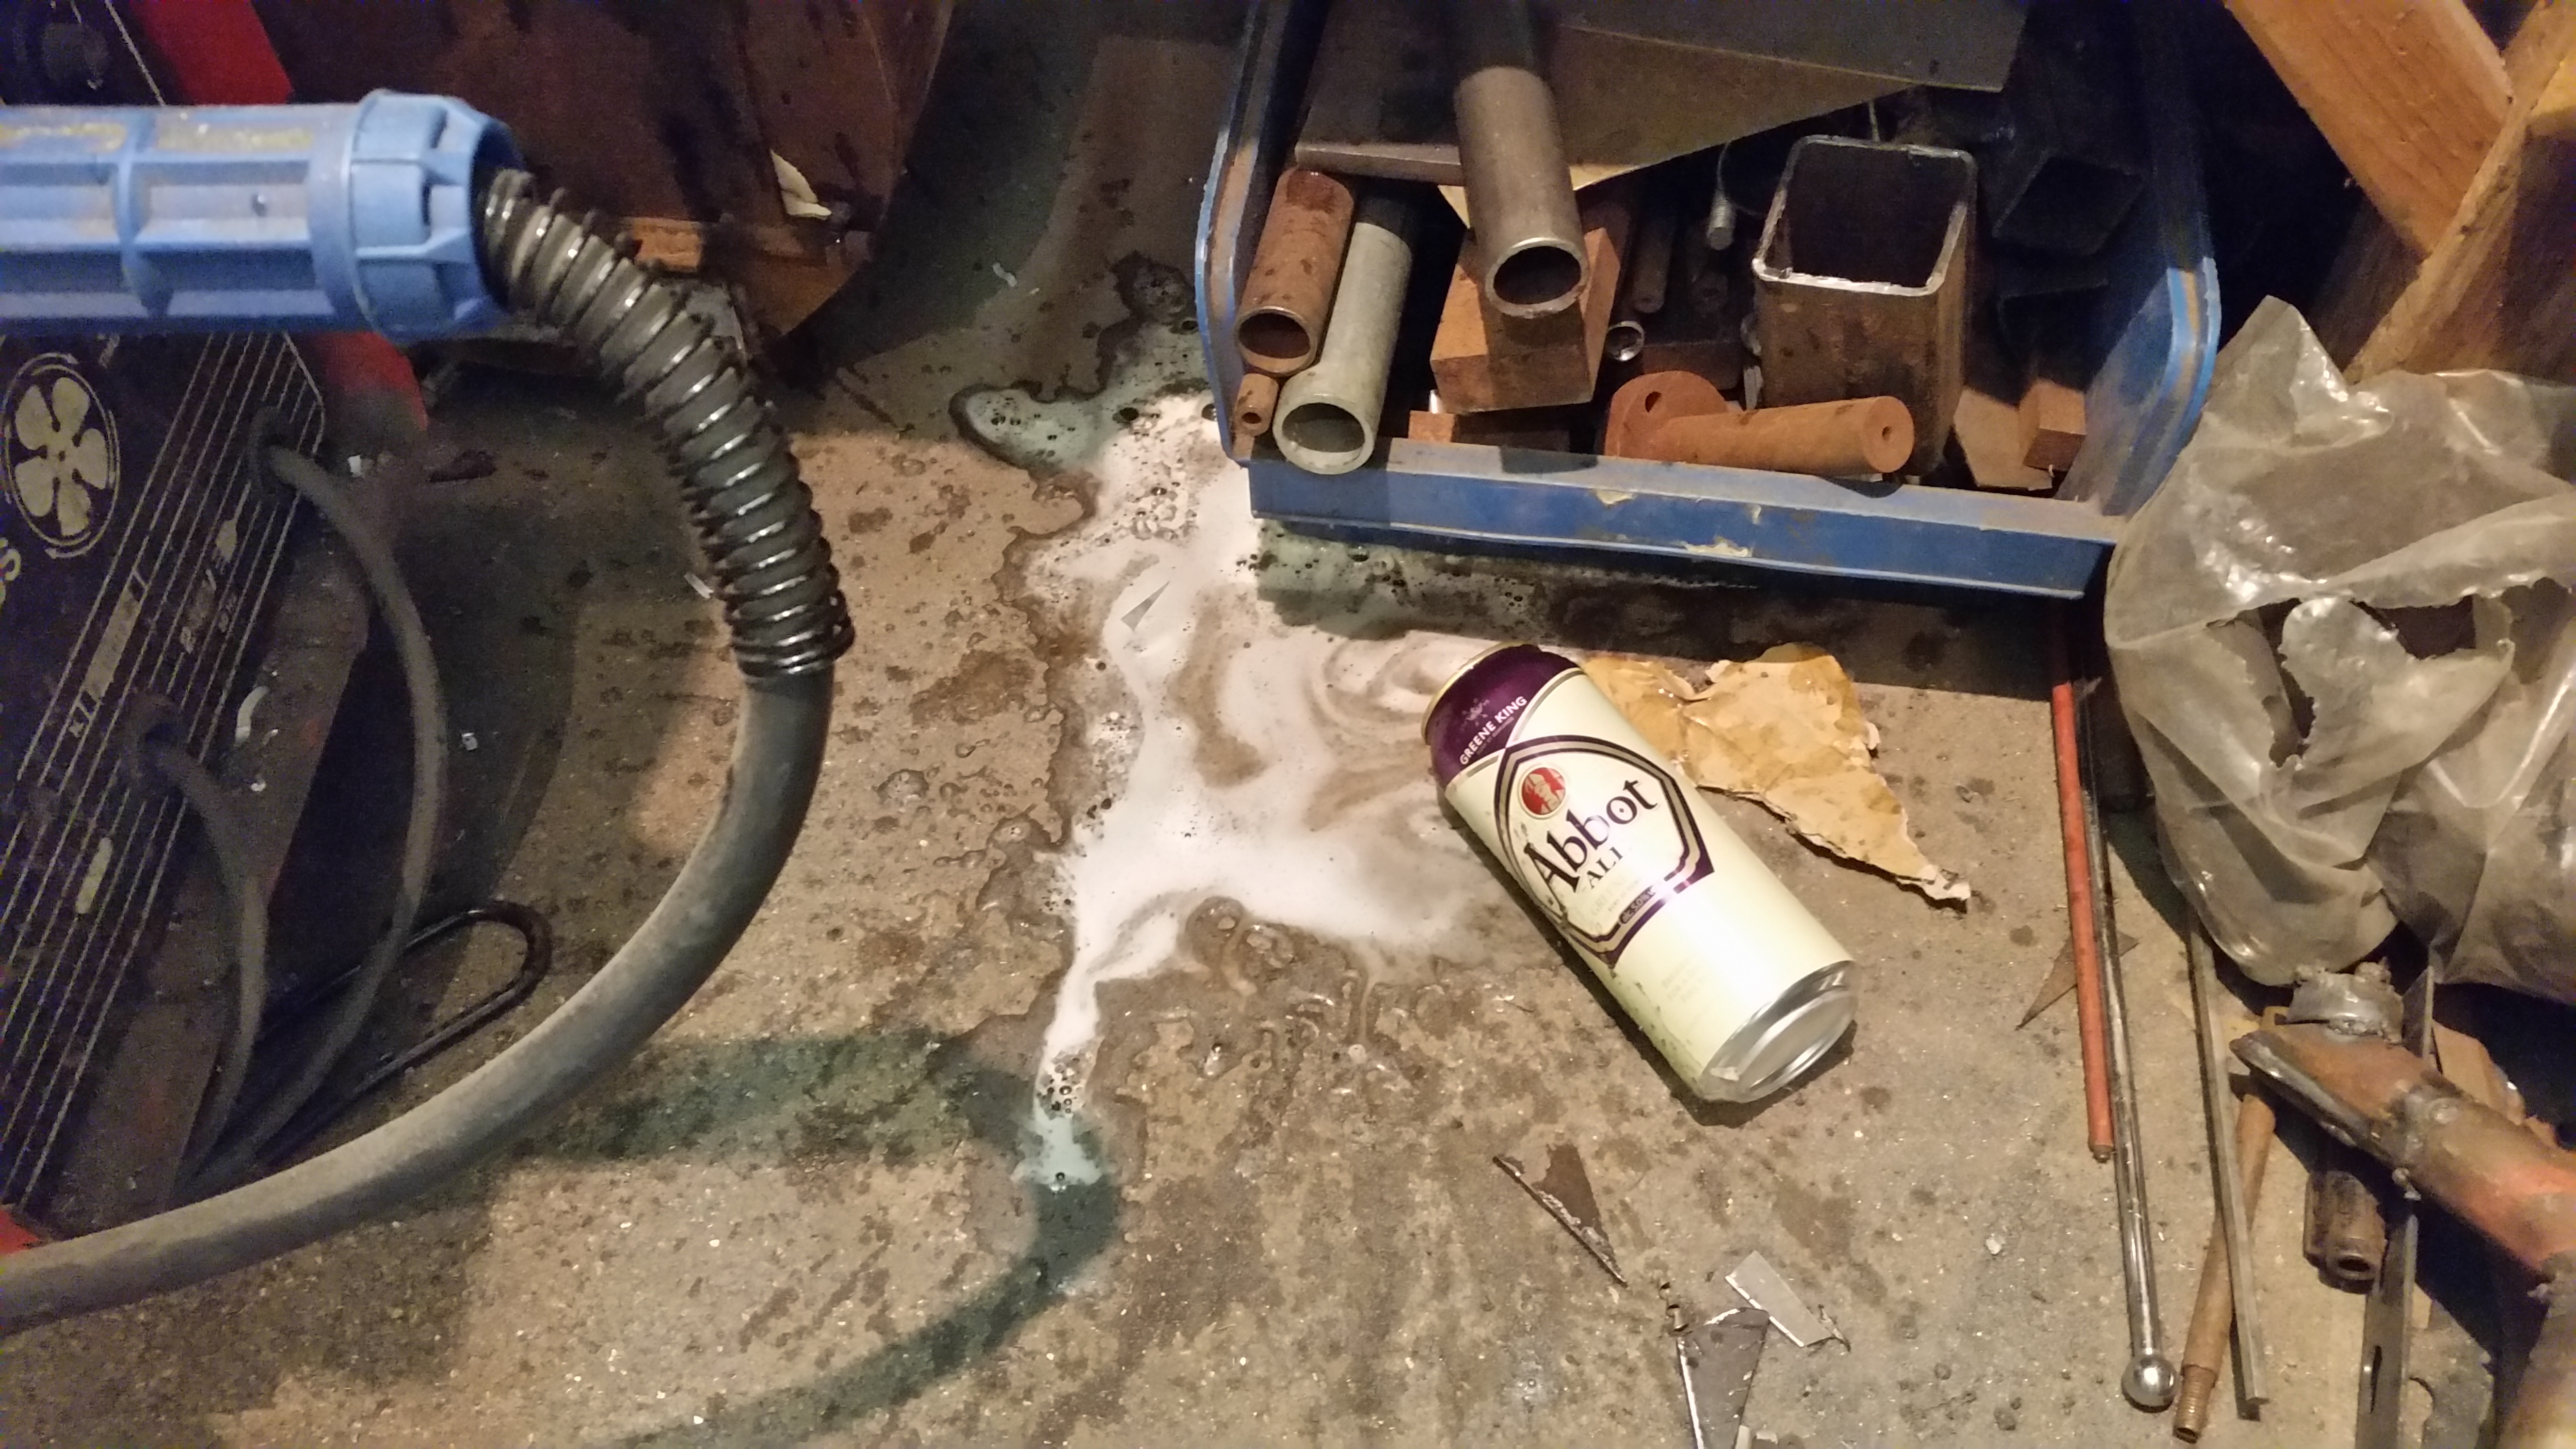
I could have got to him sooner if I had noticed or had faster reflexes but sadly it was too late for me to attempt a rescue, the damage was done.
I was in a state of shock but Fruitshoot was in pieces, he may never recover from this I think the mental damage is just too deep.
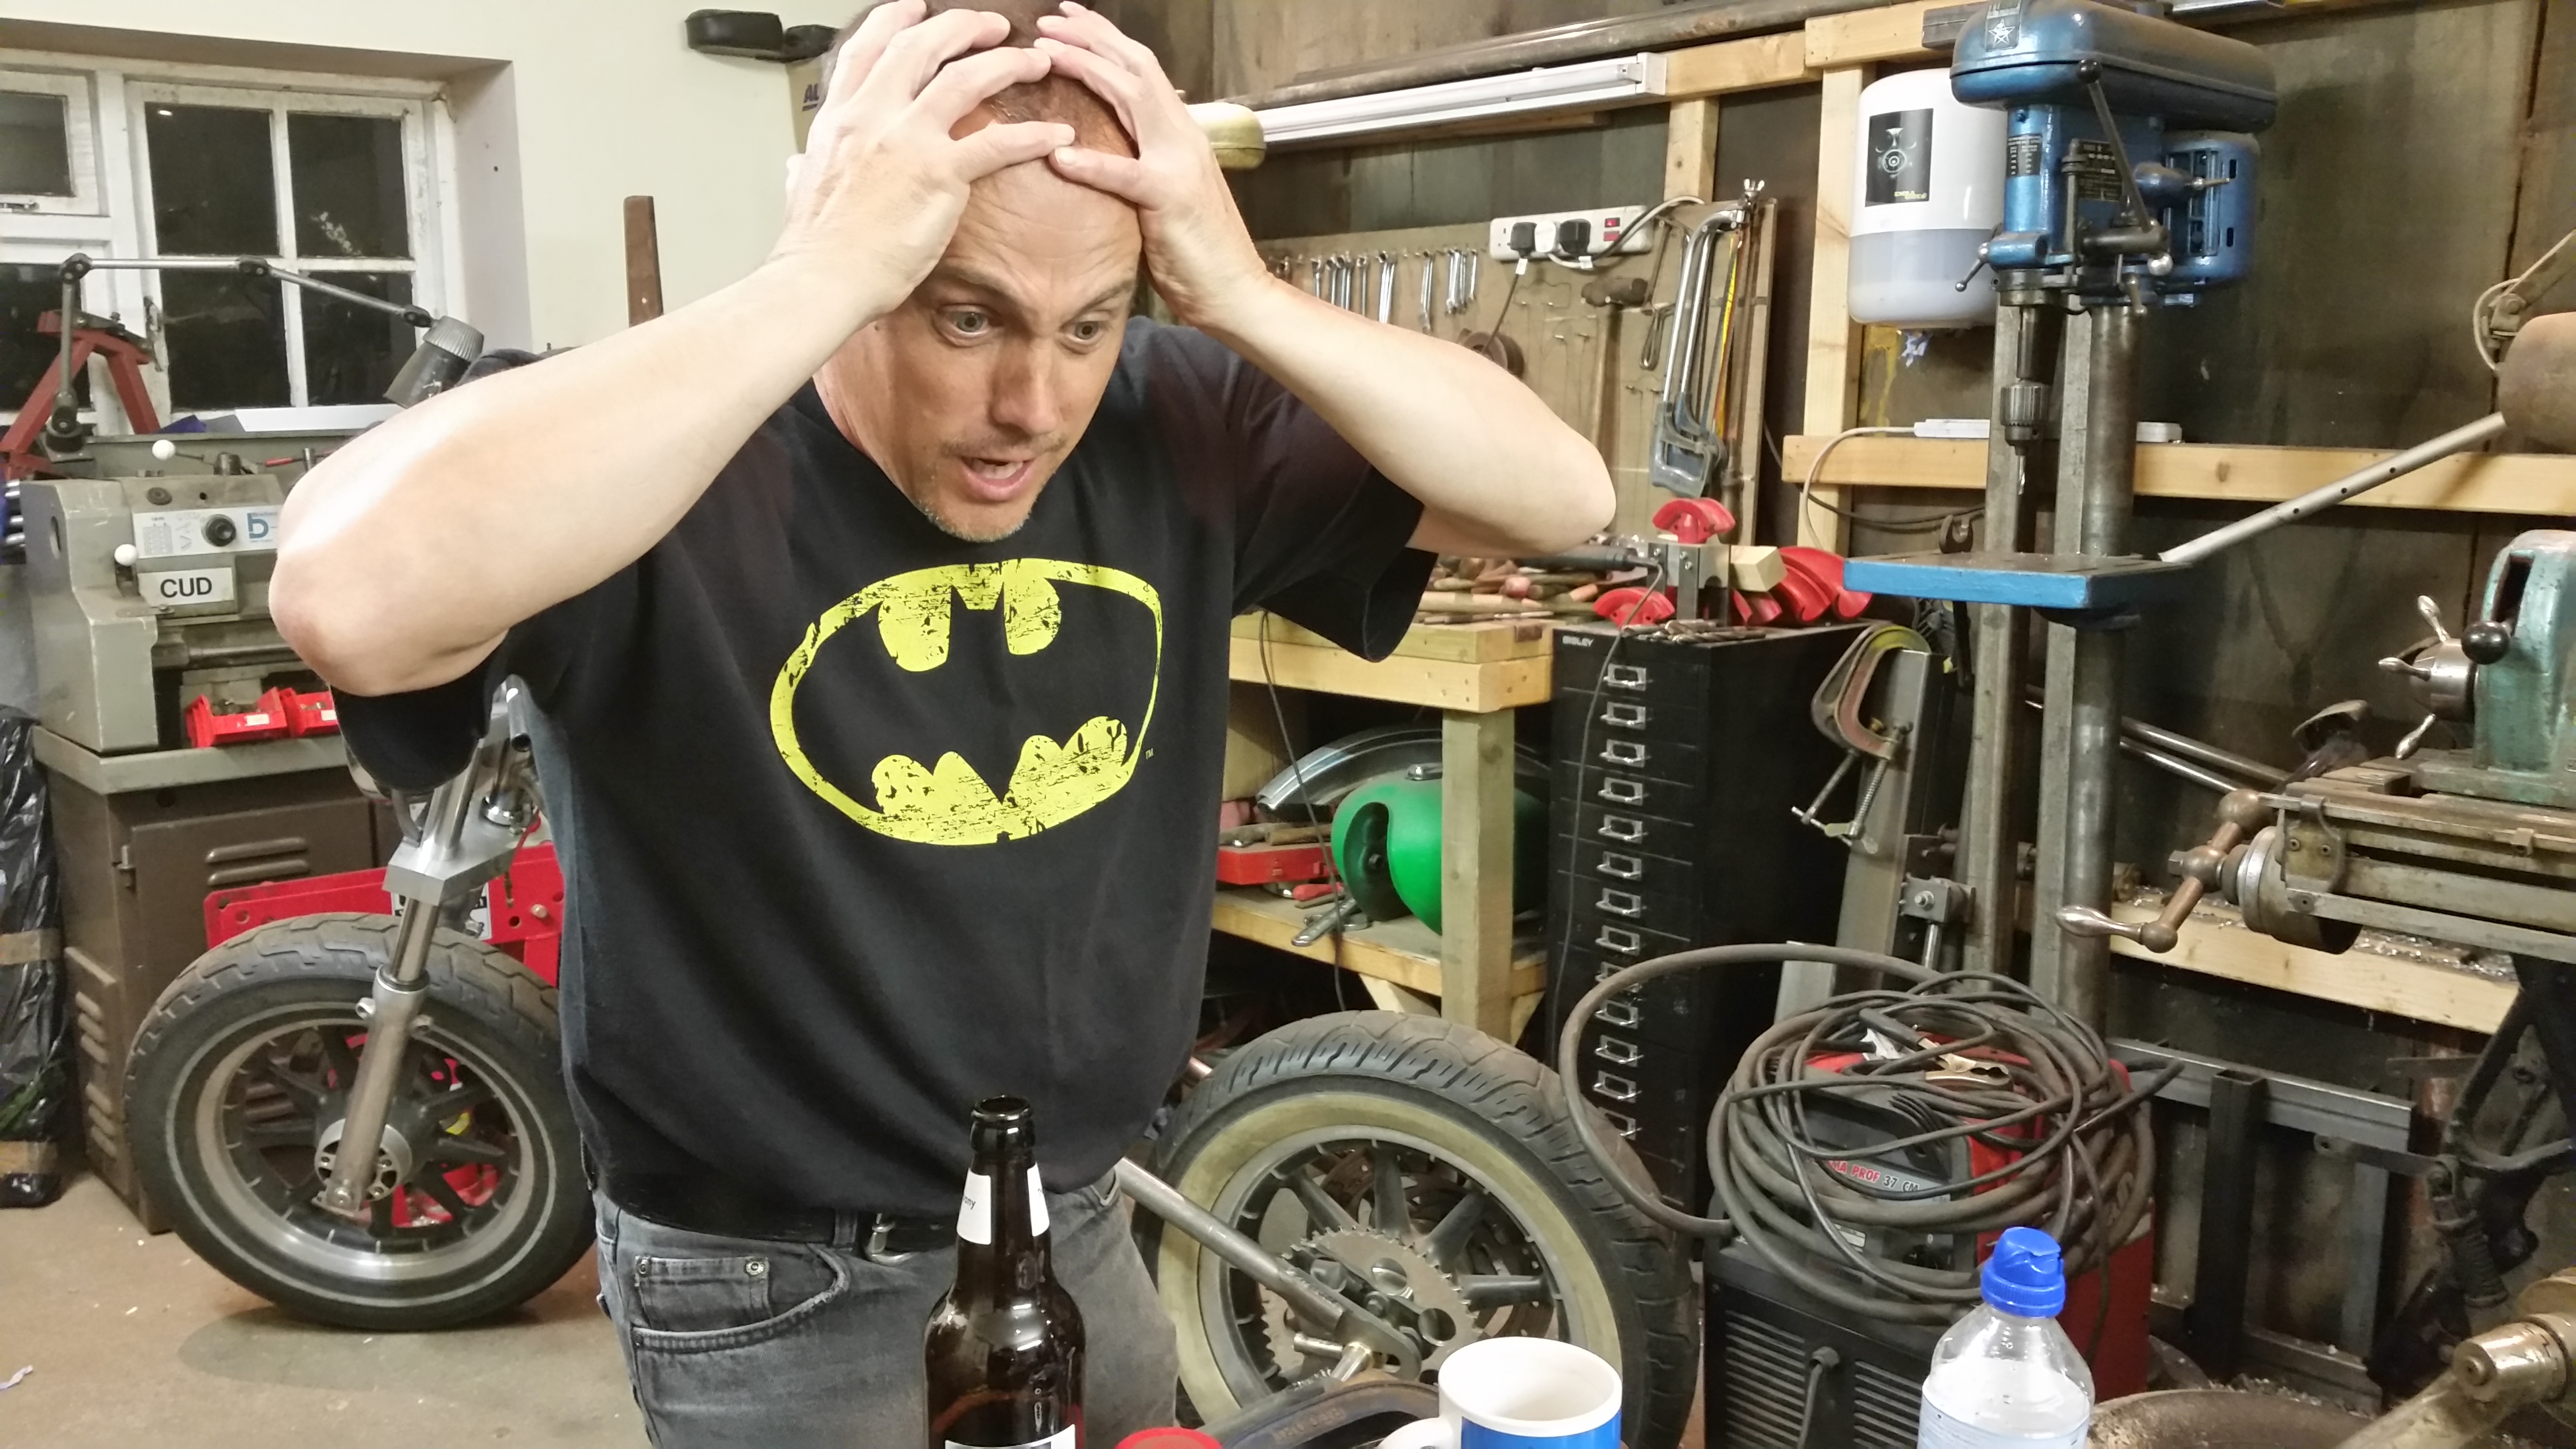
Now all fruitshoot can manage is backwards and forwards motion in his ‘rockingchair’ and making references about ‘Monty Python’ films that dont make any sense, with the correct amount of medication and support from friends and family we can only hope that one day he may be able to be accepted by society and claim his rightful place once again as ‘Village idiot’.
So there was very little jealousy amongst the scavengers after Mac’s win at the show this weekend, almost not worth mentioning…….grrrrr
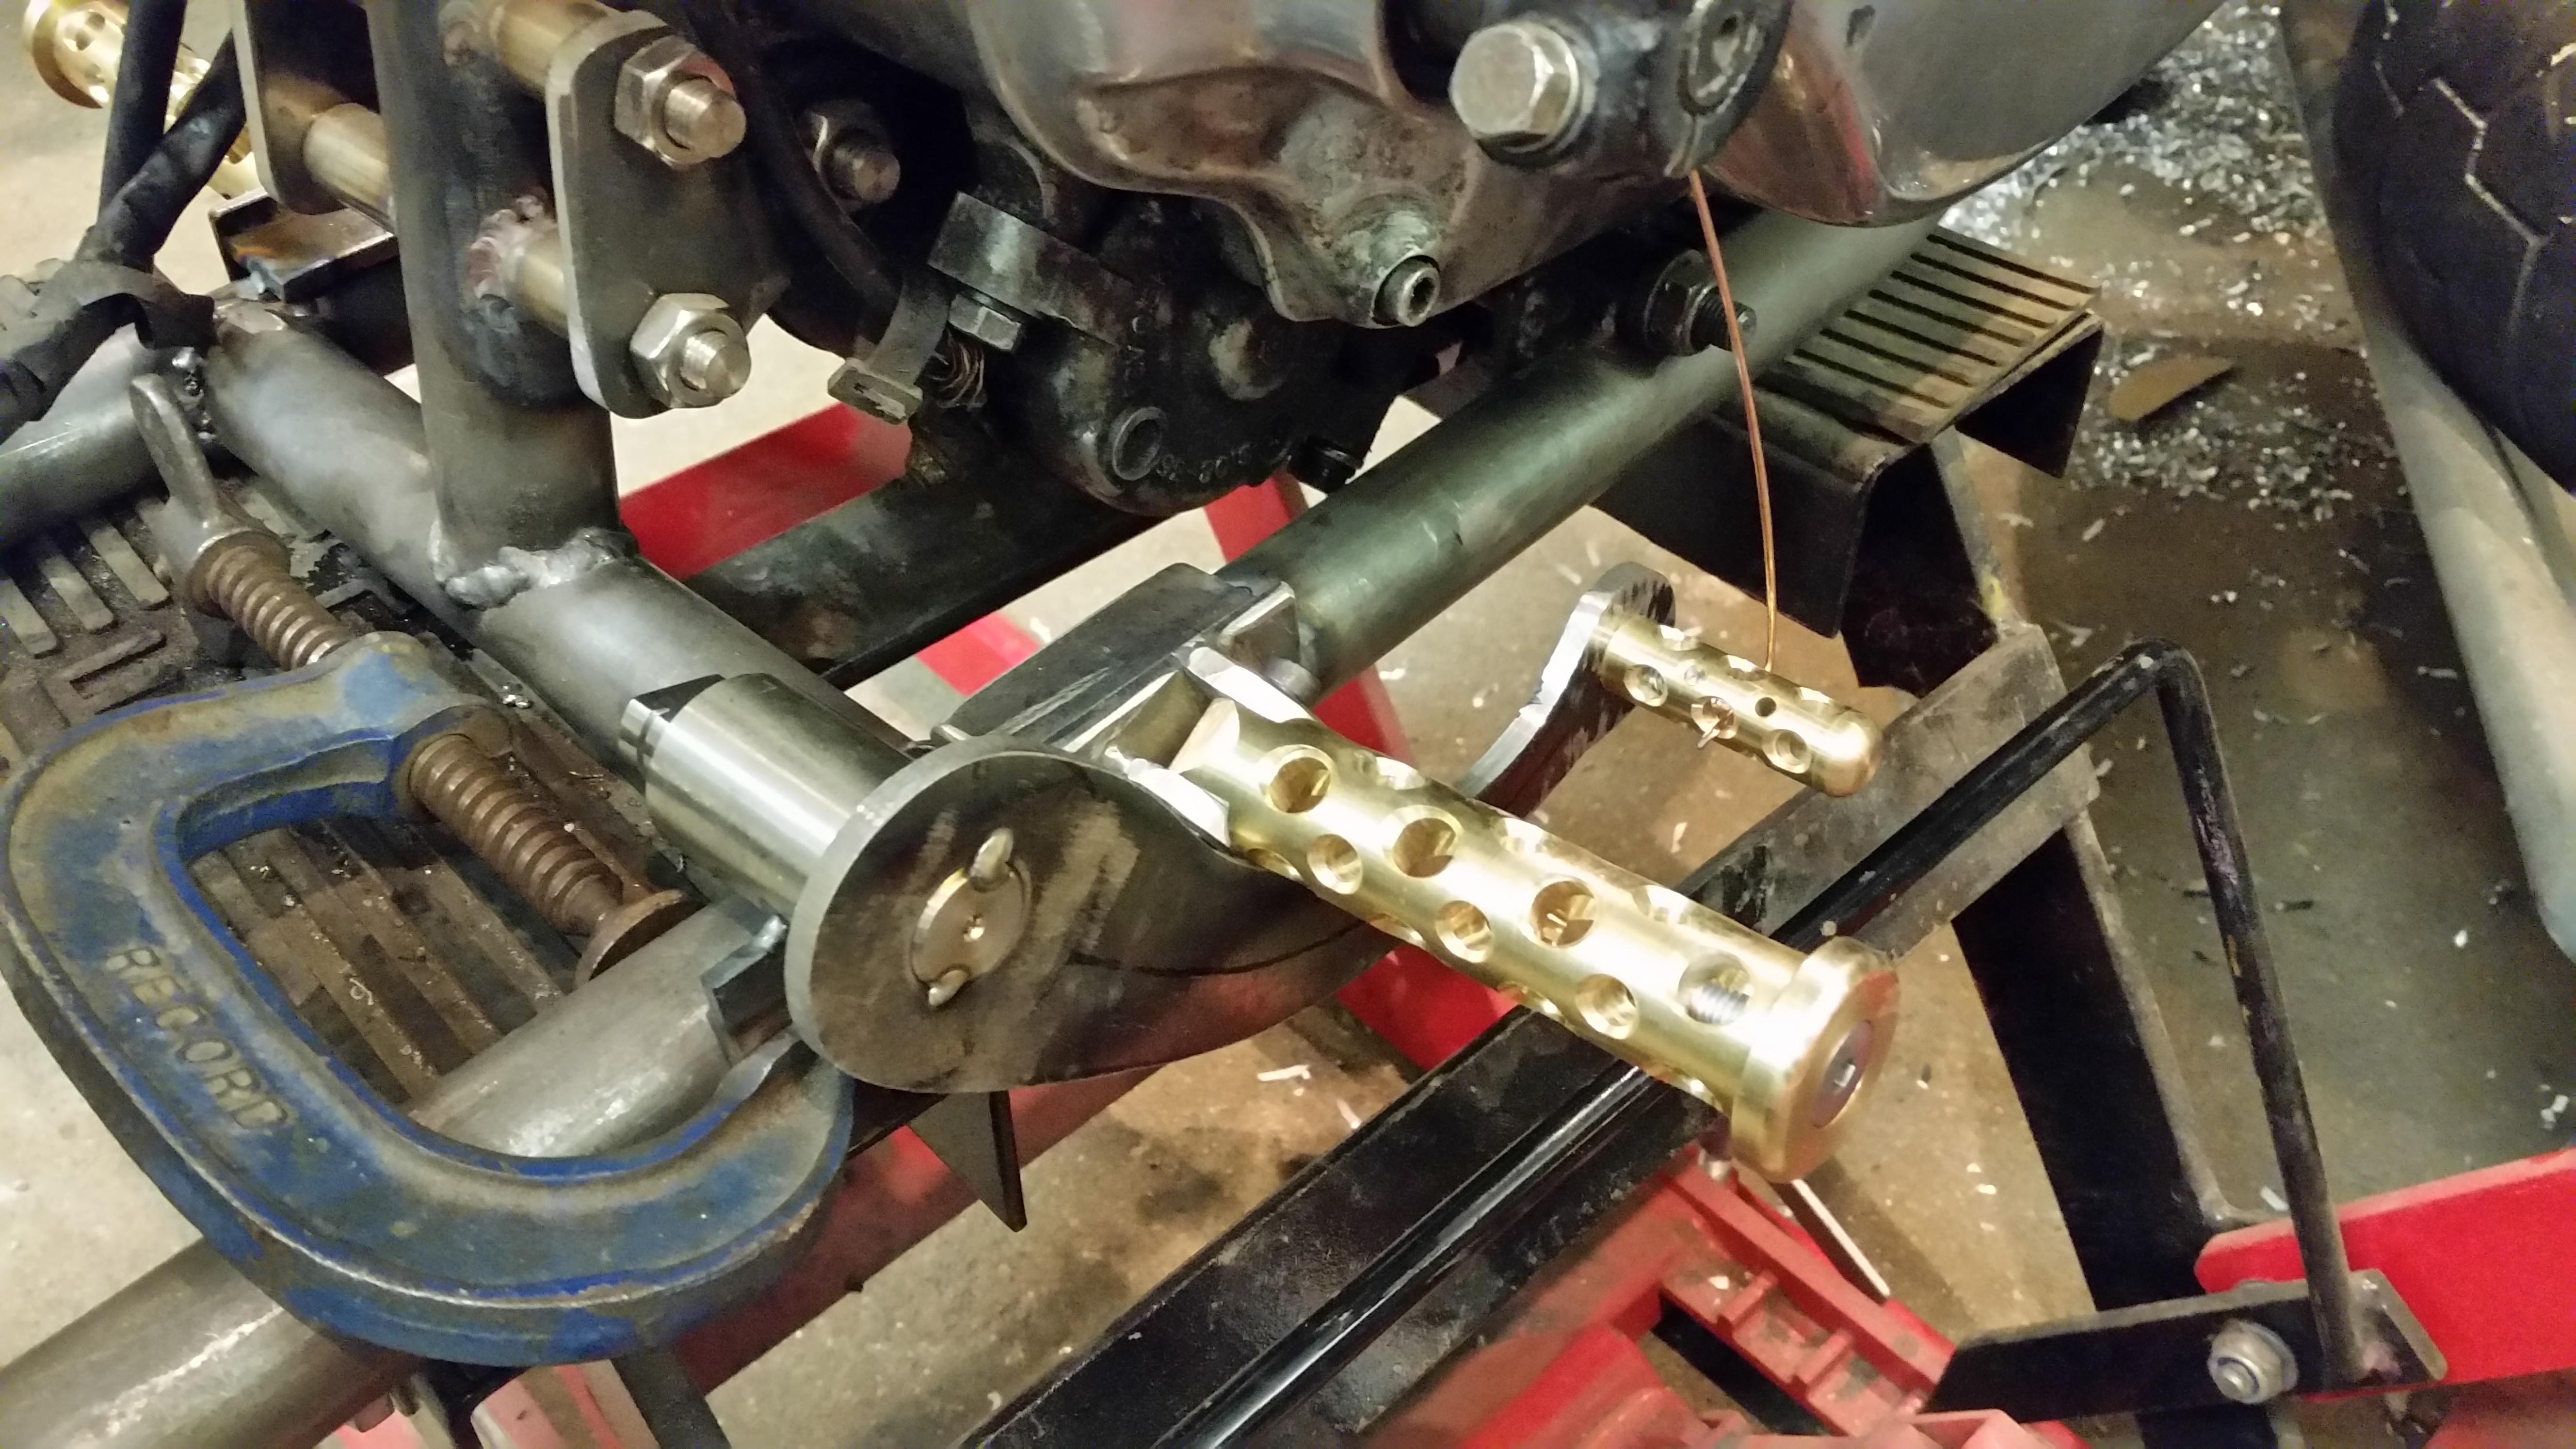
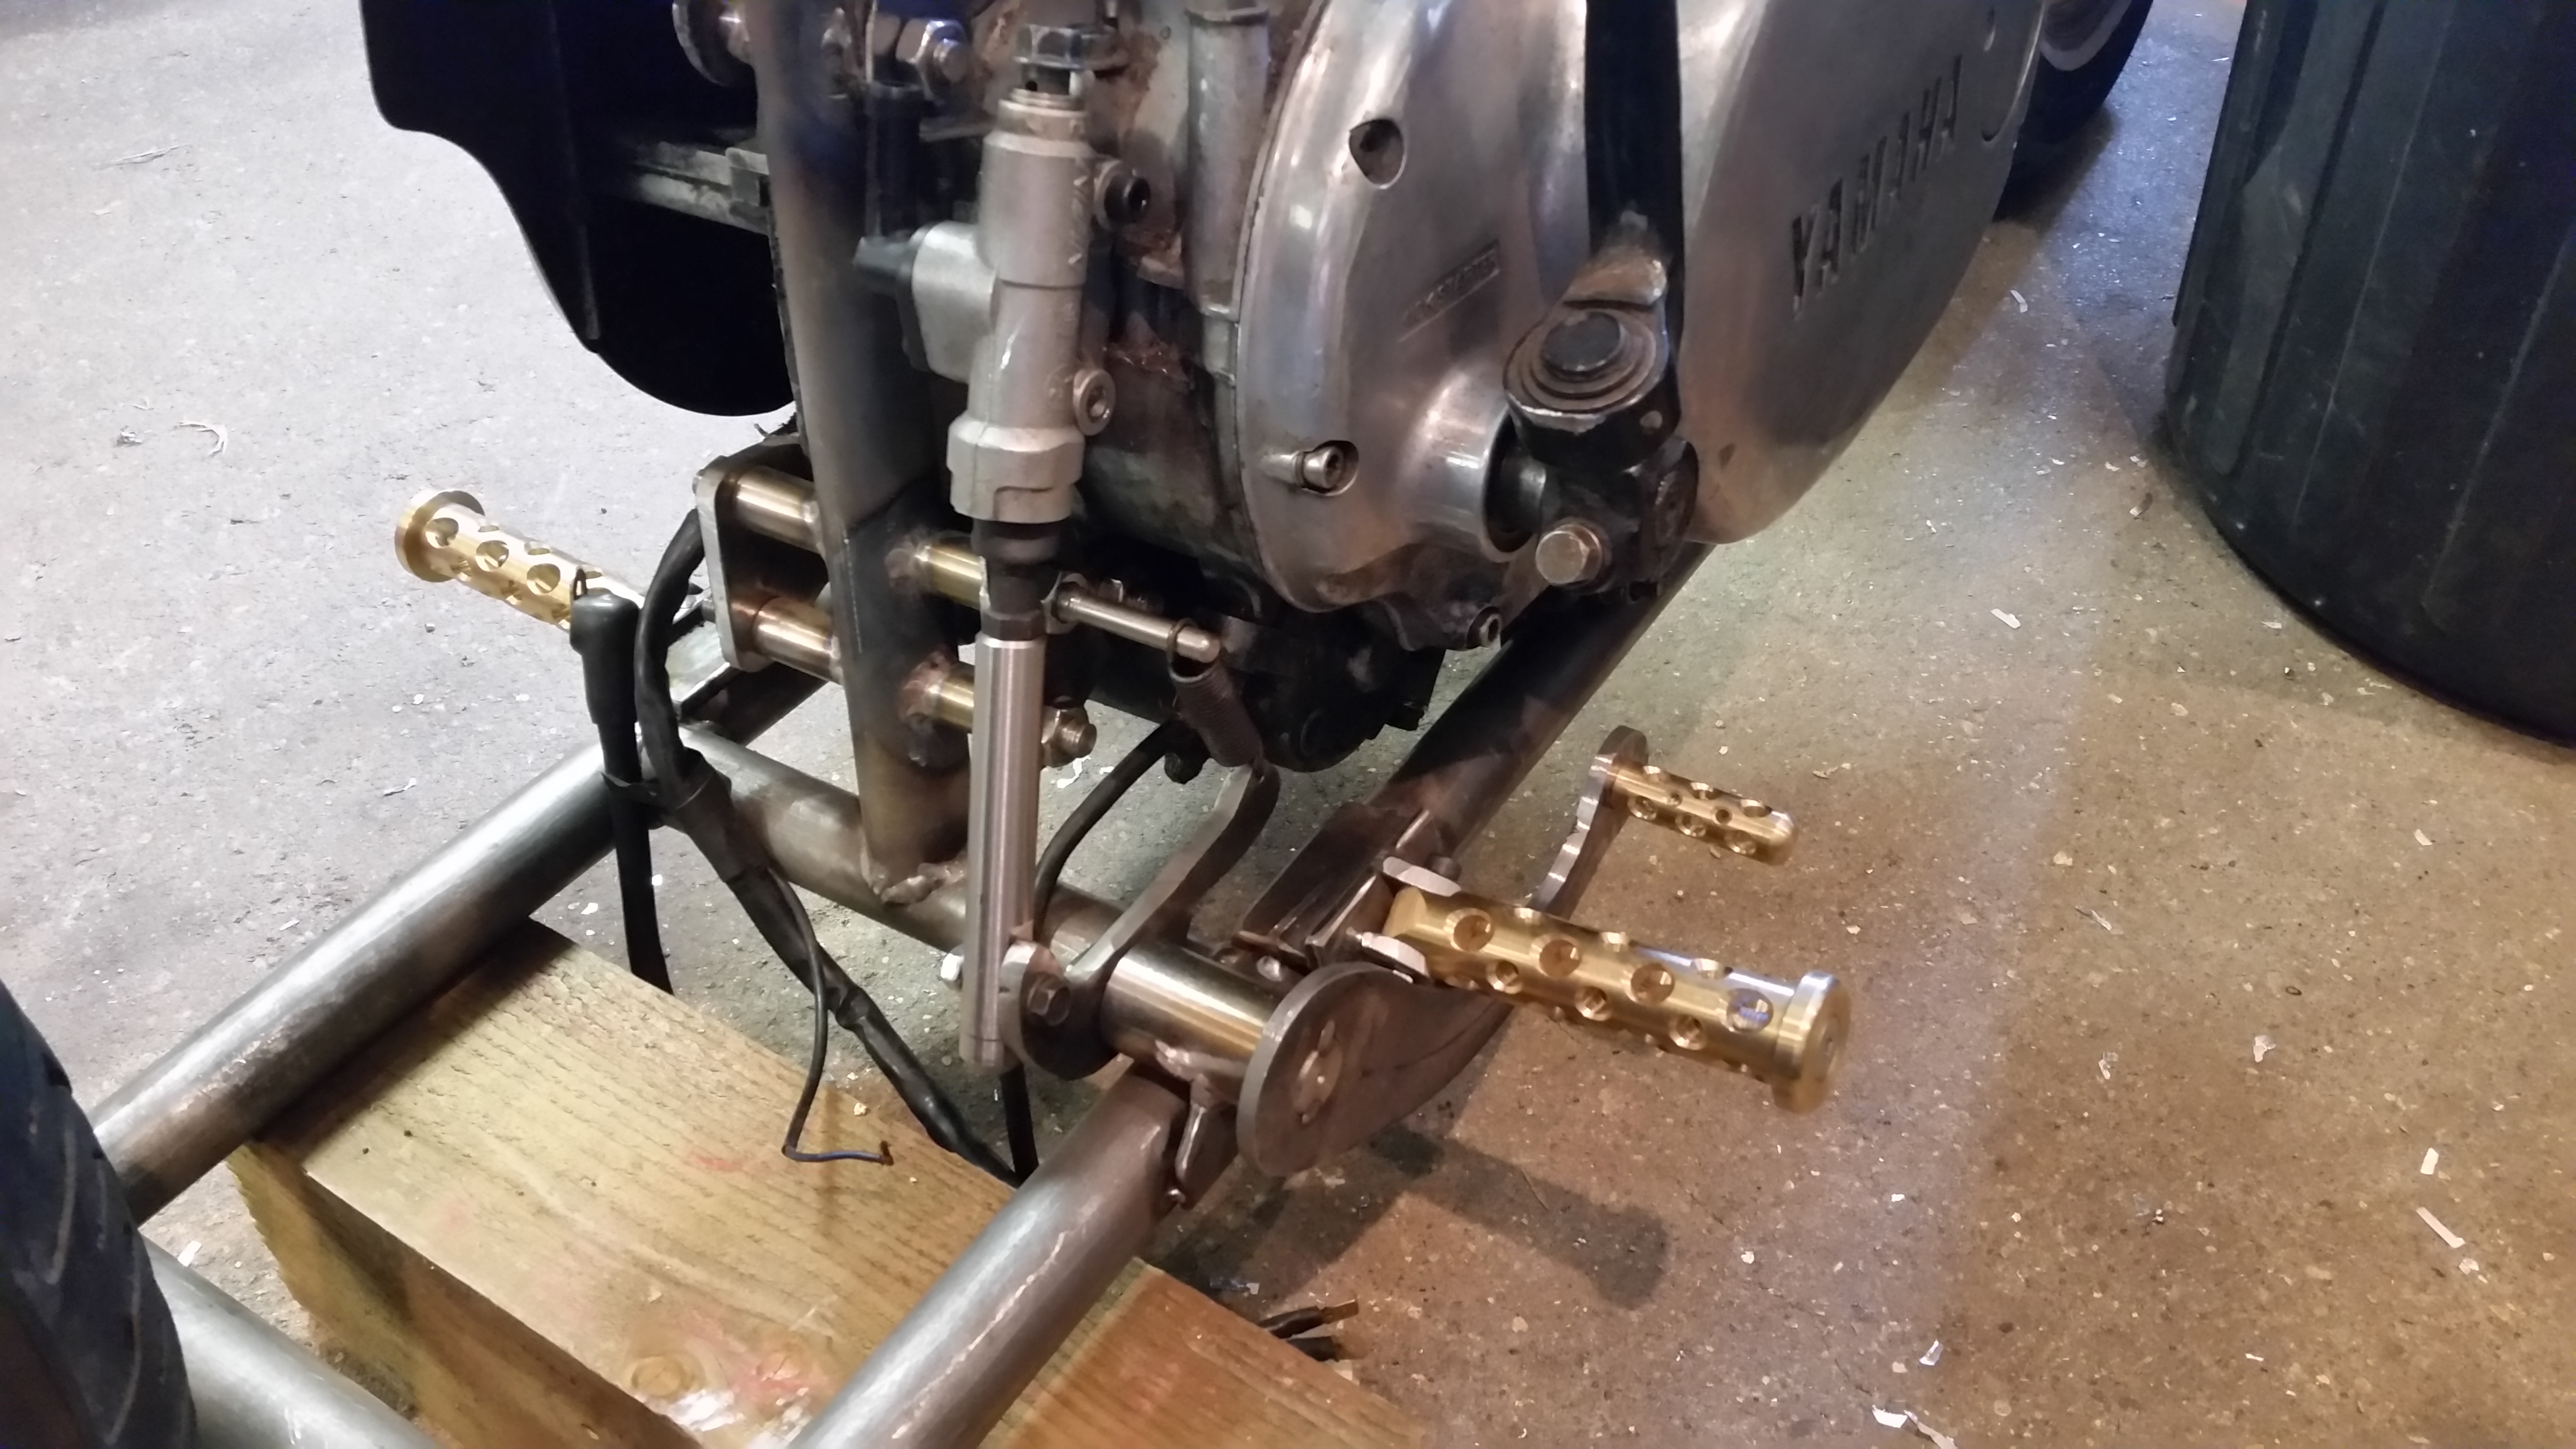
One way I thought I could ‘return fire’ was to try to out do Mac with even better foot pegs as I think the best judges probably admire decent foot pegs, well lets hope so.
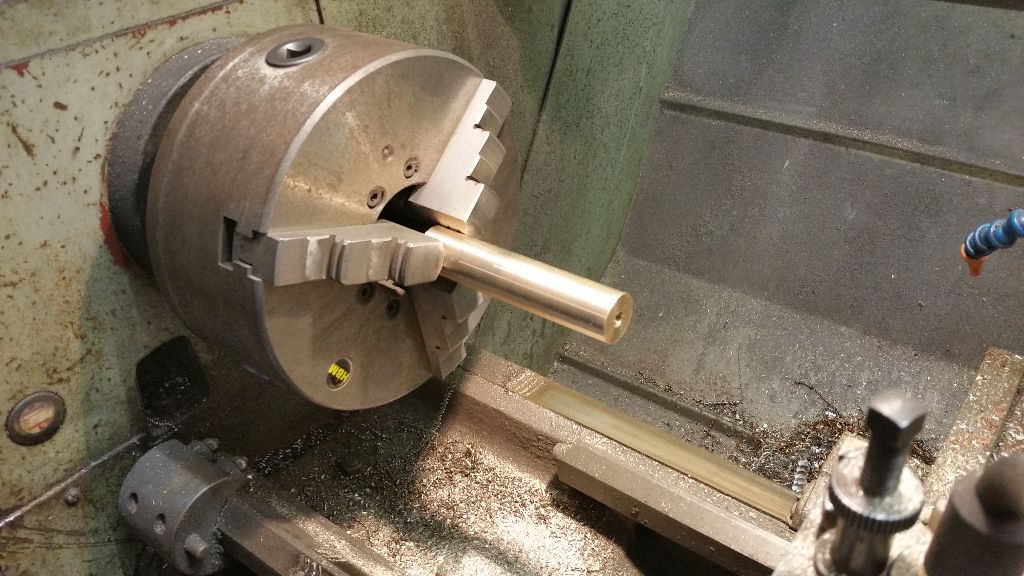
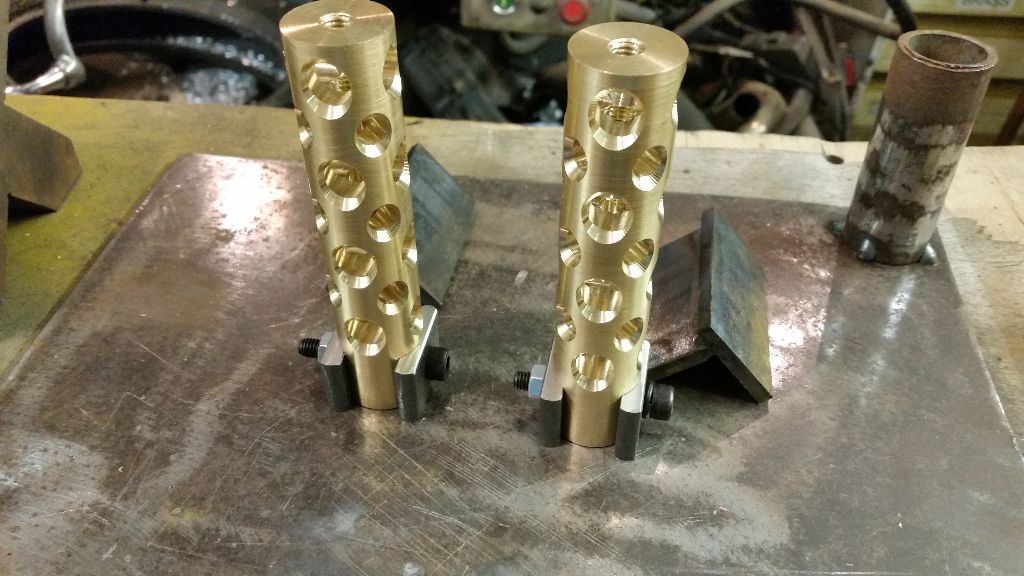
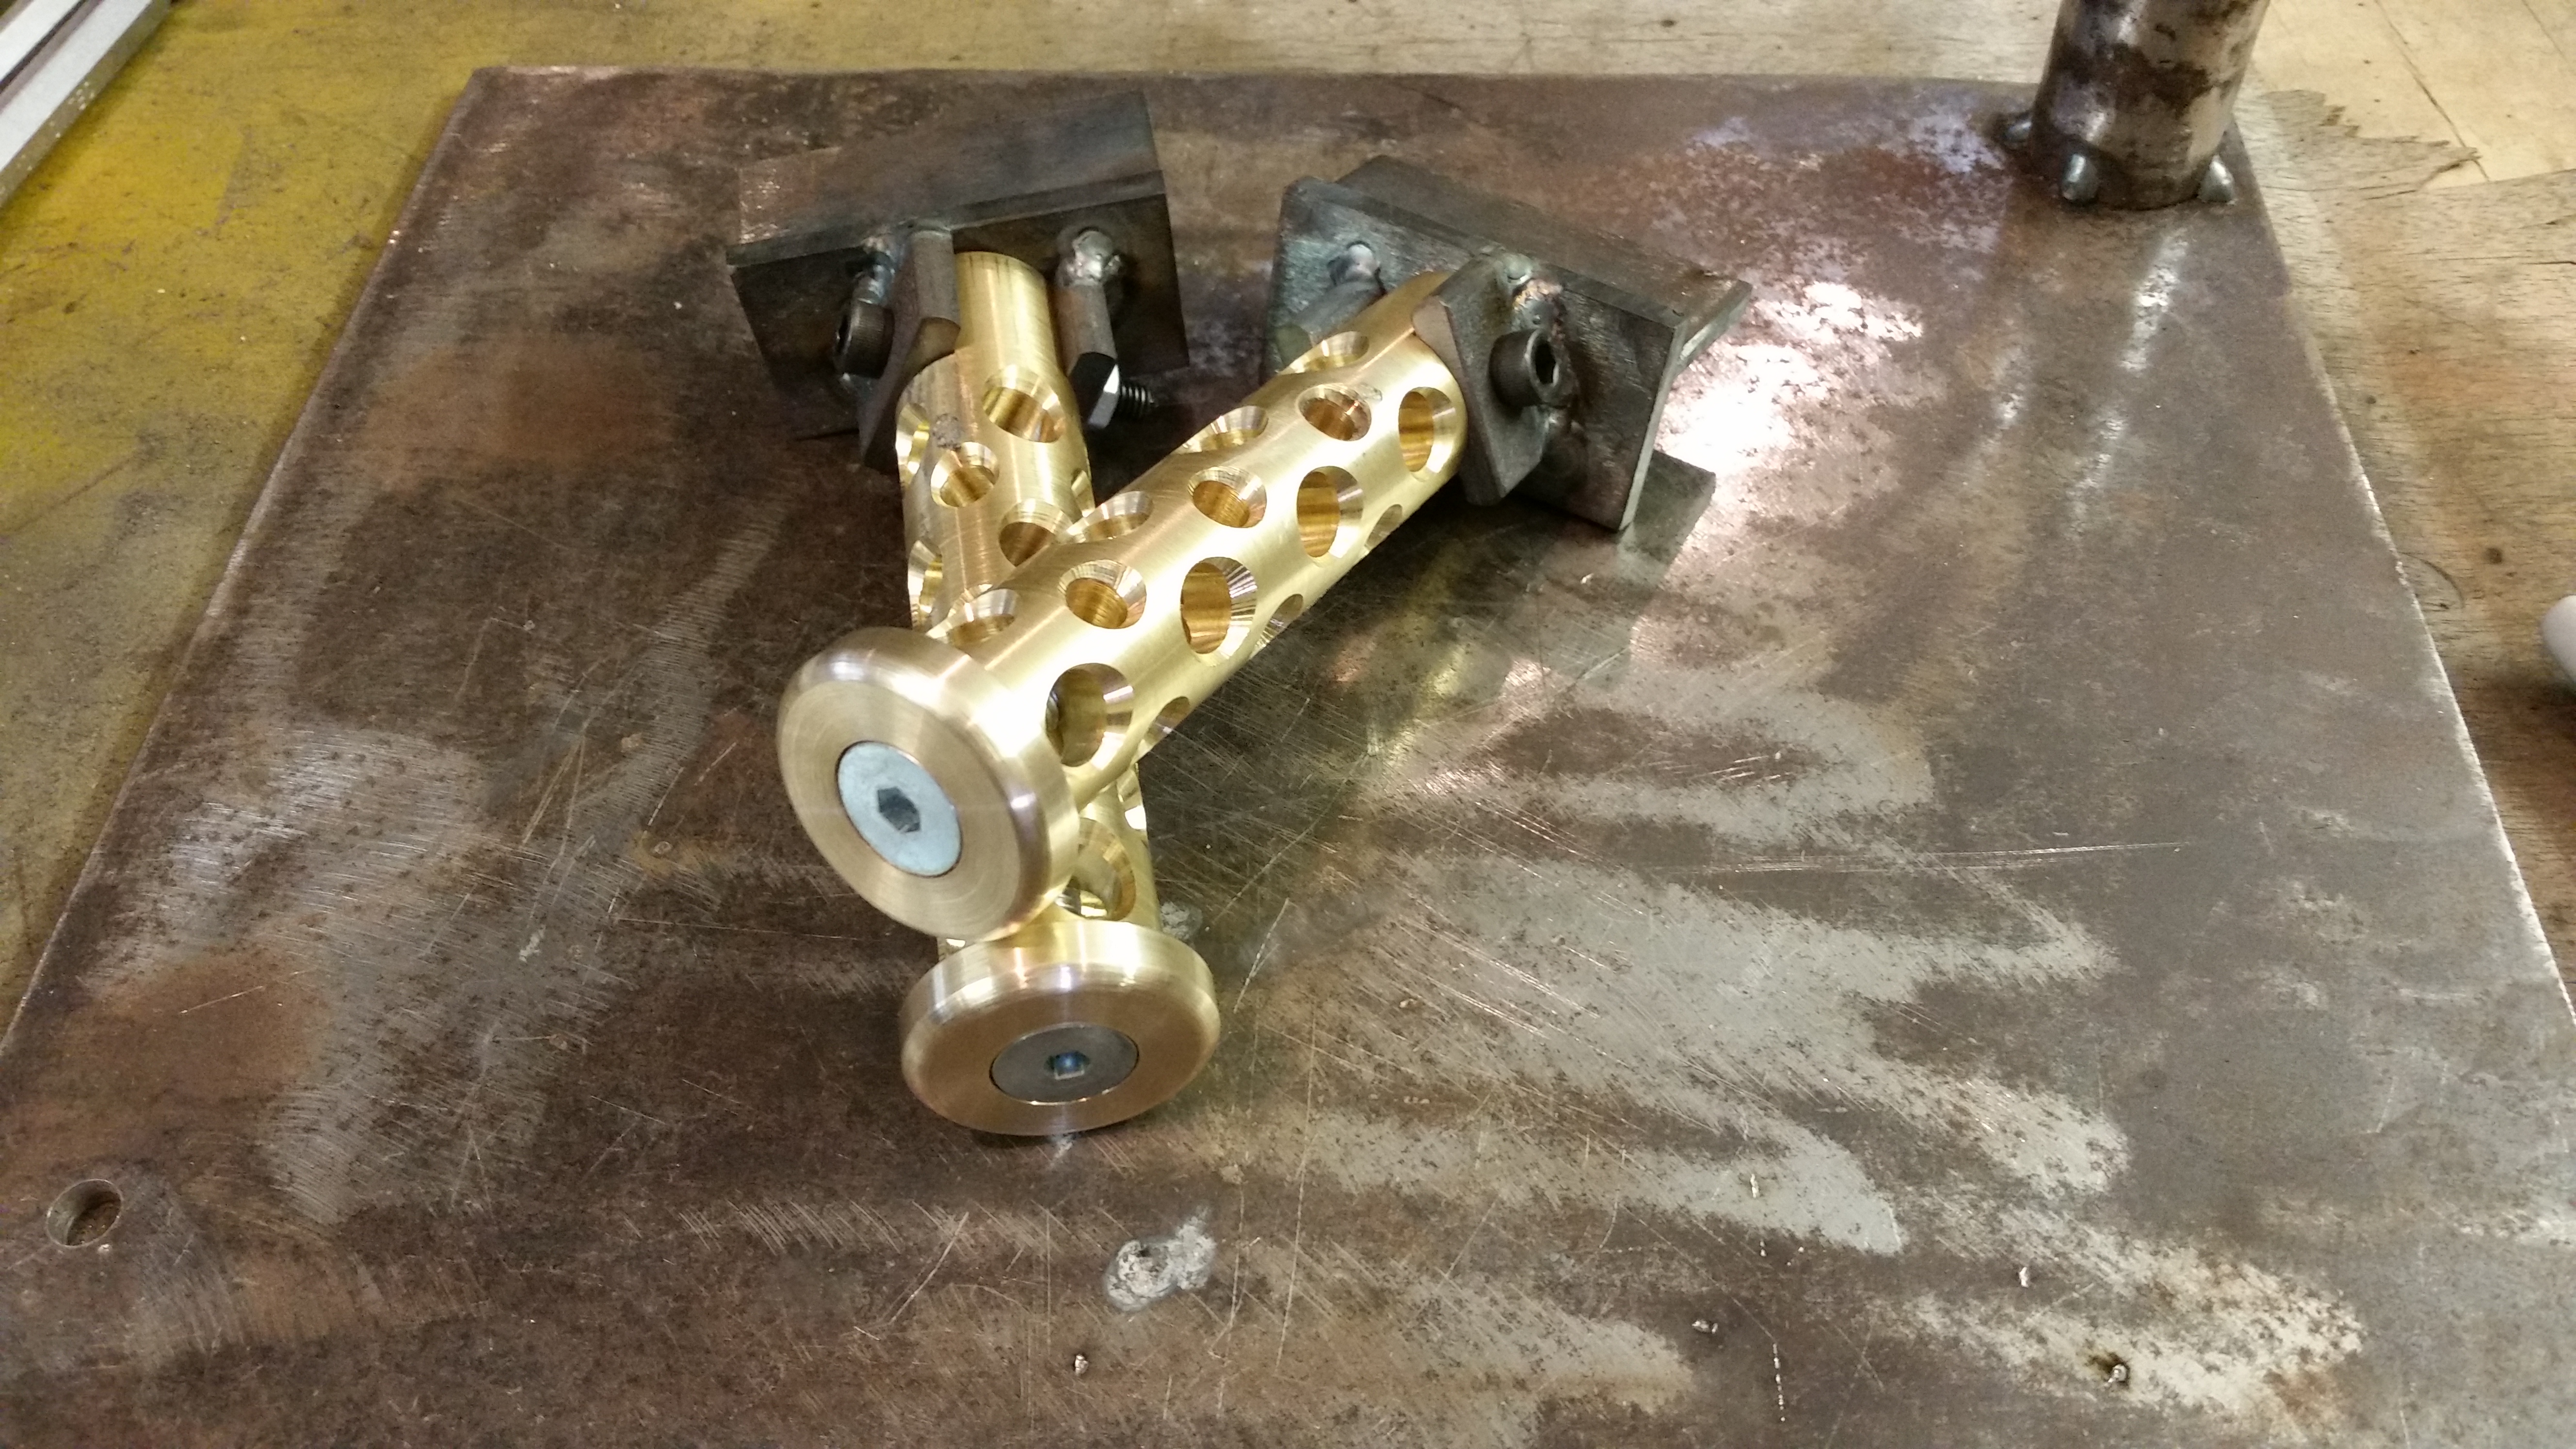
I had in stock some 1″ brass bar so I cleaned it up in the lathe and put M8 threads in one end to accept an end cap later.
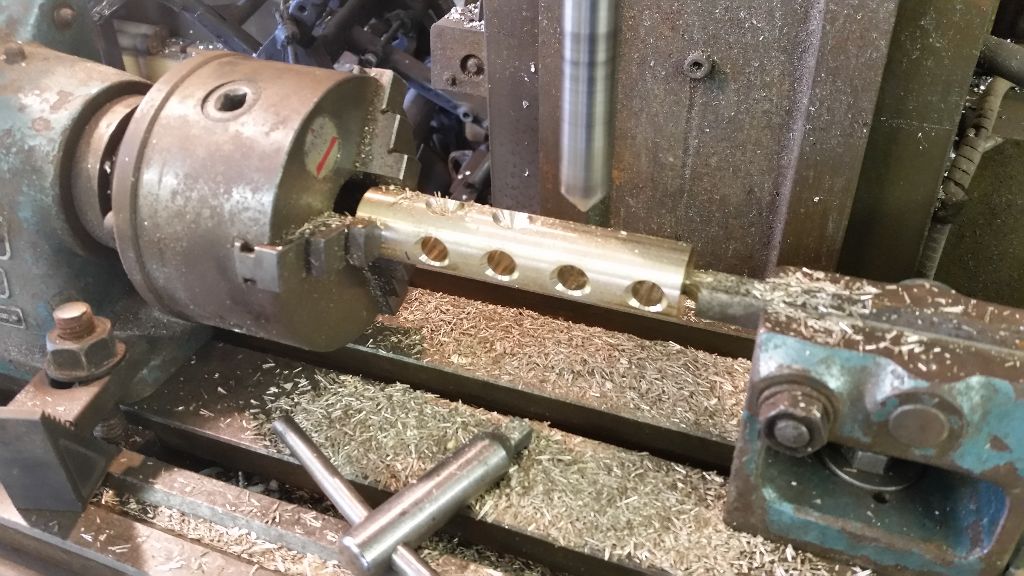
I next used the mill to drill some holes as I’m sure you can remember ‘holes make things look tough’.
Once the large holes were finished I wanted to add smaller holes so I used a 45 degree block to set the angle.
Started drilling the smaller holes, it’s begining to look good/tough.
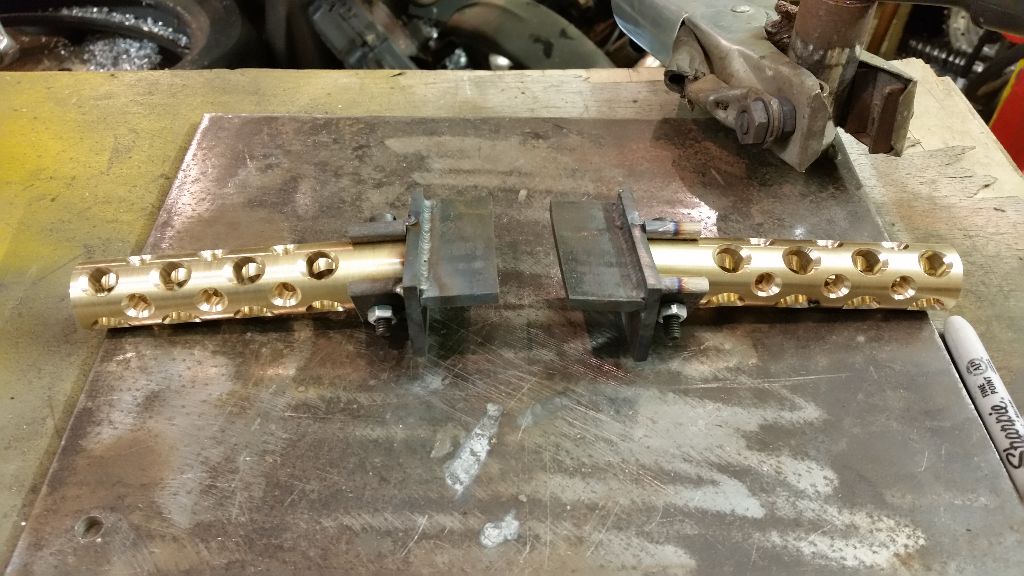
This is how they ended up, pretty pleased so far.
I now needed to think about mounting them and also alowing them to pivot out of the way so I used the mill and machined some flats ready to be drilled later to accept the mounting pins.
Next I needed to make some mounting brackets, I chose 5mm plate to add some strength, chopped them out with the angle grinder and tacked them in to shape.
I don’t have any training with welders, I’m self taught but every now and again I manage a decent weld, quite proud of this one although it will never be seen as it is an inside weld hidden by the frame, if it would have been visable I imagine children would have sung songs about it around a camp fire for many years to come.
Next I chopped some more bits of plate to make the rest of the mount, drilled them to accept the bolt, I’ll change these bolts for pretty bolts at a later date.
Now all the parts were ready I welded it all together ready to be mounted on the frame.
Thats all for tonight, it’s a bit hot and I’m off to bed.
—————————————————————
Well that was a warm few days, betty swallox all round……. but it’s letting off now so time to get back to building some custom bits!
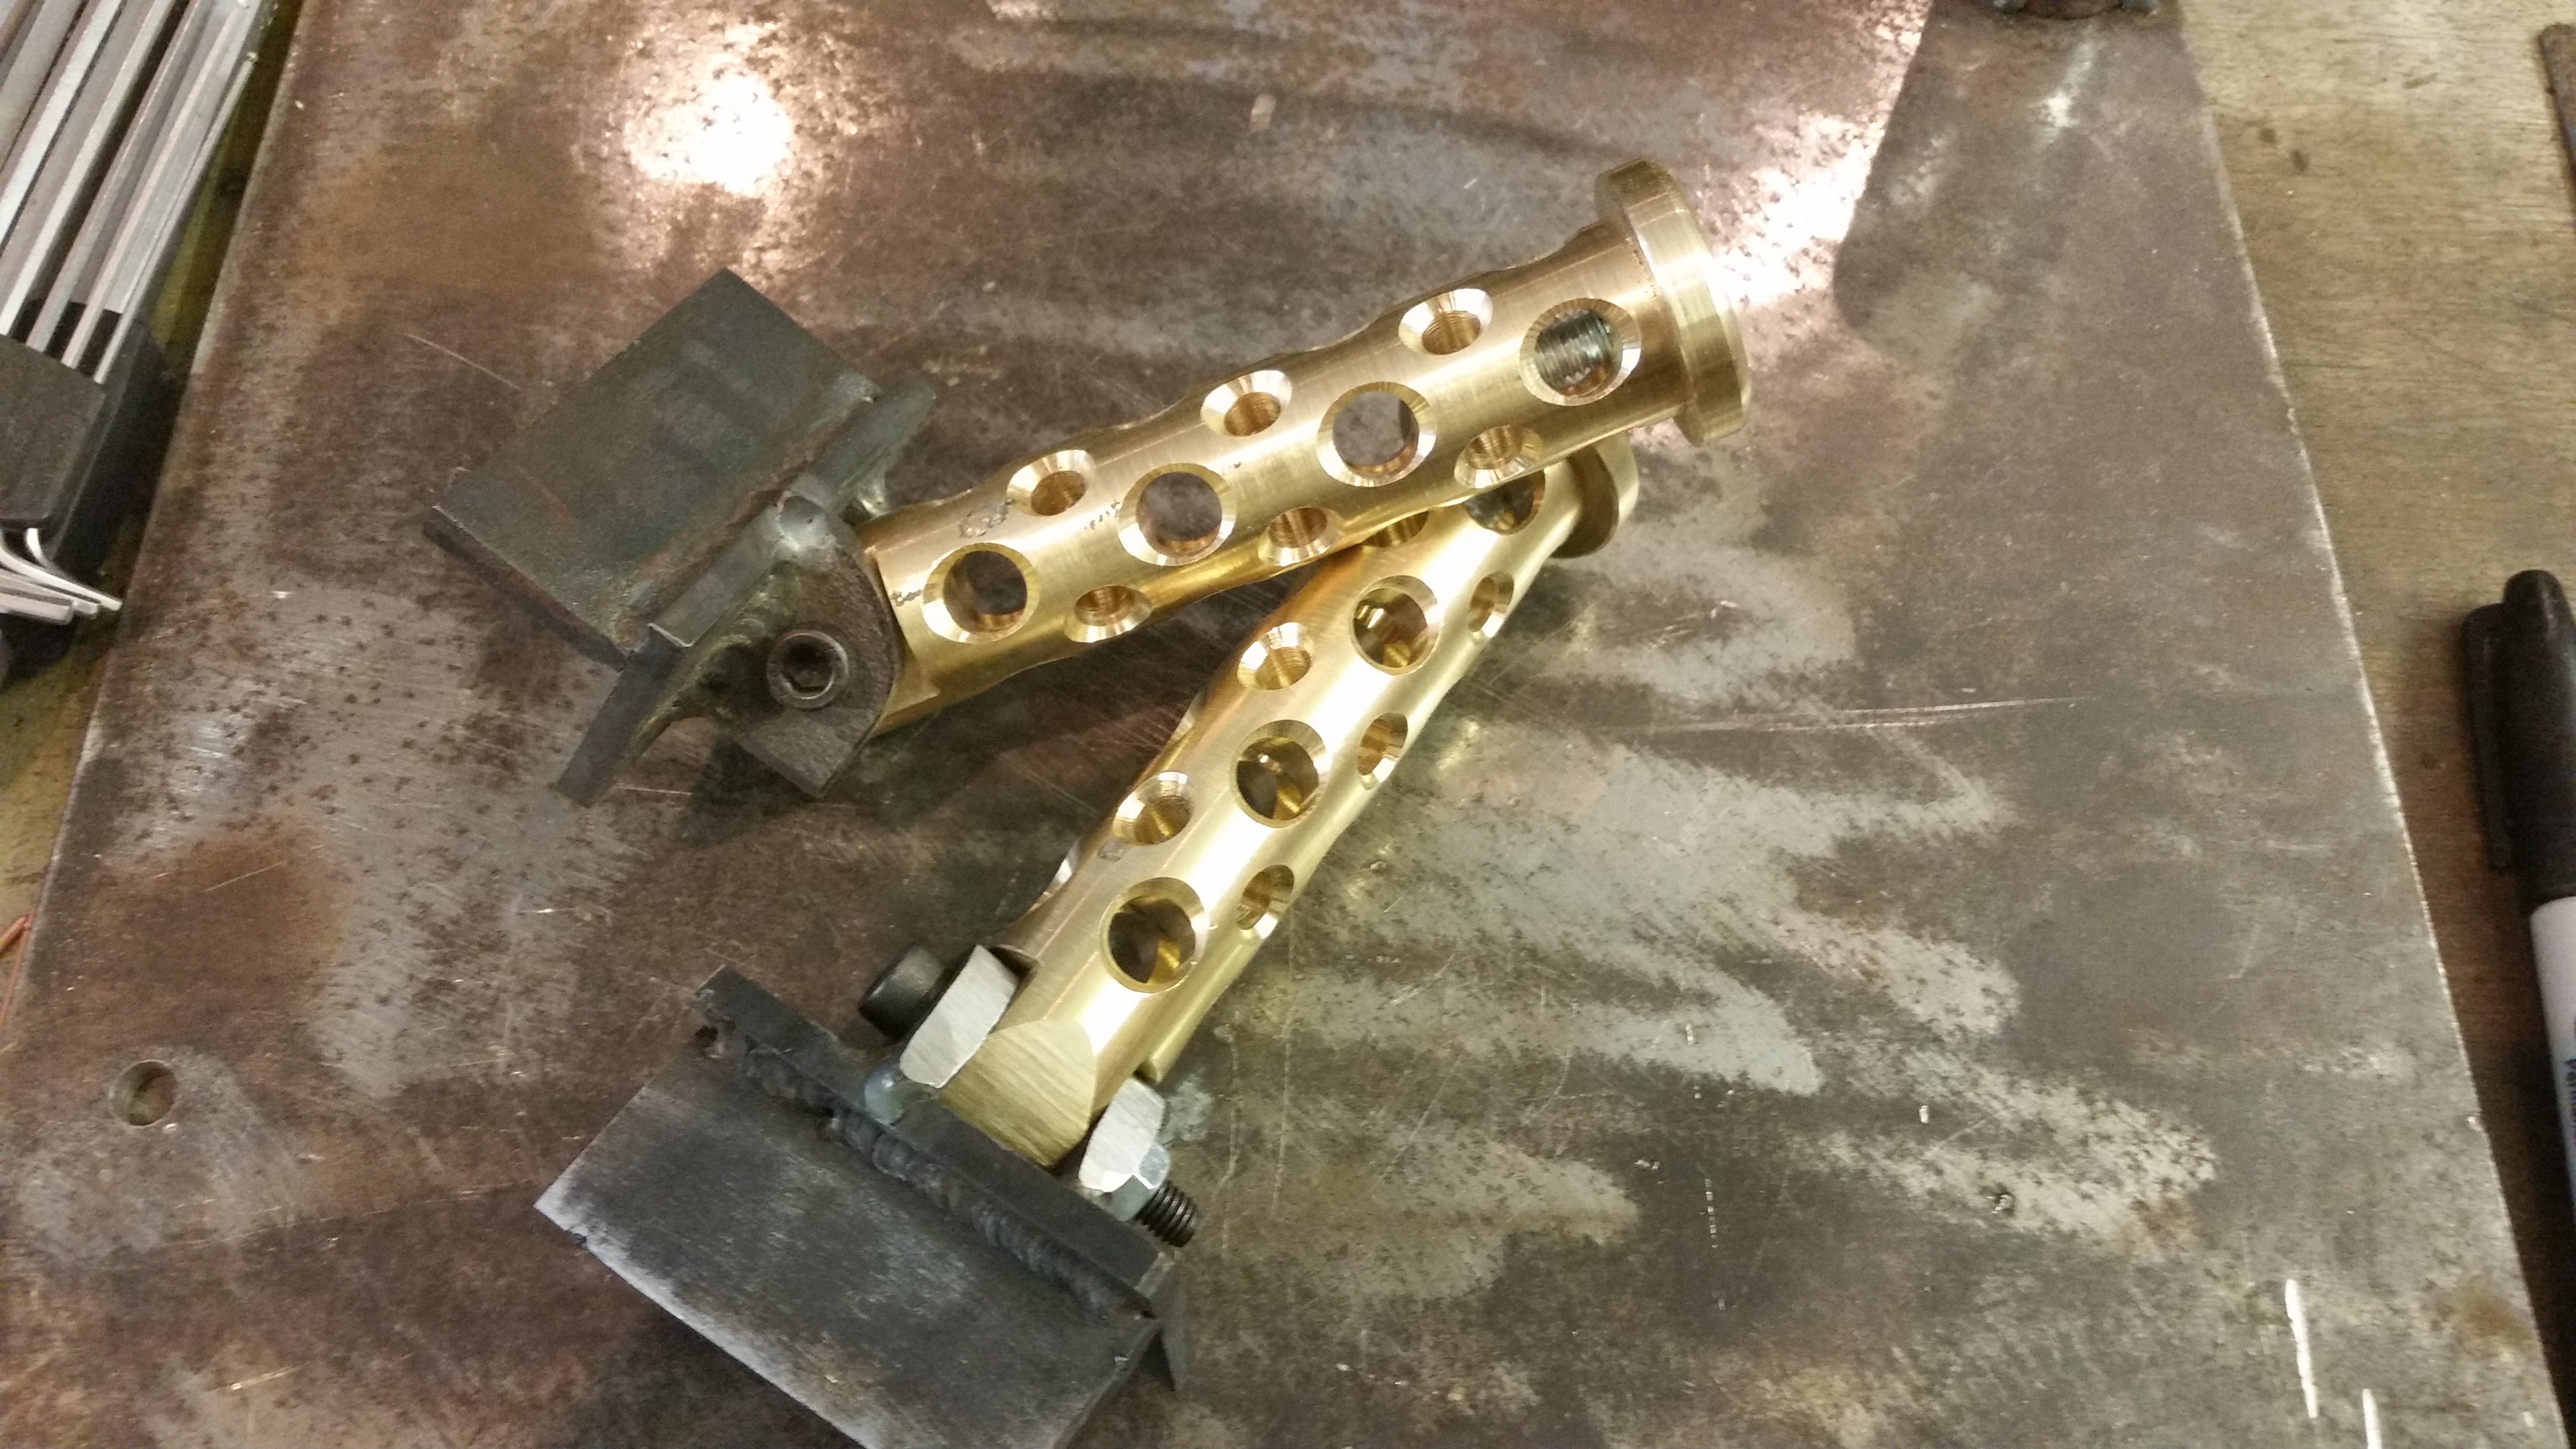
At the start of the article I mentioned an 8mm thread was inserted in one end, now I have made some brass caps and using countersunk screws attached these to the end so my feet don’t fall of the pegs in high speed manoeuvres or feats of derring-do.
Now was the time to fettle the pegs to allow thm to fold, this took ages as it’s all filework but in the end both pegs fold nicely and return home via gravity.
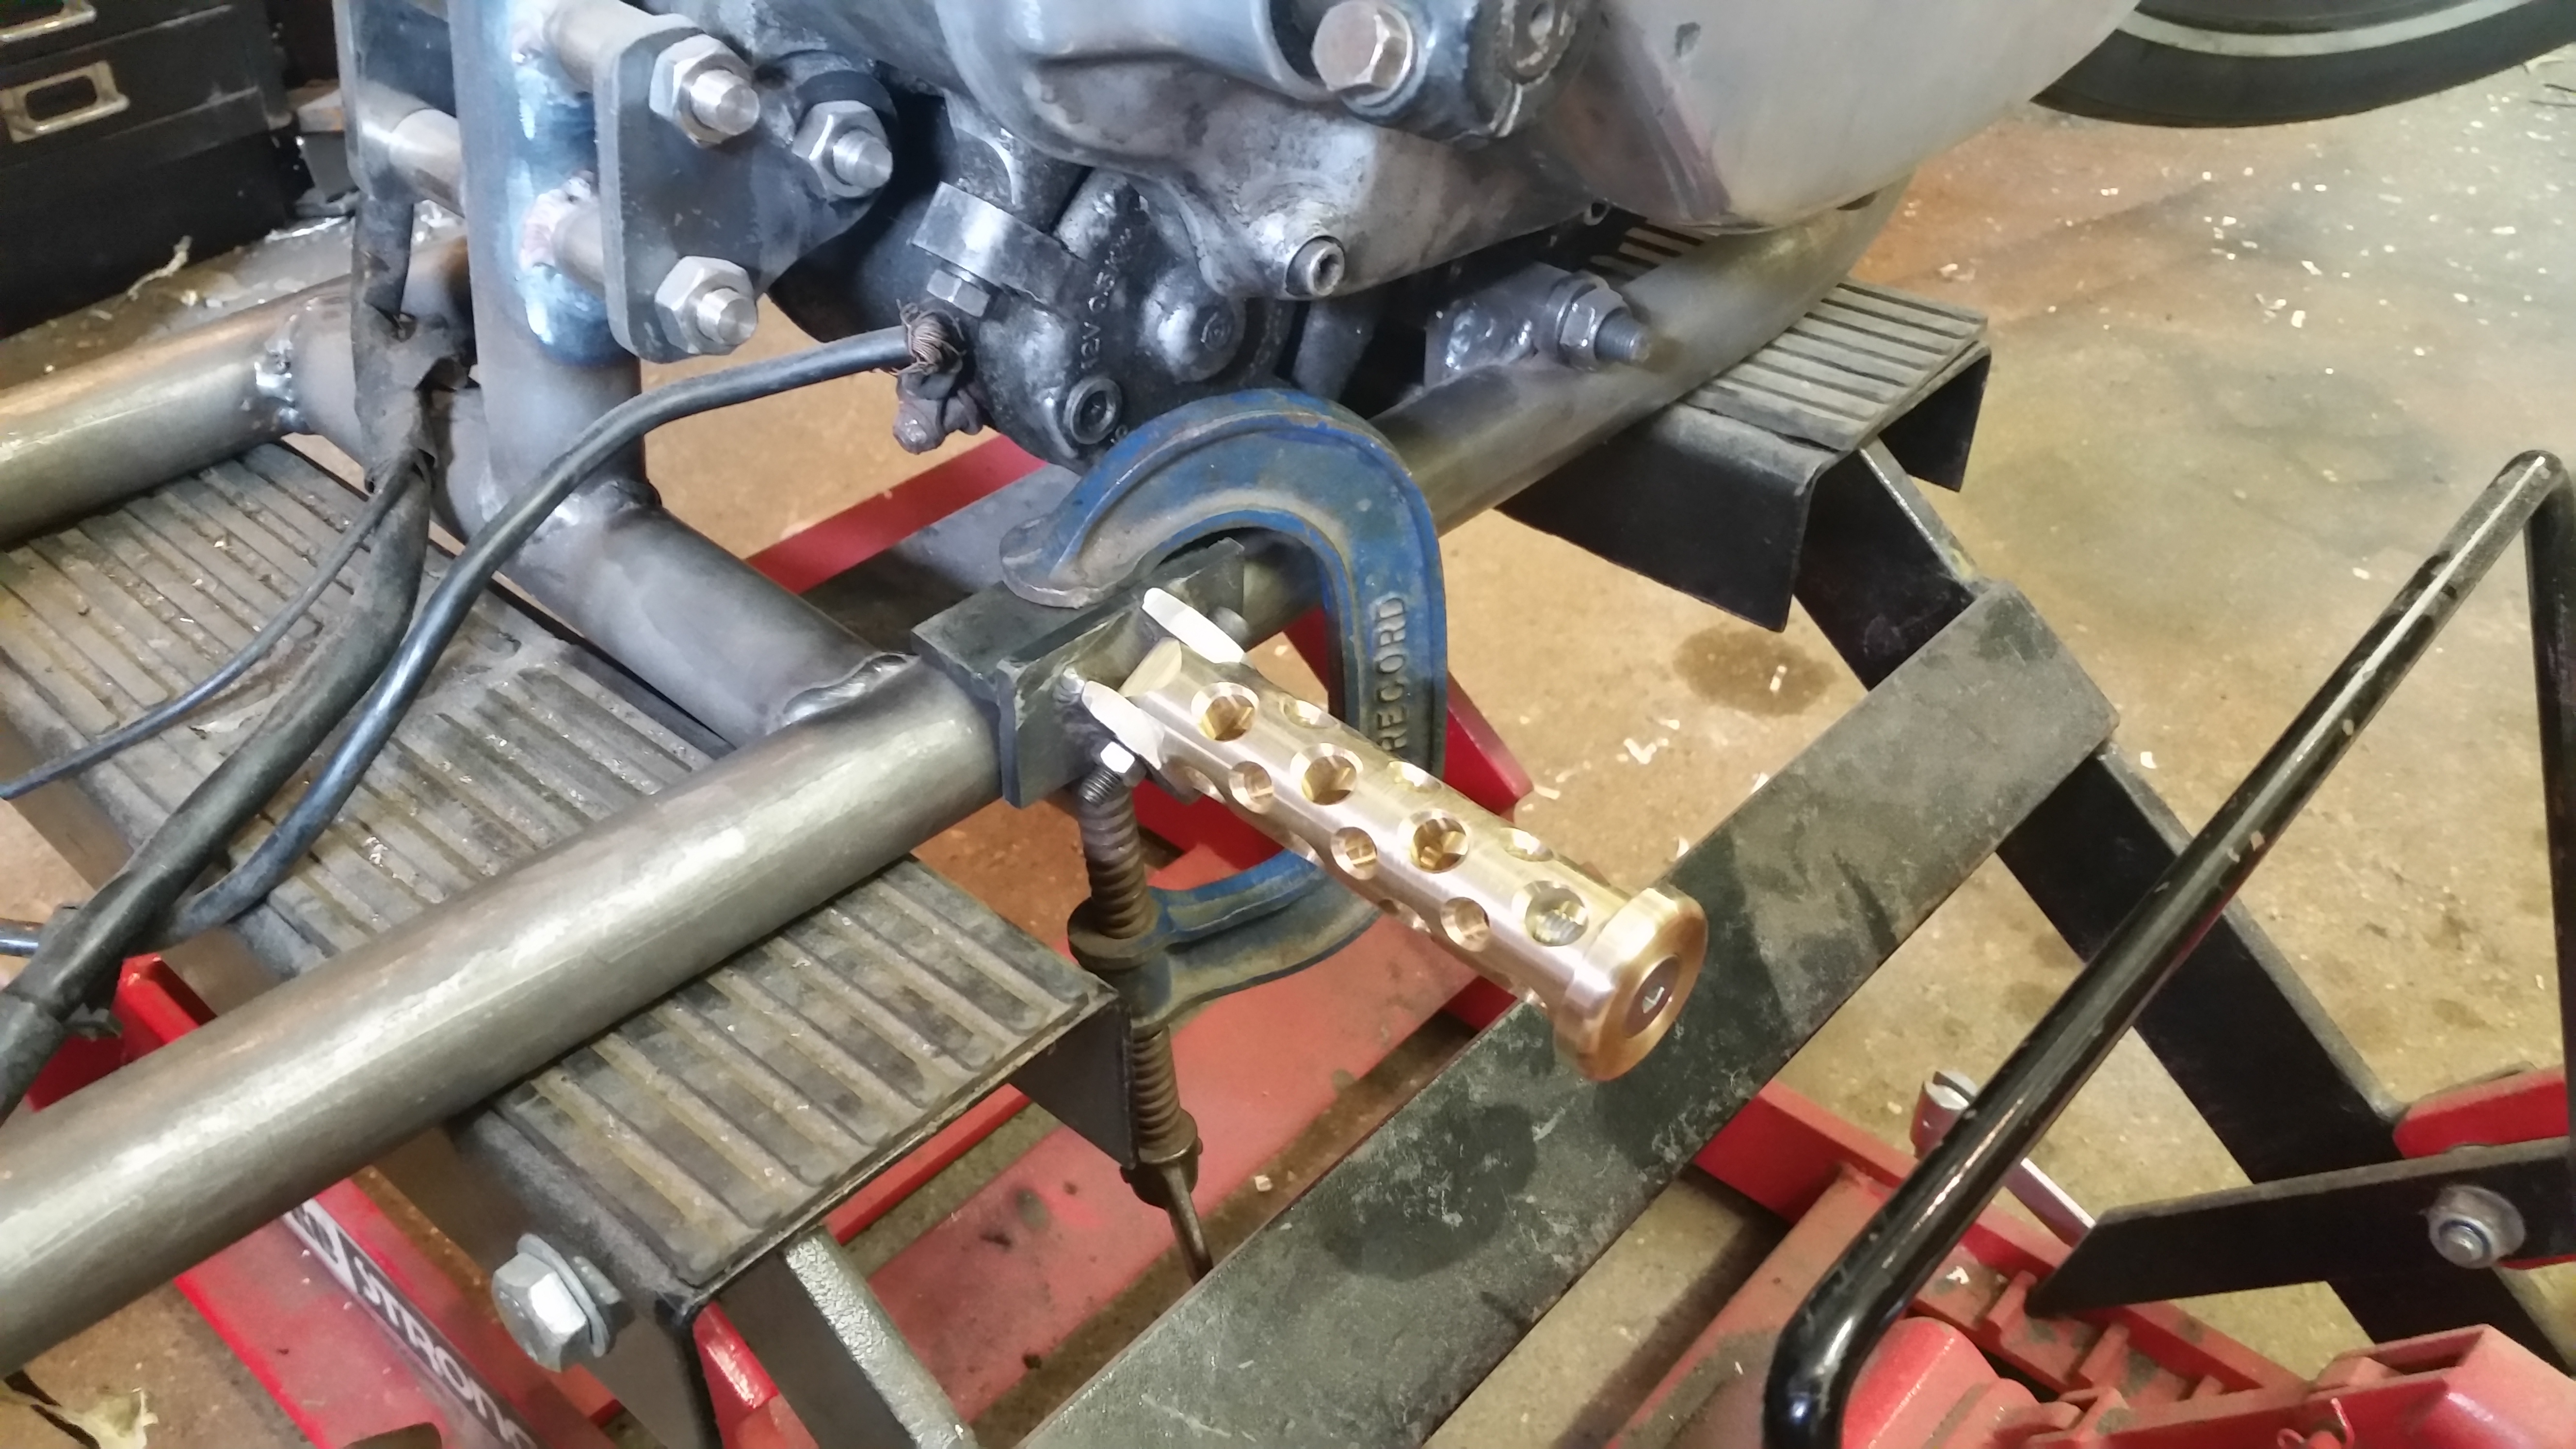
Using a gee clamp I tried a few positions out to find the sweet spot and settled for here, it sits well and leaves enough room for a brake lever.
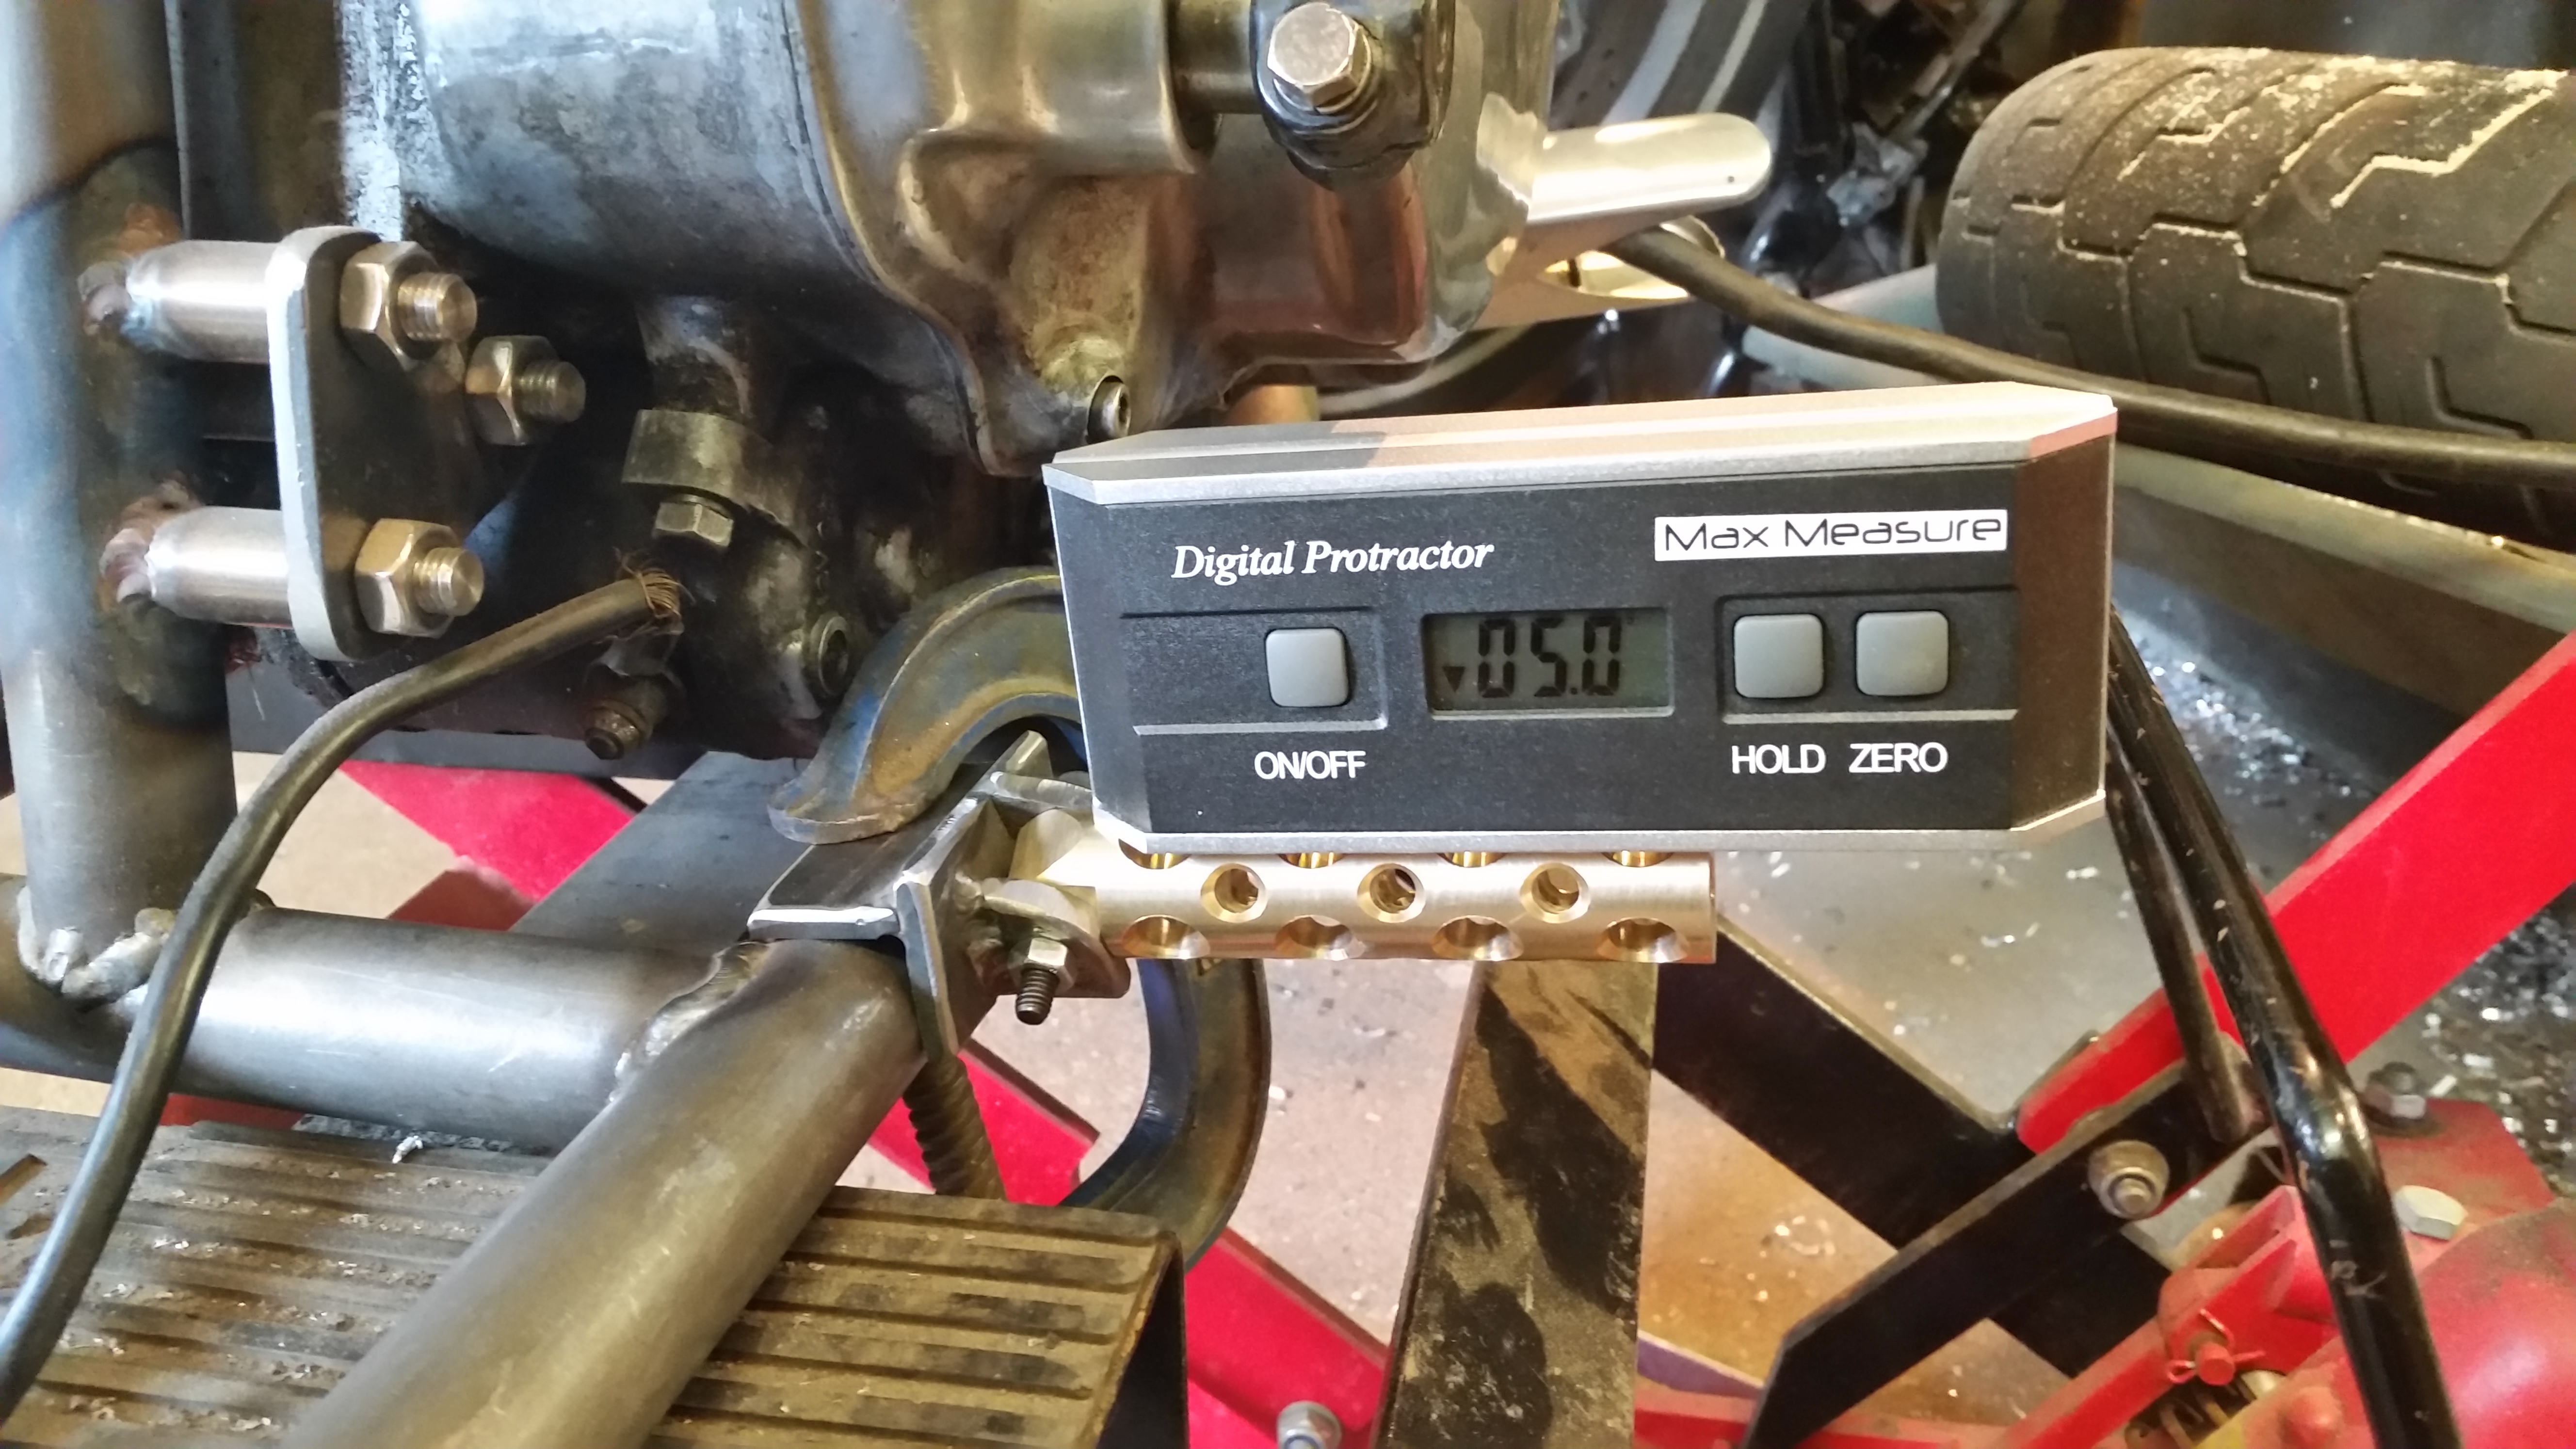
As pegs seem to drop over time I decided to set the pegs at 5 degrees tipped in and if they don’t settle this much I’ll just file a bit of the back of the peg to allow it to sit down a little although they look a bit sporty like this so I’ll get some feedback from the judges on this……. 😀
A quick shot of the tack welded peg before I add the brake.
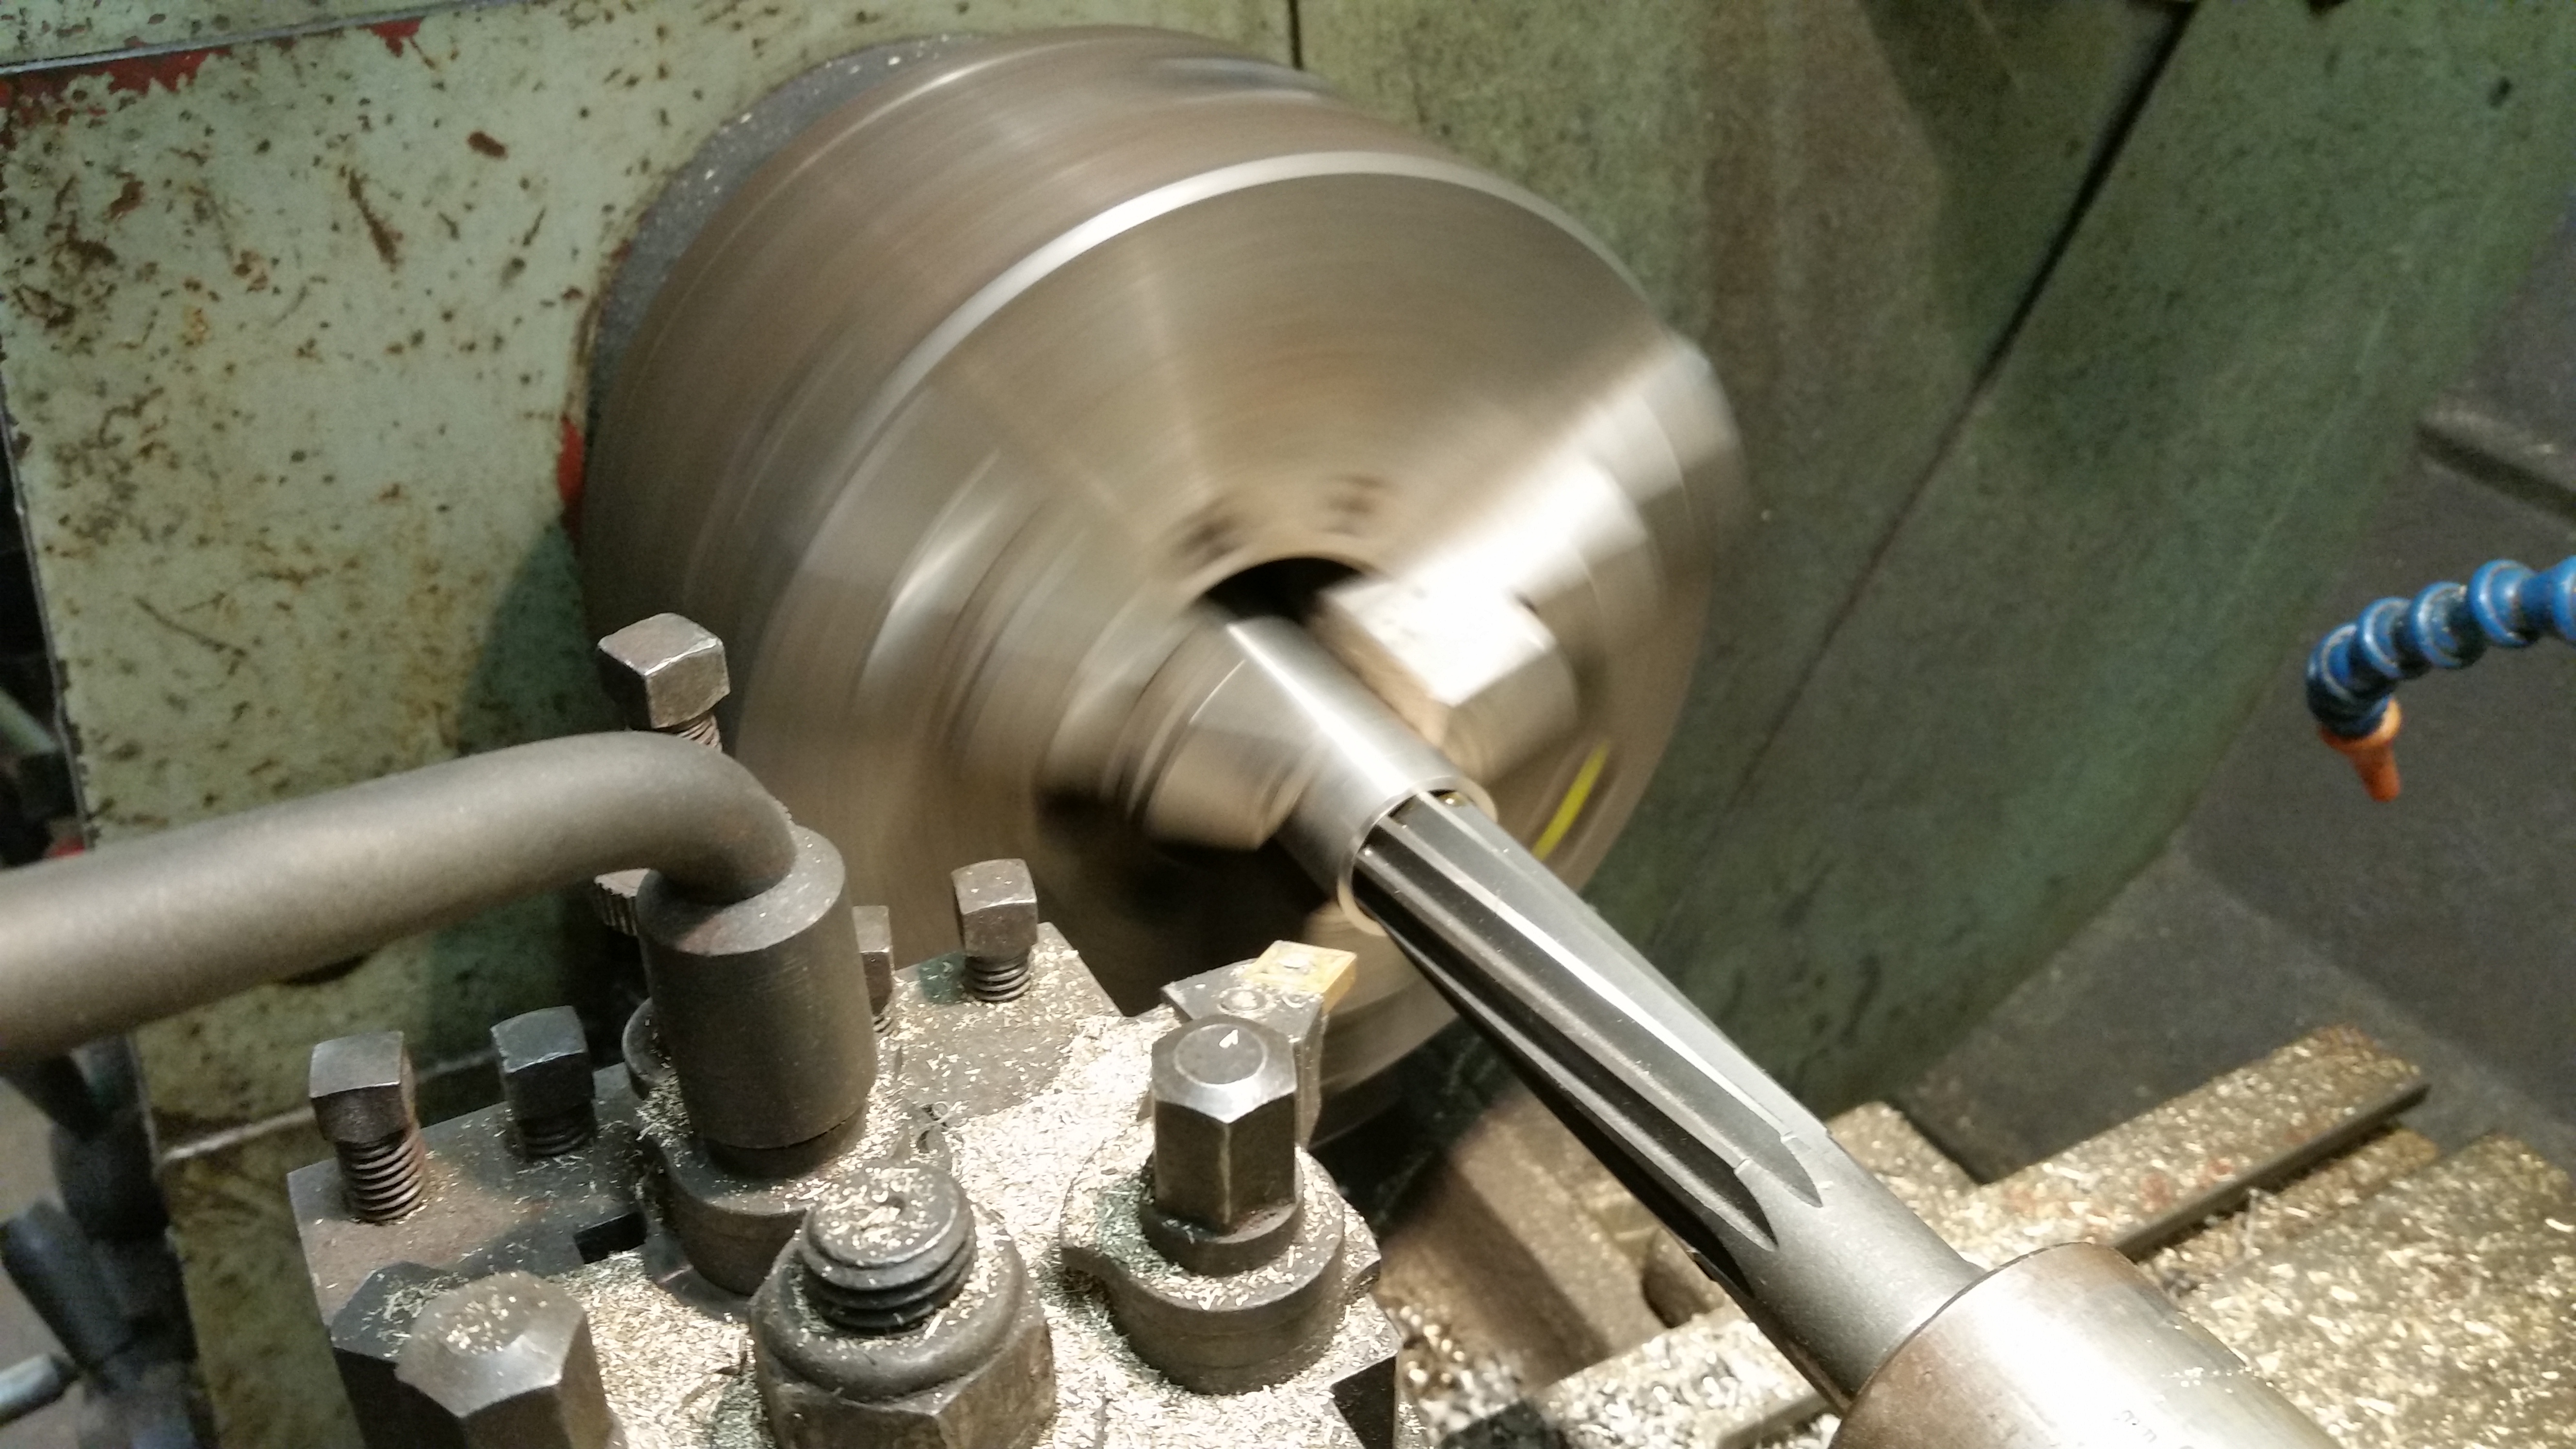
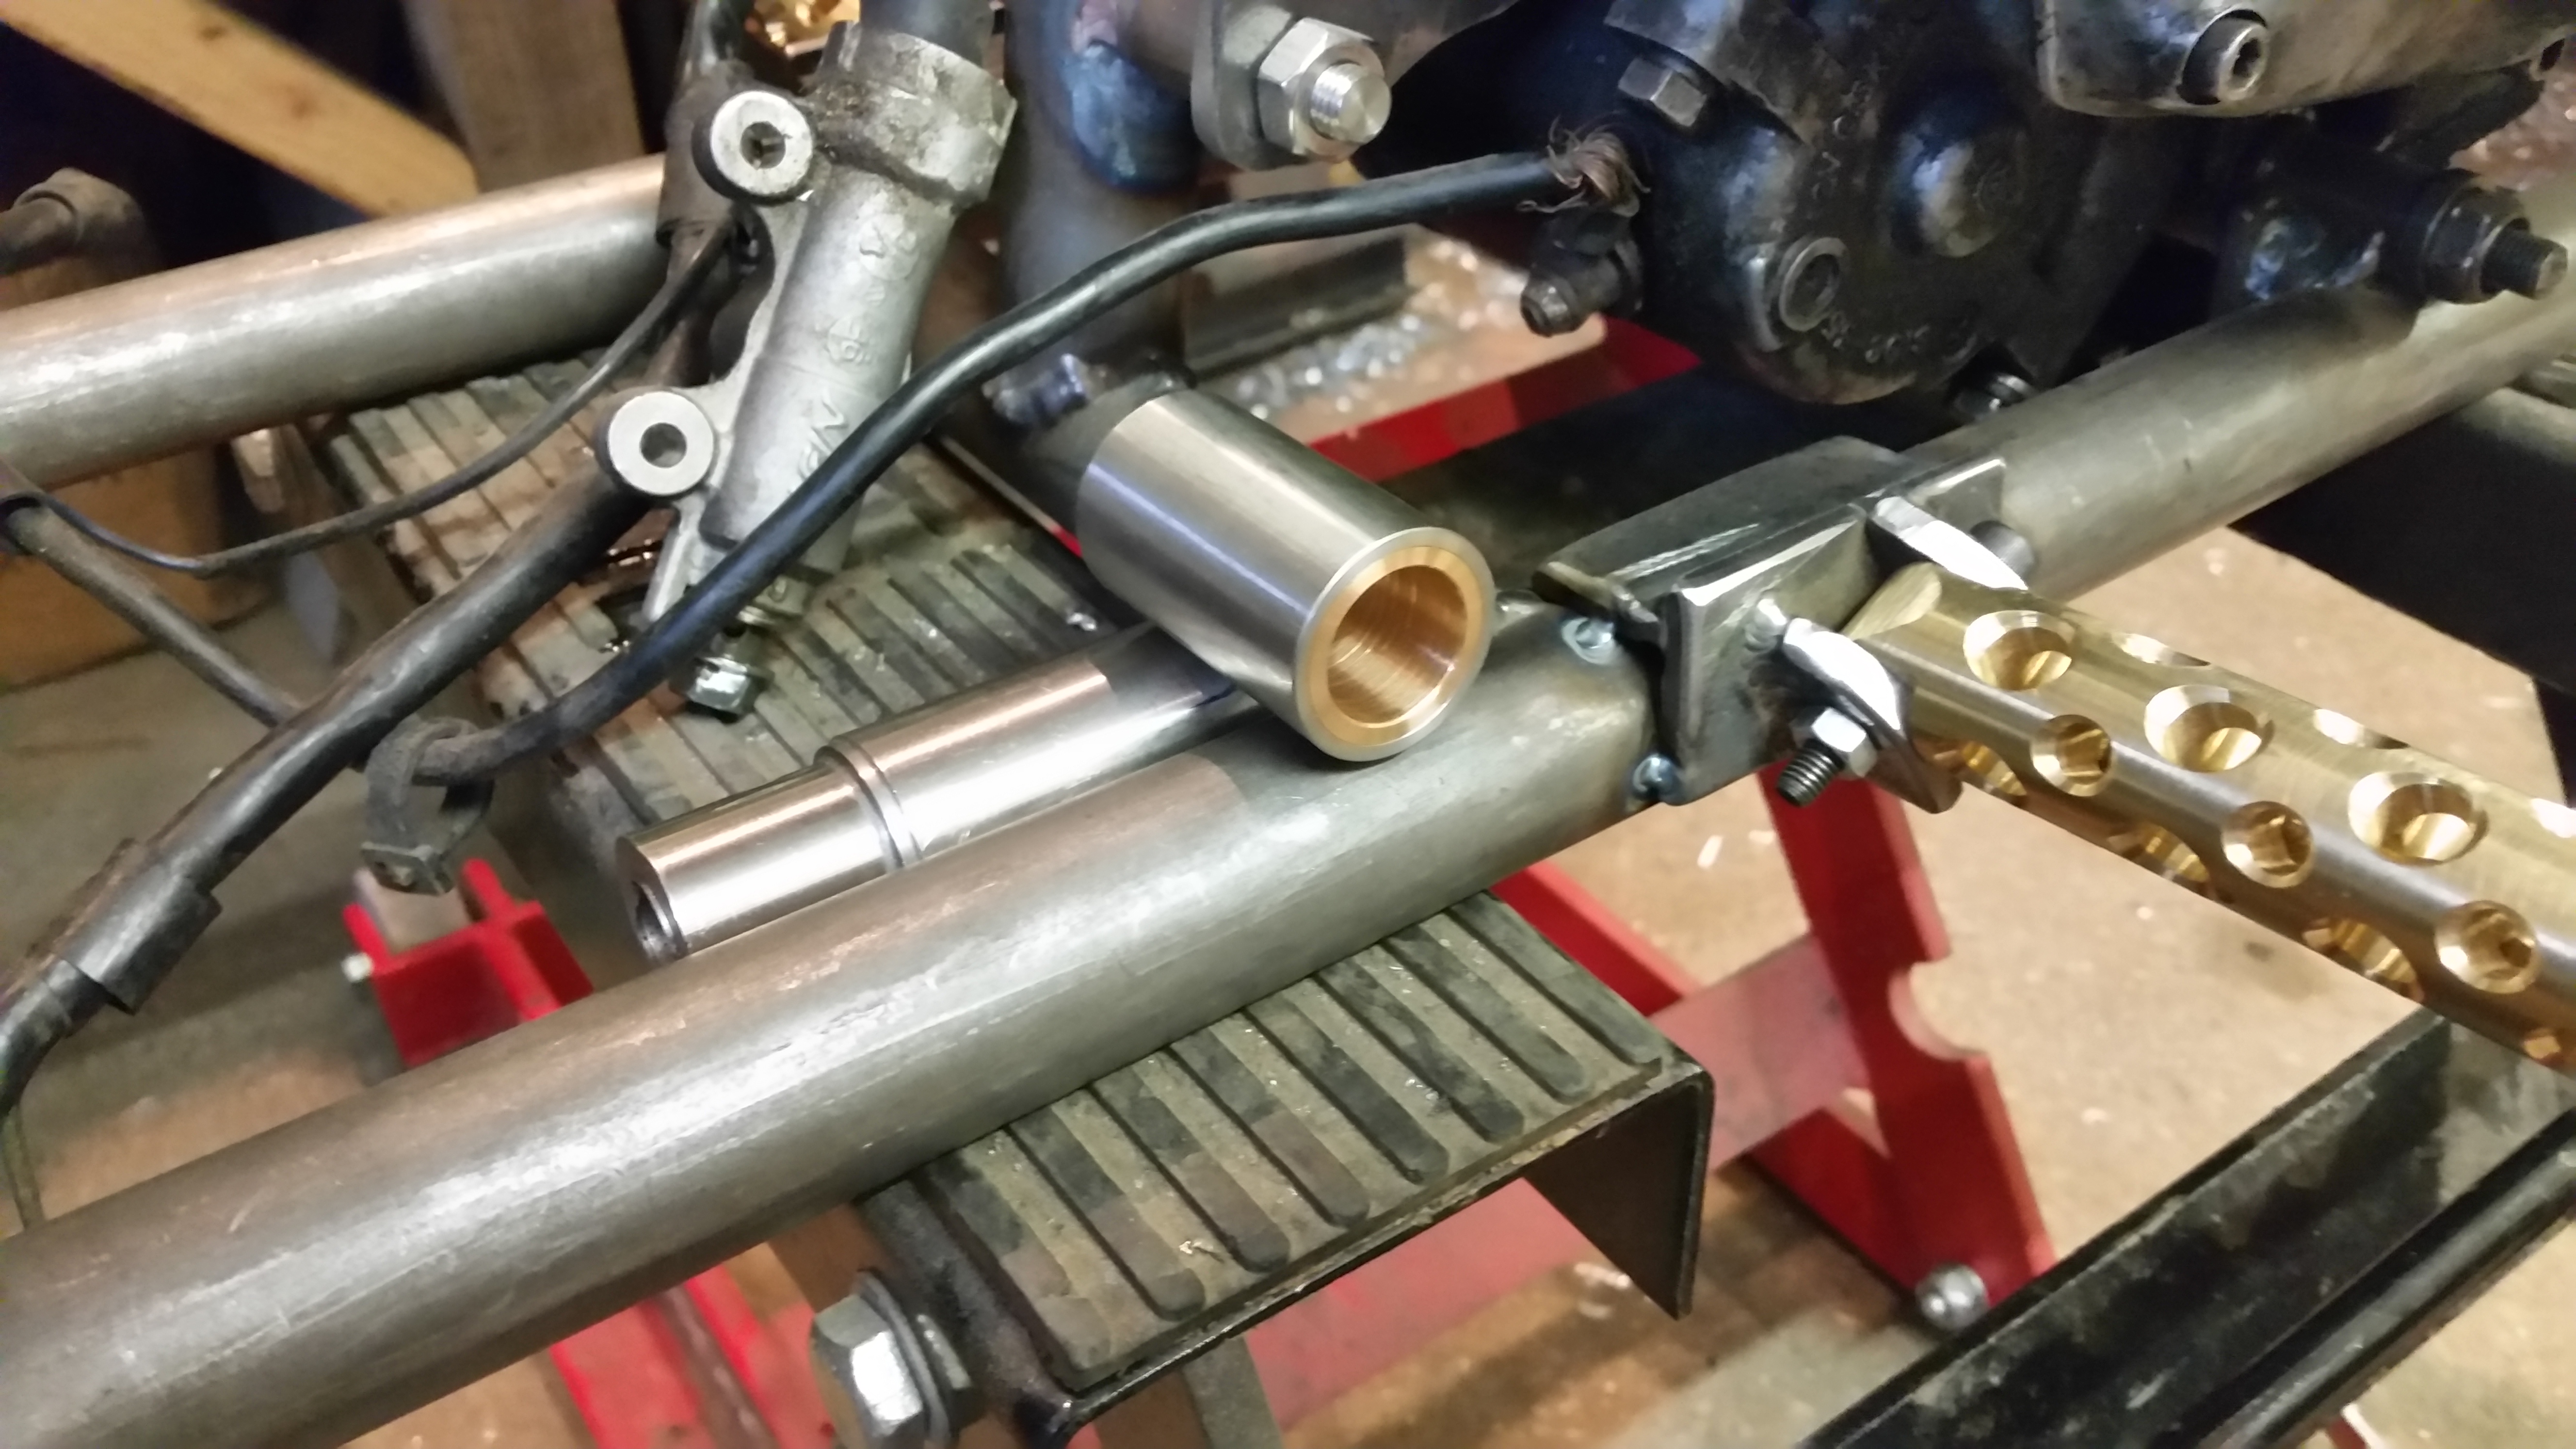
The rear brake assembley was something I have not made before, can’t even remember seeing this on American chopper so I guess I’m on my own….. first bored out some stainless bar to accept a bronze bush.
Used a reamer to get a nice fit.
Thats not my real hand, I hired a chap from a ‘stunt hand’ agency to cover for me as I was making a cup of tea, I think he did quite a good job.
Luckily I keep a small amount of bronze in stock so I was able to swiftly turn out a bush, I really hope the judges admire a nice bush.
Next the bush needs pressing in to the stainless outer.
So this is the assembly so far, roughly in place so I can see how to make the lever.
Here’s the stunt hand again, I was busy campaigning for world peace and helping orphans cross a busy road, I really hope any judges reading this don’t mind me using a stunt hand, (did I mention I also love dolphins, ponys and anything else stupid enough to end up in Tescos). Free Tibet!!
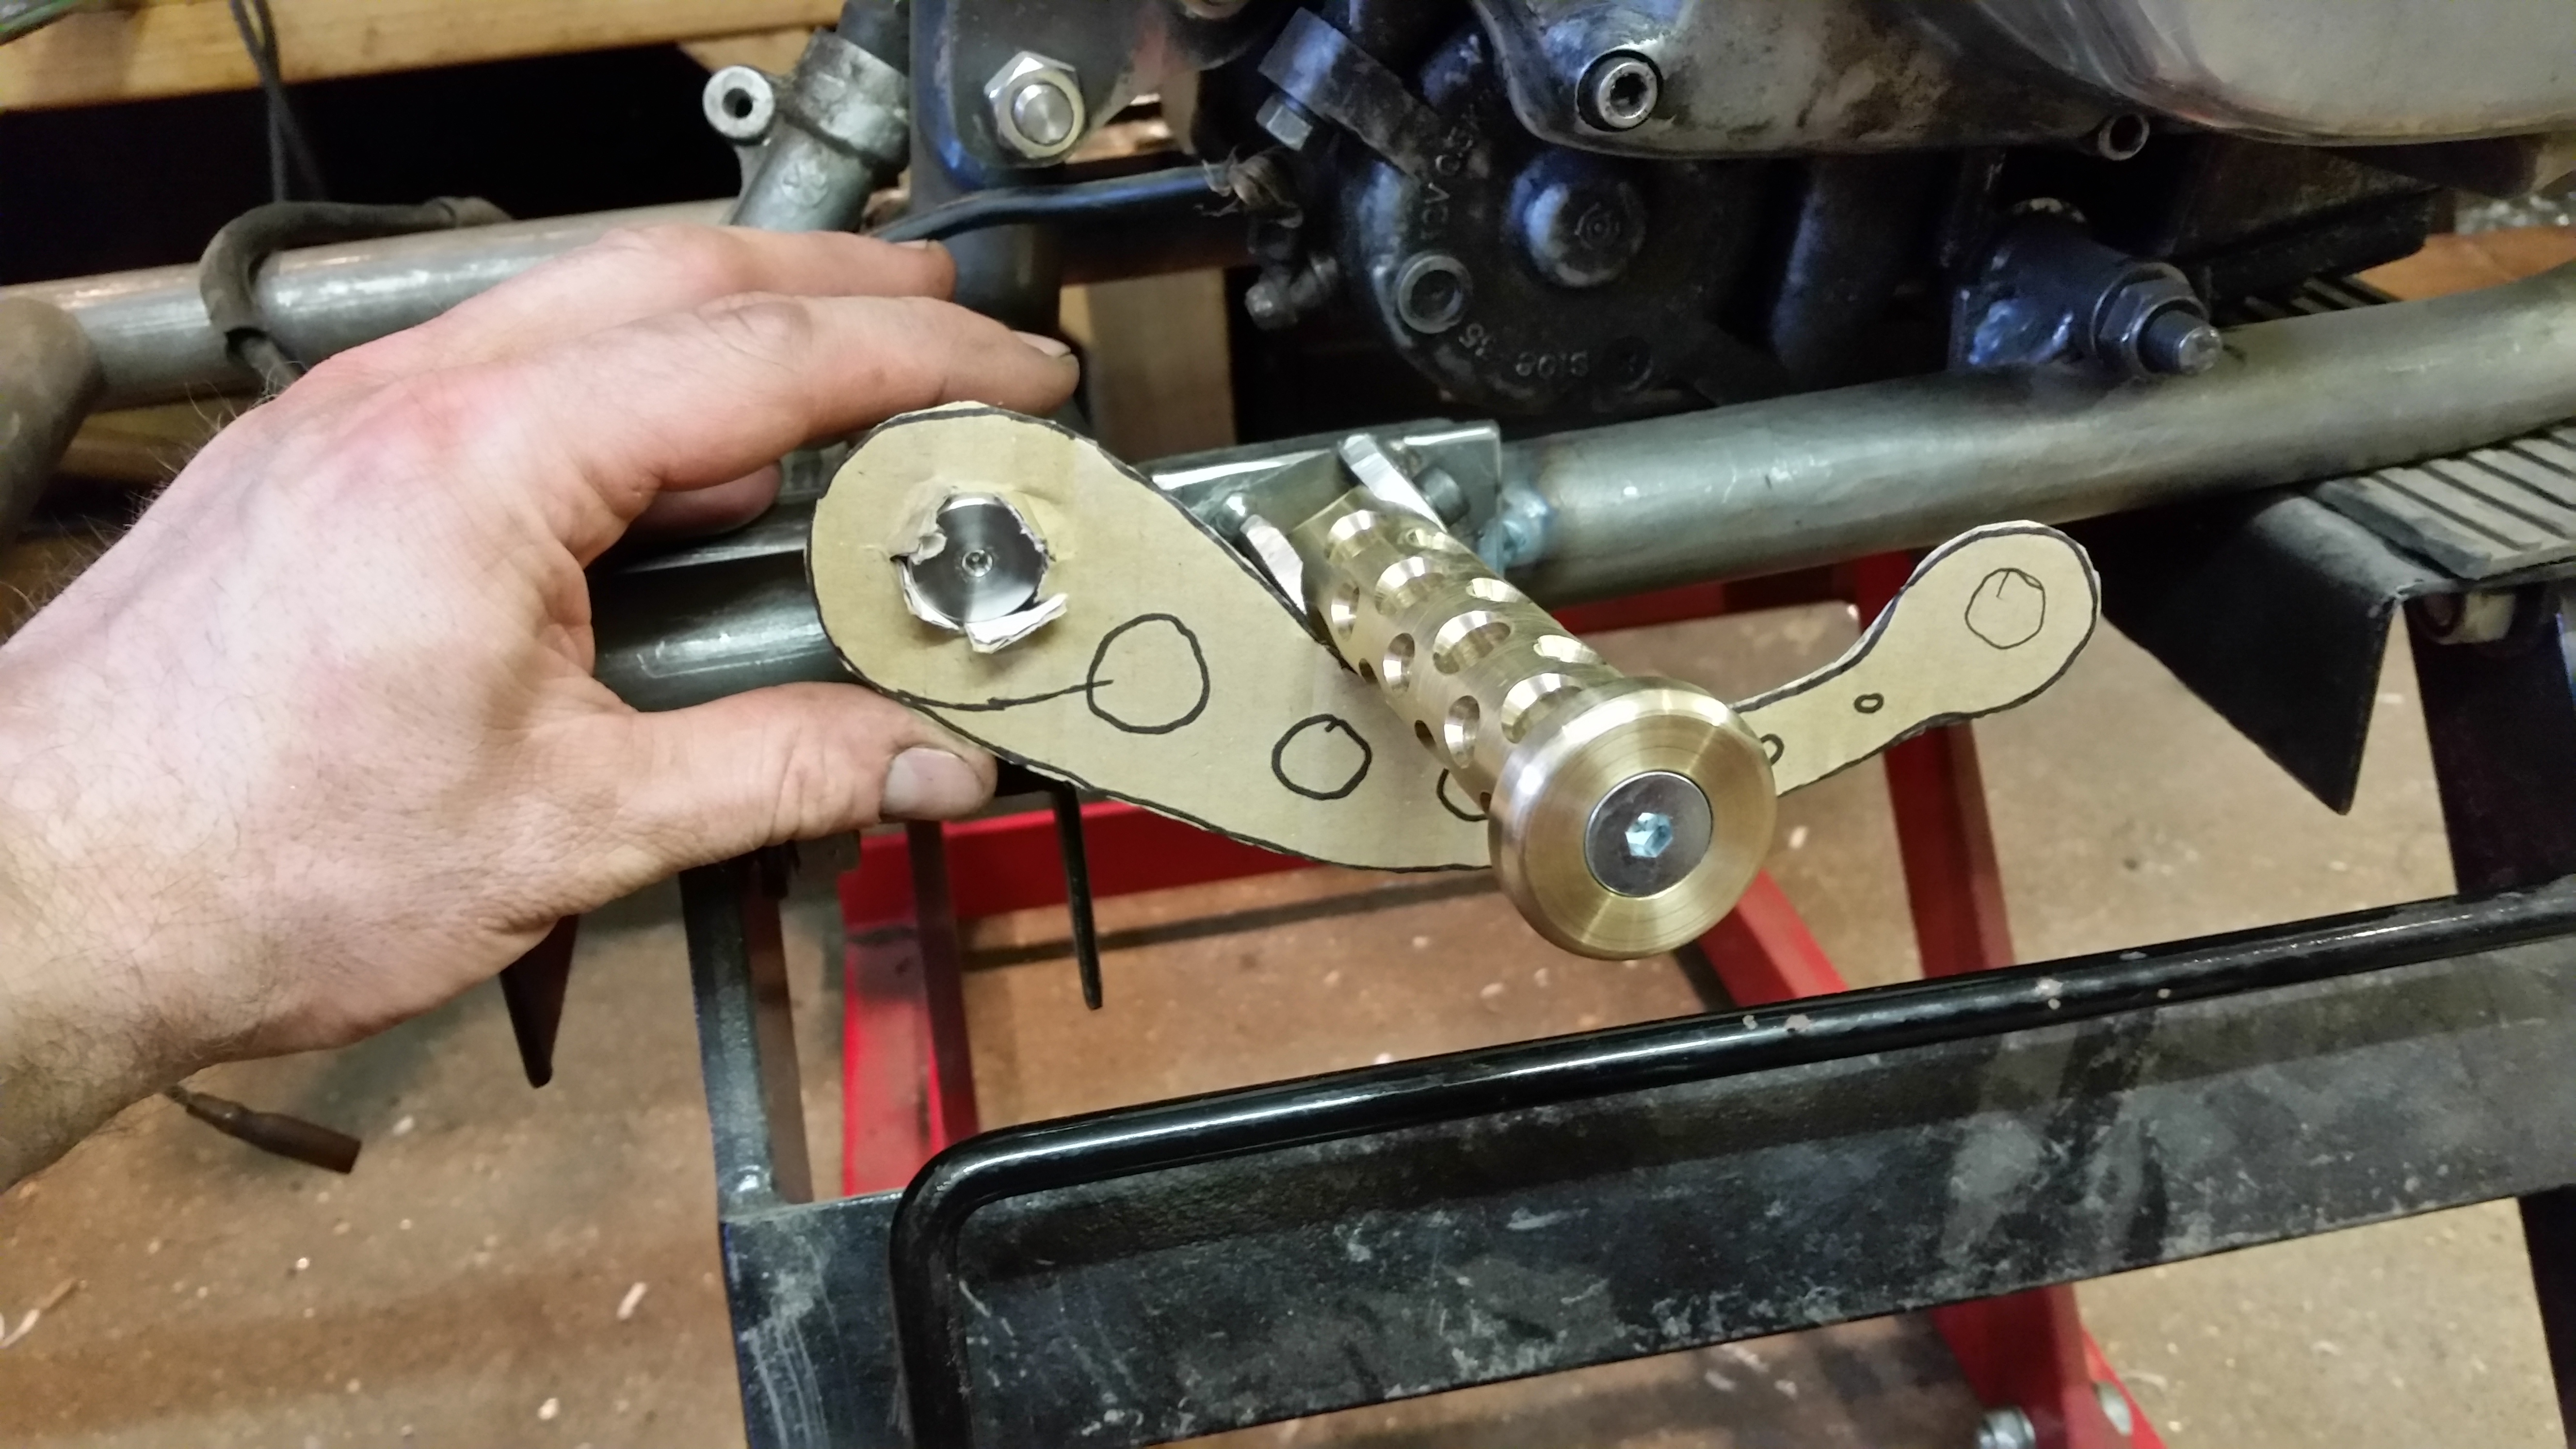
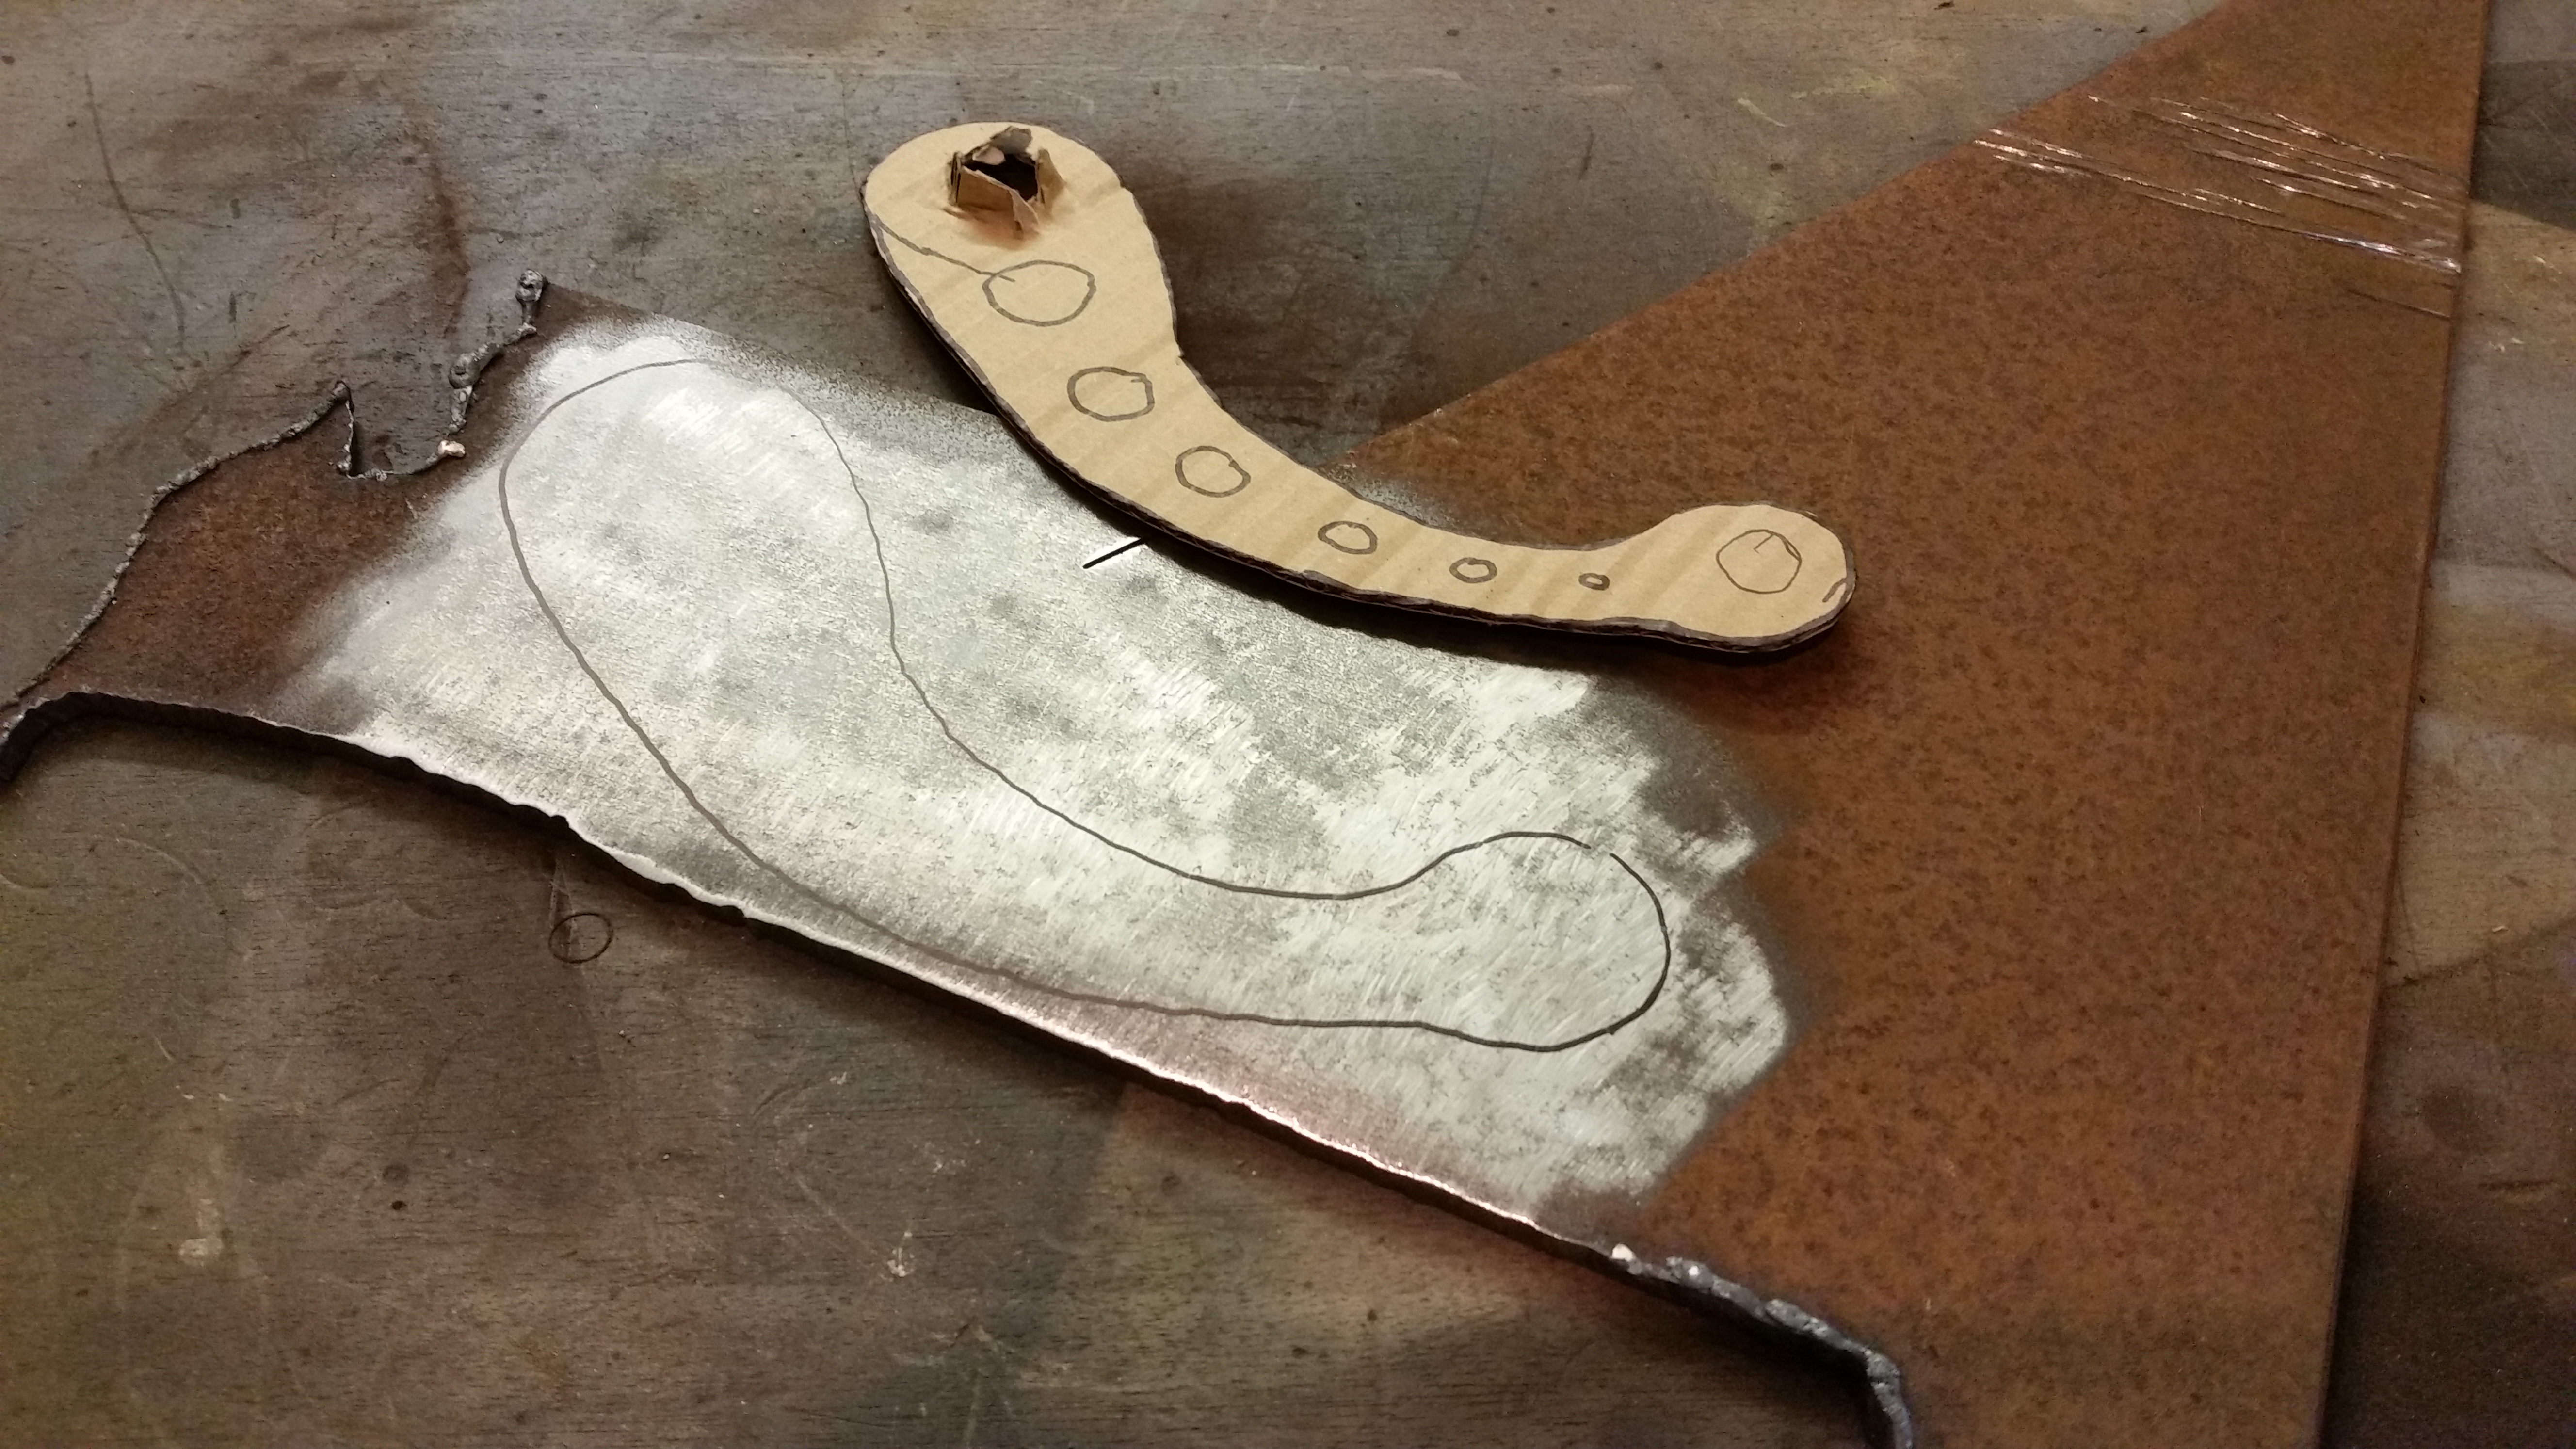
Using some ‘engineering’ cardboard box I cut out a Blue Peter brake pedal, seemed about the right size and ratio.
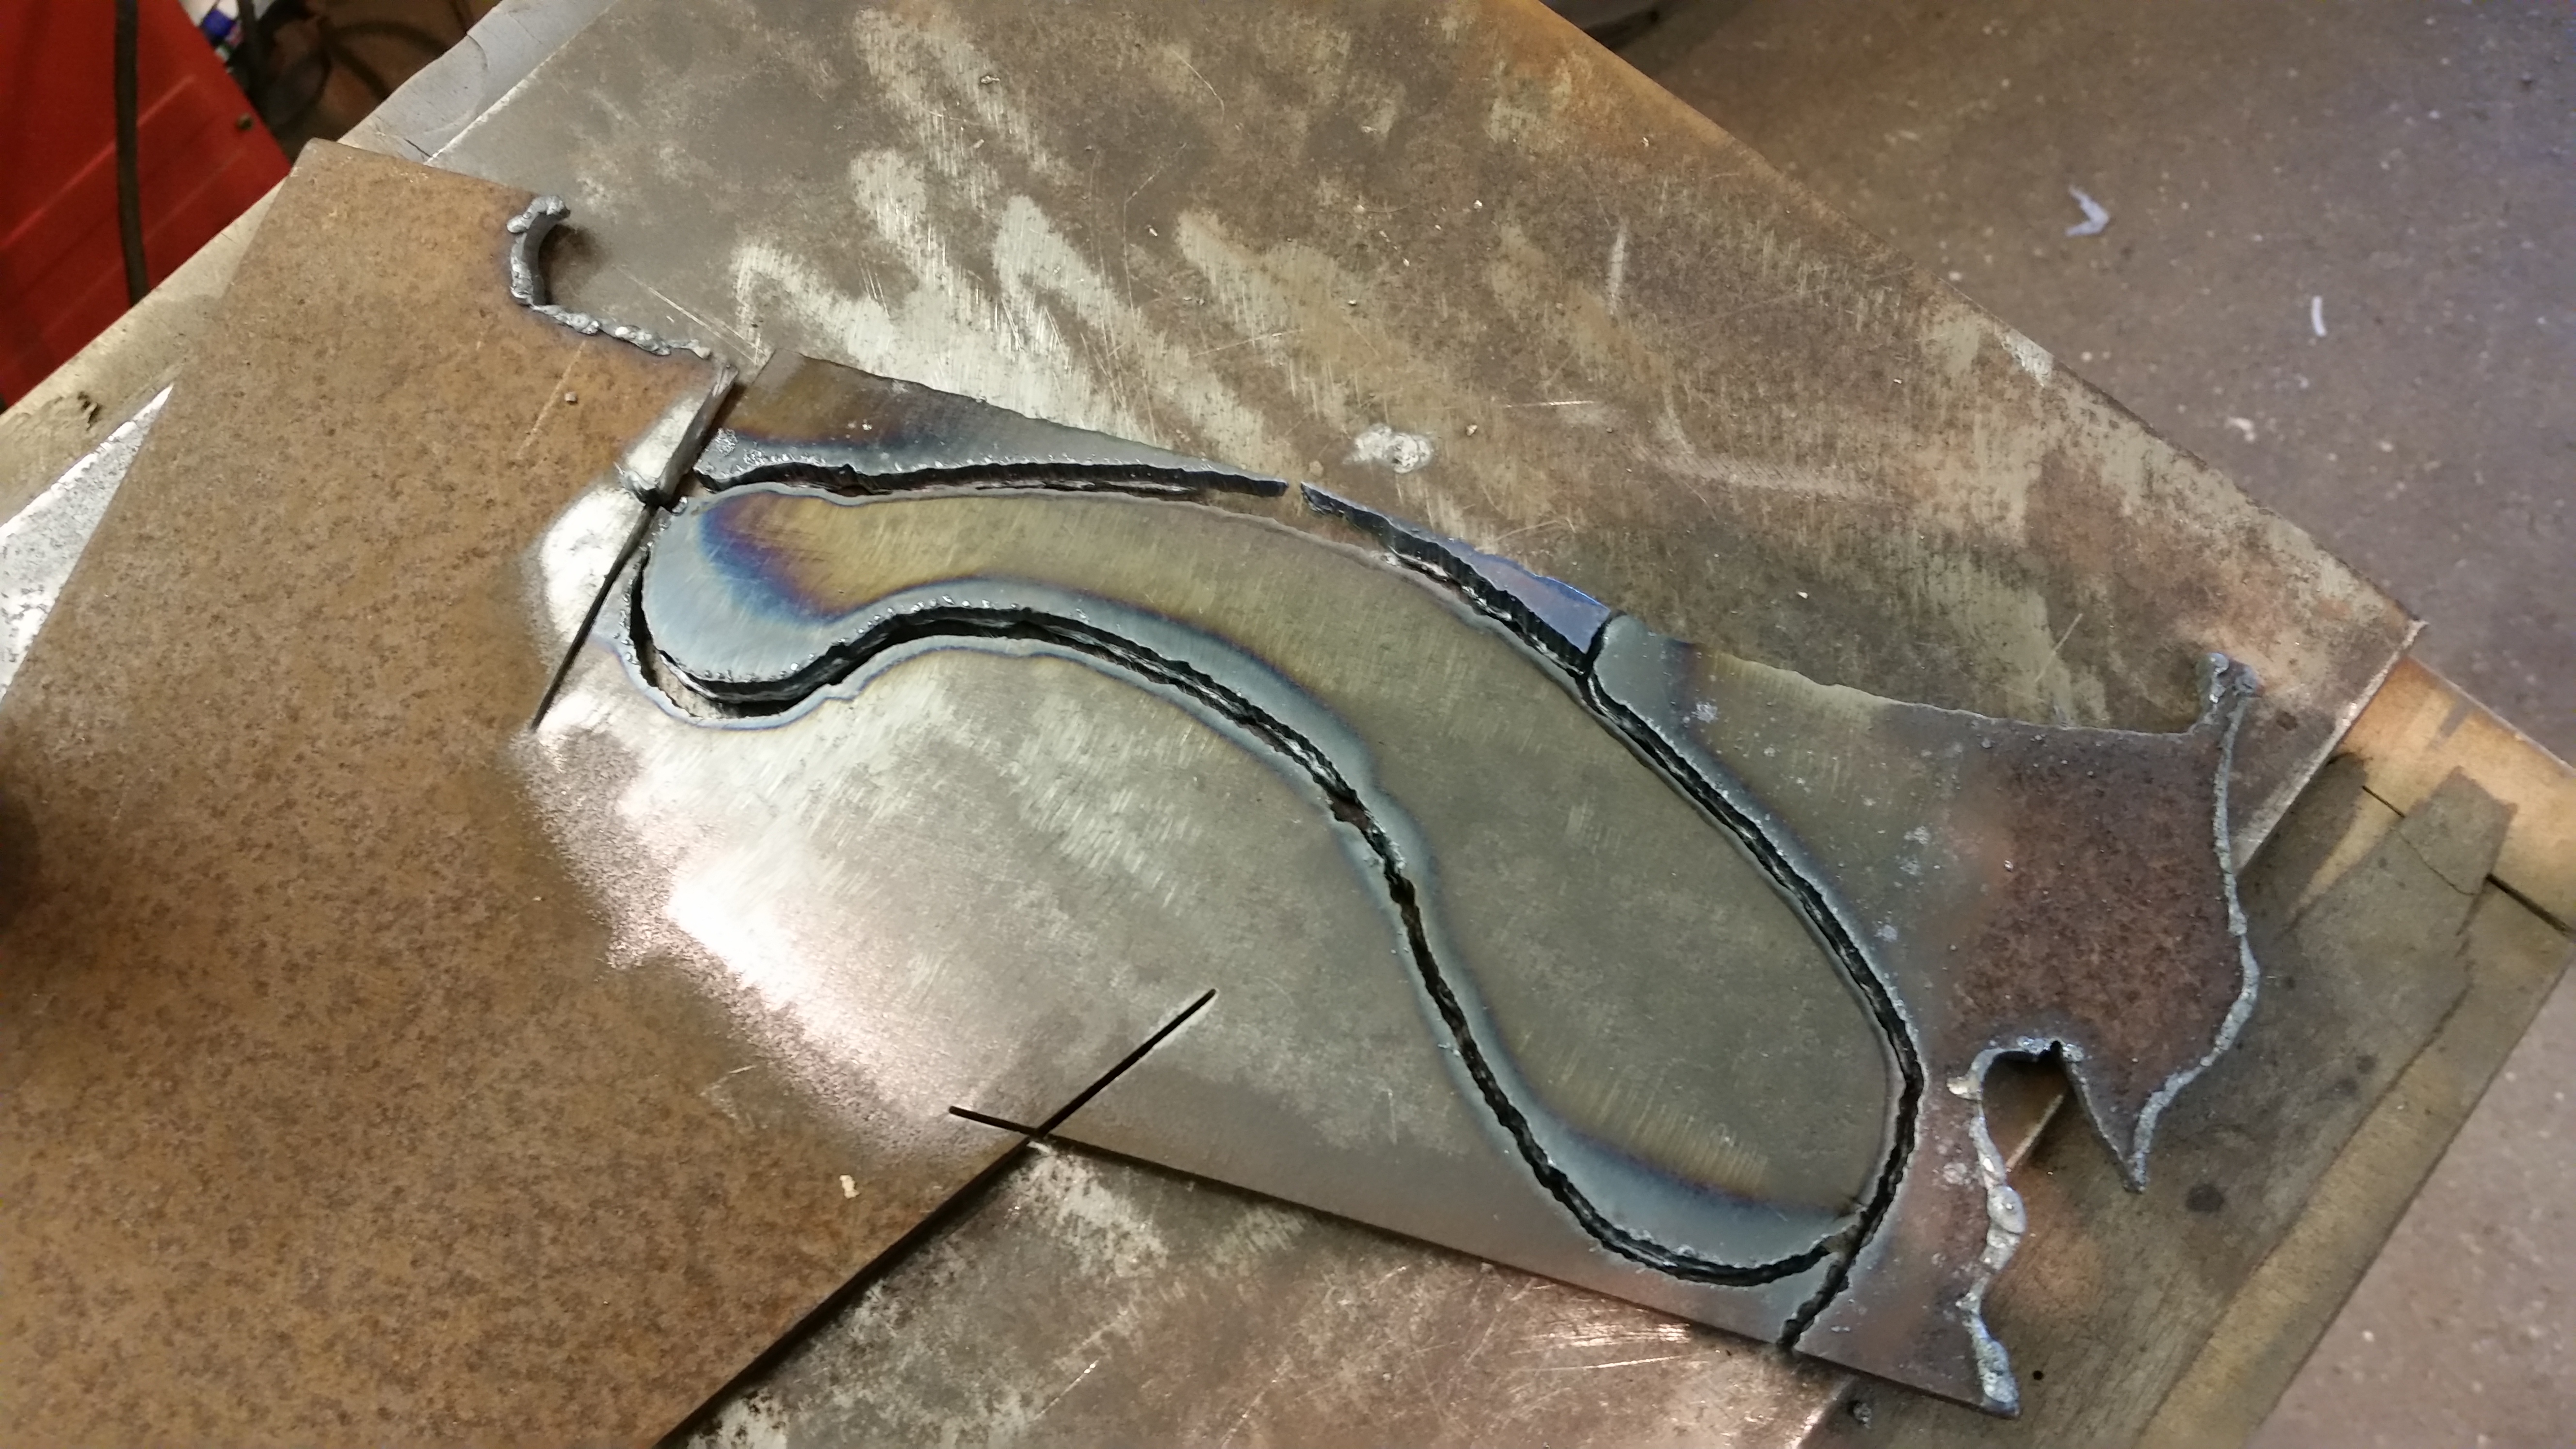
I cleaned up some 5mm plate and marked it out ready for cutting.
Using the plasma cutter I cut this out in no time and trimmed it up on the linisher.
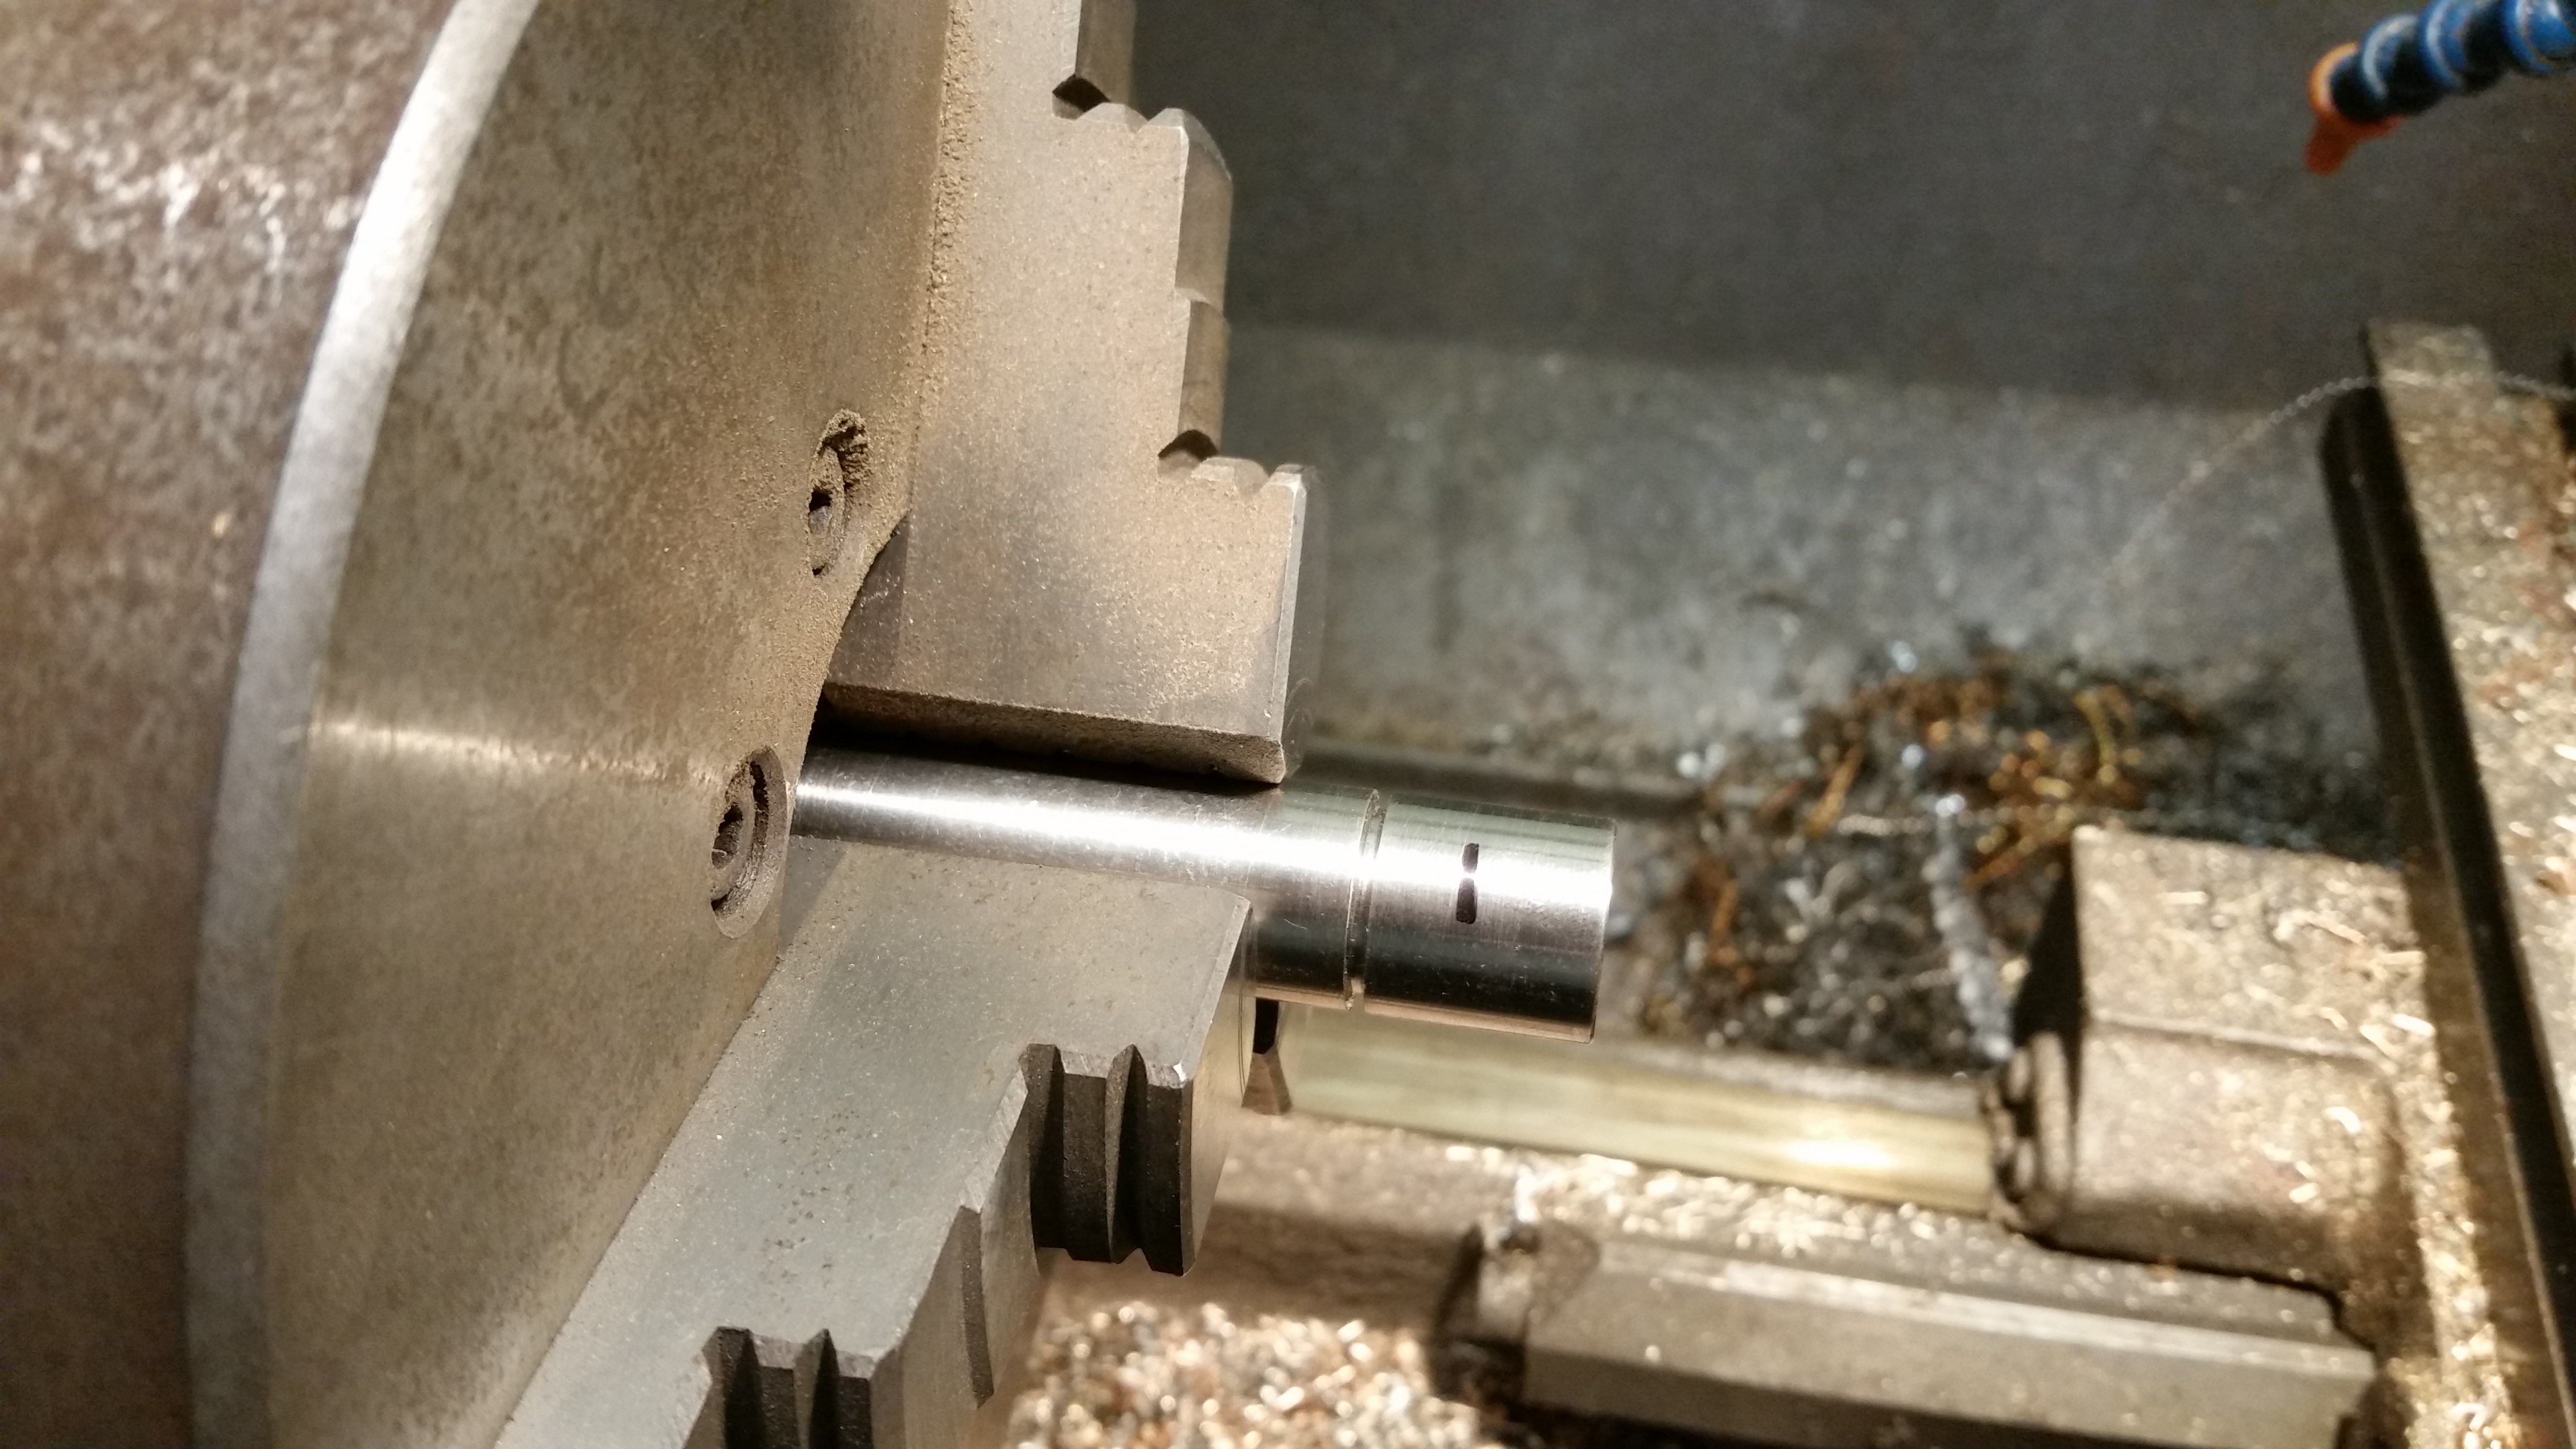
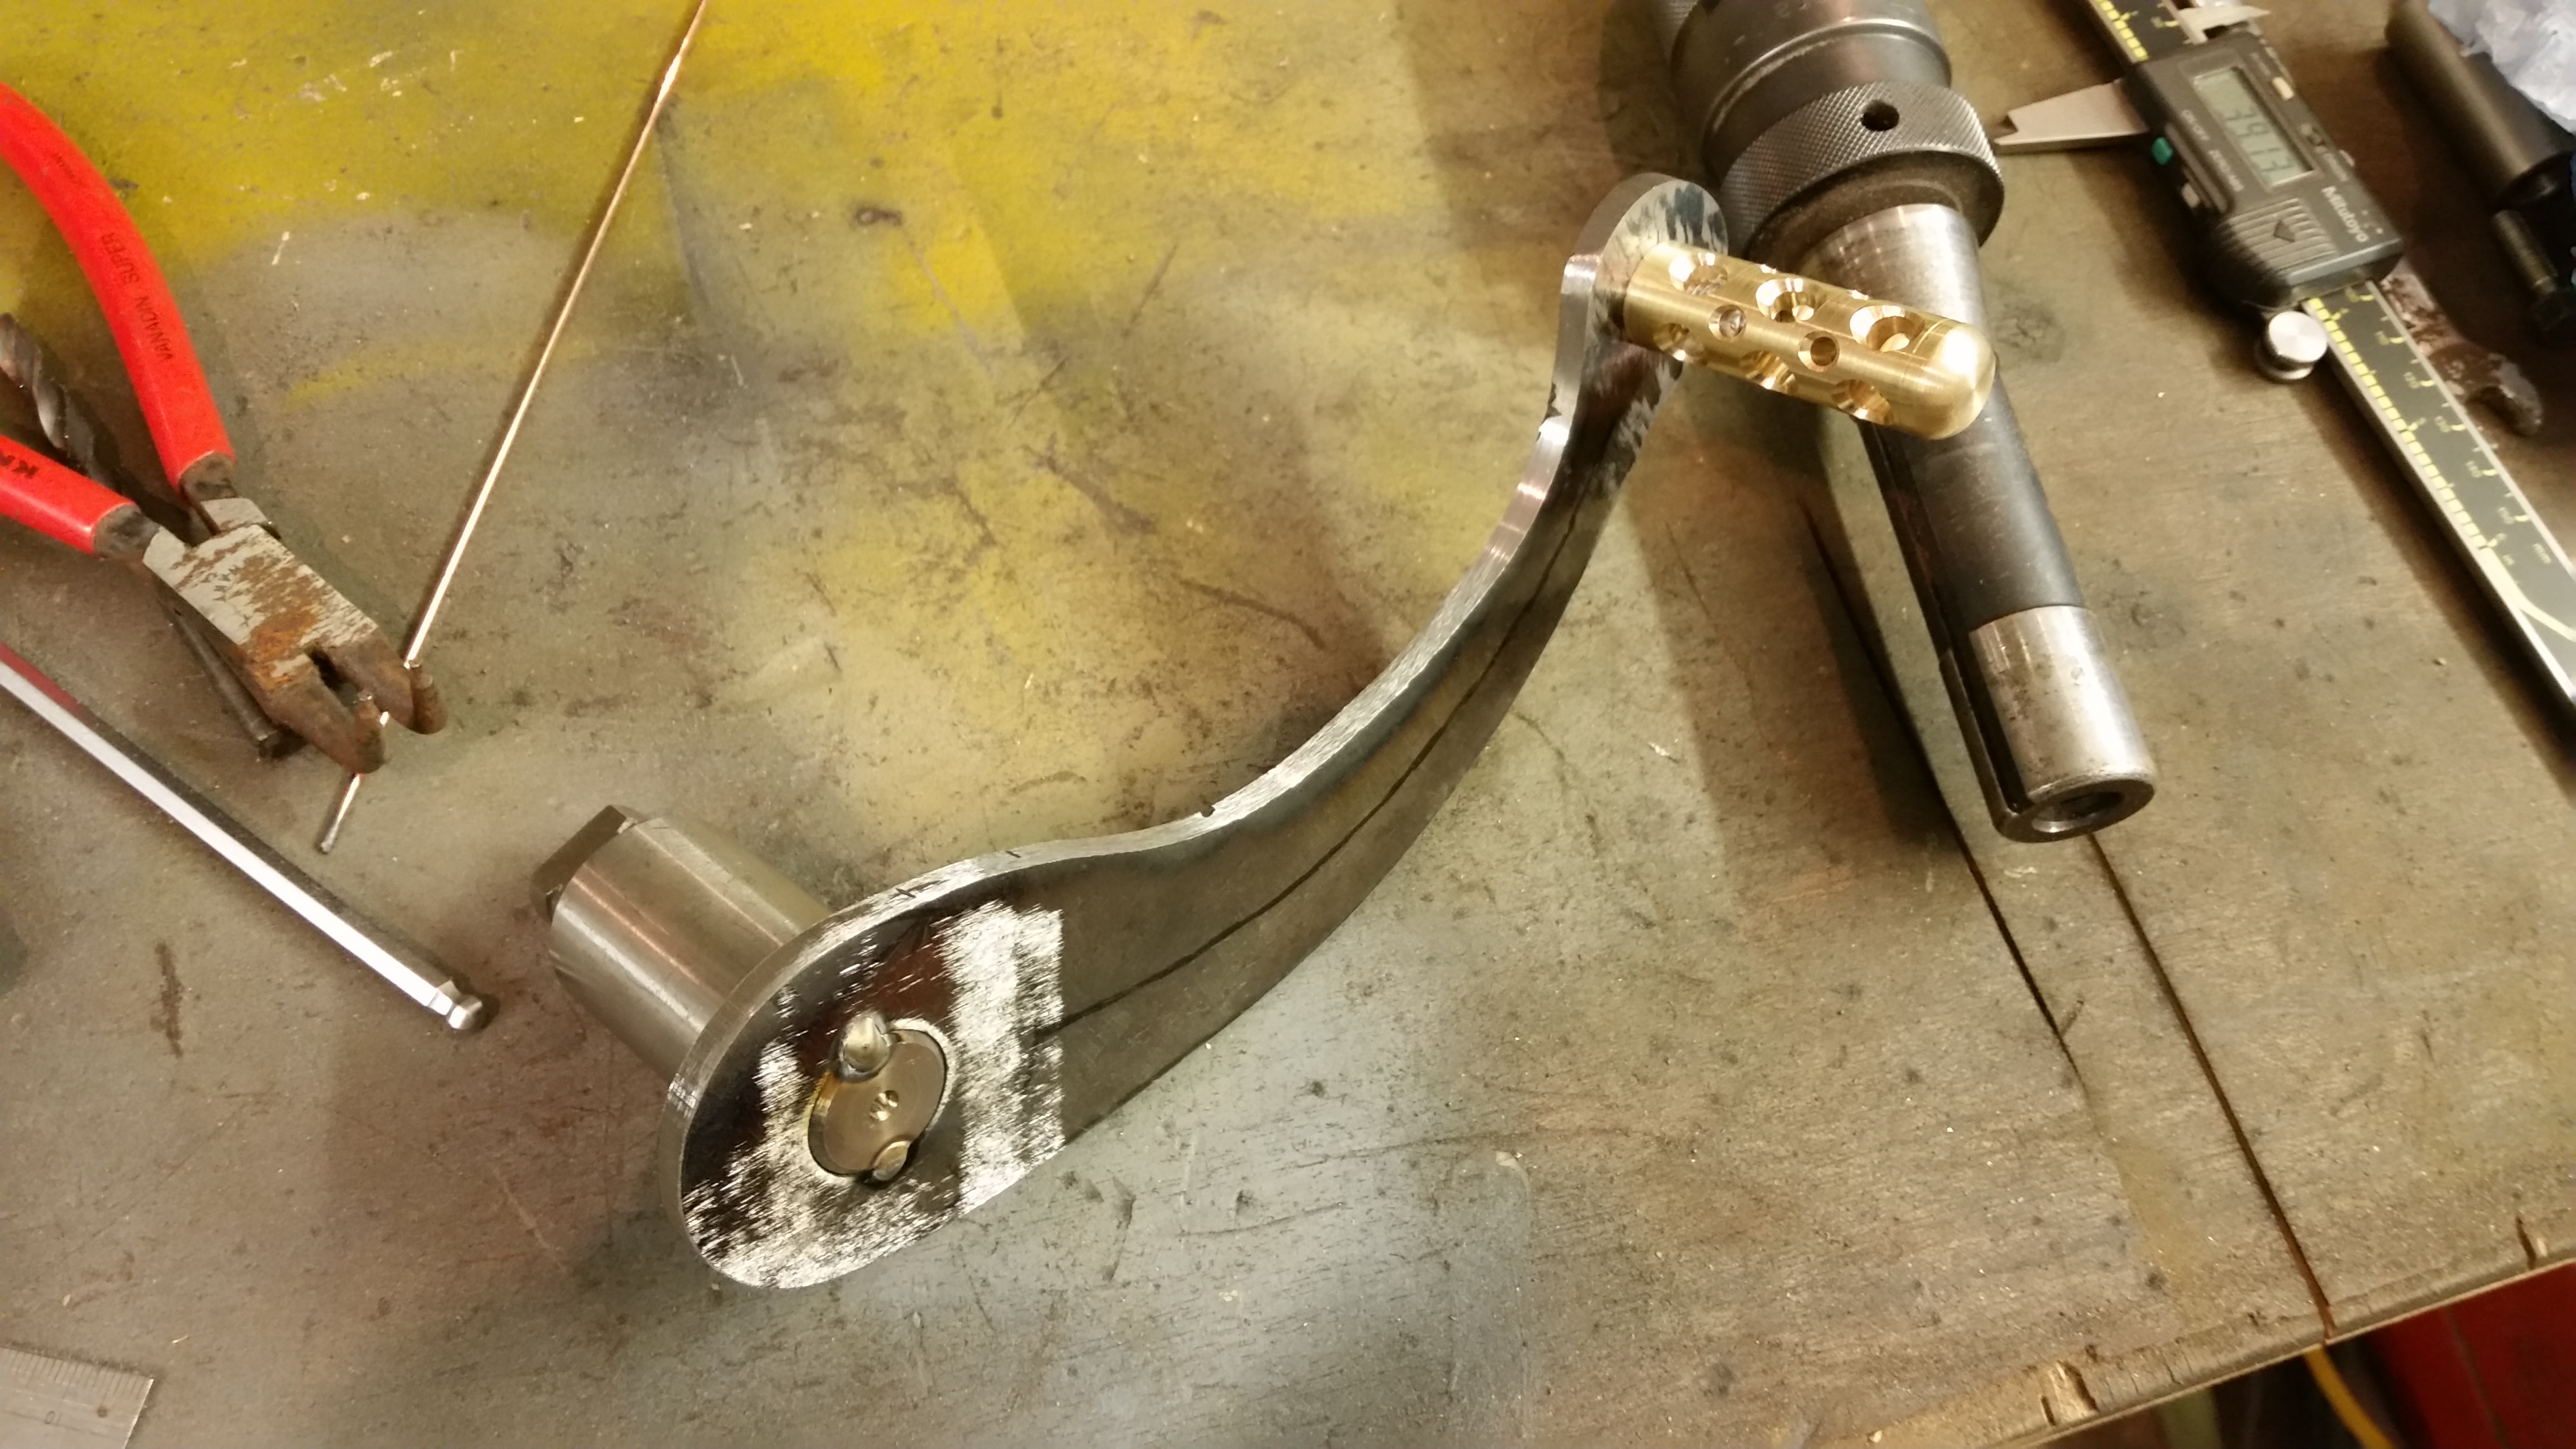
Next I made a stainless pin to accept the brake lever with a couple of circlip groves
I welded the pin to the brake lever and added a brass bit in the same style as the rest of the sparkly bits.
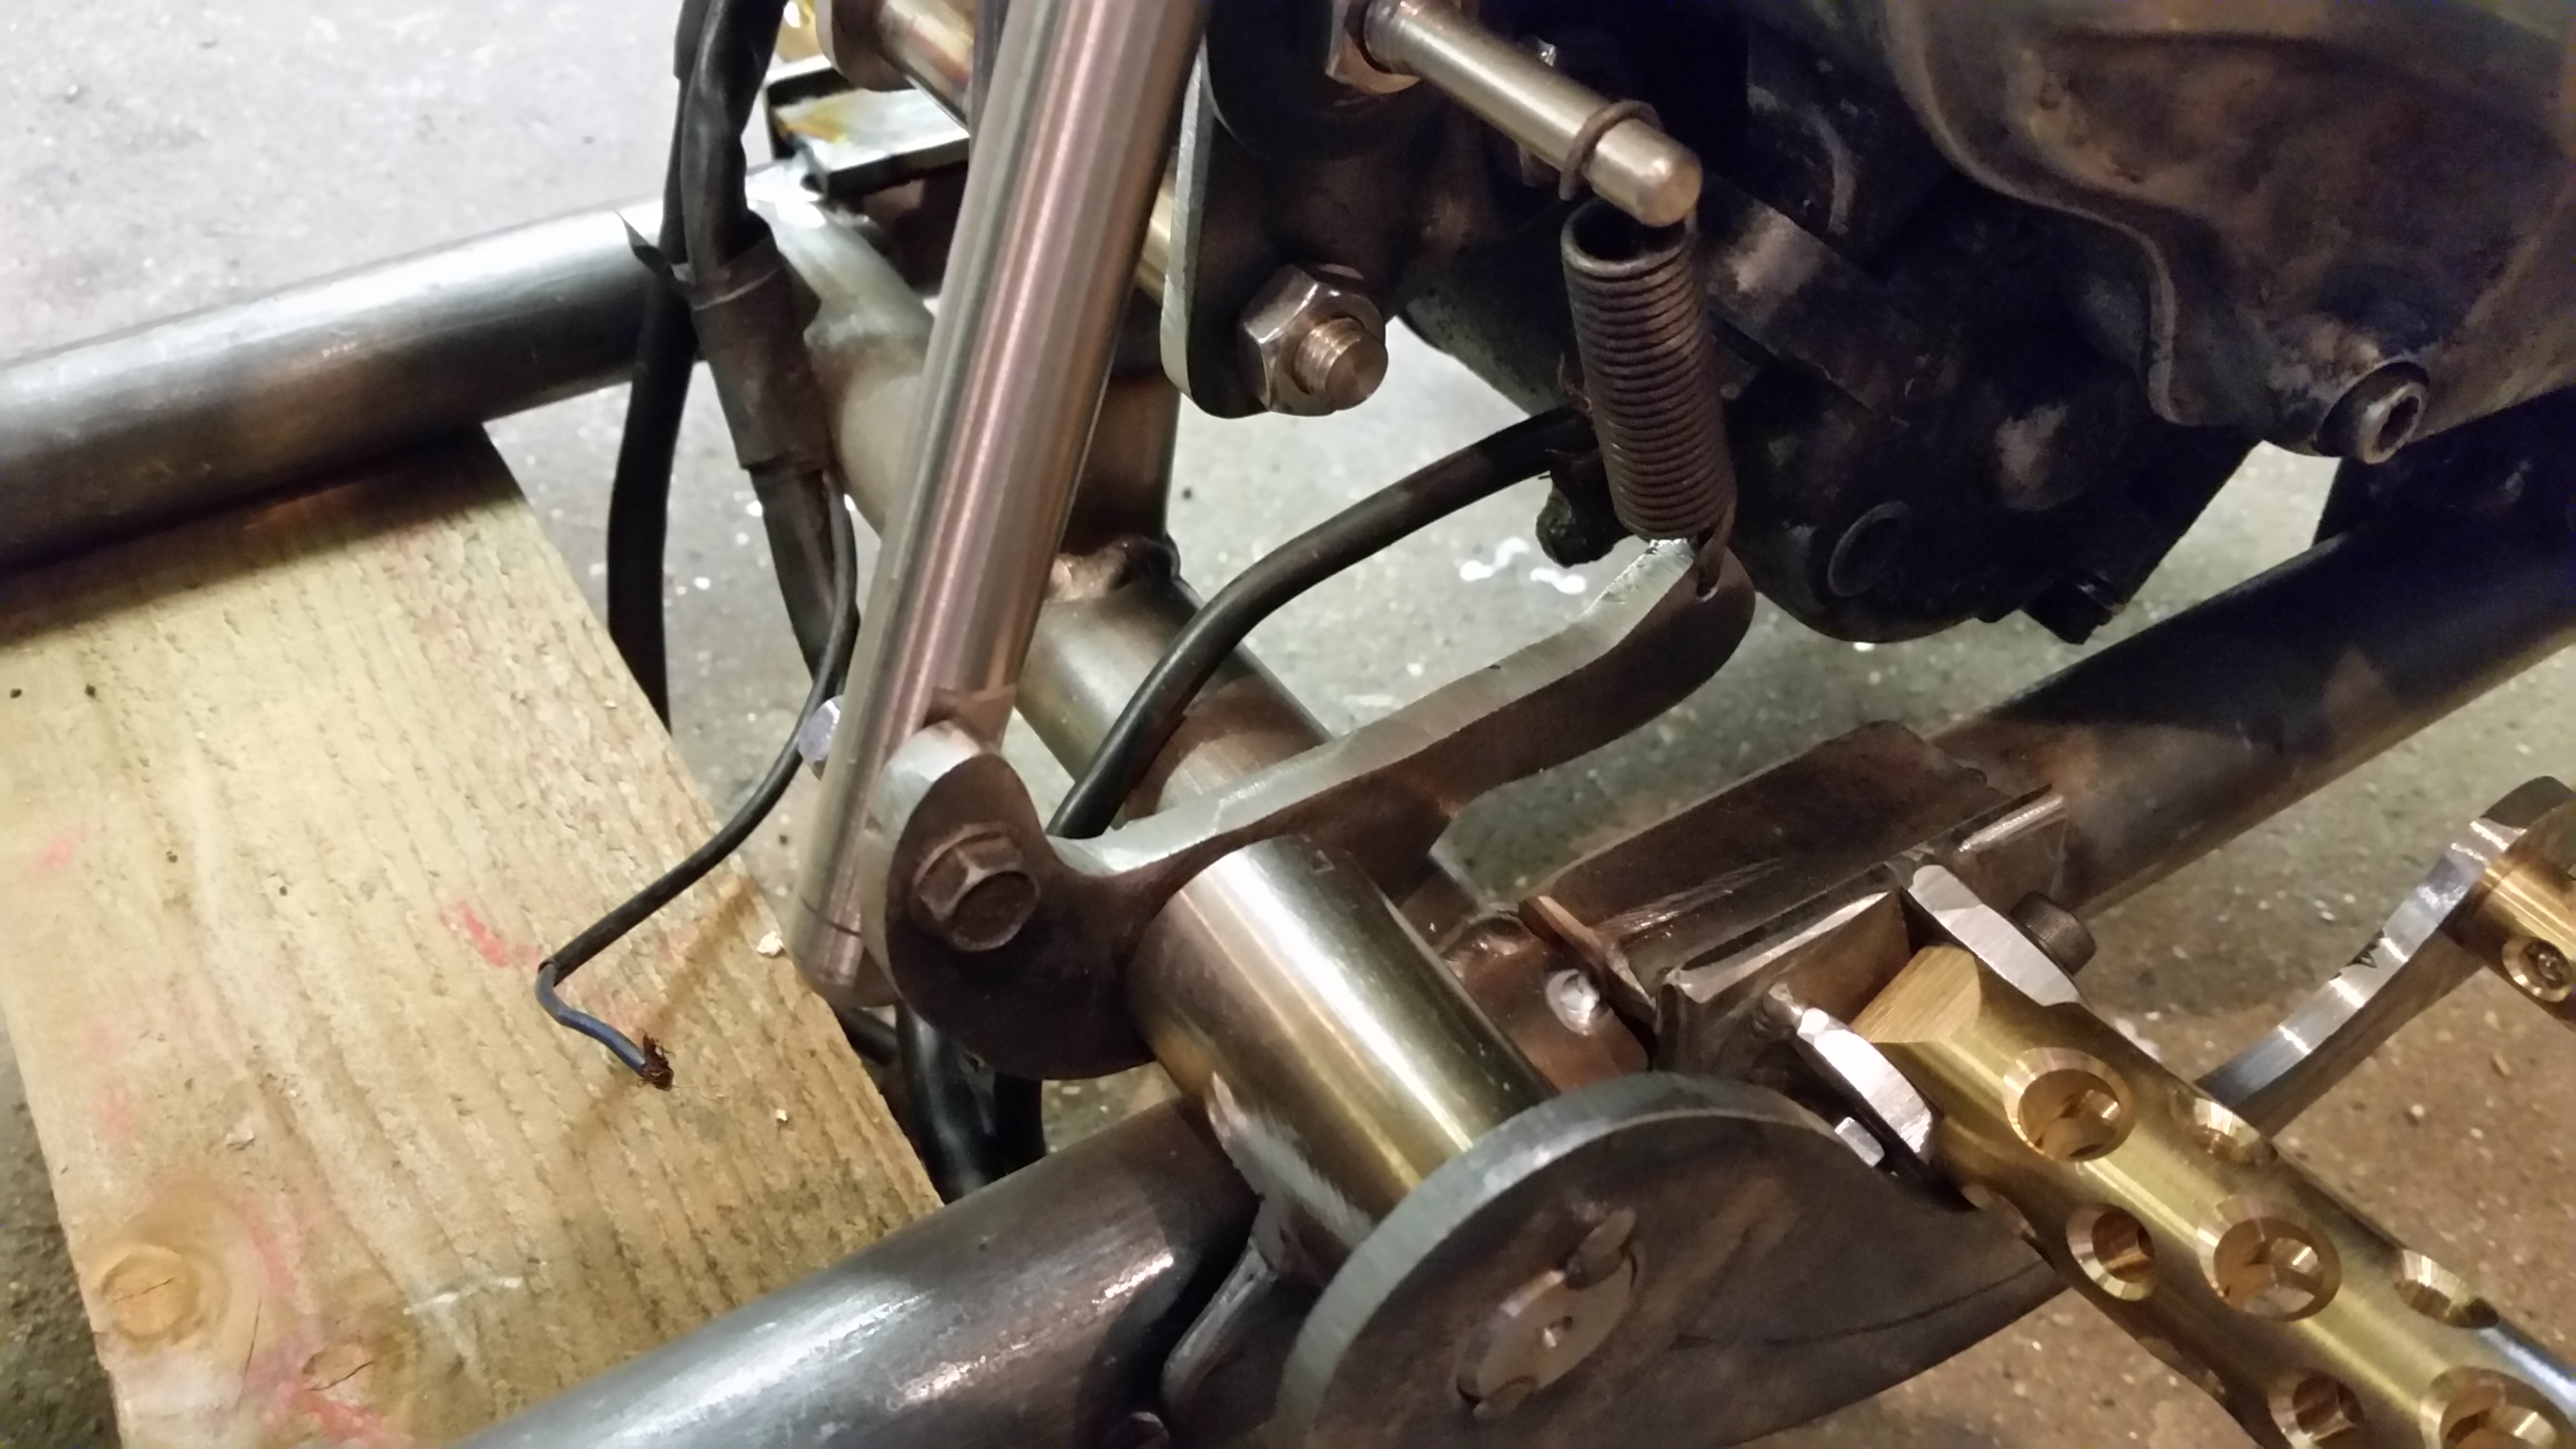
The lever is a bit tucked away under the engine and a bit close to the footpeg so won’t offer a lot of leverage but as I don’t like to use the rear anchor I’m not too bothered.
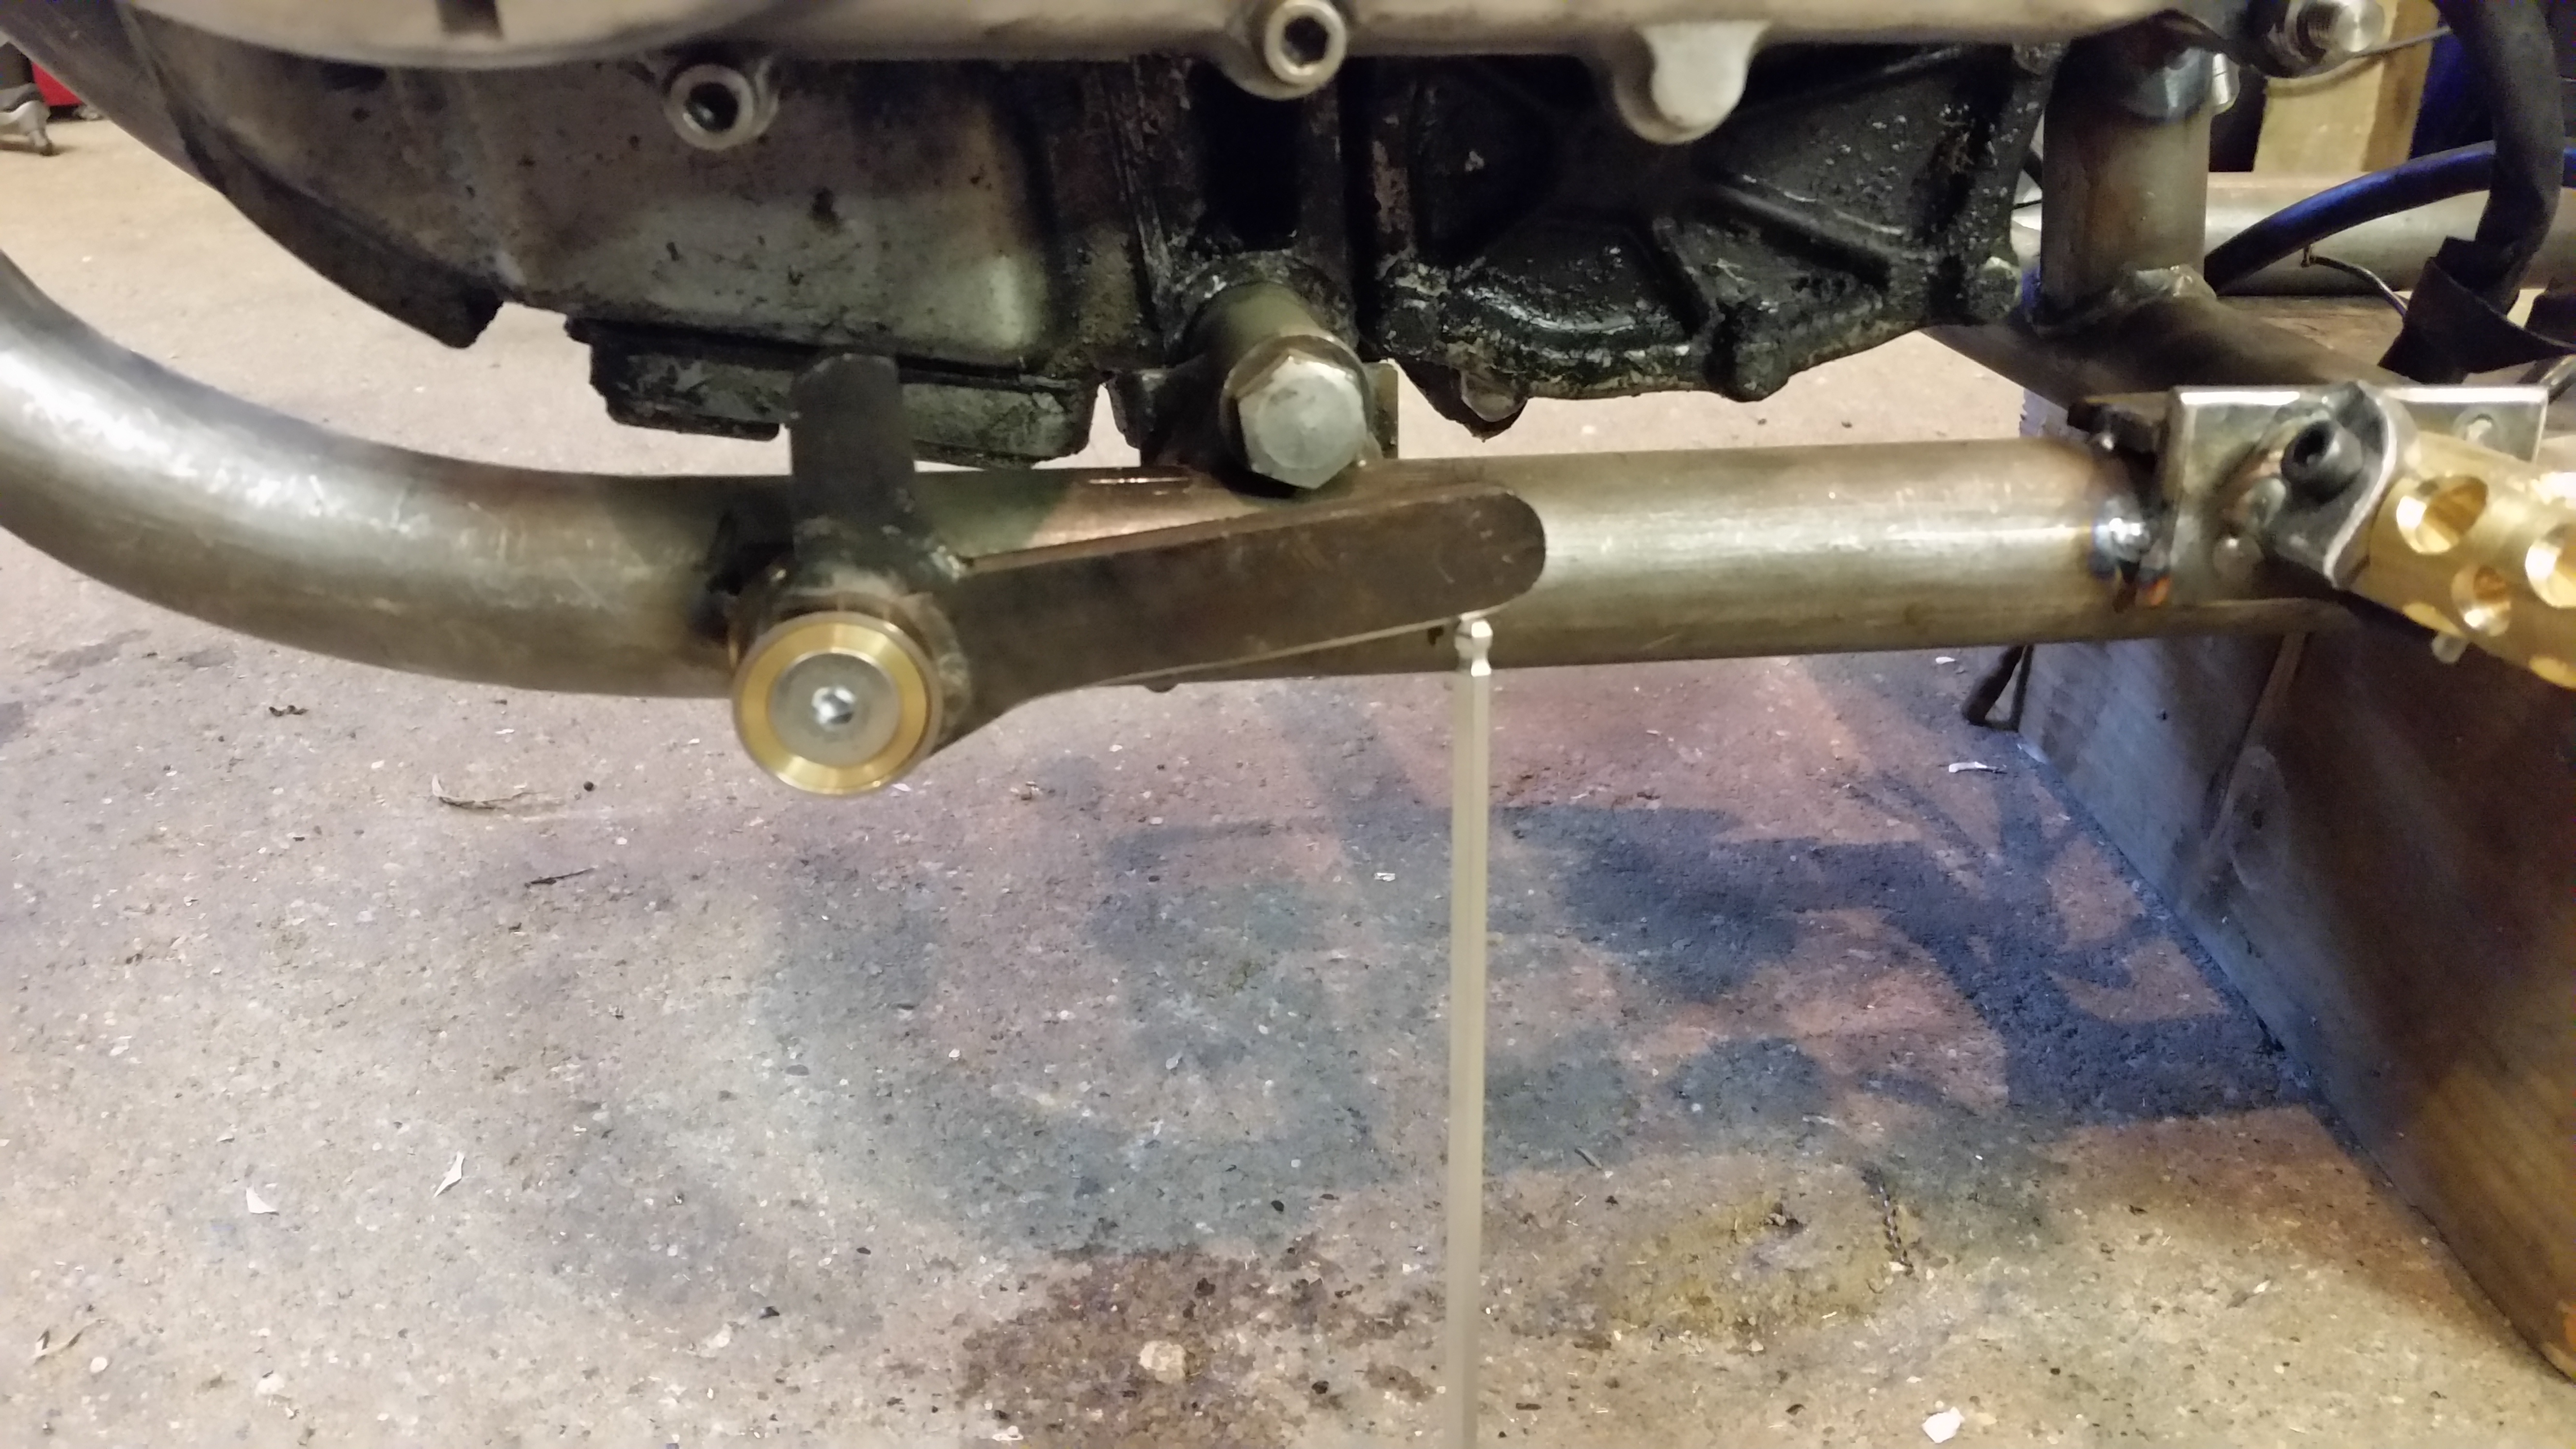
Next is the little lever that oporates the master cylinder, rough cut from steel plate, I’ll add a hole that slides over the brake pin and can be held in place by one of the circlips.
So here’s a shot of how the lever looks in position, note the addition of a return spring cunningly added on to one of the engine mount bolts.
Now attached to the rear master cylinder pump, I have a reservoir in brass made but need to take a pic.
Thats all working now, not pretty but working so next was the gear change, I made up a small square with a pin and attached this to the frame, the pin is the same size as the inner diameter of a skateboard bearing.
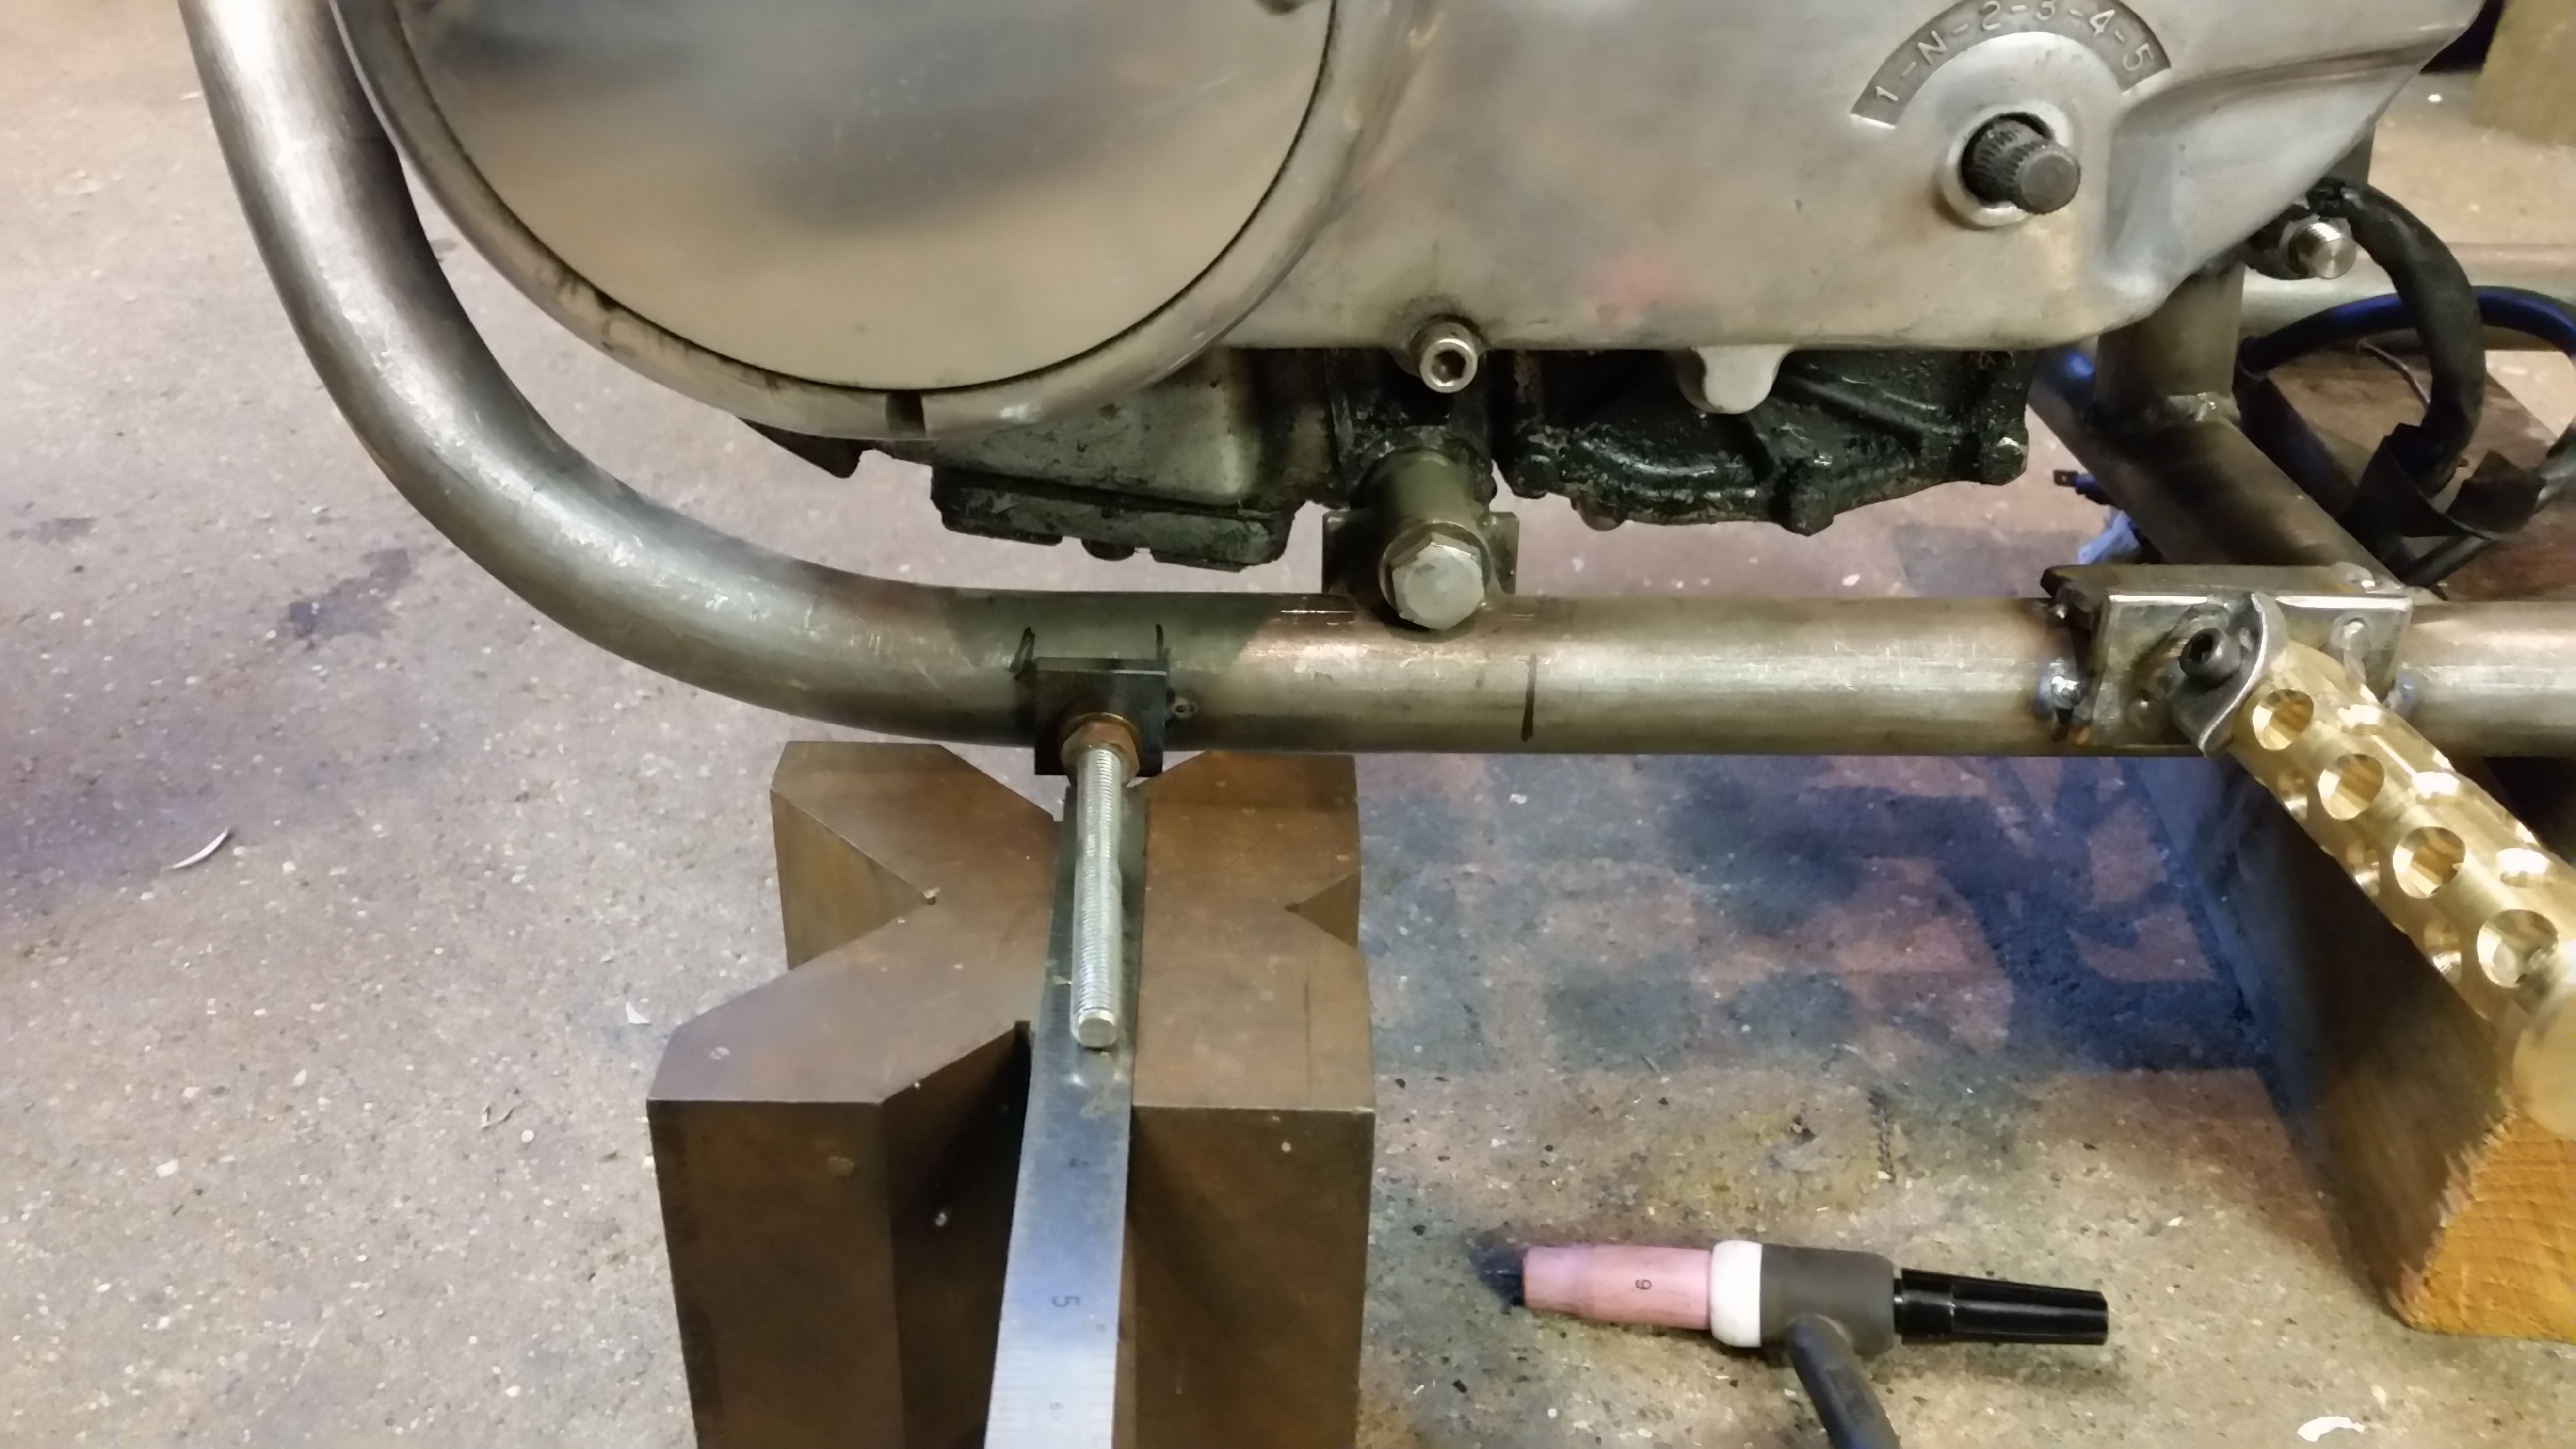
Now it’s on the frame nice and square the excess is removed and a lever made to suit containing the skateboard bearing.
Next I bought a couple of rose joints from eBay and made the connecting rods, all seems to work ok so far.
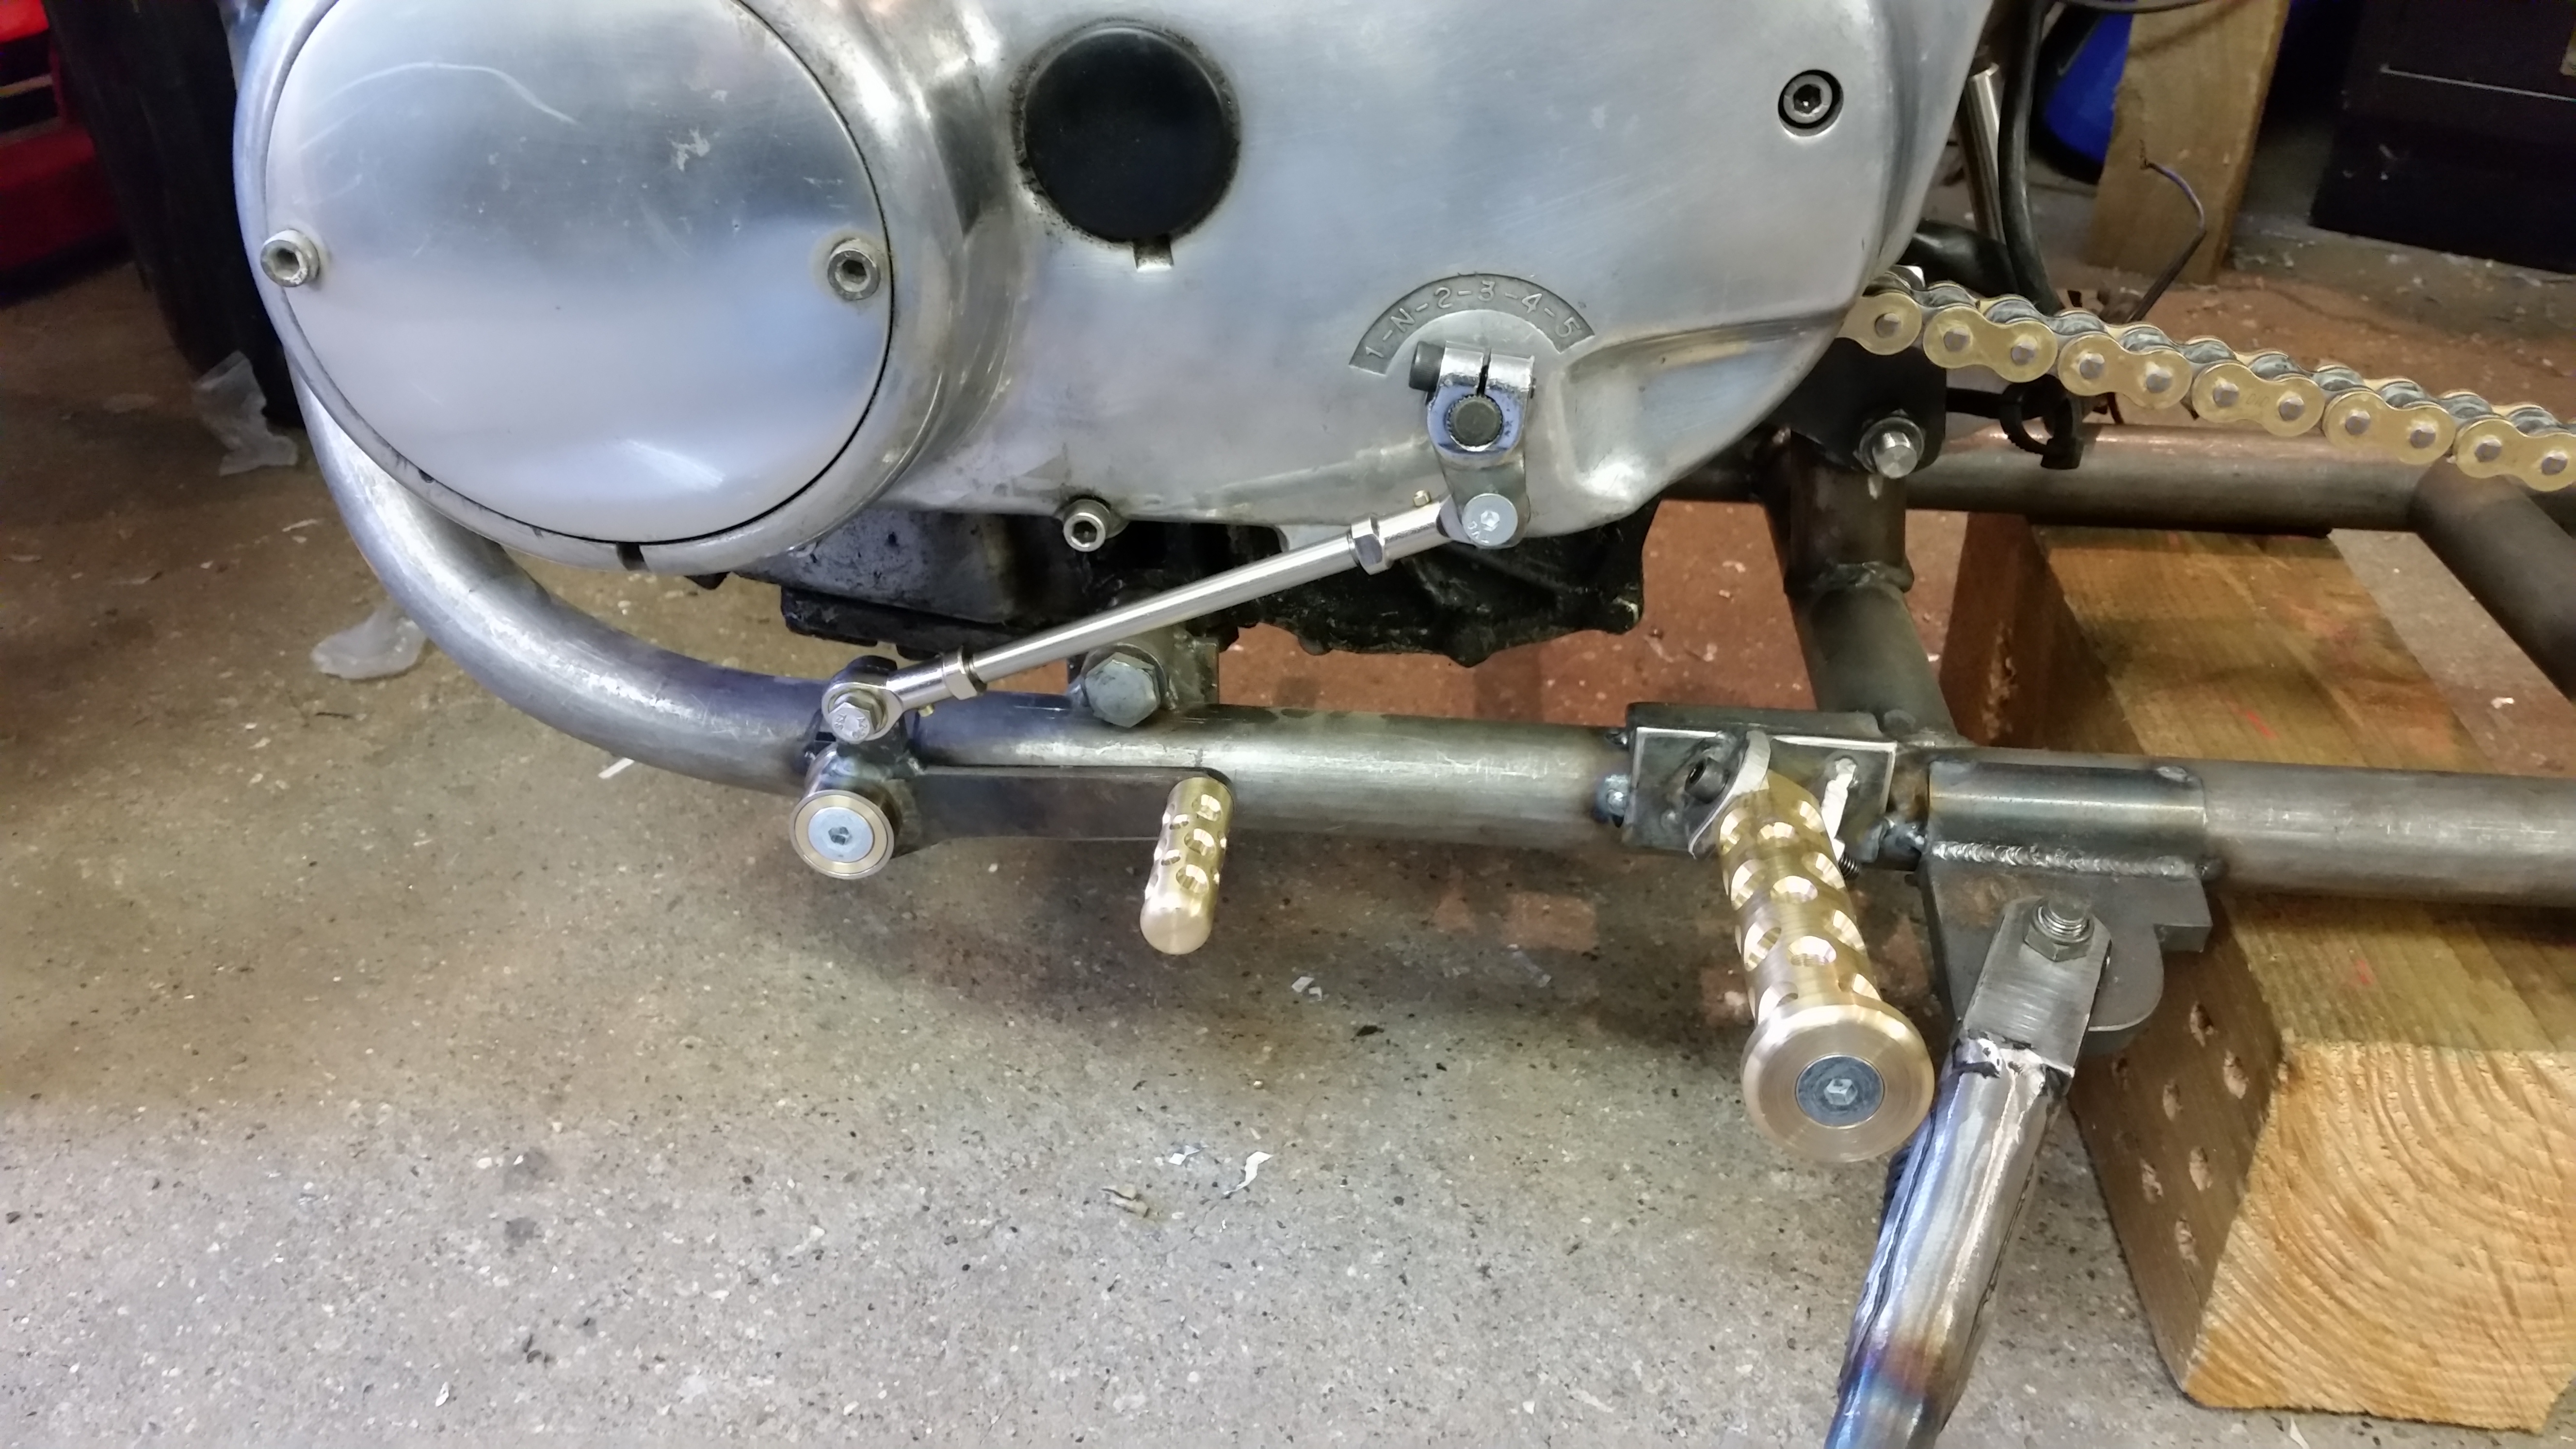
Made up a nice sparkly brass bit in the same style.
As scavengers we try to keep our thieving down to a minimum most of the time, not so much at the weekends when all the best stuff is about but certainly mid-week we barely rob anything unless it’s really well worth having, it’s an unwritten rule and we sometimes abide by it strictly.
I feel it is my duty to publicly shame FRUITSHOOT for pillaging from another member, namely me.
I spent hours welding and making bits for his bike this weekend when I should have been ‘collecting’ parts and how am I paid for this…….by being stolen from……and I have evidence.
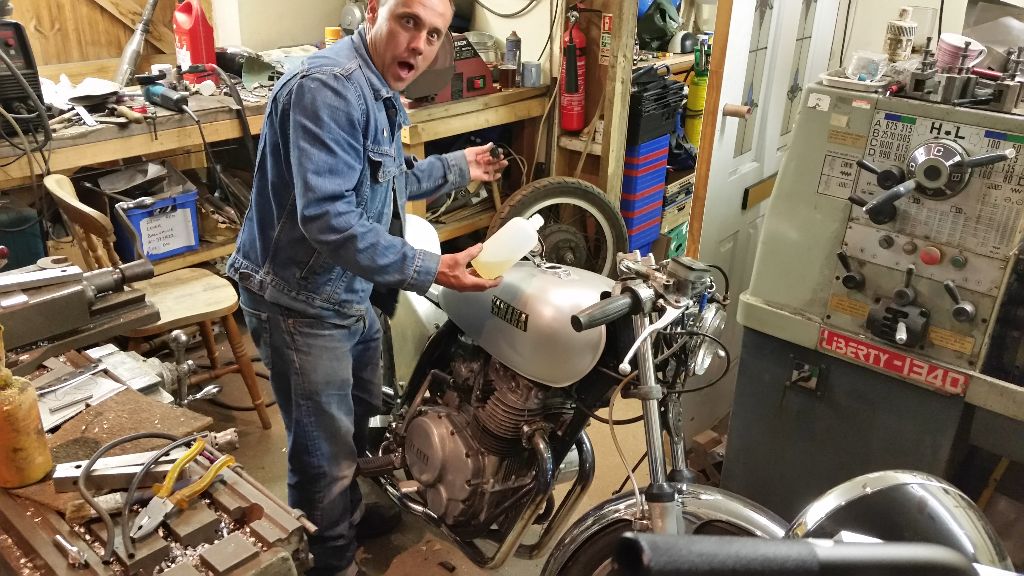
I keep a bottle of petrol in my shed for cleaning and caught the thieving git in the act of robbery whilst he thought my back was turned, I asked him what he was doing and he said “I’m not sorry and if you have any more I’ll nick that too”……what a cheek….there should be laws against thieving.
Also laws about going out in ‘double denim’ need addressing.


