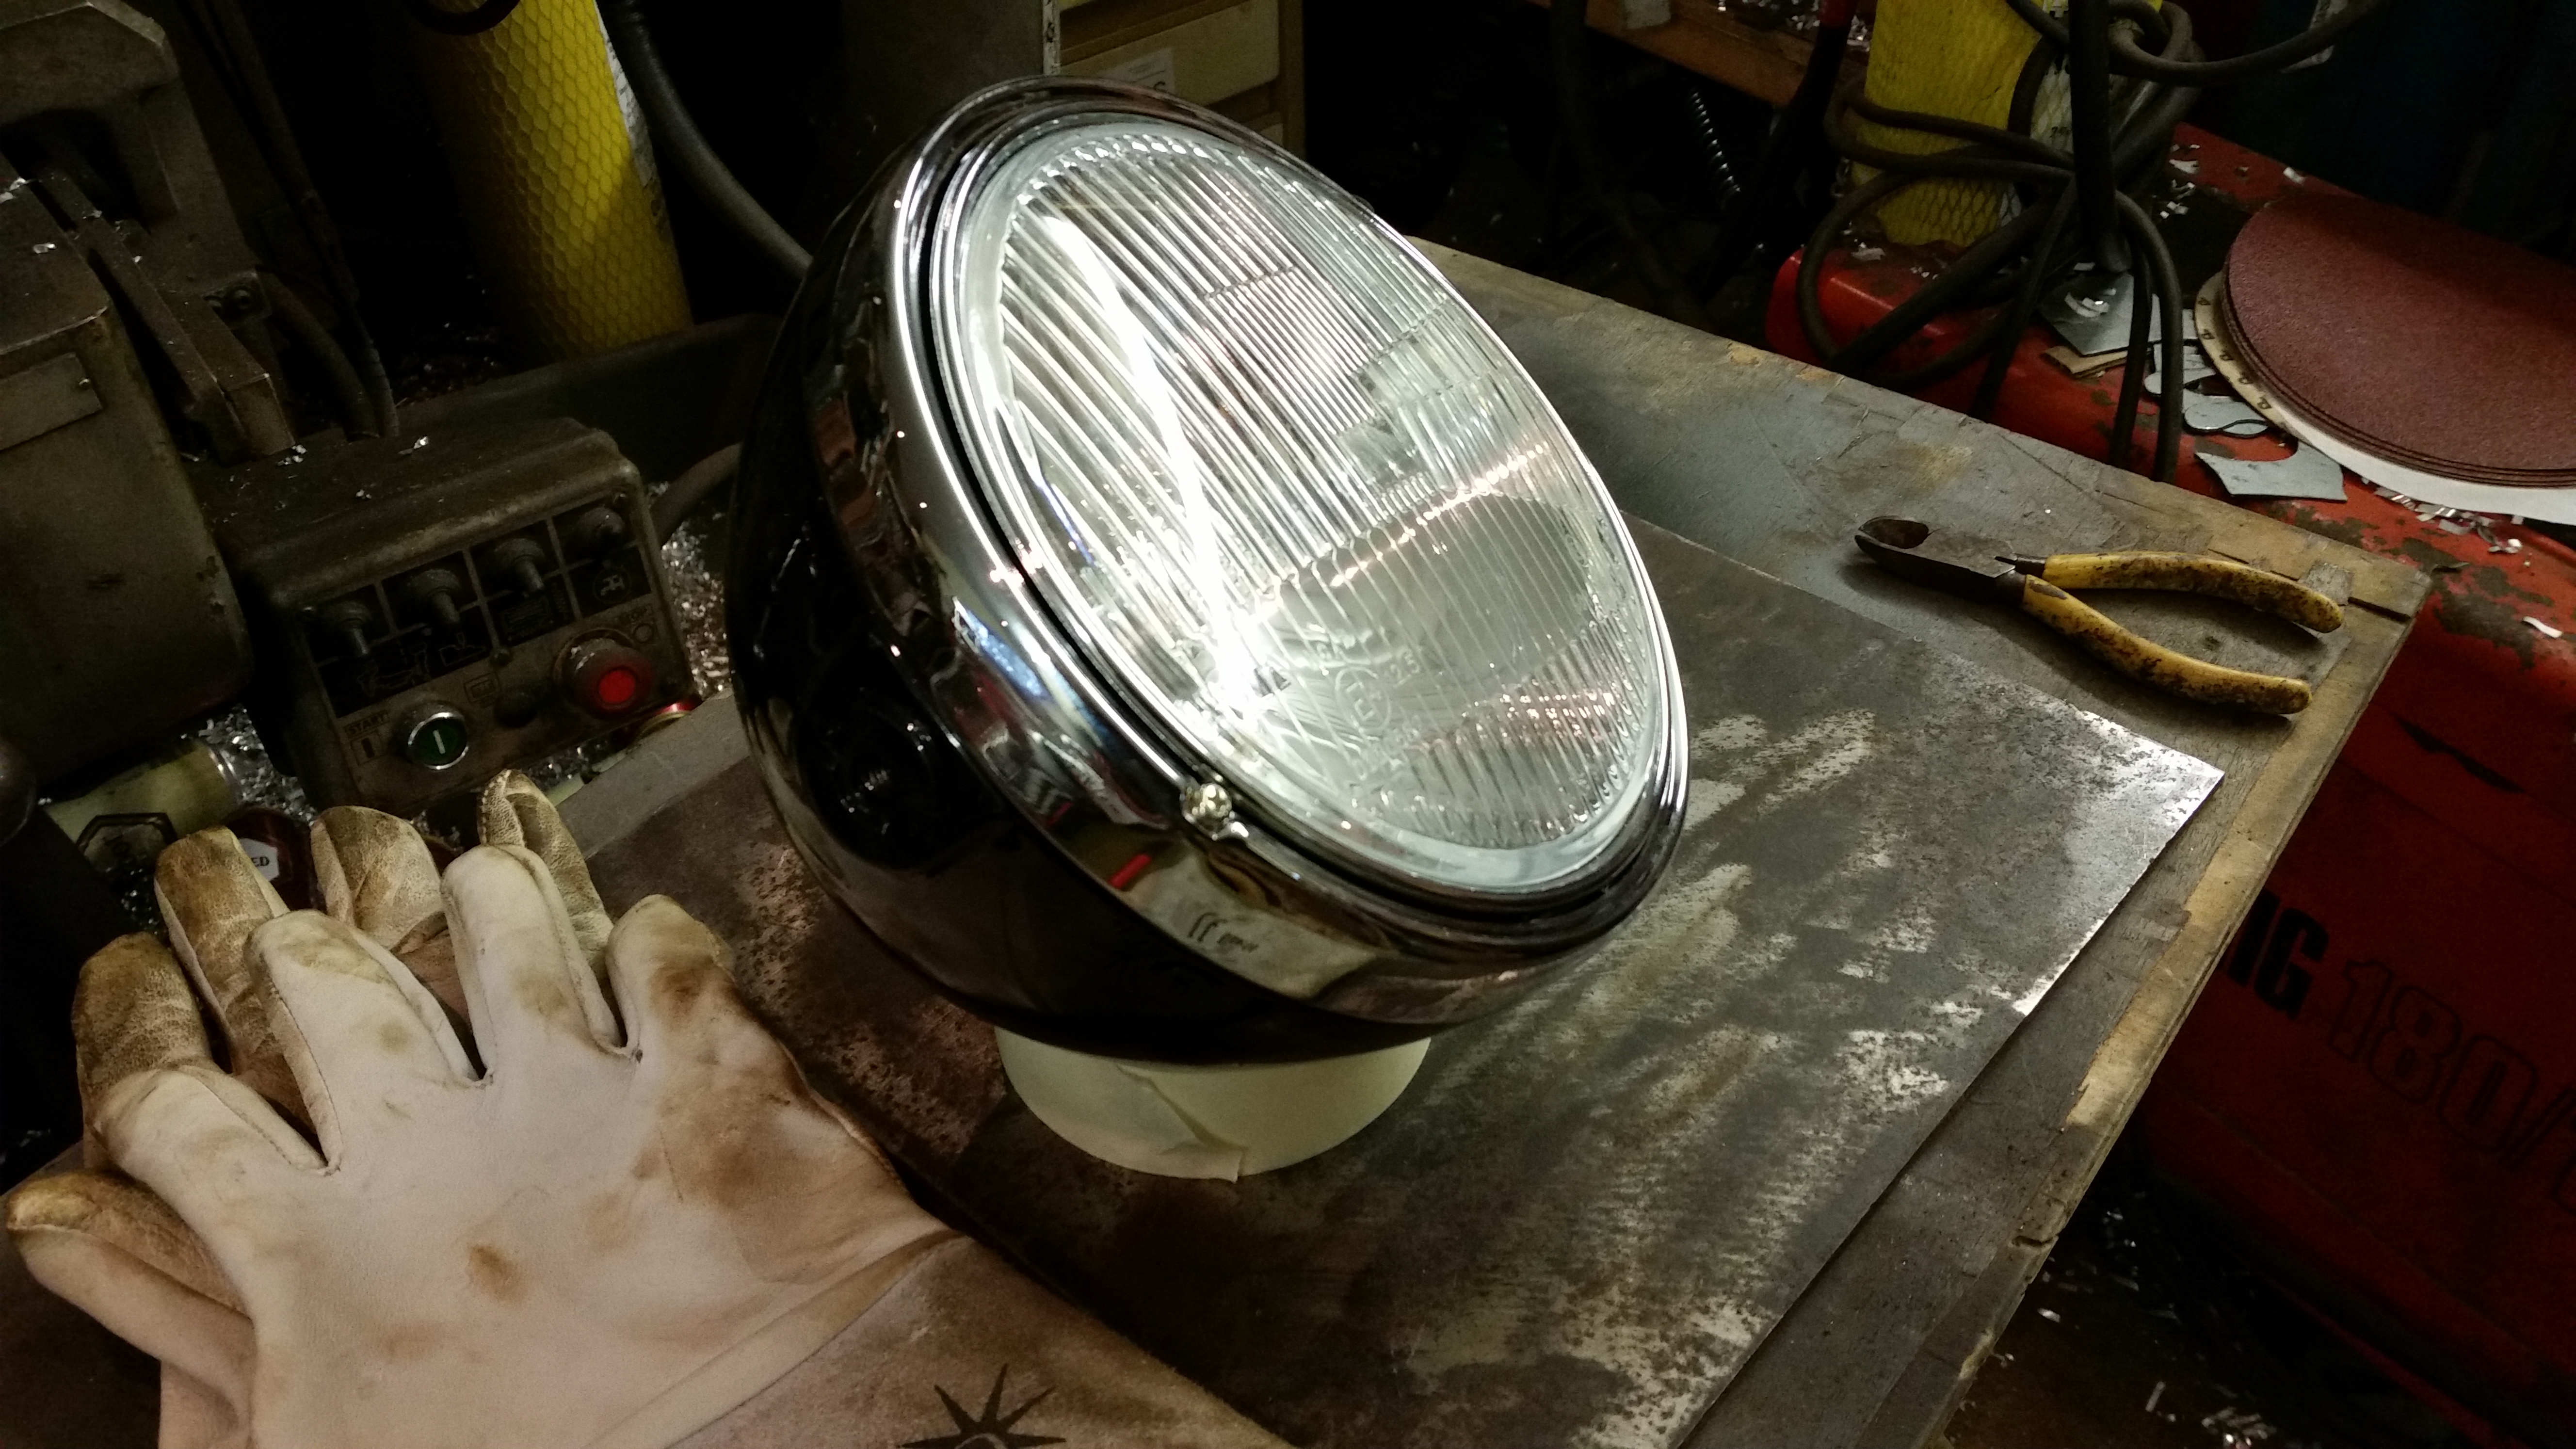
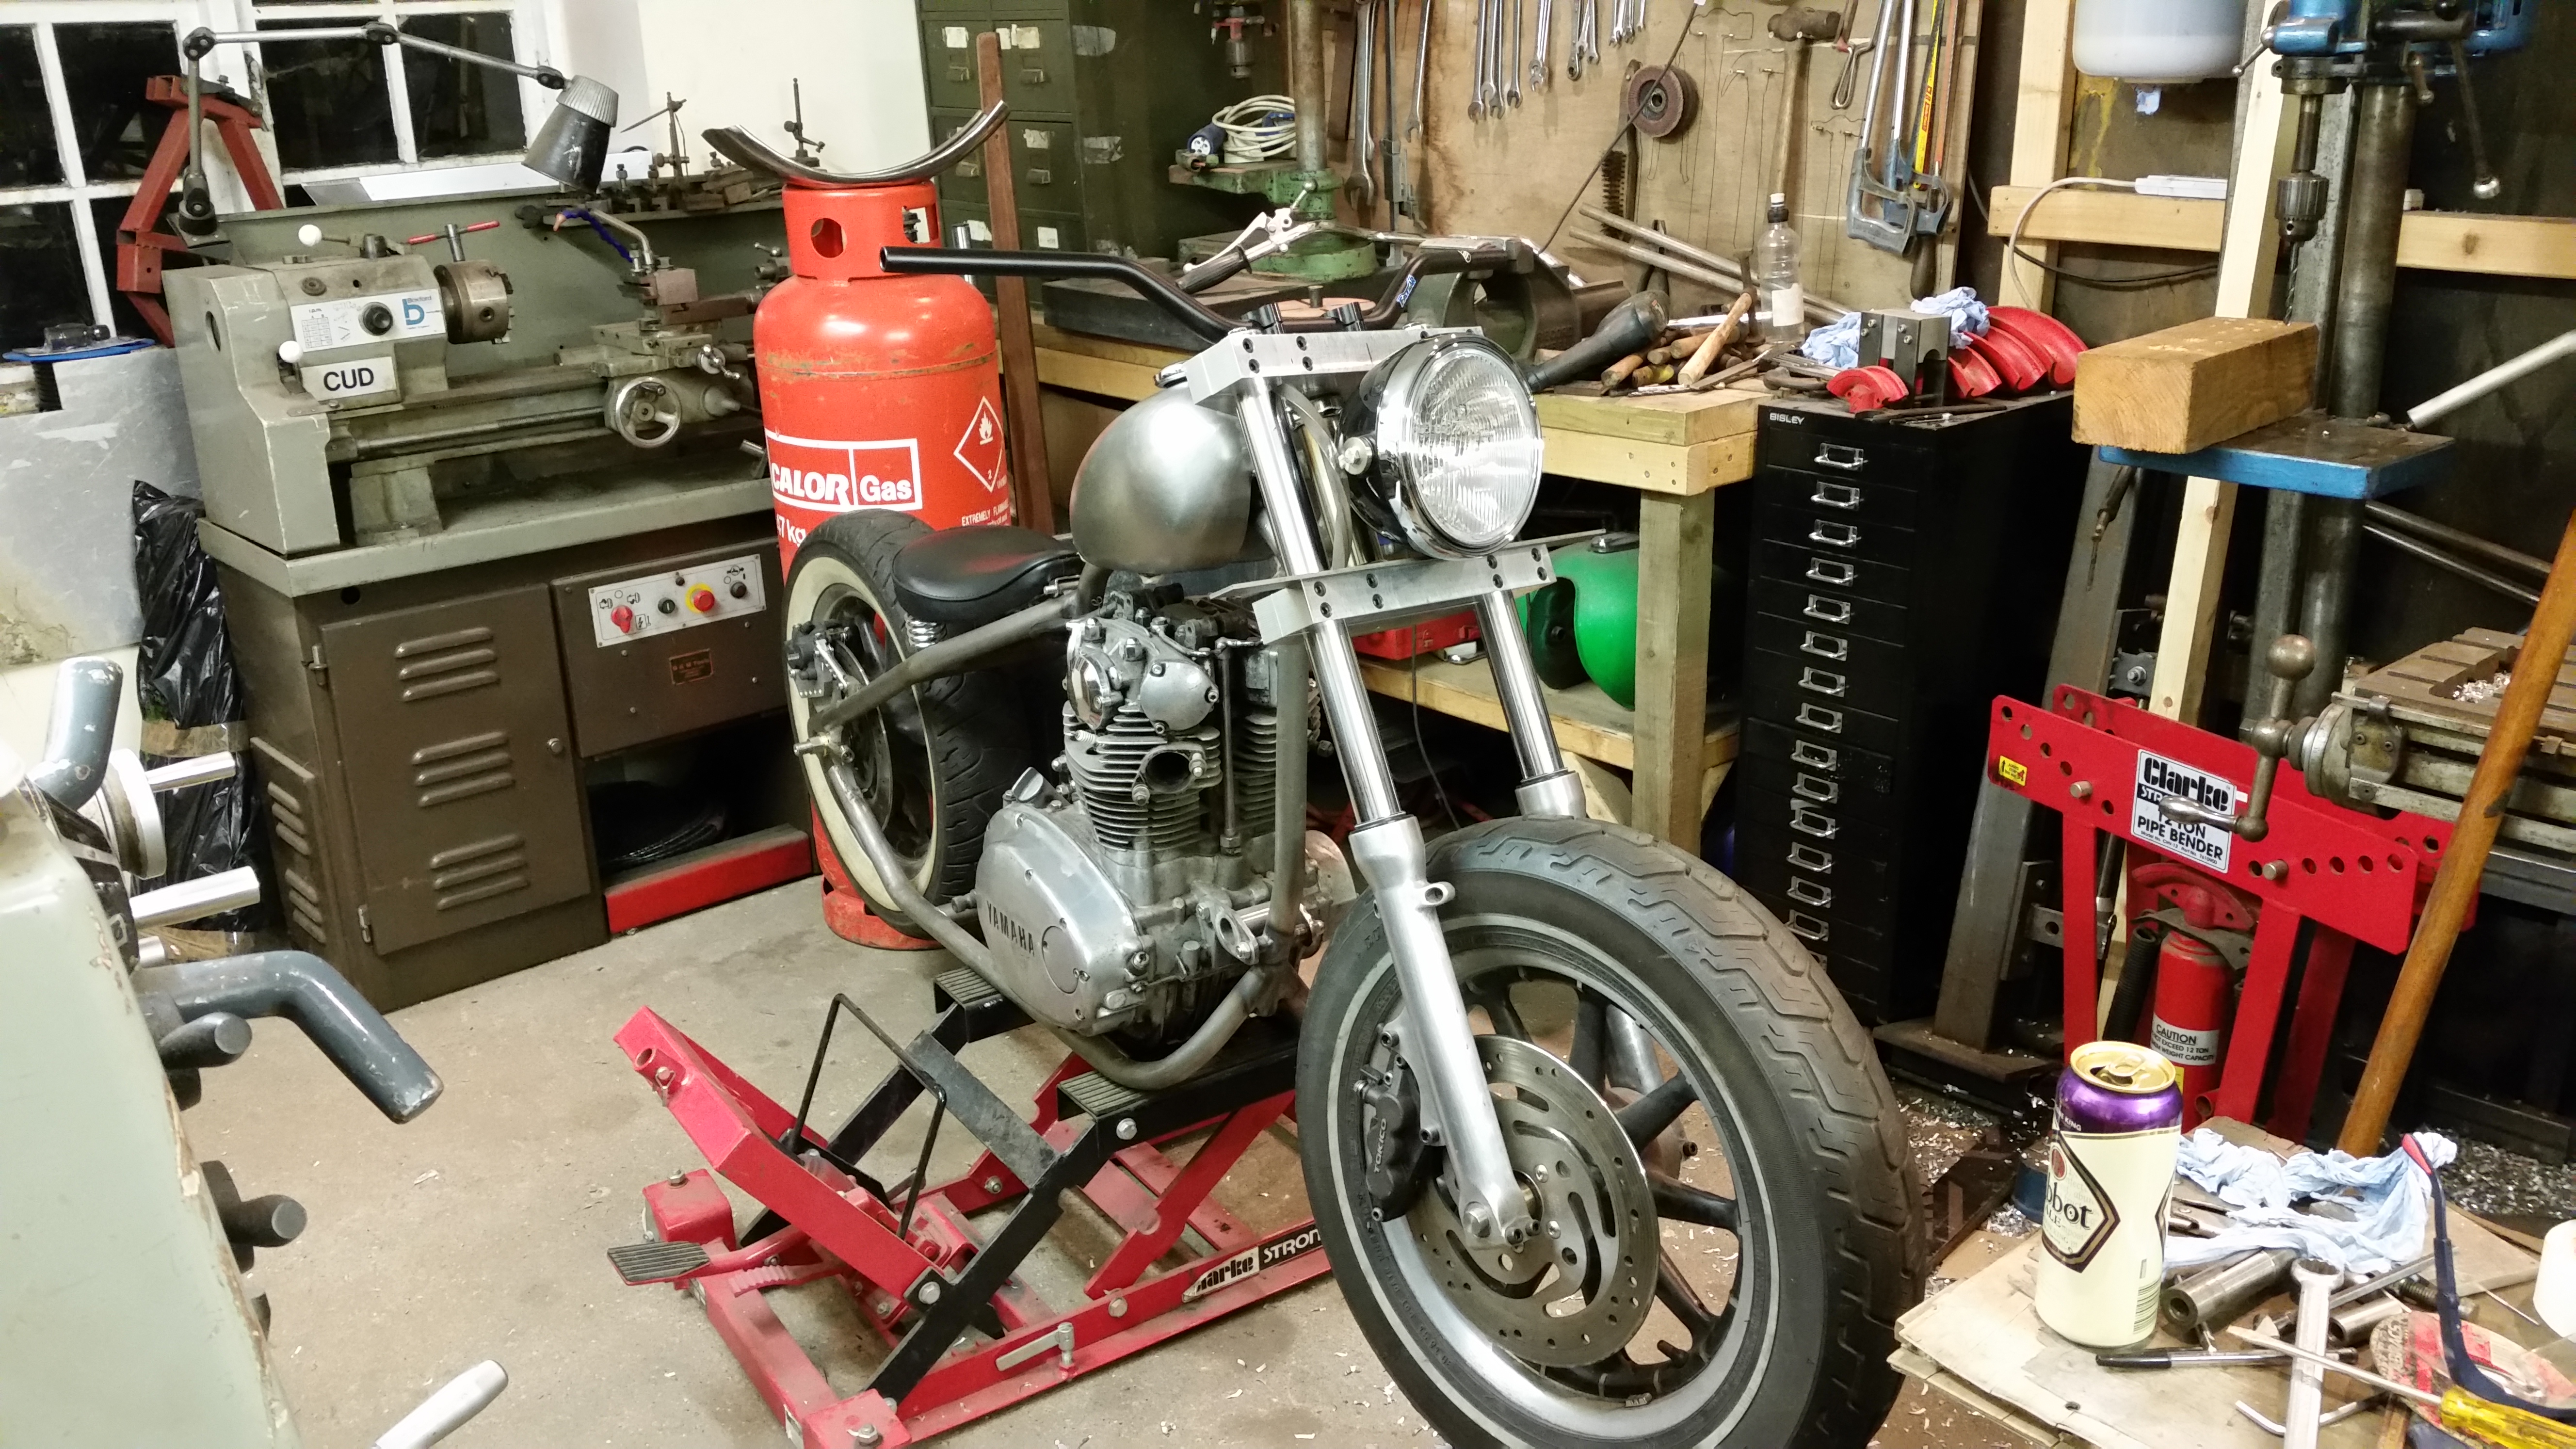
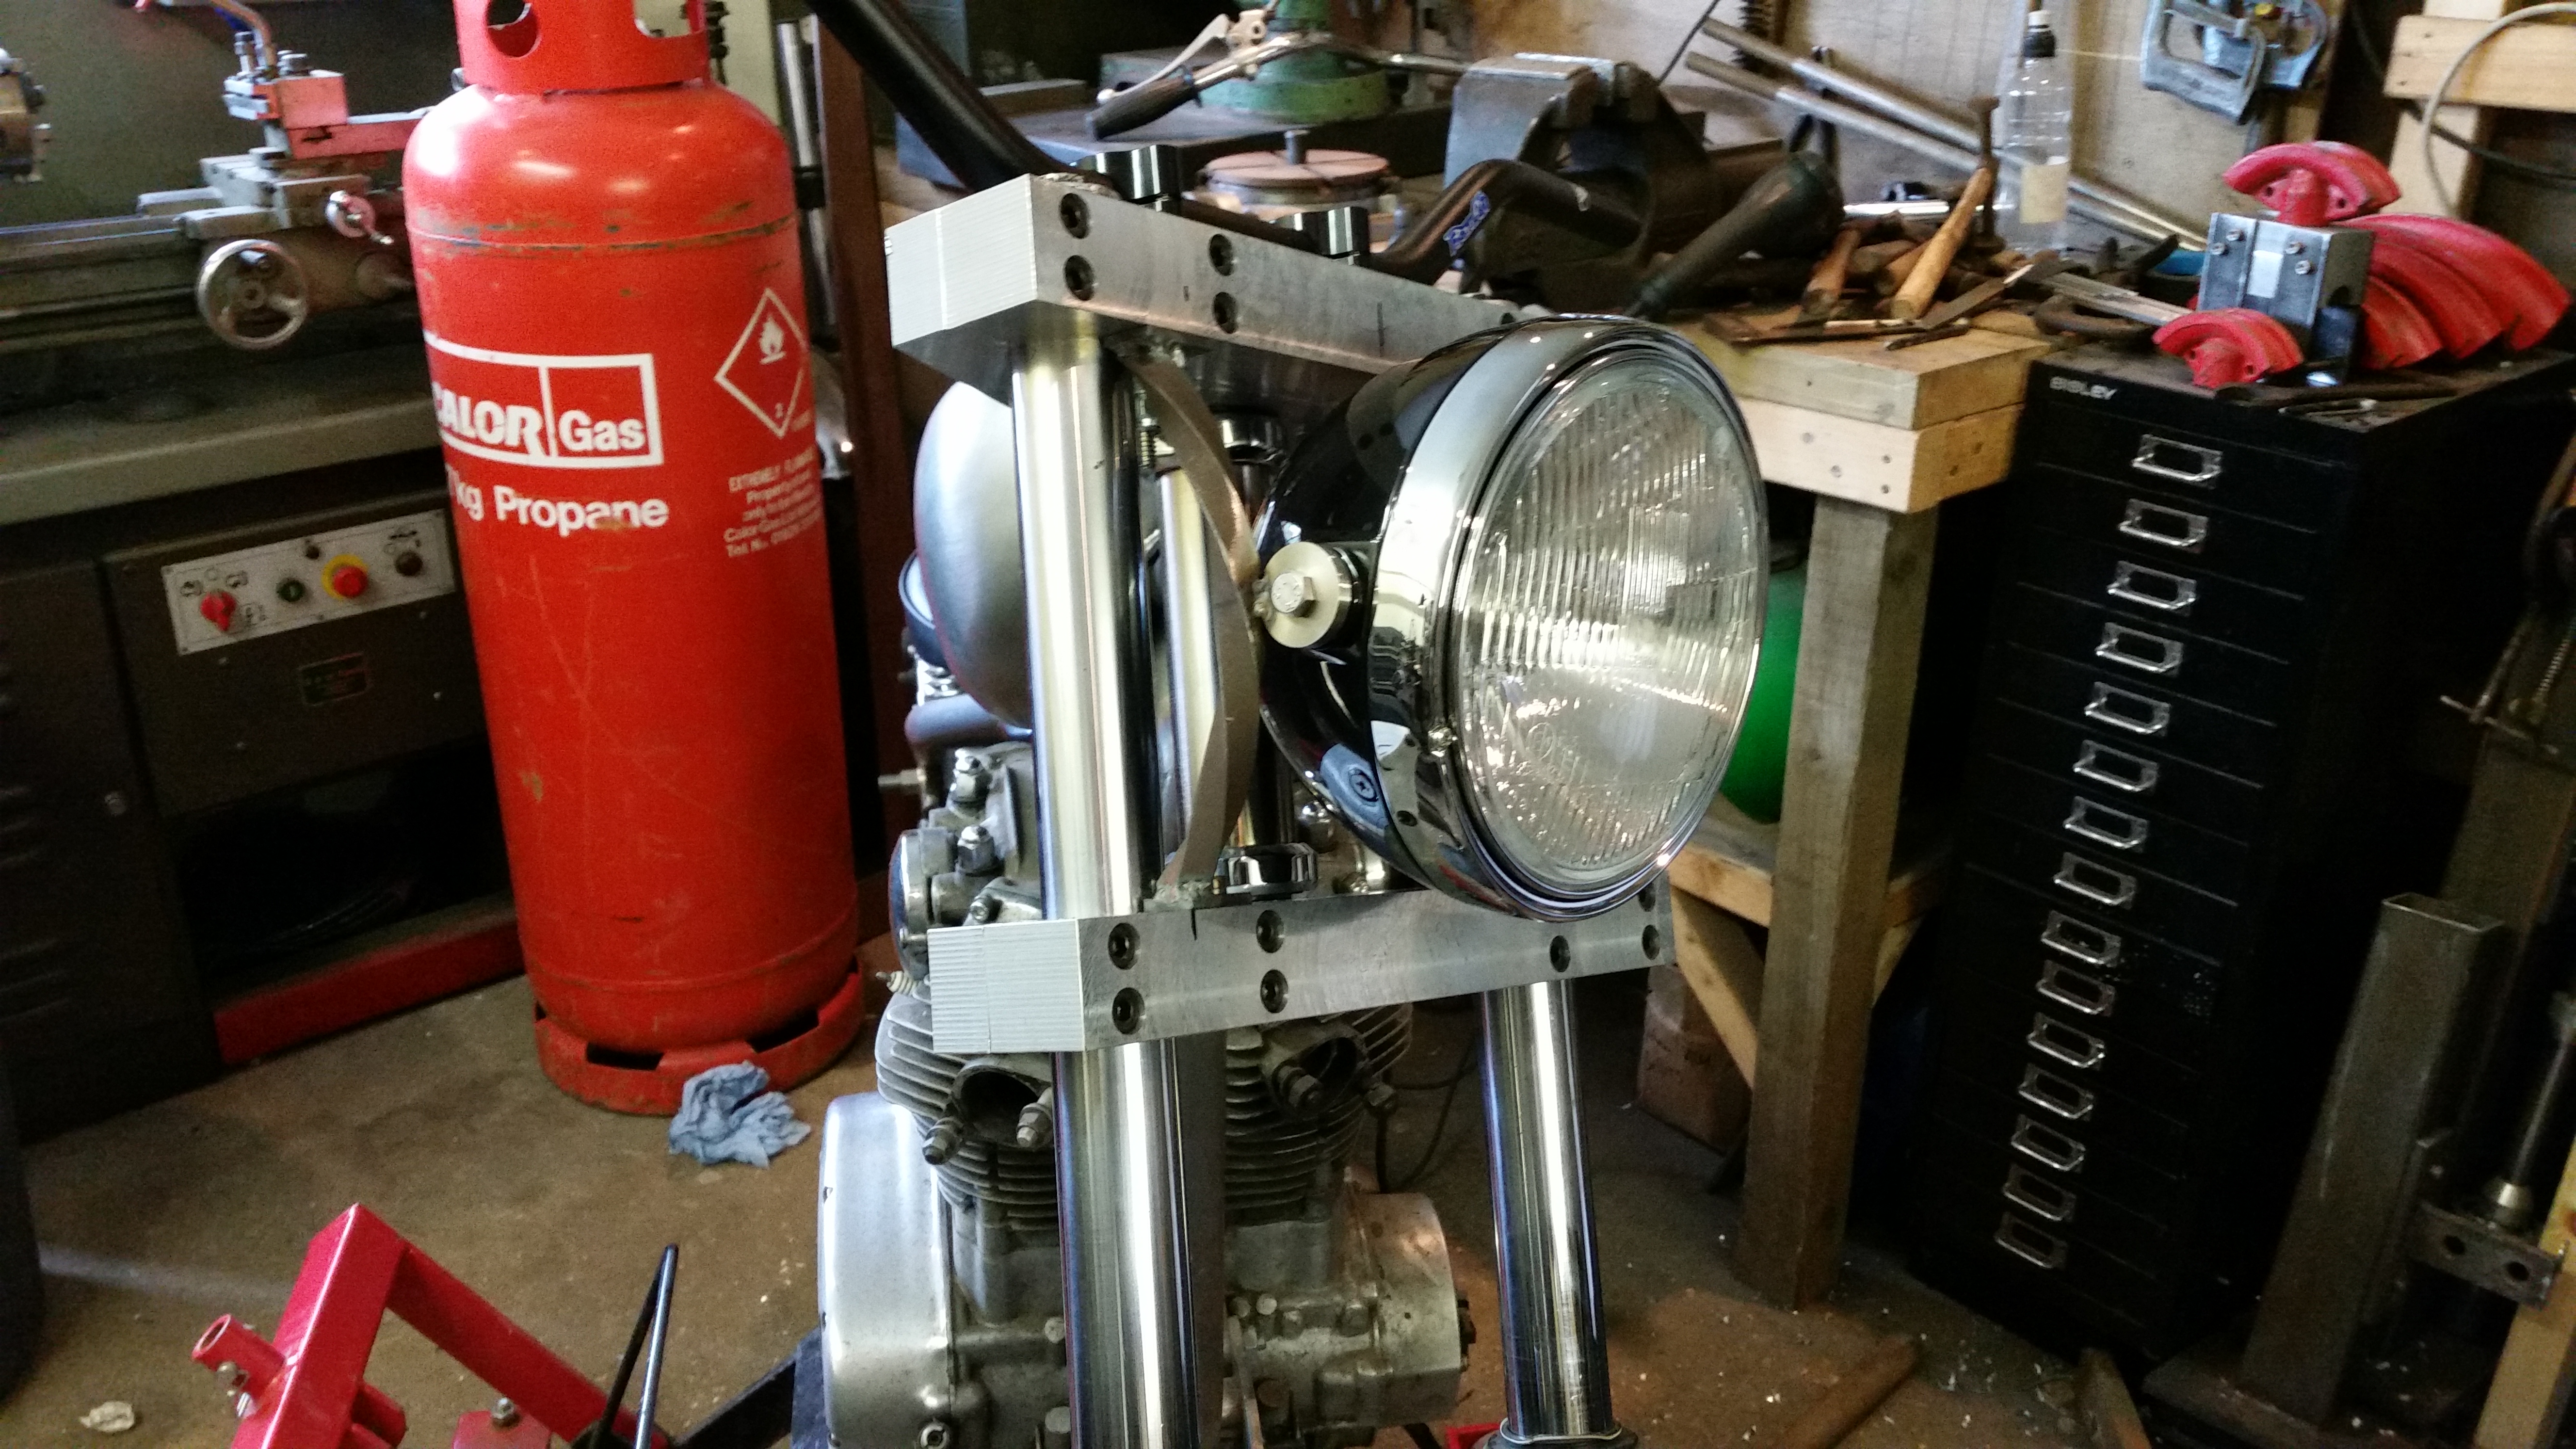
I’ve been putting off buying a headlight for some time as it’s such a focal point I think it’s worth spending a little time to get it right, it needed to be big to keep to the chunky theme but also simple so I plumped for this one, it’s 8 inch with a chrome surround and a black body, all metal, very British looking.
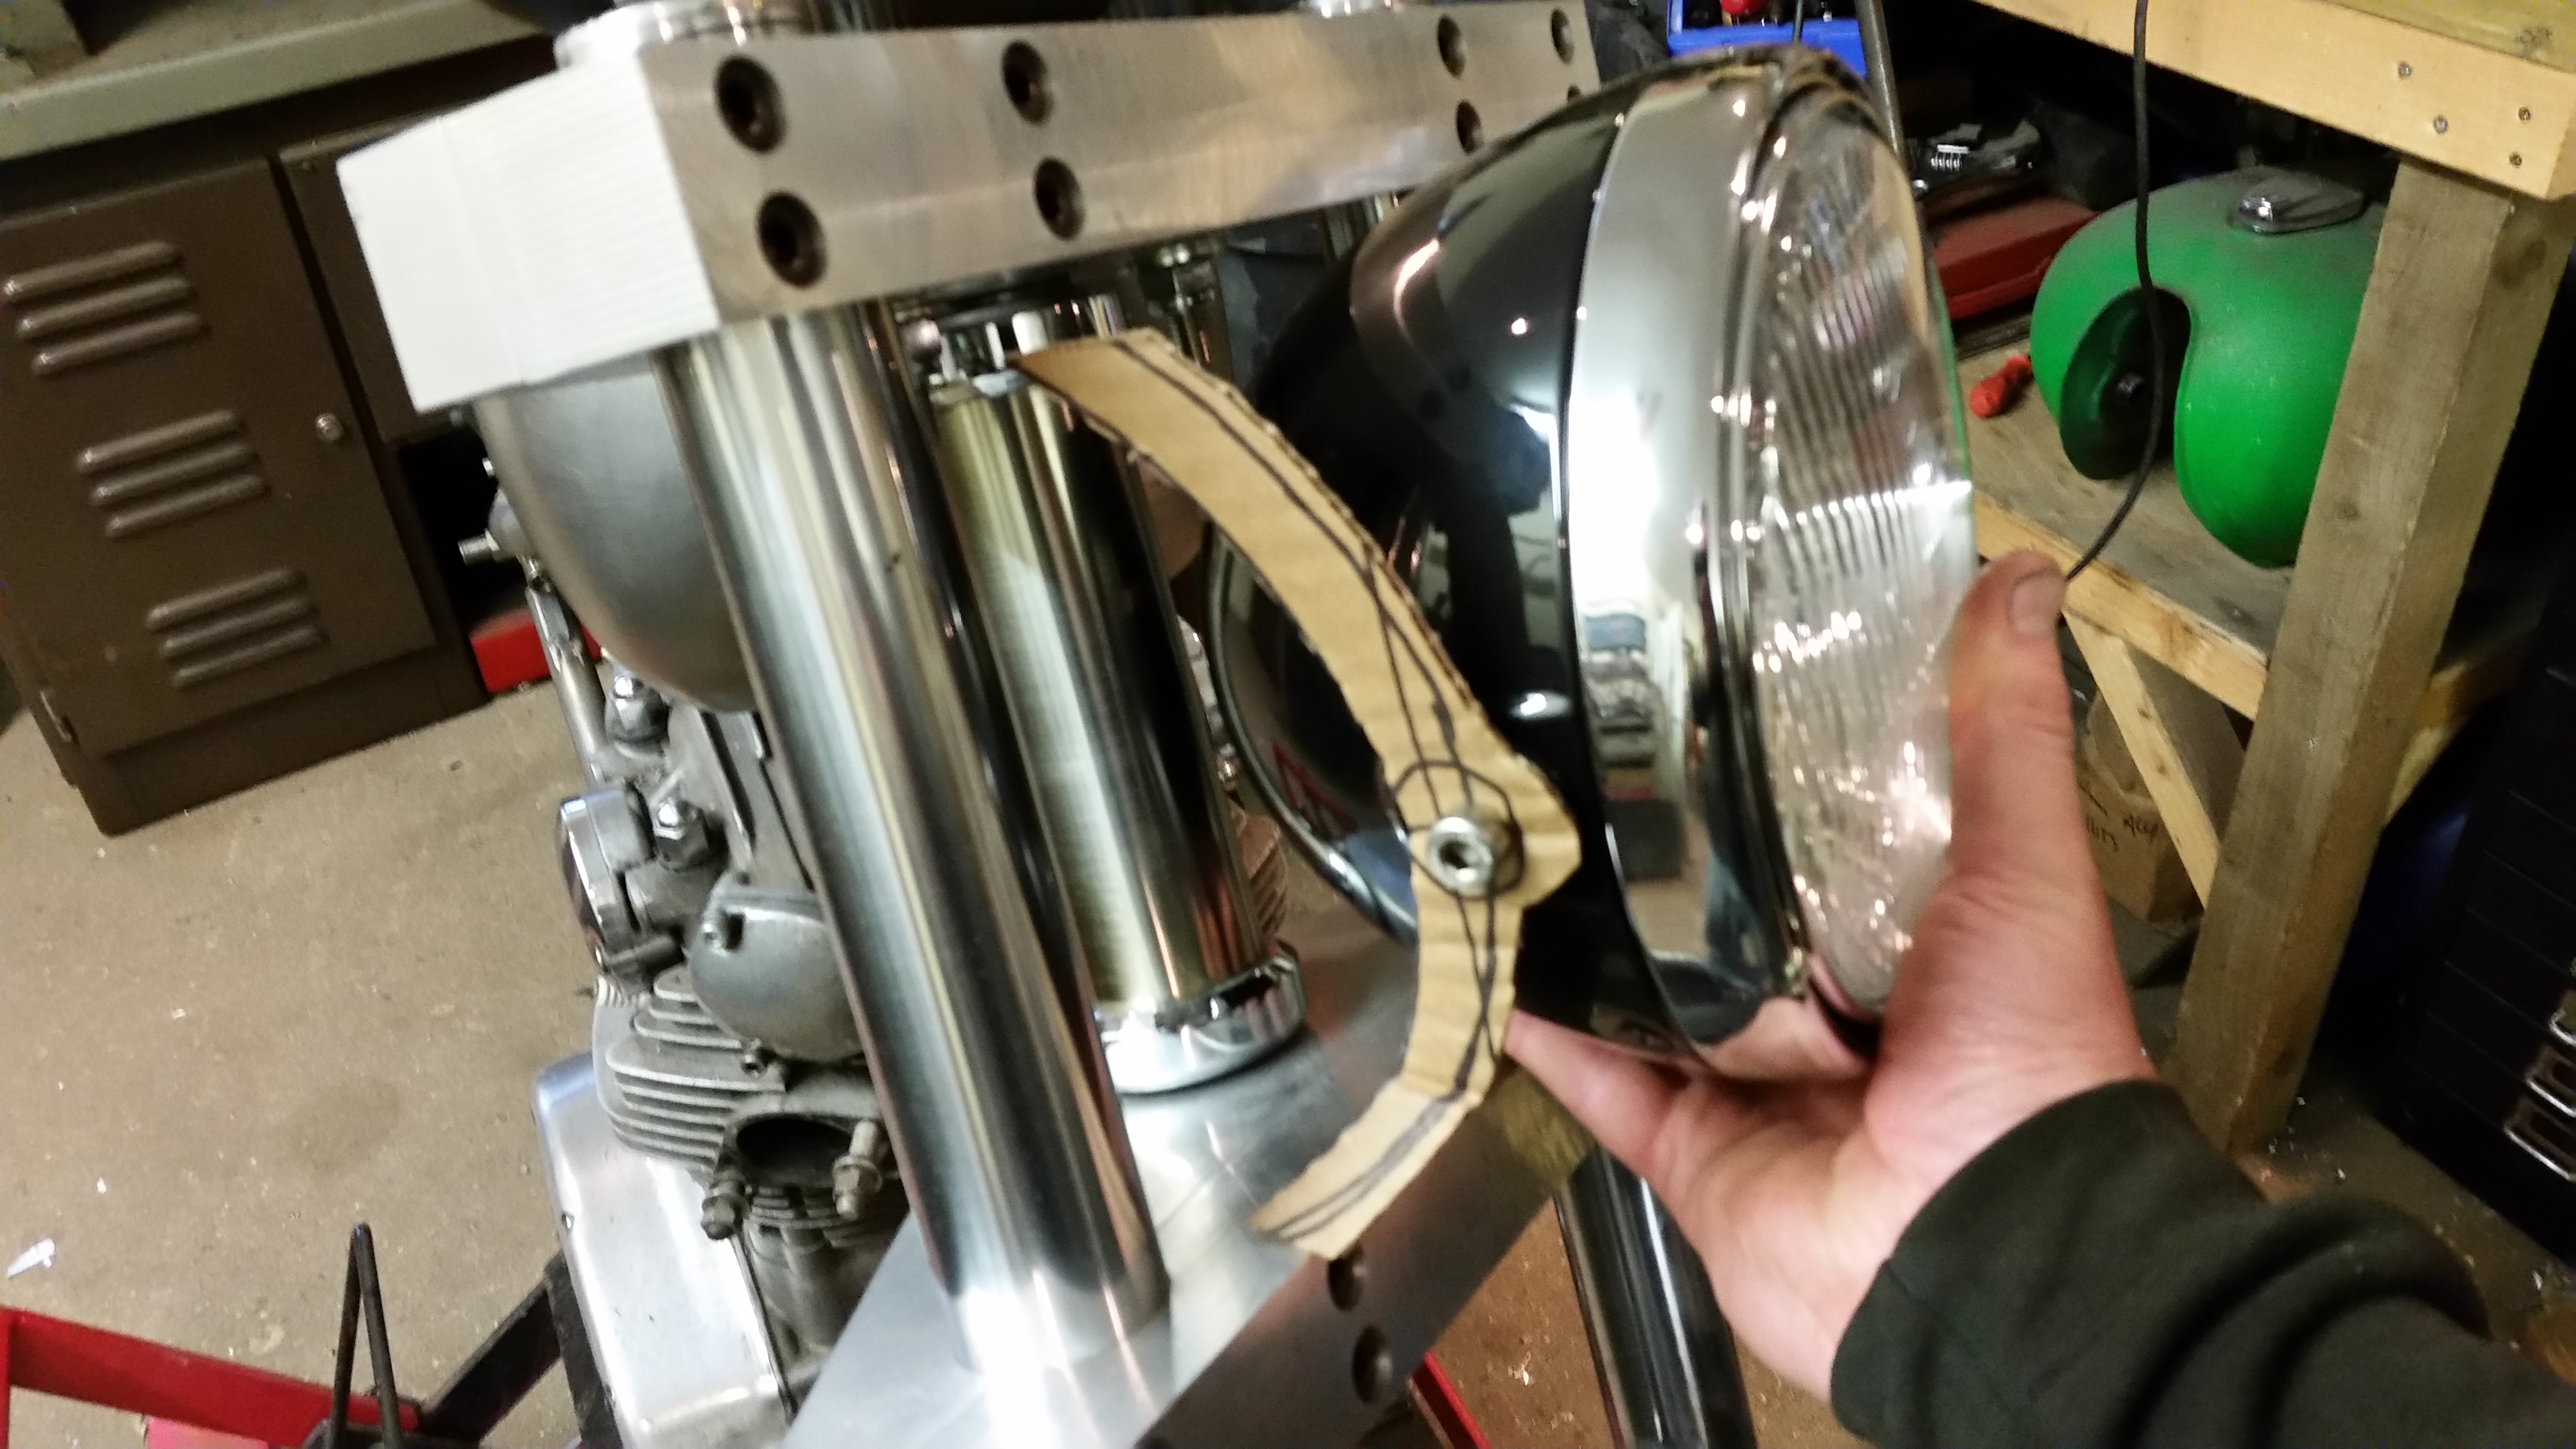
Needed to get a rough idea of the shape of the mounts so I got some cardboard and a sharpie and made a rough template.
Next decision was what to make the mounts from, no expense spared here as I butchered some twisted steel from a fancy fence, looks better on my bike, very 70’s.
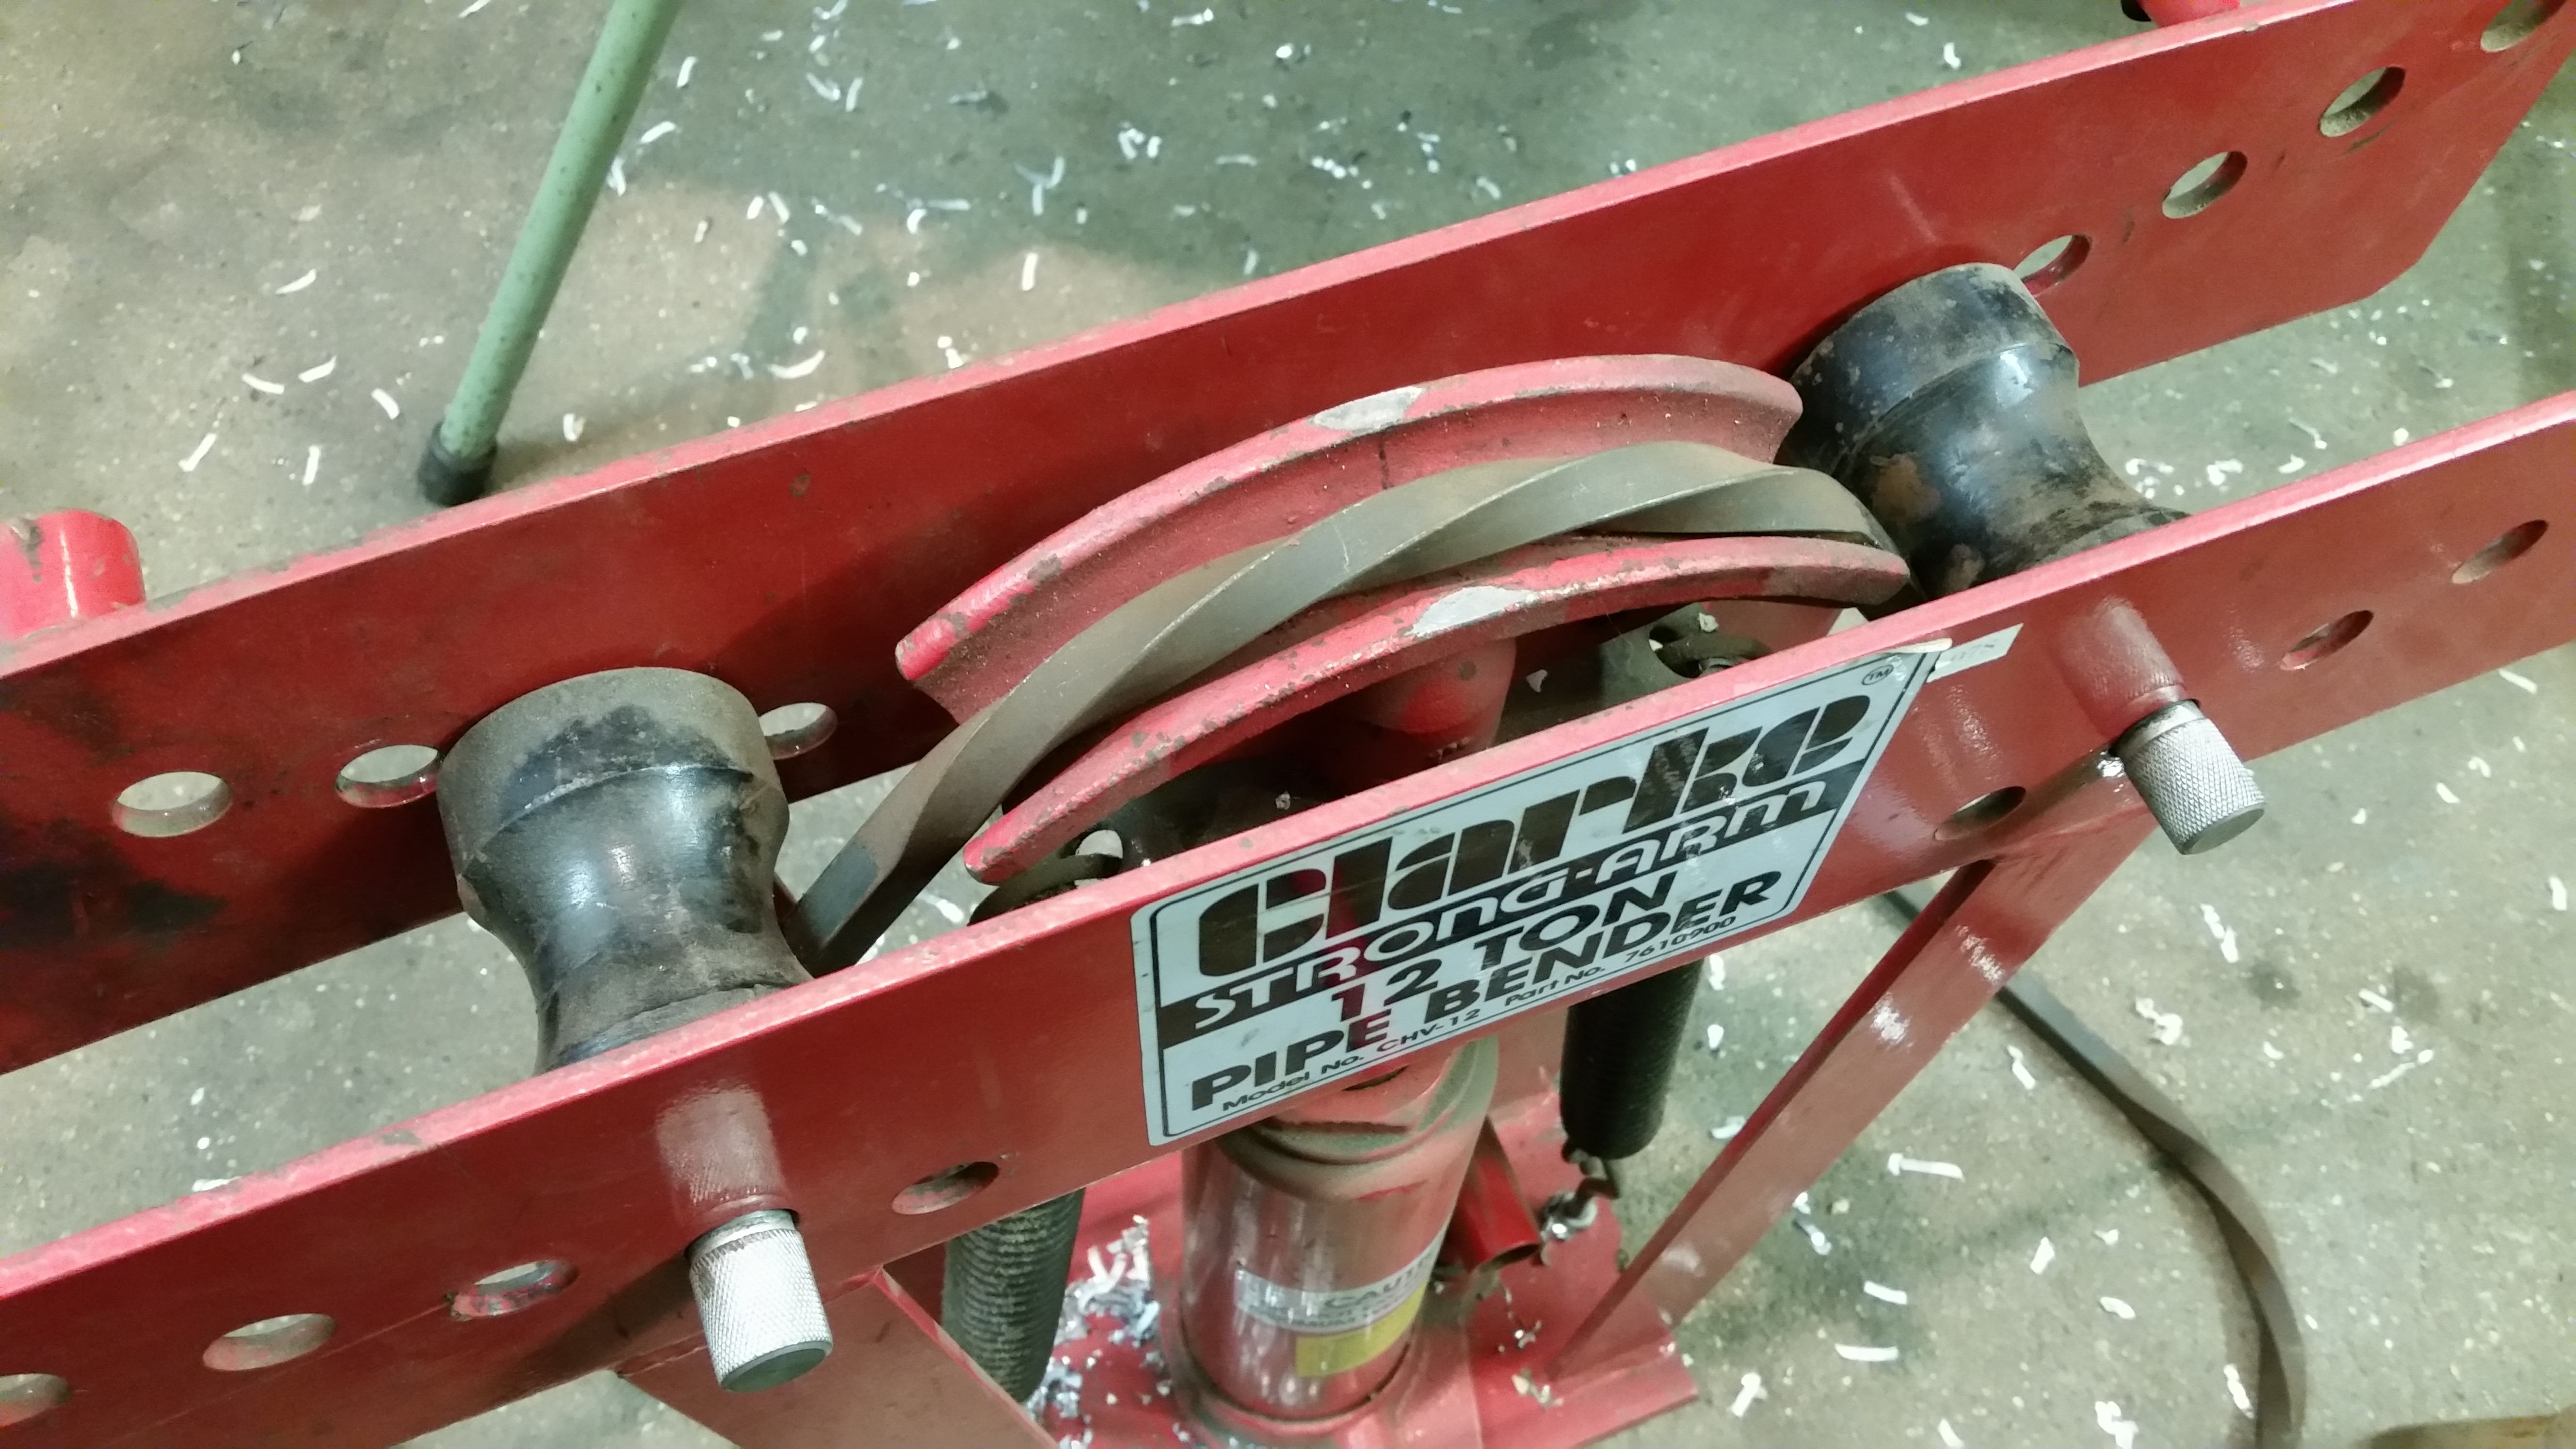
It needed bending quite a bit but my ‘El Cheapo’ bender made short work of it.
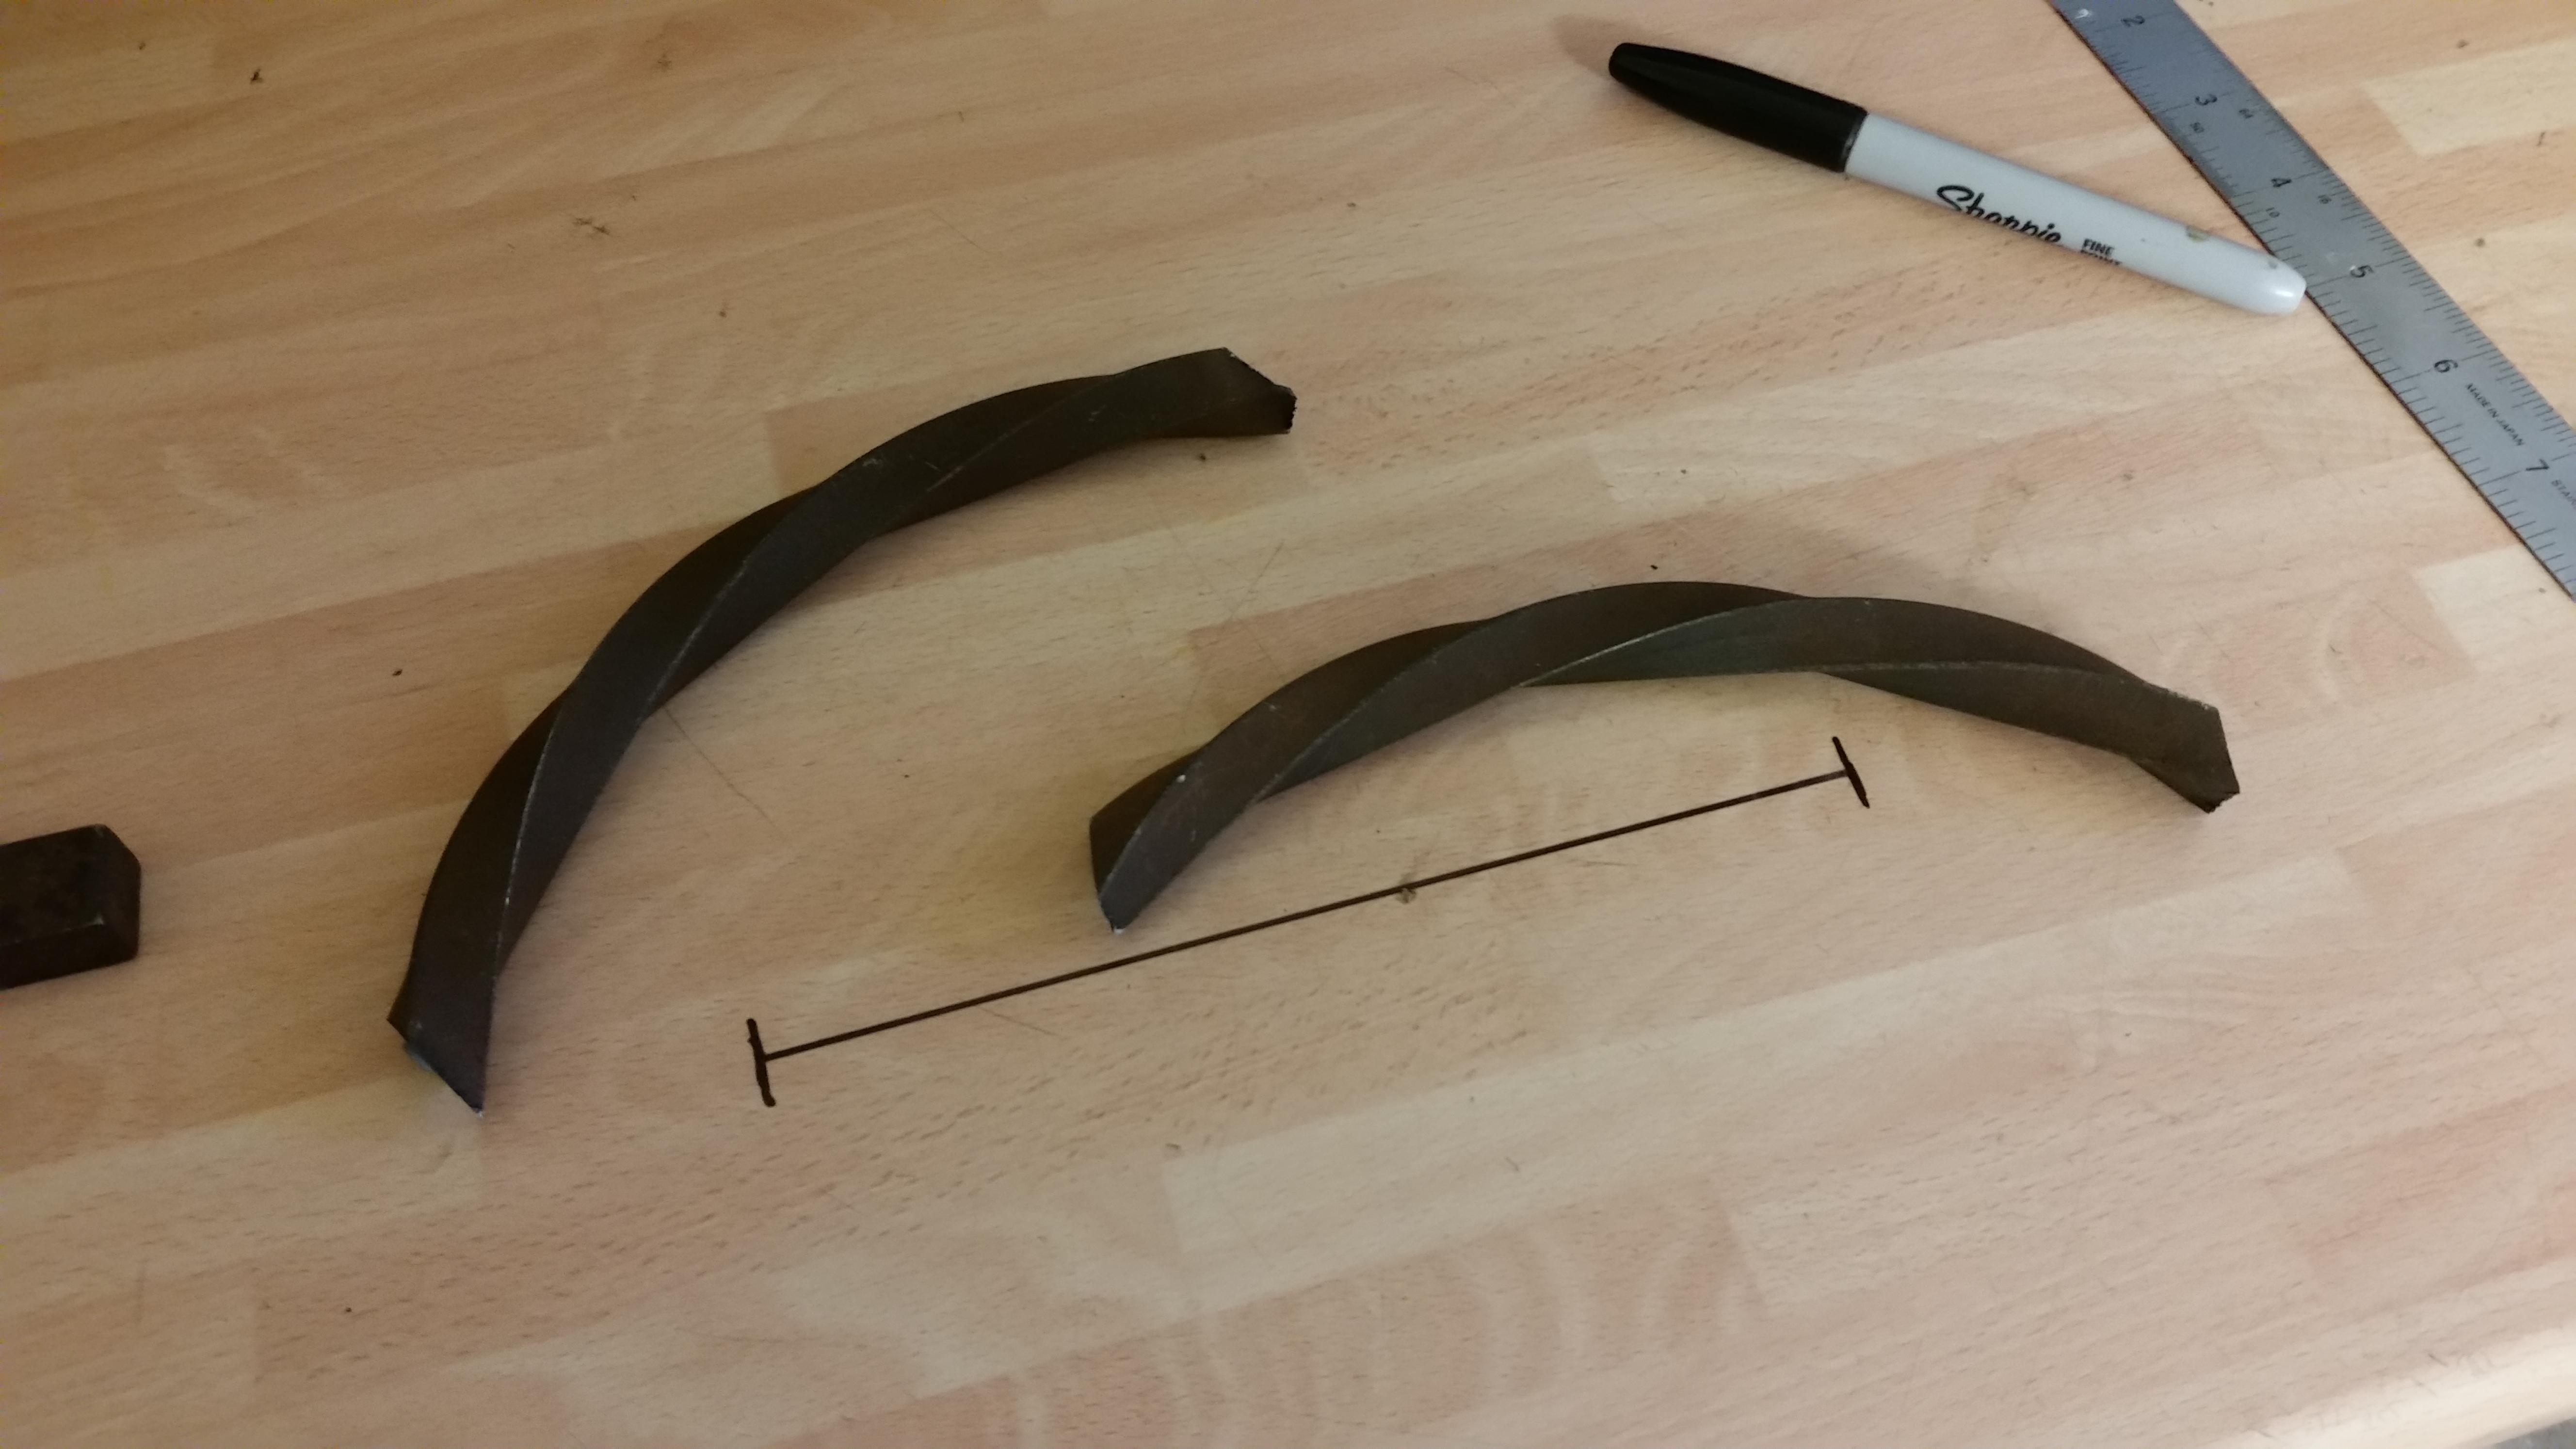
Using a line on my table I was able to find the centre point.
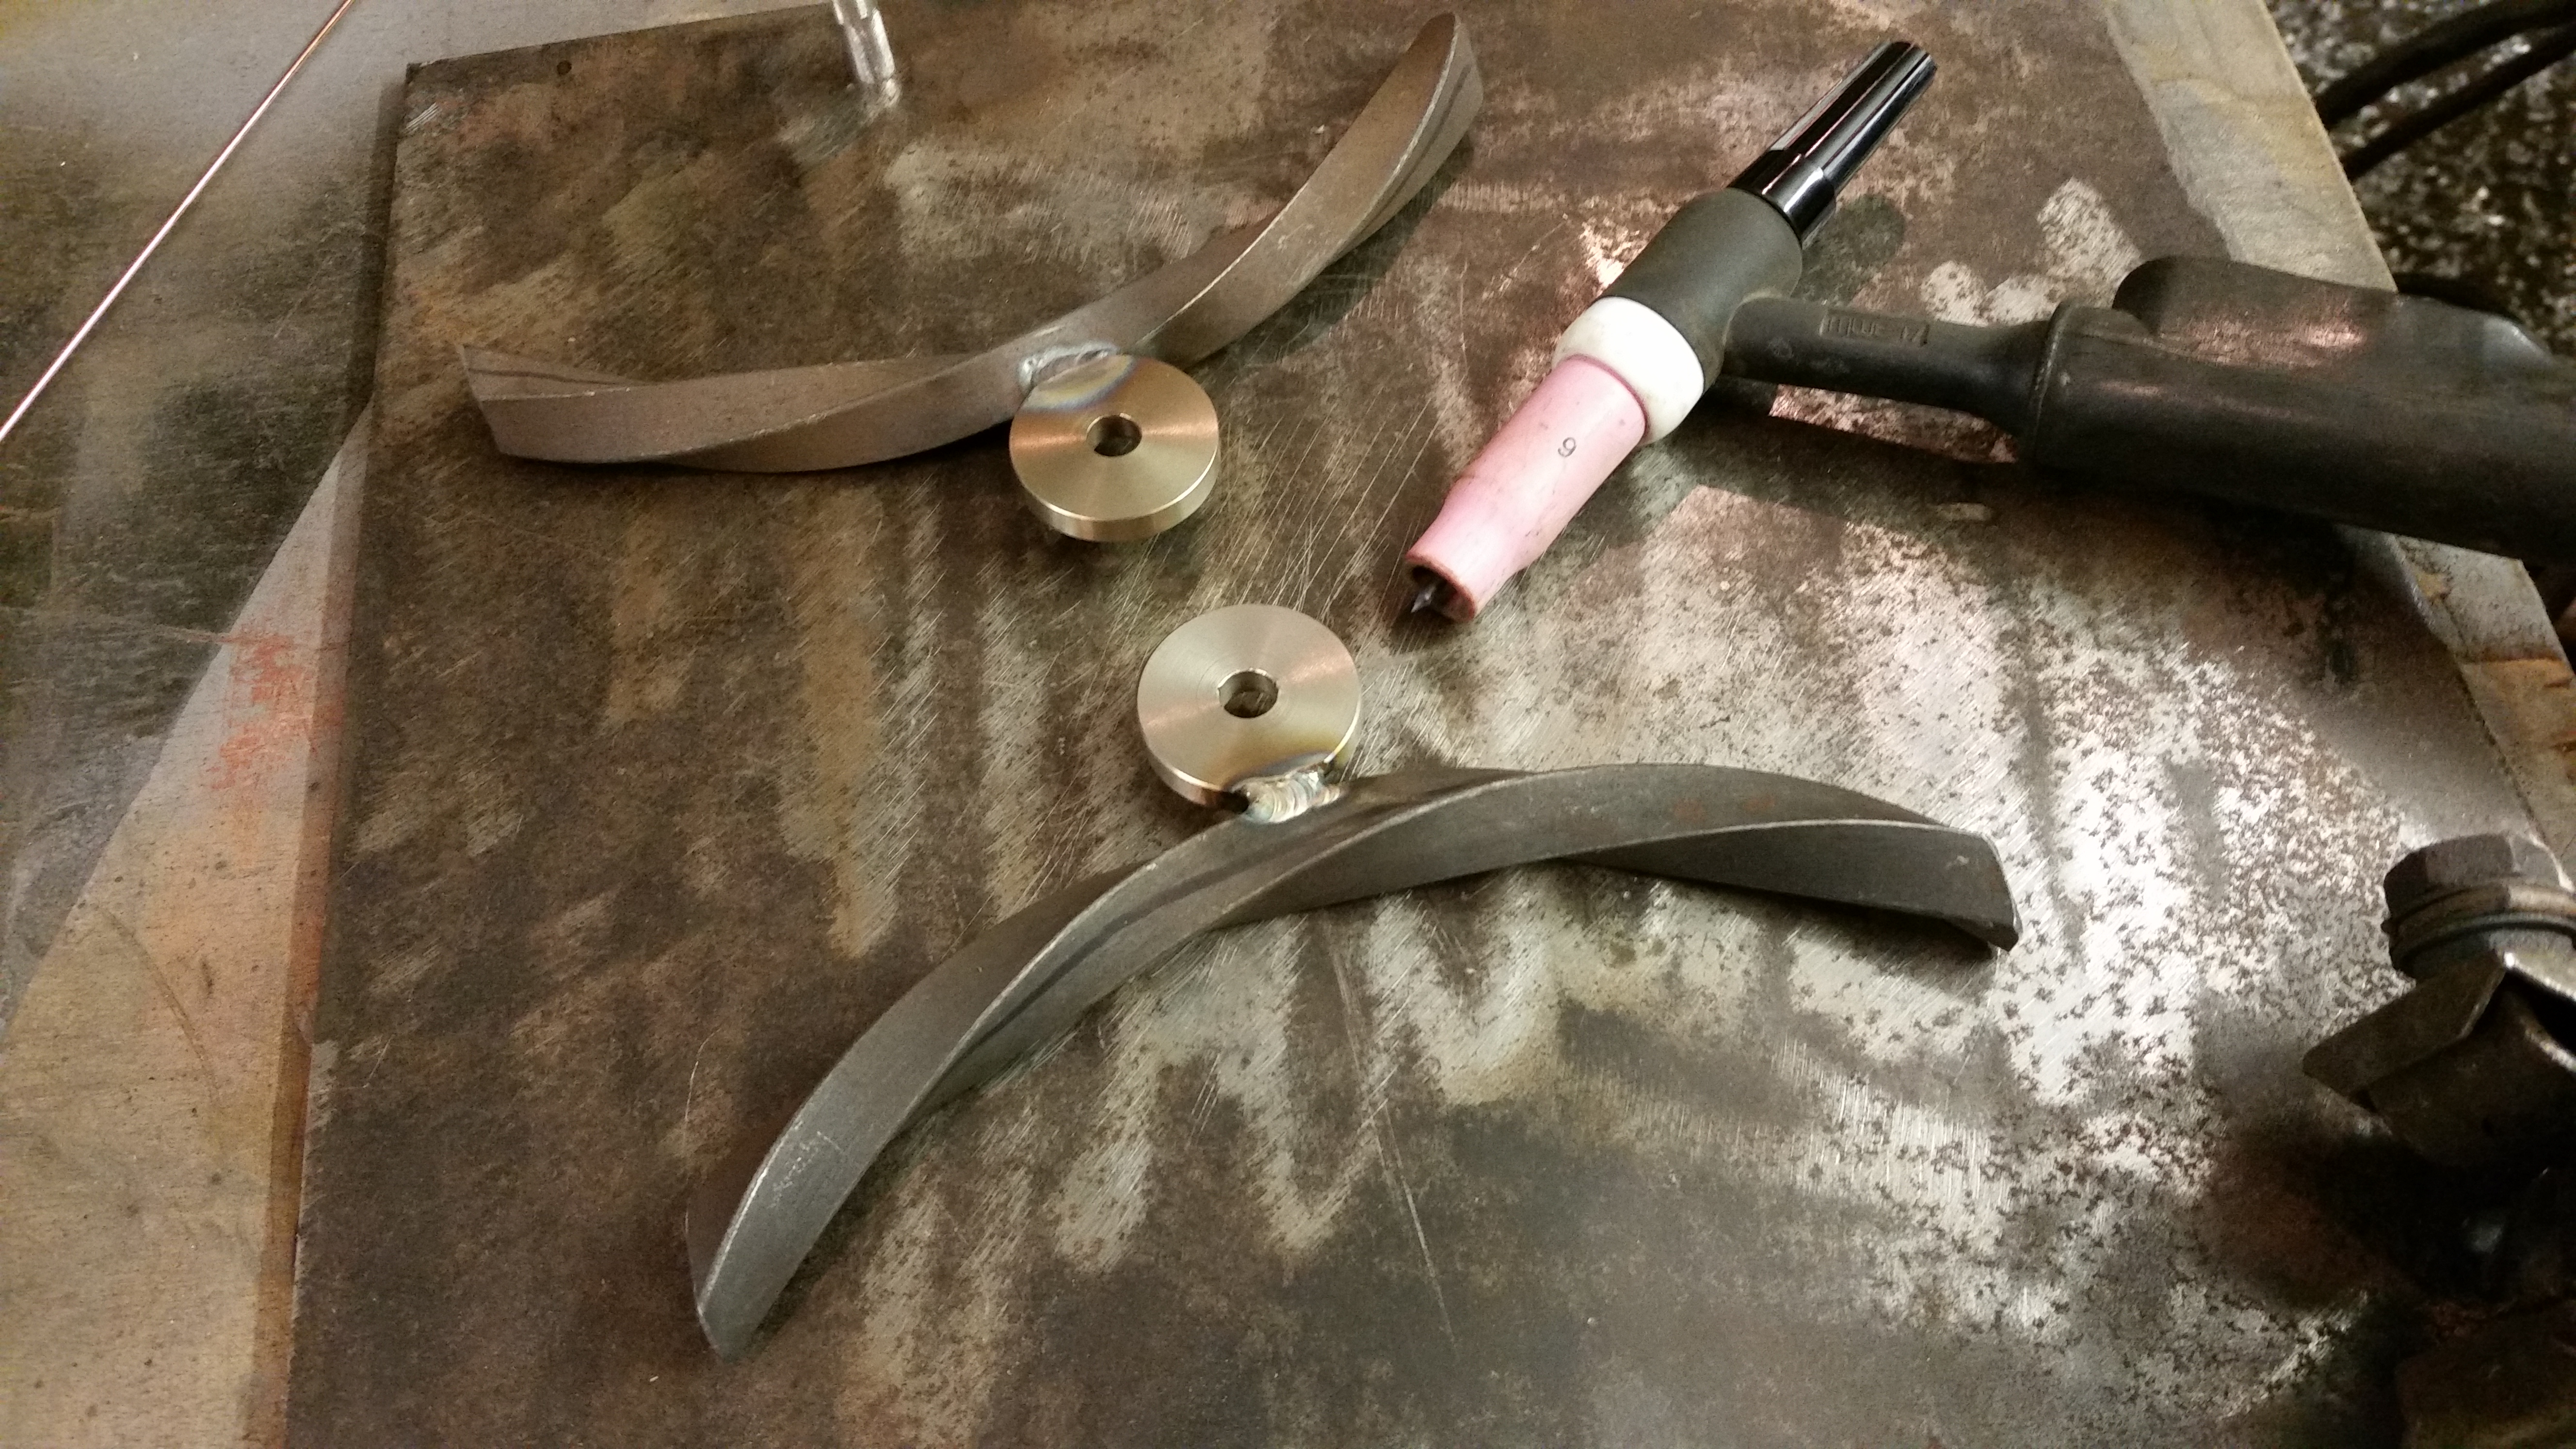
I made a couple of stainless washers to join to the twisty fence metal, lined up with the centre marks from earlier.
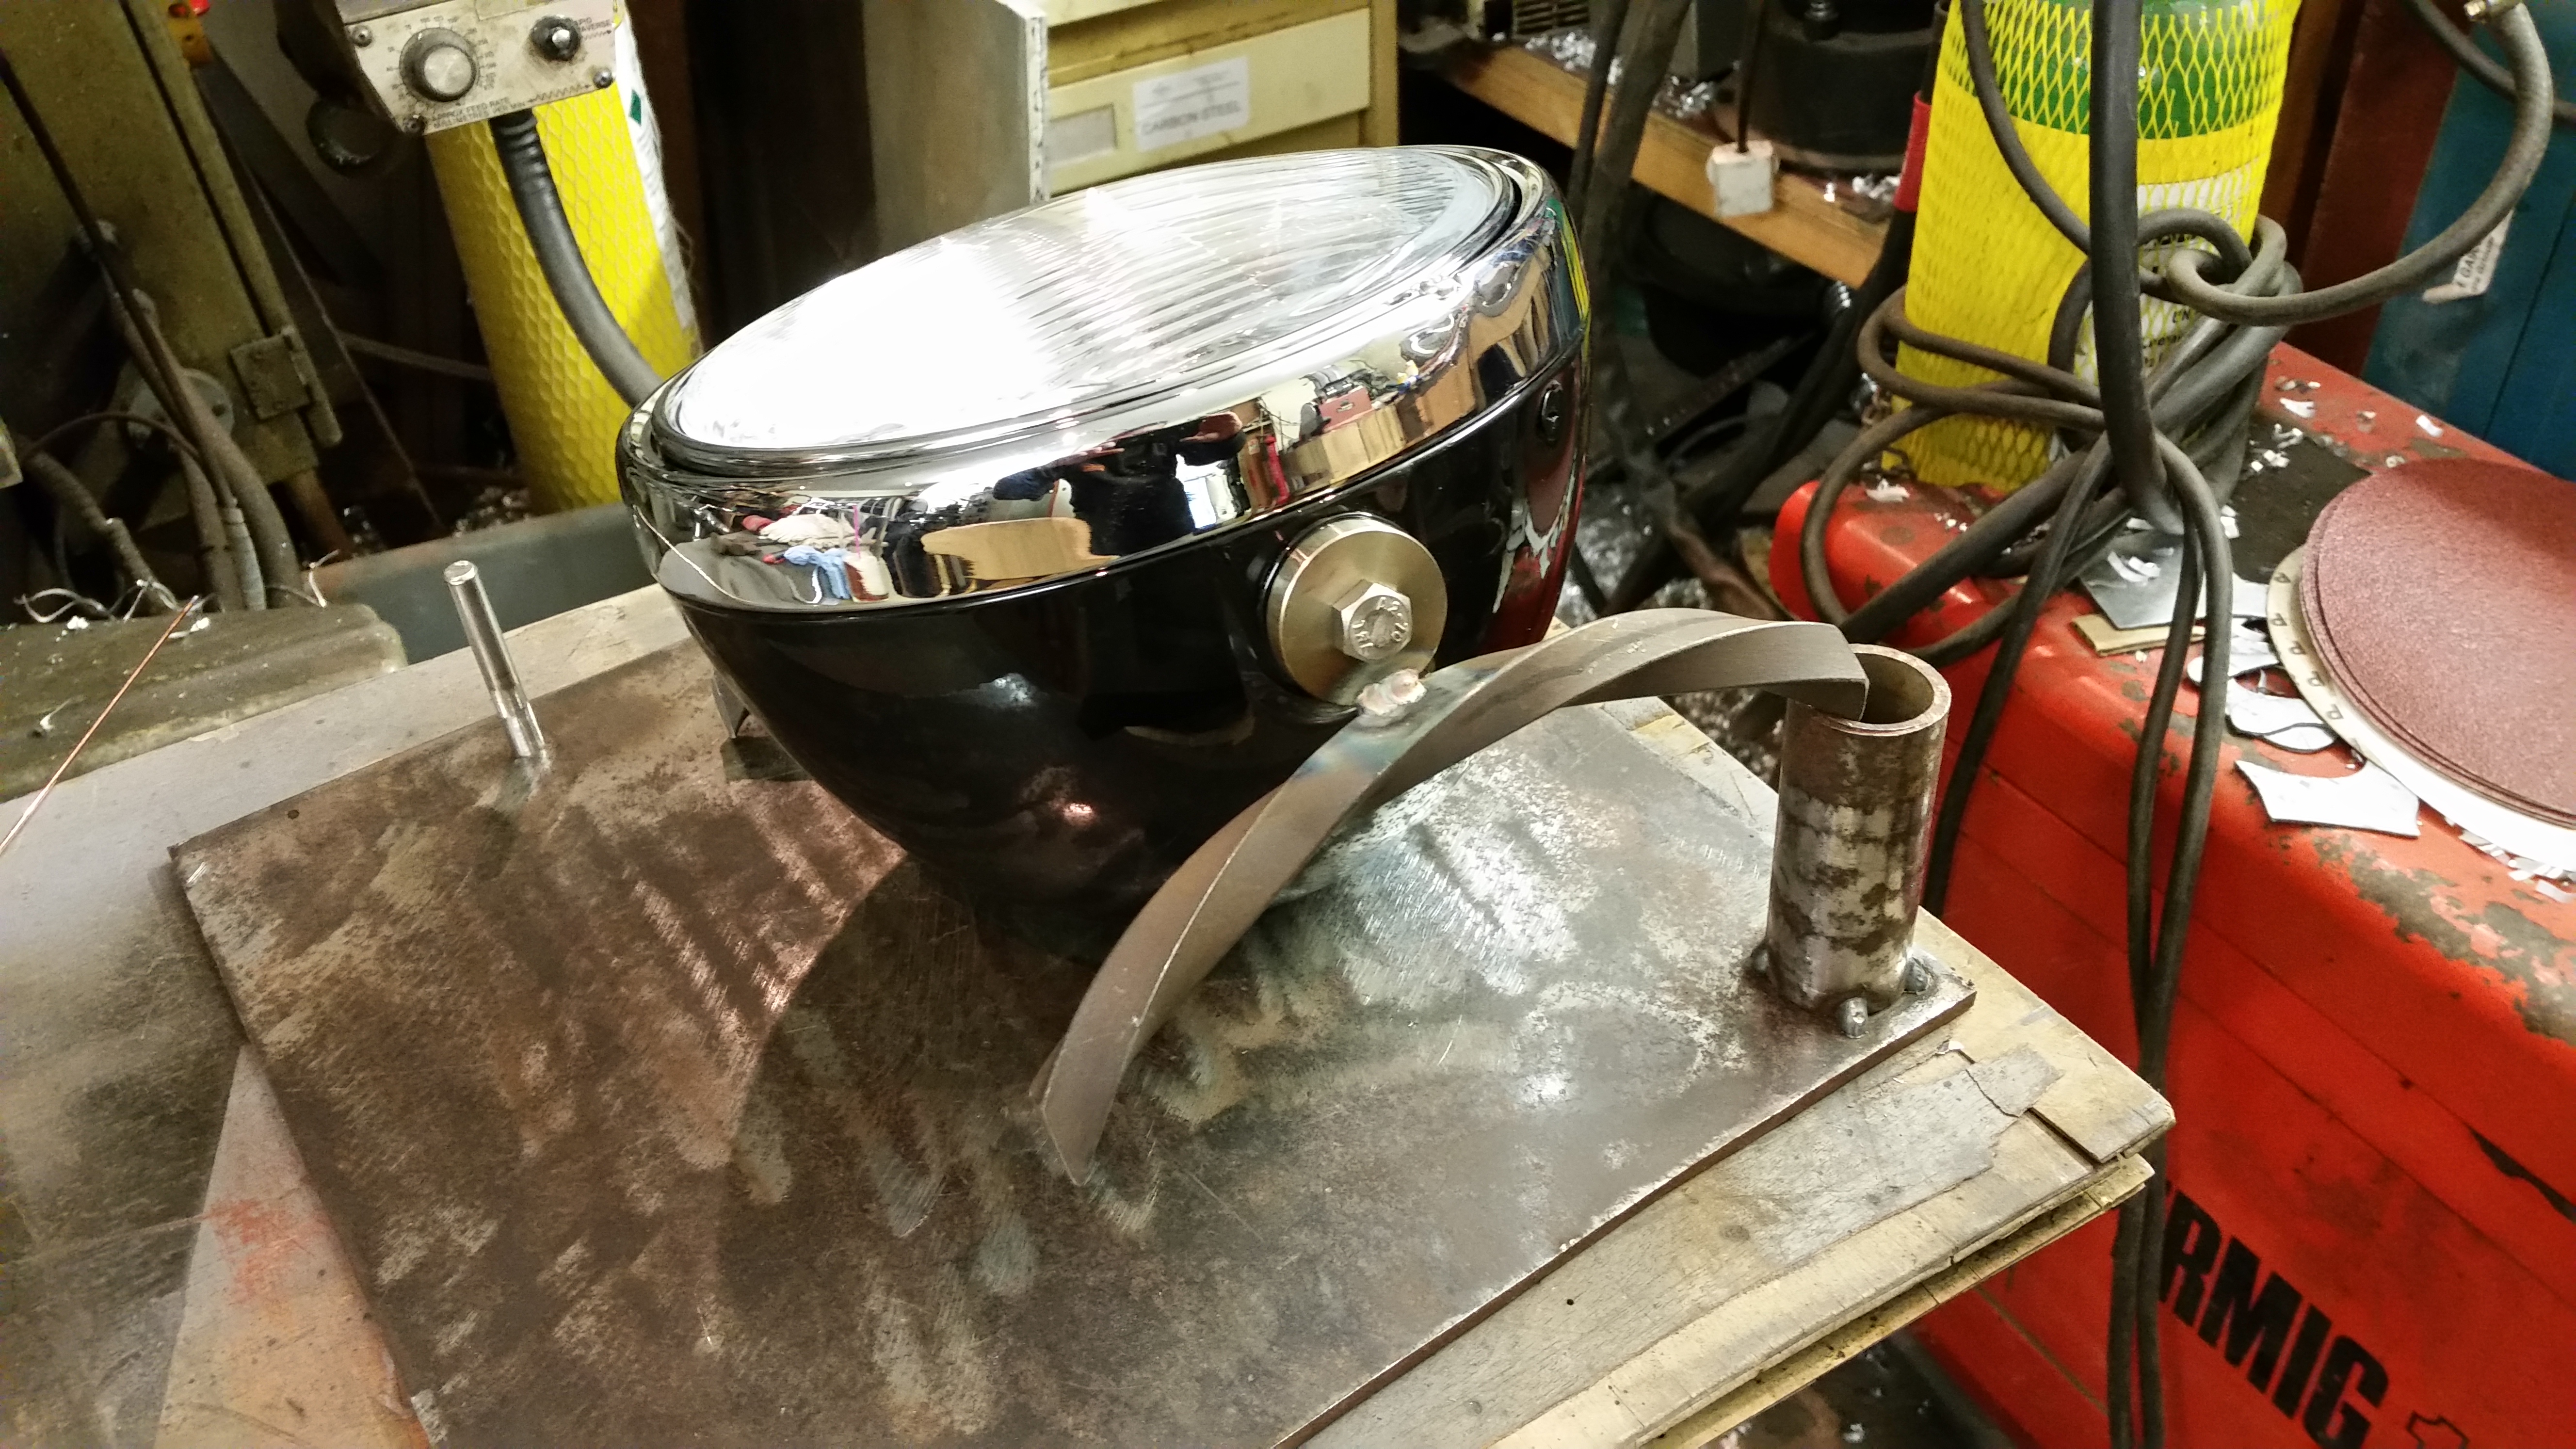
First trial fitting and it looks OK!
I wedged it all in place to get a first look at how it should end up, may be pointing at the stars but proportions look alright.
The ends are made from some plate and tacked in place on the bike to make sure it all lines up when I put it back together.
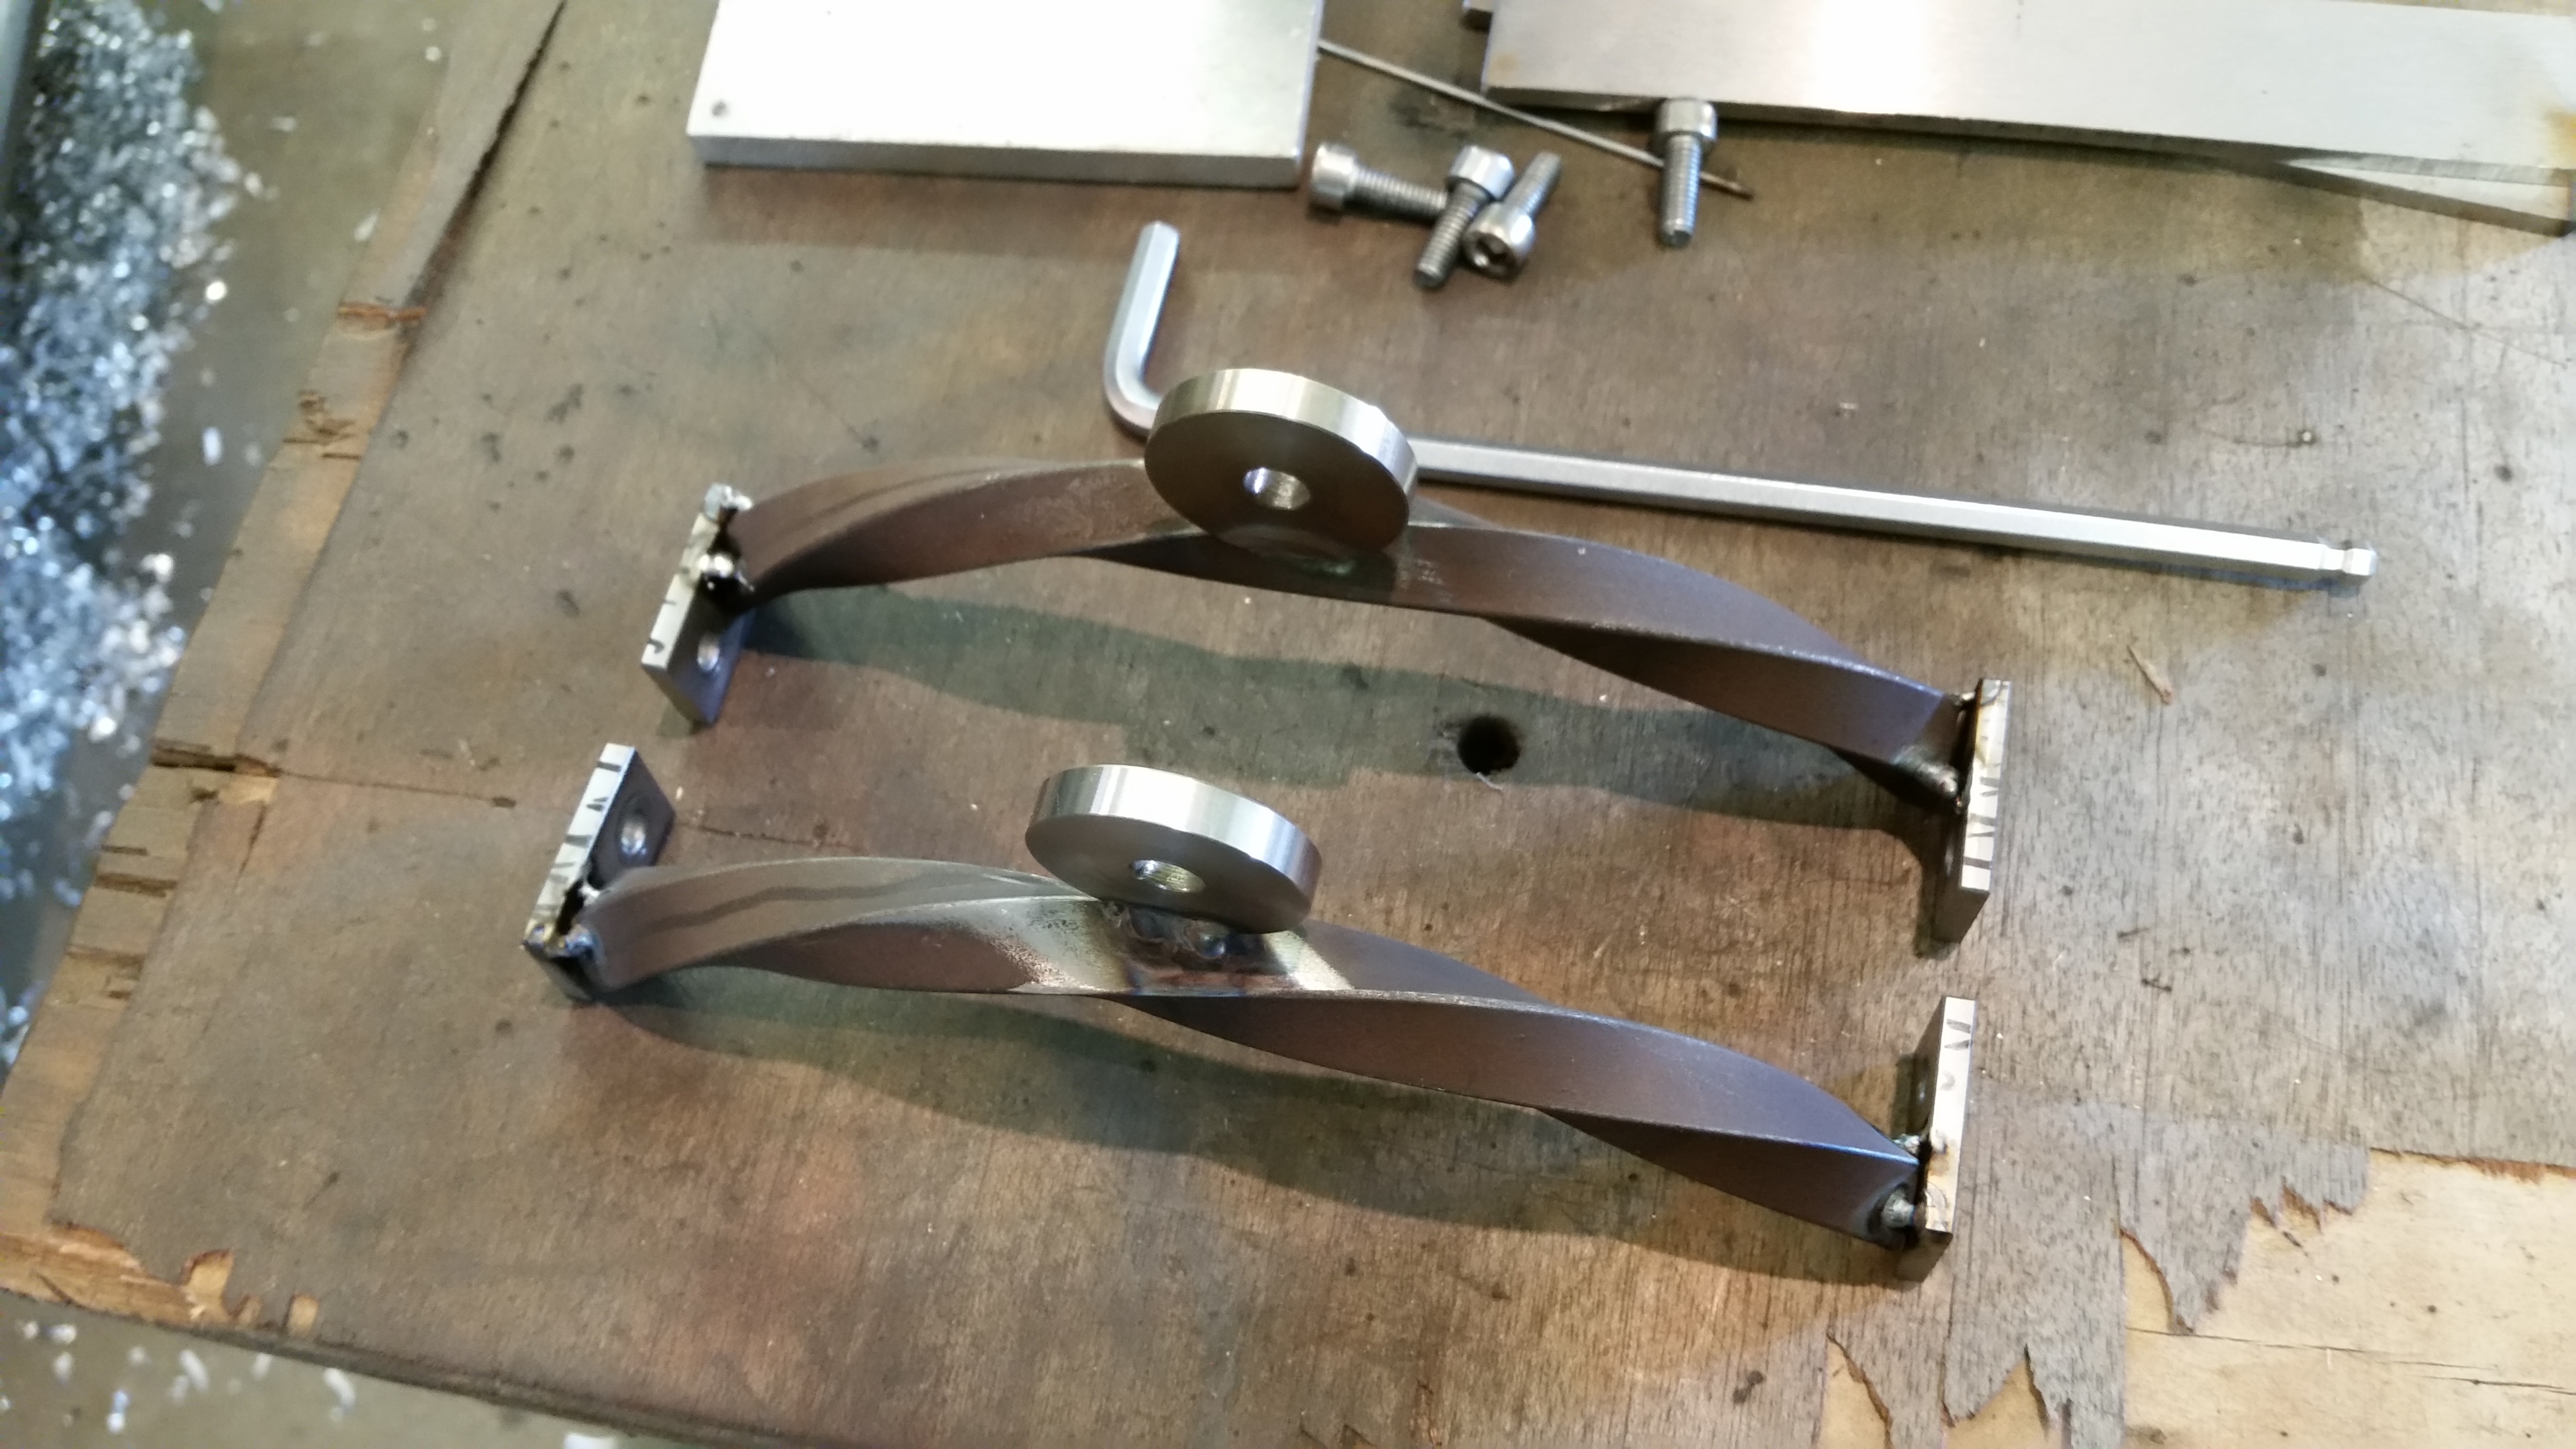
I used a cramp to make sure the foot mounts stayed in place whilst I welded them up, worked quite well.
I think they turned out alright, I’m quite pleased with the overall look of them, quite simple but effective.
After receiving a verbal roasting from Mac (no names mentioned) regarding my article on making a ‘Fender’ instead of a ‘mudguard’ I have decided my ‘GAS TANK’ will be called a ‘petroleum enclosure’ to save any further roastings that may occur.
The unit I am using is a 2 gallon (9.09 litre so I don’t get in trouble) from TC Bros , cost me a fortune with shipping and taxes but well worth the money.
I decided early on that one design feature would be a hidden rear mount for the tank as I think it looks really clean this way and shows the bare frame tube so keeping to the minimal style, so the first picture is a removed mount.
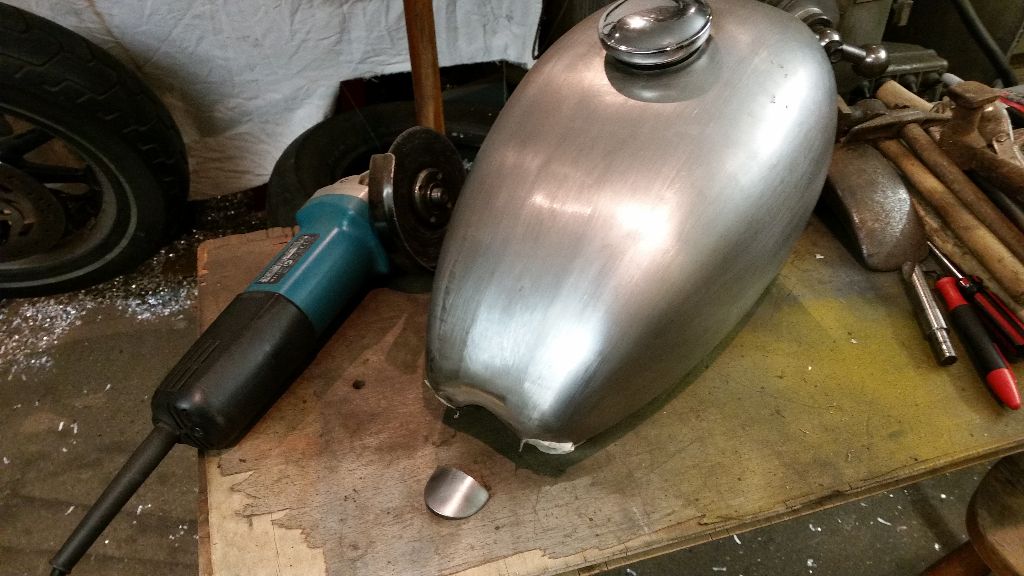
I cut this off with a 1mm disc and shaped the leftover metal with a flap wheel.
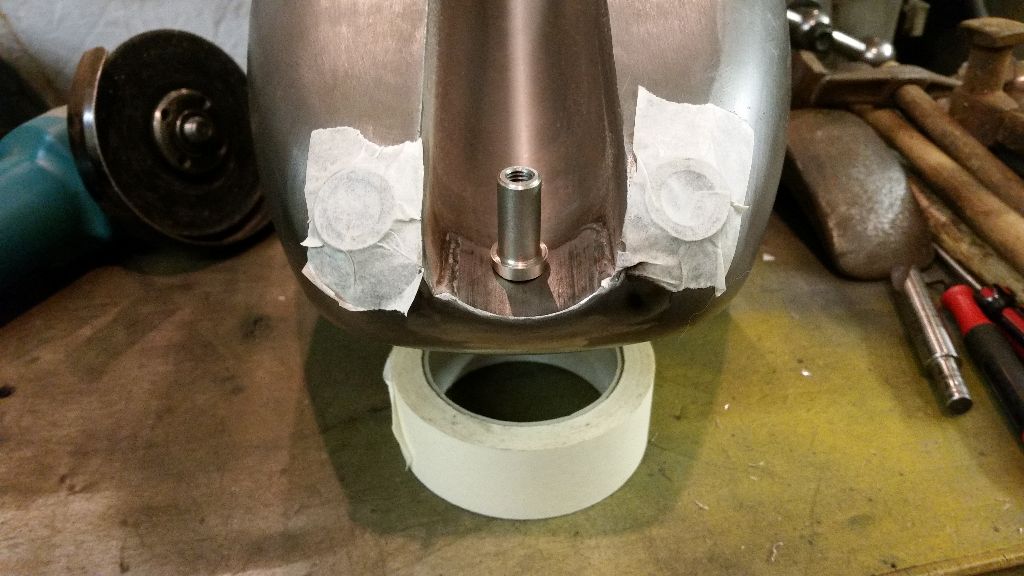
I made a mounting post from stainless that has an 8mm thread and will weld this to the tank shortly.
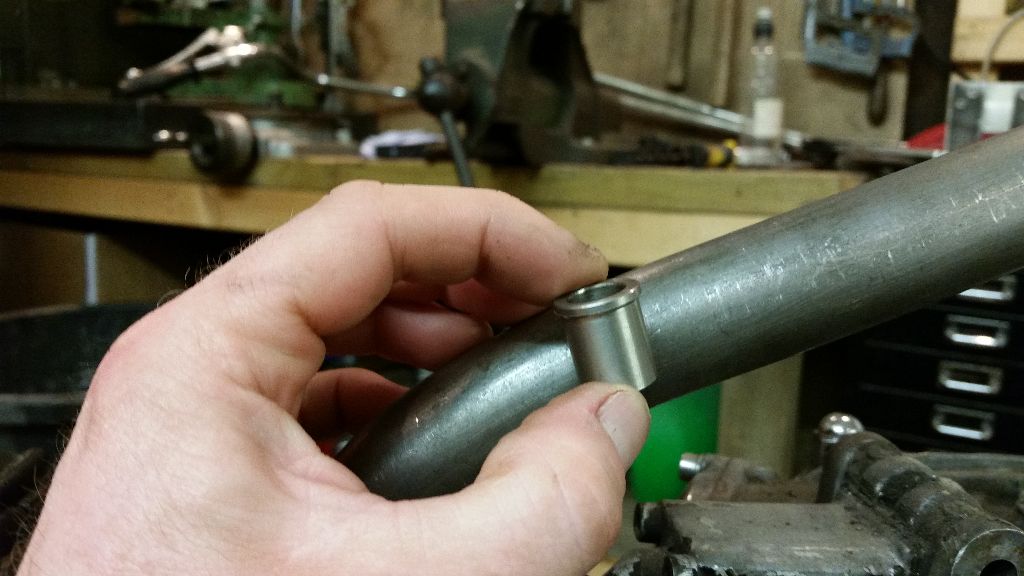
Next I made an insert to be welded in to the frame to accept the mounting post.
I found a spare hole that I made years ago that was 16mm at the top and 8.5mm at the bottom so I inserted this in to the frame tube, got it pretty well in the middle as it happens!
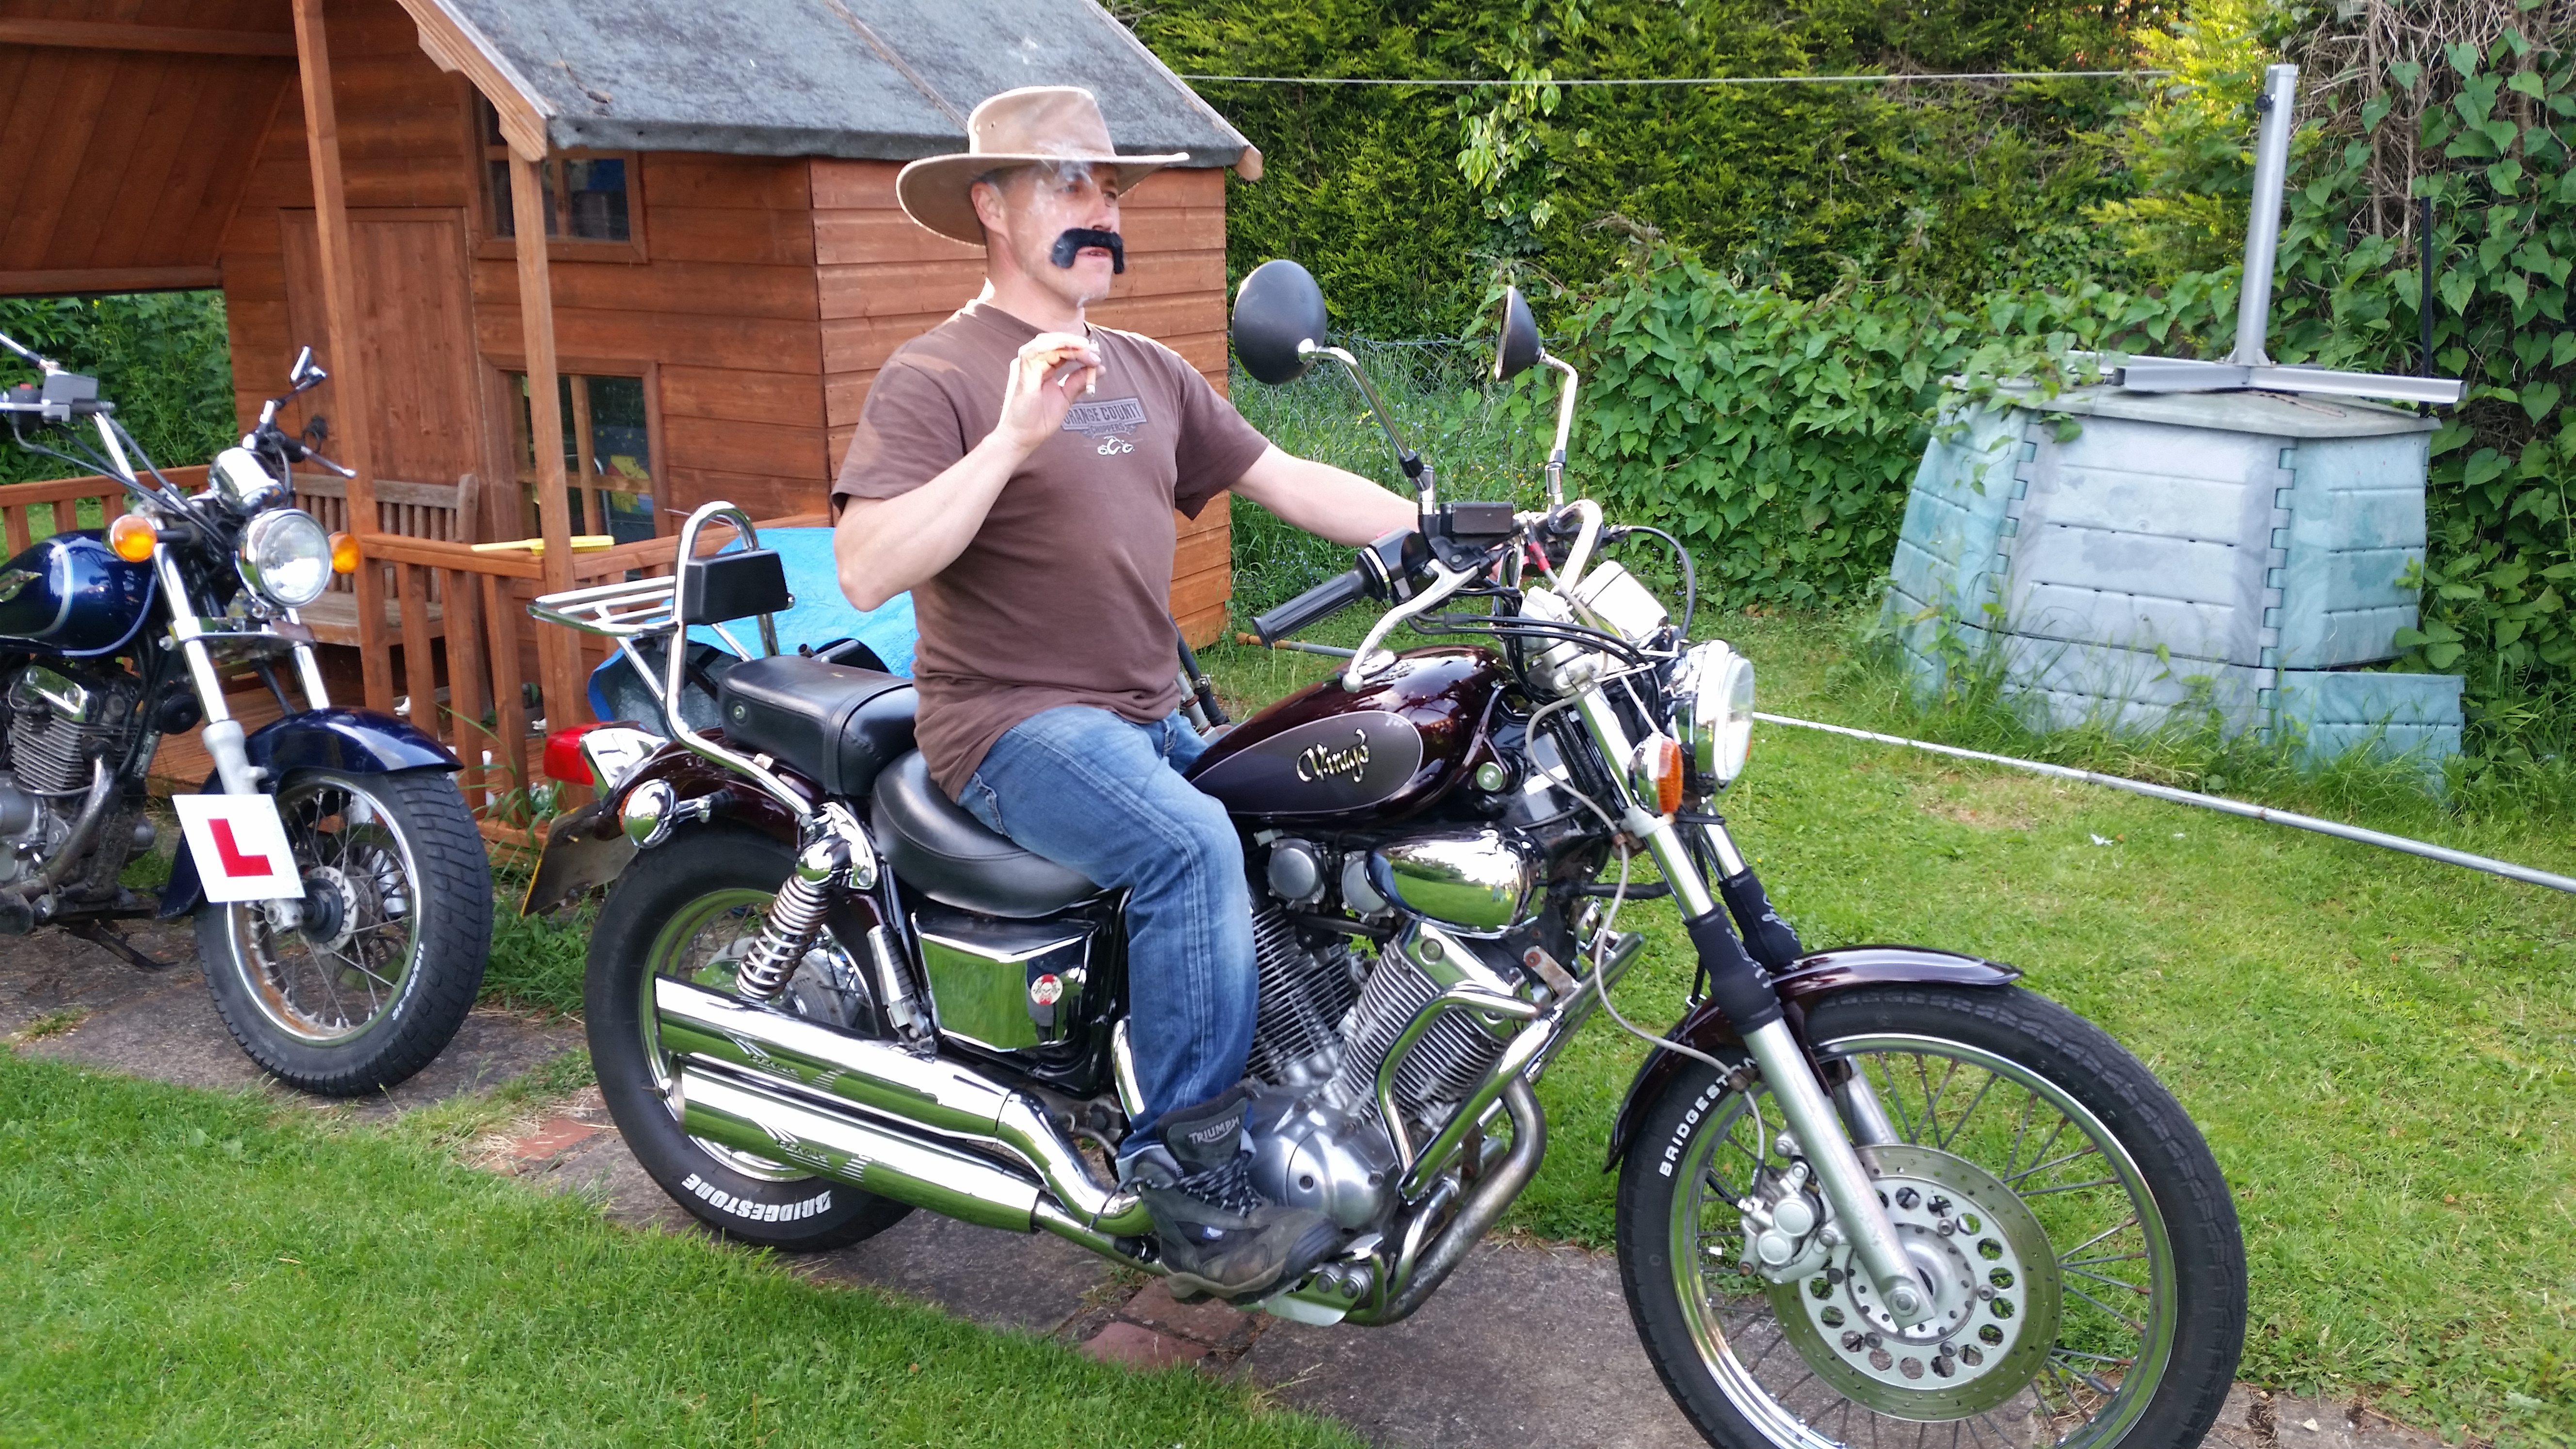
Next should have been a picture of the insert welded in to the frame but it has been stolen by the ‘photo pixies’, the welding was simply amazing, some of the best you would have ever seen, it reminds me of a picture of a huge fish I once caught that also had the picture ‘stolen’……. So this is Fruitshoot on his bestest bike in the world, he goes to bike shows on it every friday night at ‘Pink Punters’ in Milton Keynes….. none of the other Scavengers are invited, not sure why?
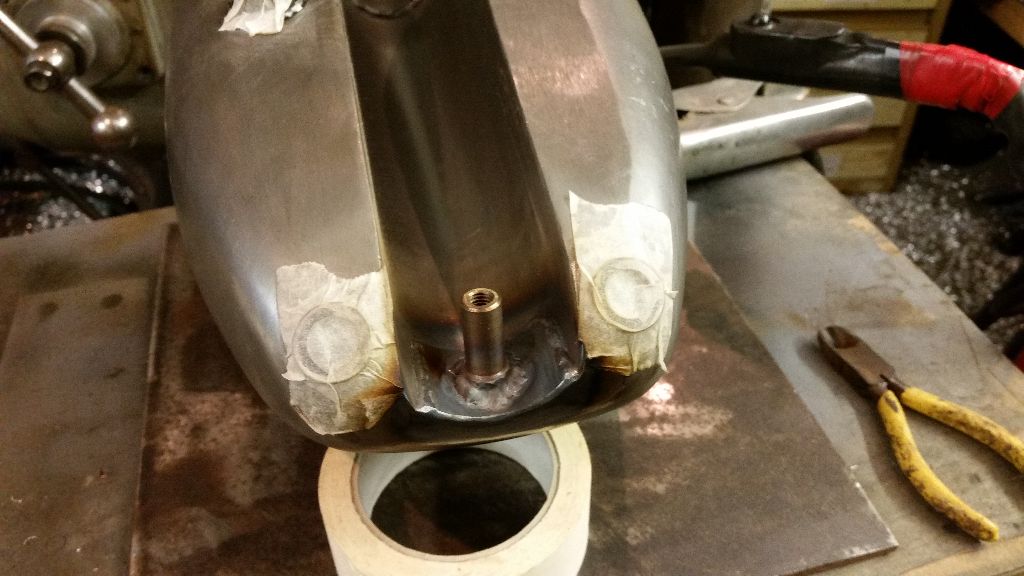
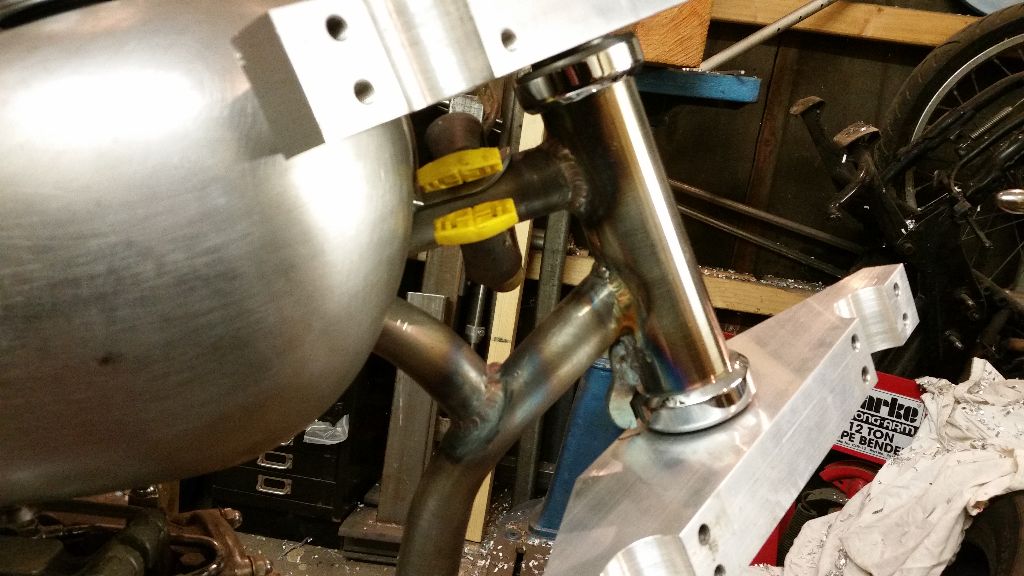
Meanwhile, back at the farm I continued with my welding and stuck the threaded boss on to the tank, it went on pretty well, bit tricky to weld around the sides but it looks plenty strong enough.
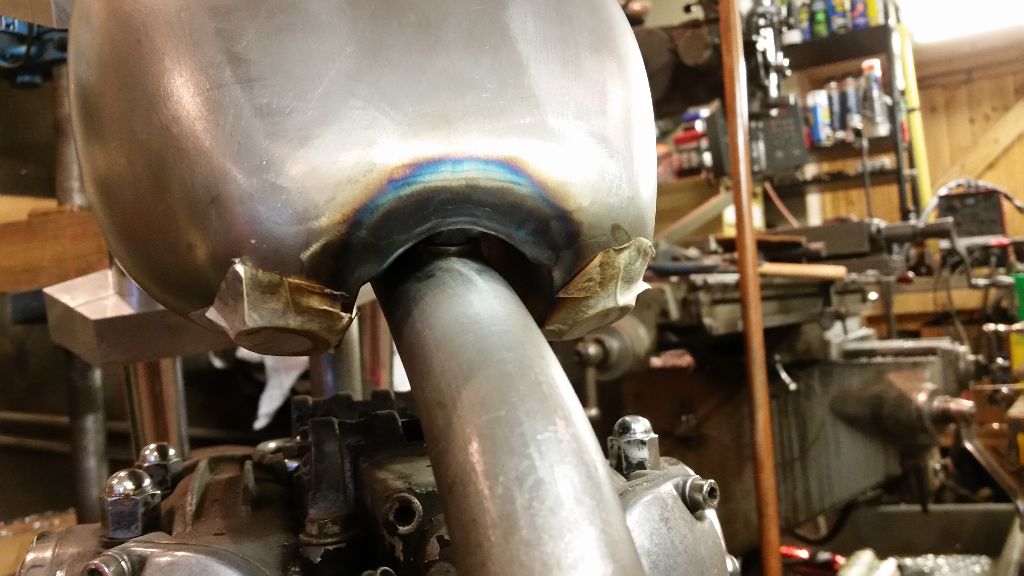
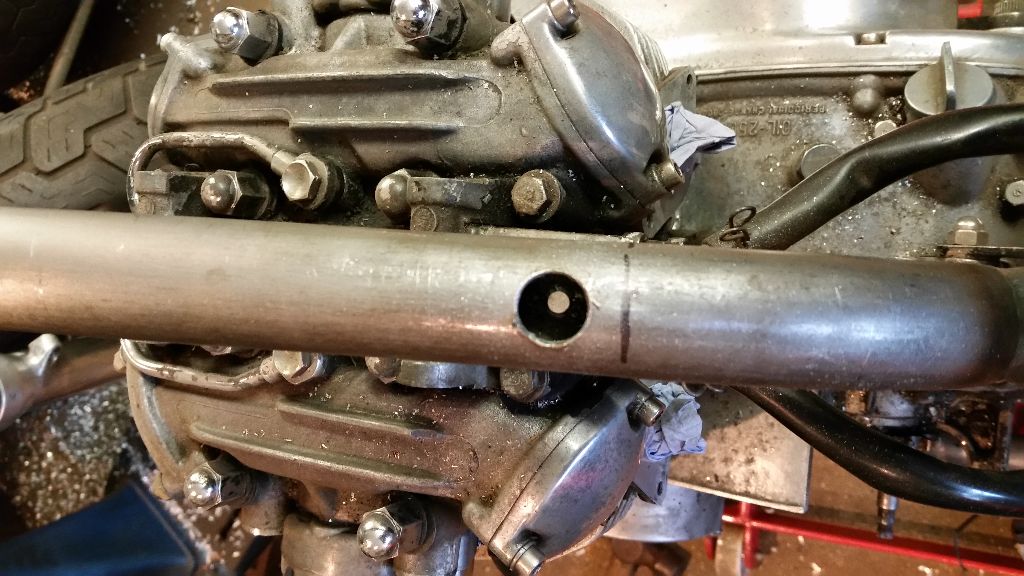
This is how it looks from the back, imagine it painted, should look pretty tidy. Next is the front mount when I find some time.
One of the problems with using such a wide front wheel is of course you need some custom yokes, I could have bought some Harley ones I suppose but thats not the Scavenger way! As luck would have it a mate popped in to my shop to get some parts for his van, he has access to a metal store and is easily corruptable so I managed to swap these nice chunks of aluminium for a gallon of oil and a new tow rope.
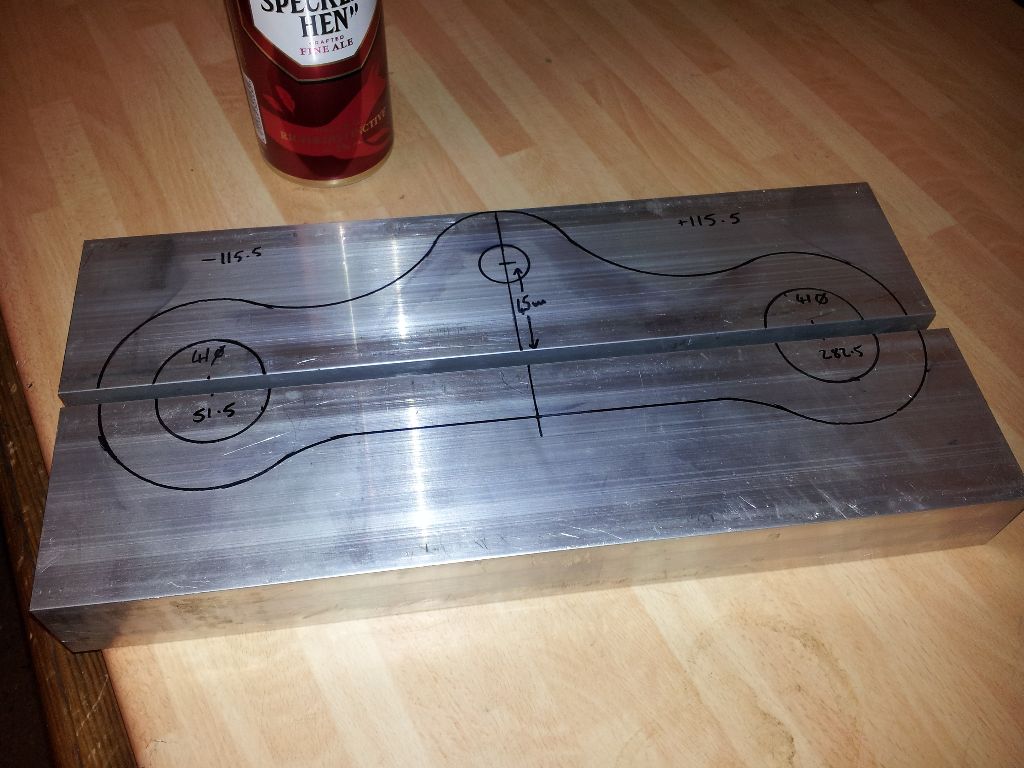
With the help of my trusty sharpie I marked out a rough idea and started hacking!

Drilled the holes for the forks with the biggest drill I could find.
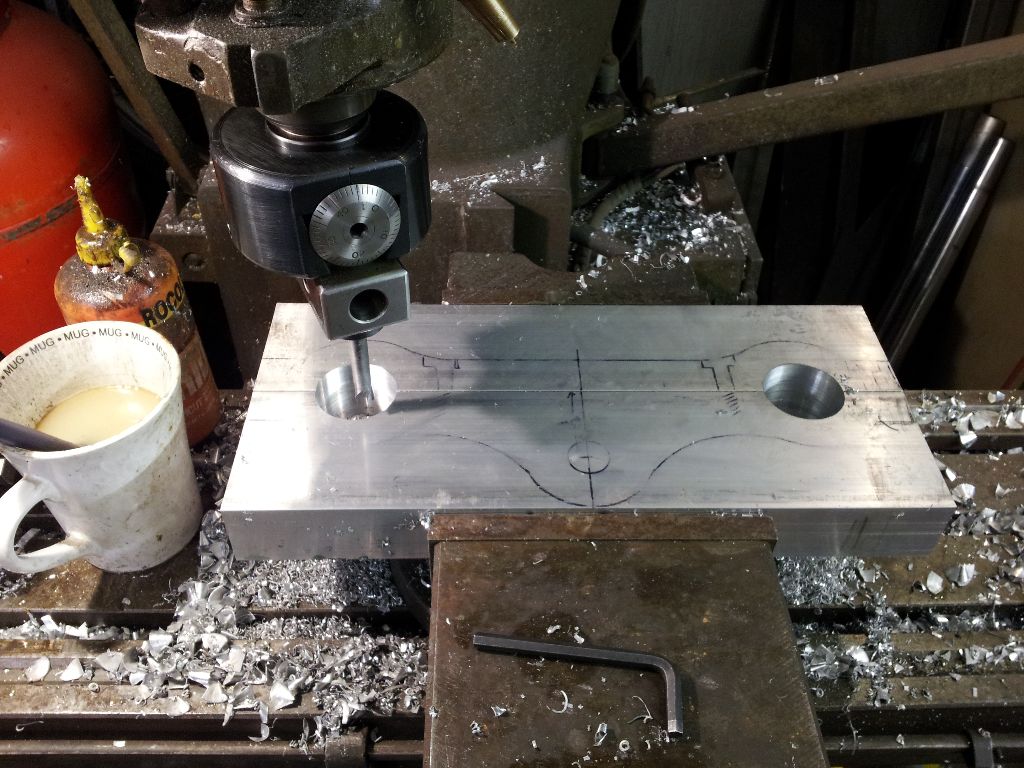
Set to work with my boring head, got this off eBay for fifty quid about a year ago, what a bargain!
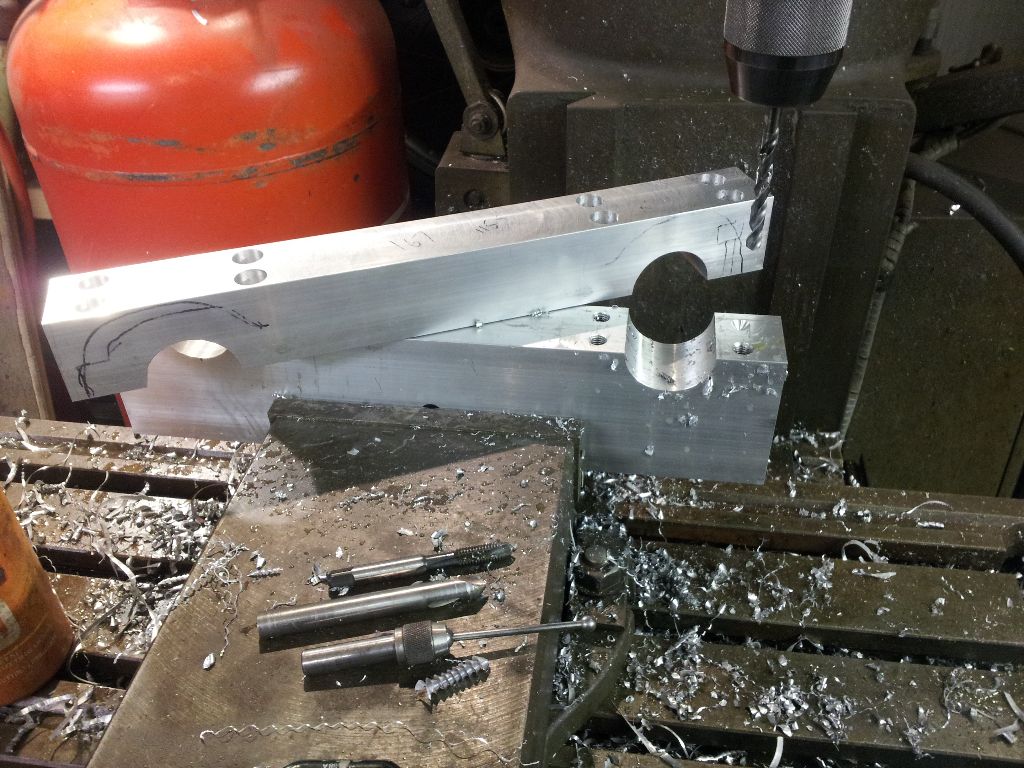
Next up was some tapped holes for some M8 bolts, you can see in the picture they are currently flush to the surface but later when I remove the rest of the waste they will be sunk in further, I’m putting off removing the waste as I don’t really know exactly what the finished yokes will be like, I’m sure my sharpie guess will be close but I’d hate to remove to much, may need some extra for a headlight bracket.
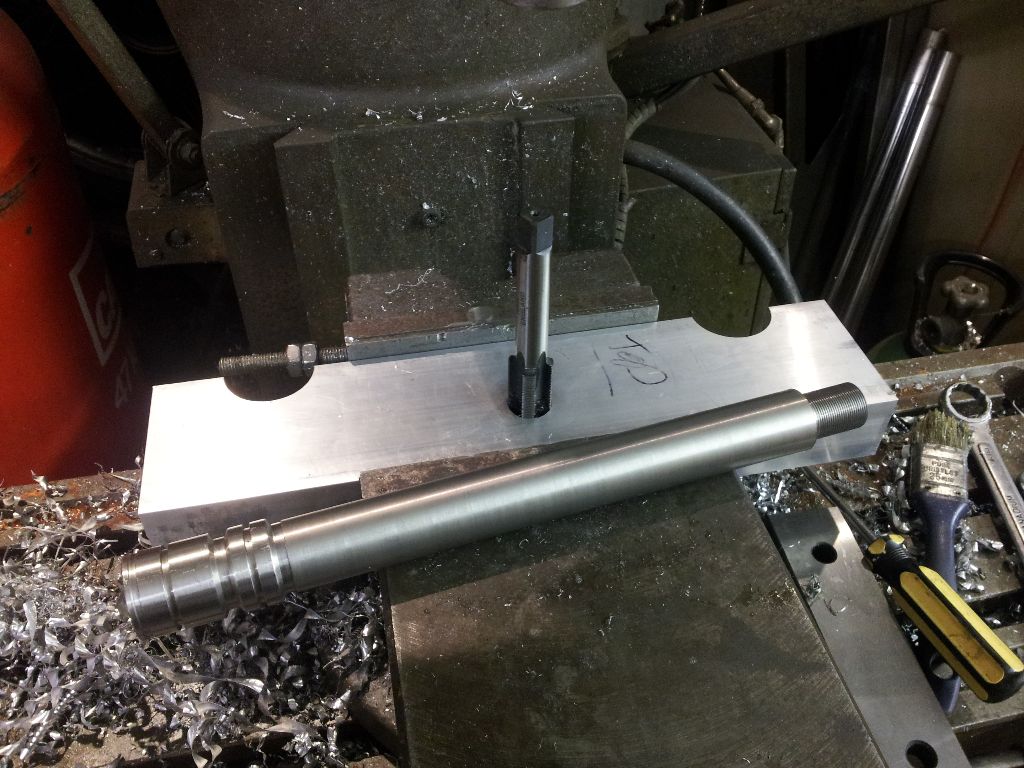
Needed to make up a bar to go through the head tube and found this pneumatic piston rod I’d had kicking around for ages, I knew it would come in handy when borrowed it….. 🙂
Ohhhh shiney new bearing cups! Got these pressed in today, of course not plain sailing as you would expect, the bearings diddn’t fit the cups so I bored them out an extra half a mil and they fit pretty good.
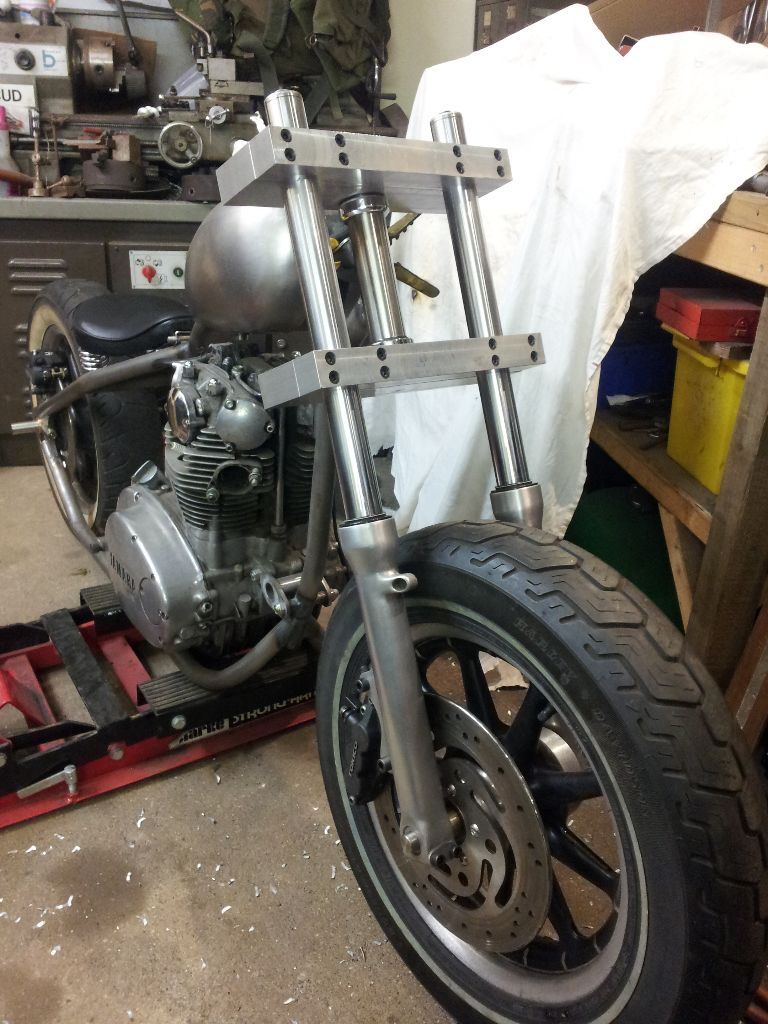
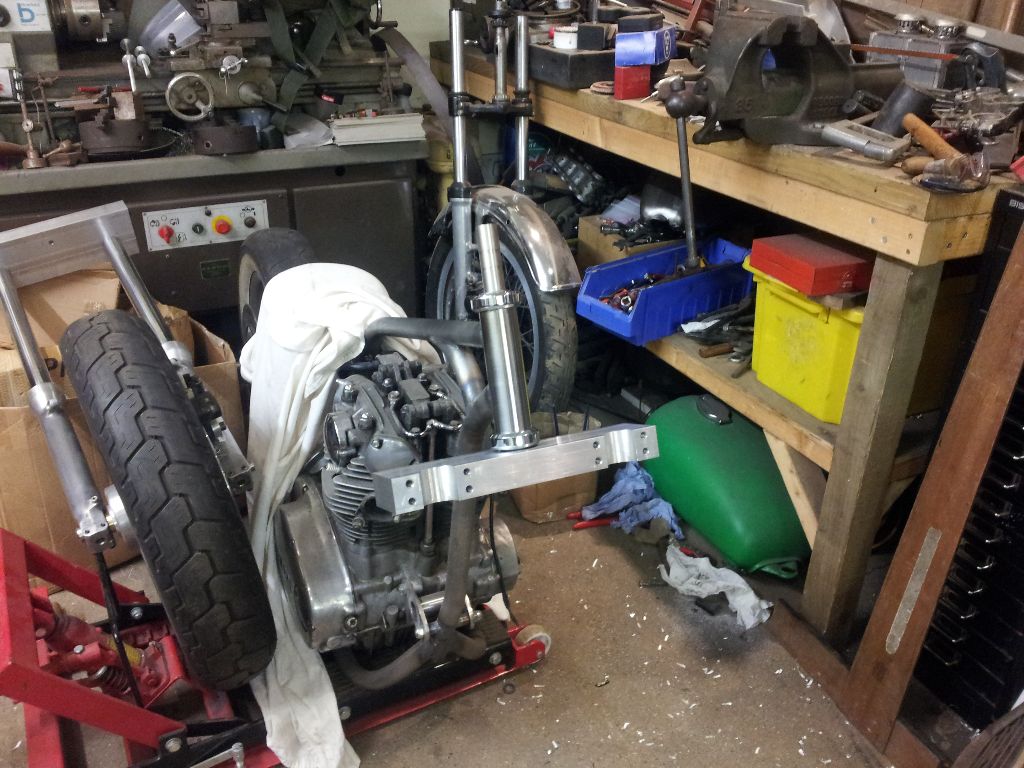
And finally what it looks like assembled, pretty chunky!
So tonight I had a fettle with the yokes, it’s been a while since I touched these and they are starting to bug me, decided to trim them down a bit so I can finally add the steering stops and mount the tank without fear of it getting dented, it doesn’t look much to cut off but it made quite a mess, I’ll have to get Fruitshoot to pop up and have a quick tidy, theres a good lass.
I marked out where to cut with a sharpie and lined it up straight in the vice and started to chop.
This was supposed to be an action shot to catch all the flying swarf but I think the camera is a bit fast, but you get the idea.
The battery ran out shortly after so thats it for tonight, I got both sides chopped out roughly the same so that will do for now, I’m heading over to eBay now to grab a headlight, thinking something in 8″ to keep with the chunky feel of the bike.
So, I got a little more done tonight, finally got the steering stop added to the frame and some stainless bolts added to the yokes, works pretty good.
Got the handle bars fitted also but I’ll gloss over these quickly as I shamelessly bought both the bars and the risers as we are running out of time, I’ll change these at a later date for something homemade.
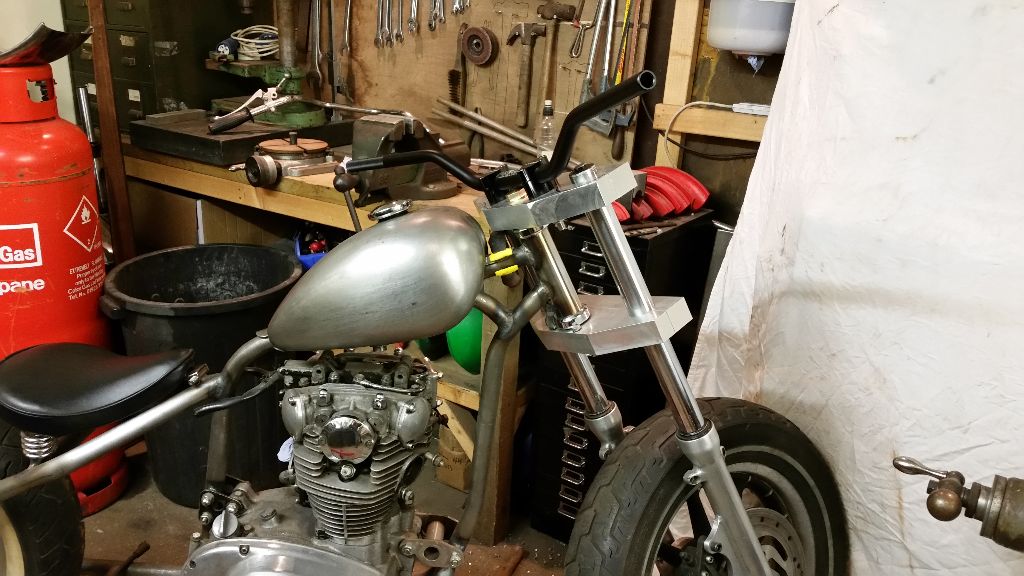
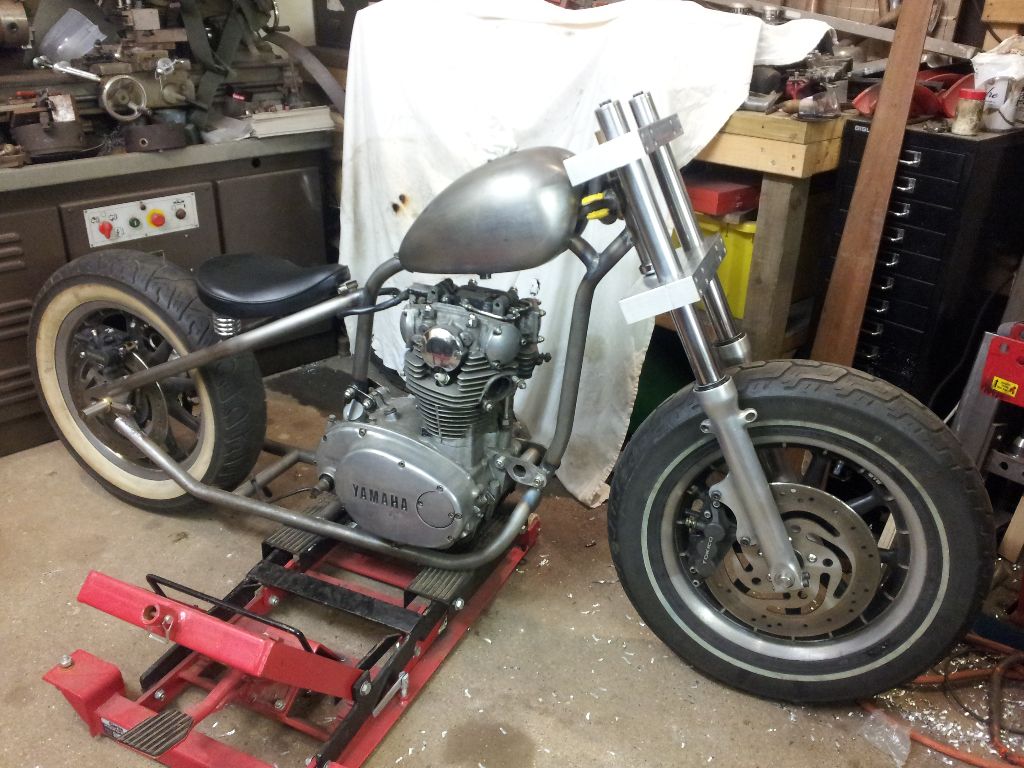
Although the yokes still look like bricks they will do for now, they clear the tank and work as yokes so just a lot of shaping left to do.
I took a trip over to Mack’s Mega-superstore today for a spot of shopping as I was looking to procure a rear fender, I was in luck as I struck gold on the ground floor in the form of an old trailer mud guard, steel construction and in excellent condition.
It’s a bit of an odd shape as the curves on the edges dont match, one side is pretty sweet but the other side is quite flat, ideal for attaching to your custom hotrod trailer but not ideal for a motorcycle fender.
It’s roughly the right shape so well worth customising to make a fender, I’m an avid fan of both OCC and American hotrod so I’m qualified to do the work, I’ve seen it done many times and it looks easy.
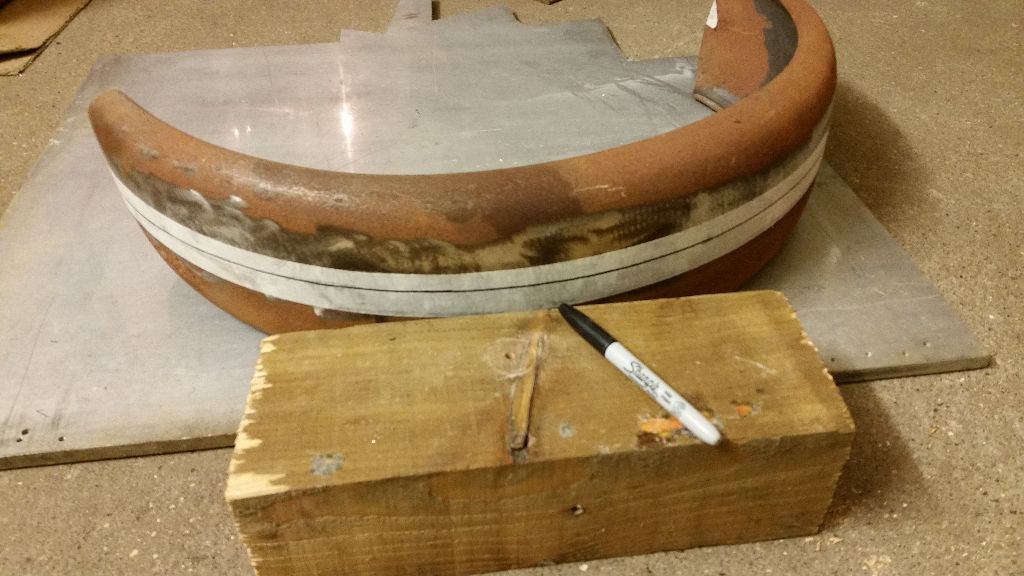
The wheel measures about 140mm wide so I marked out the mudguard a bit off centre so both halves would measure about 160mm when put together.
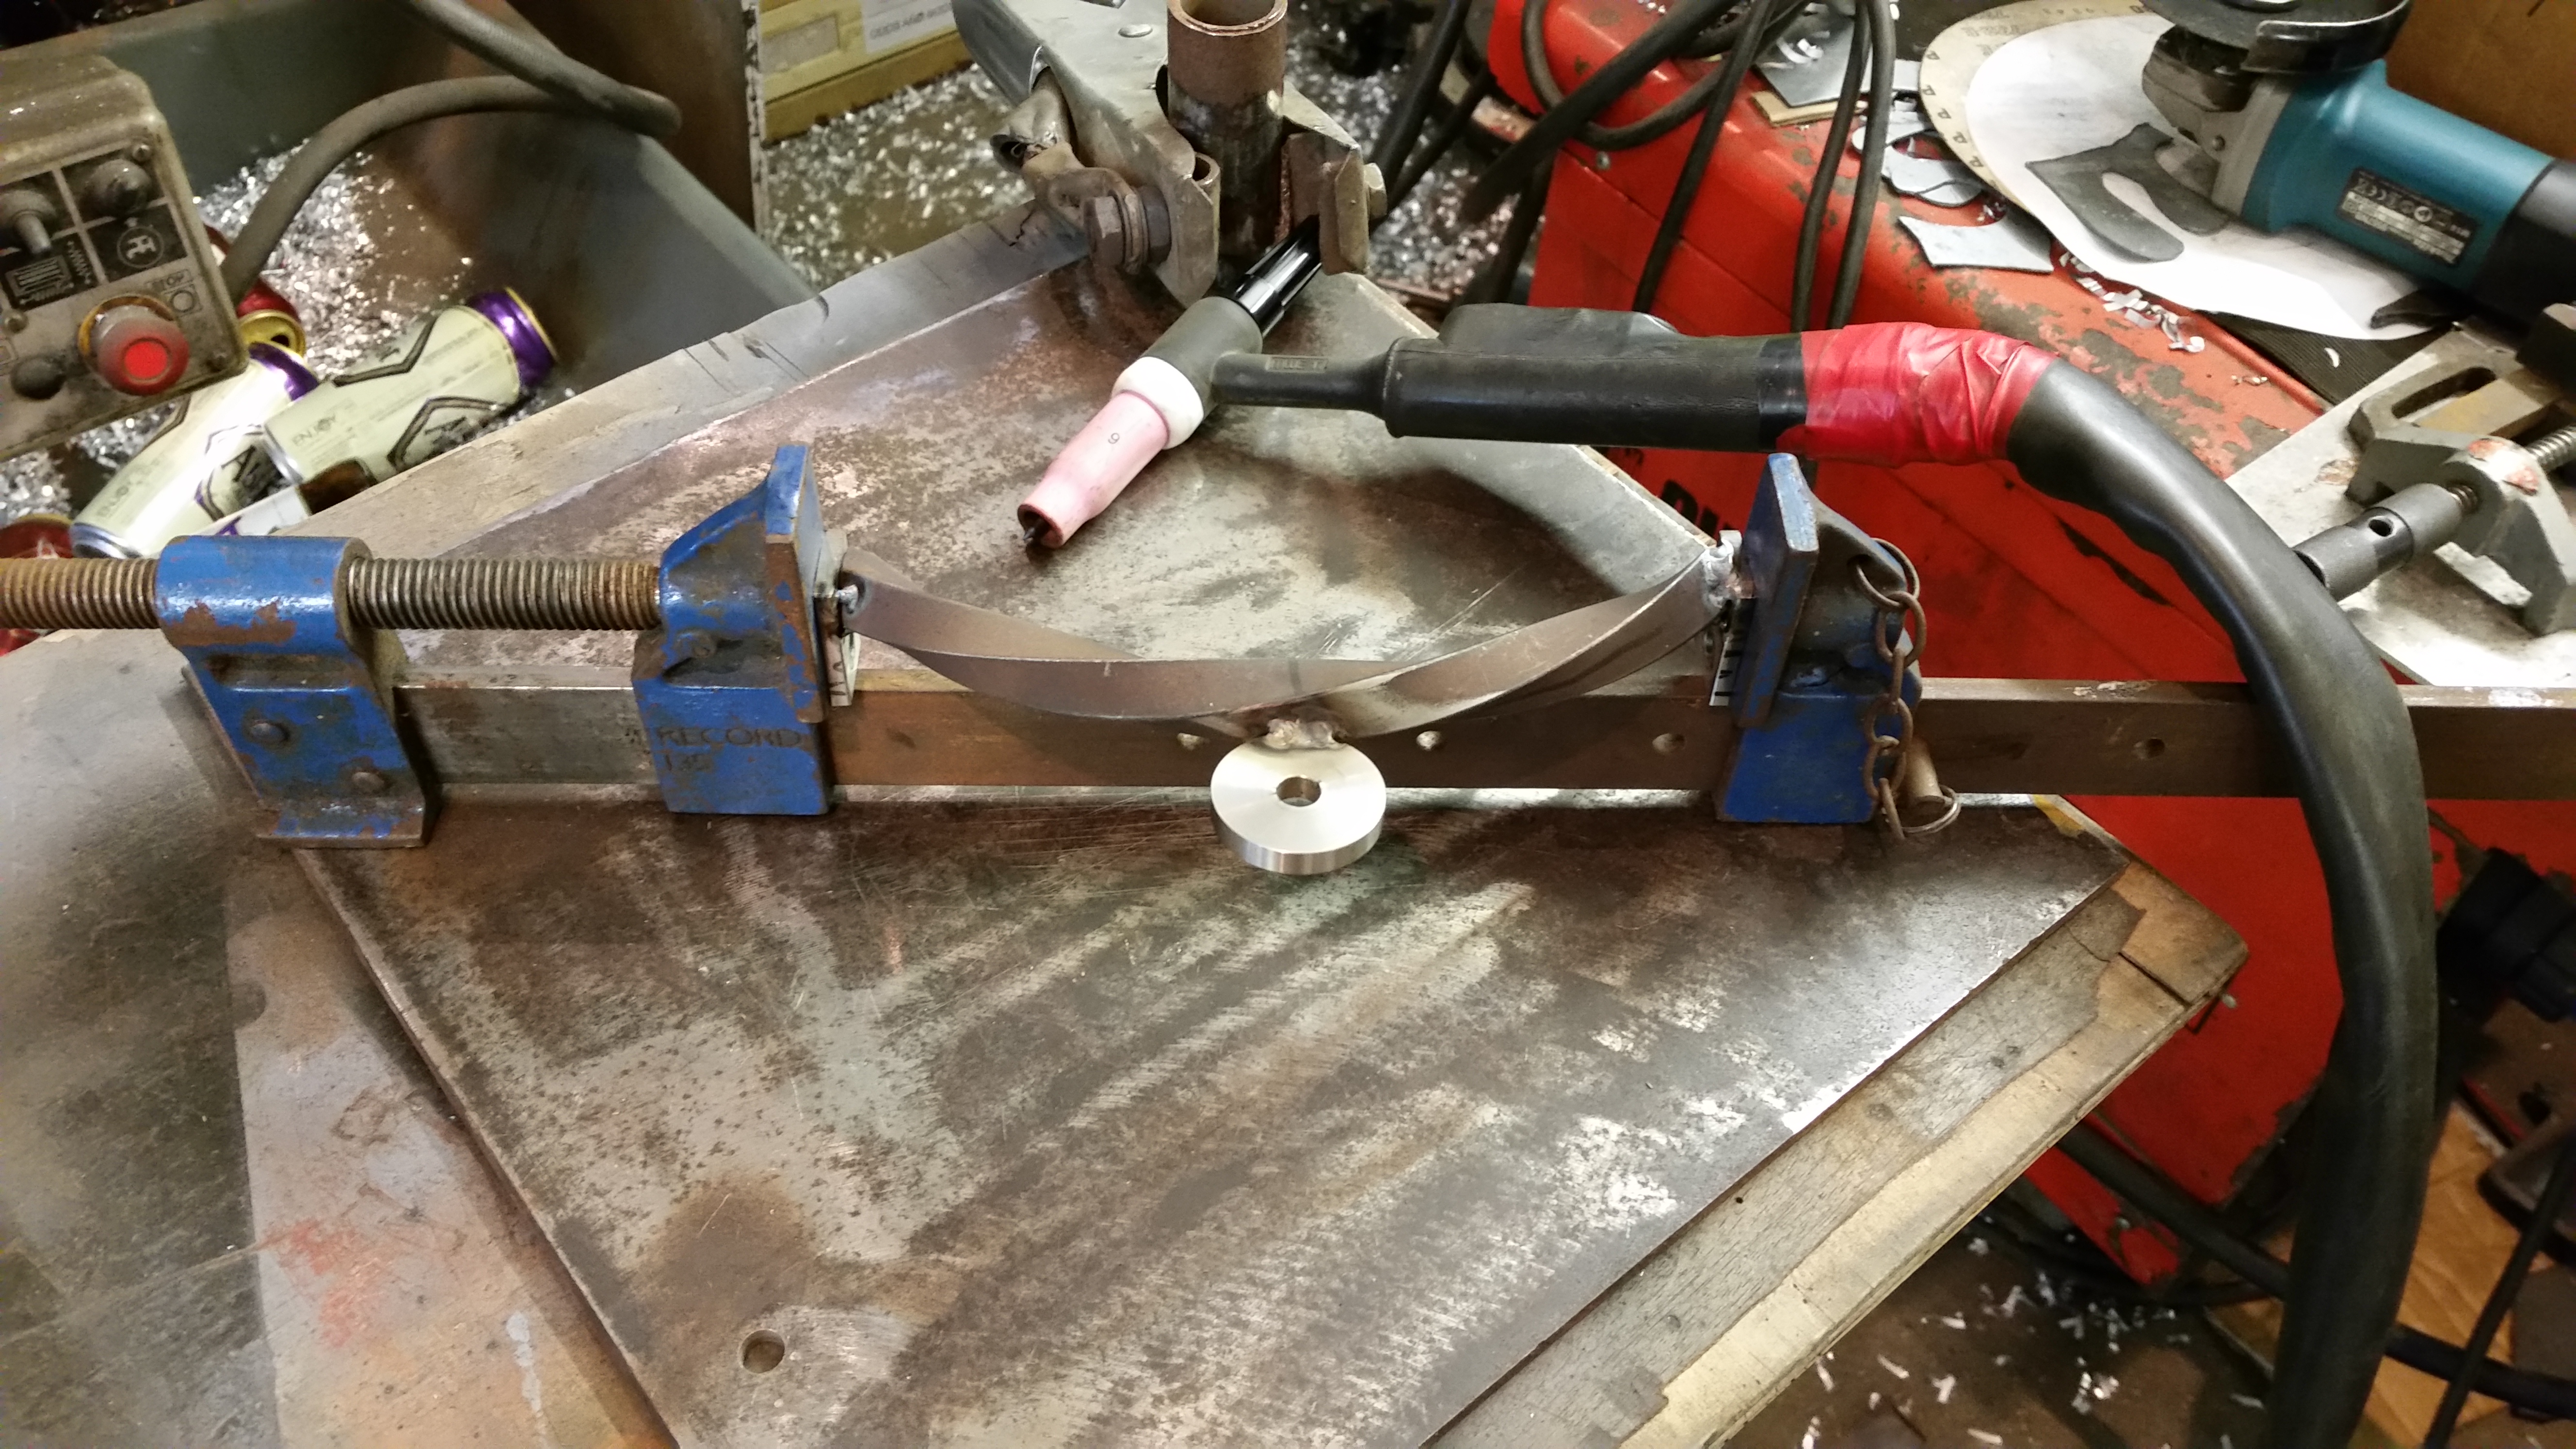
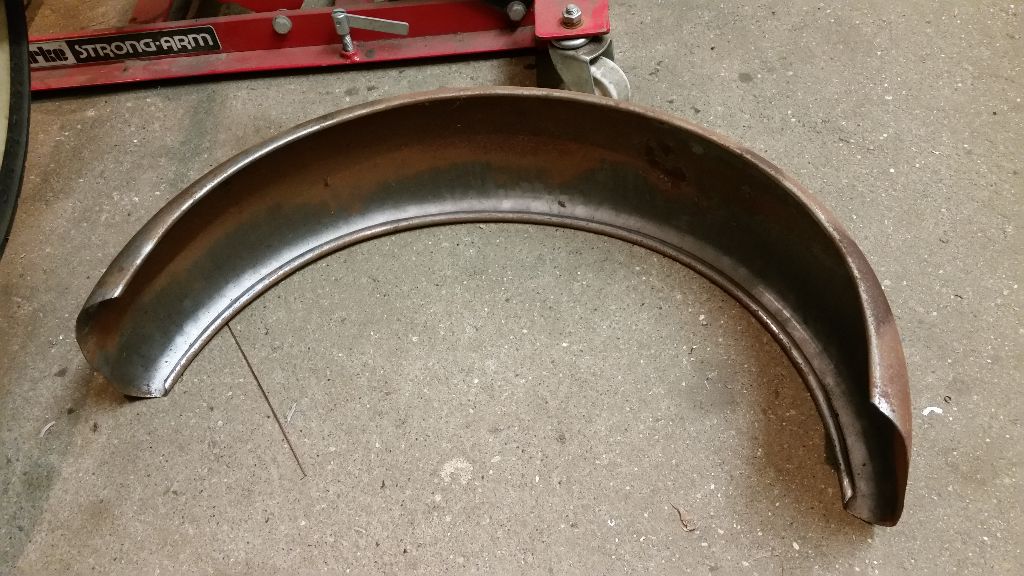
I set to work with my trusty angle grinder and followed the line to lop it in half, found the midway point and cut the part in to two sections to be nailed back together to form the fender.
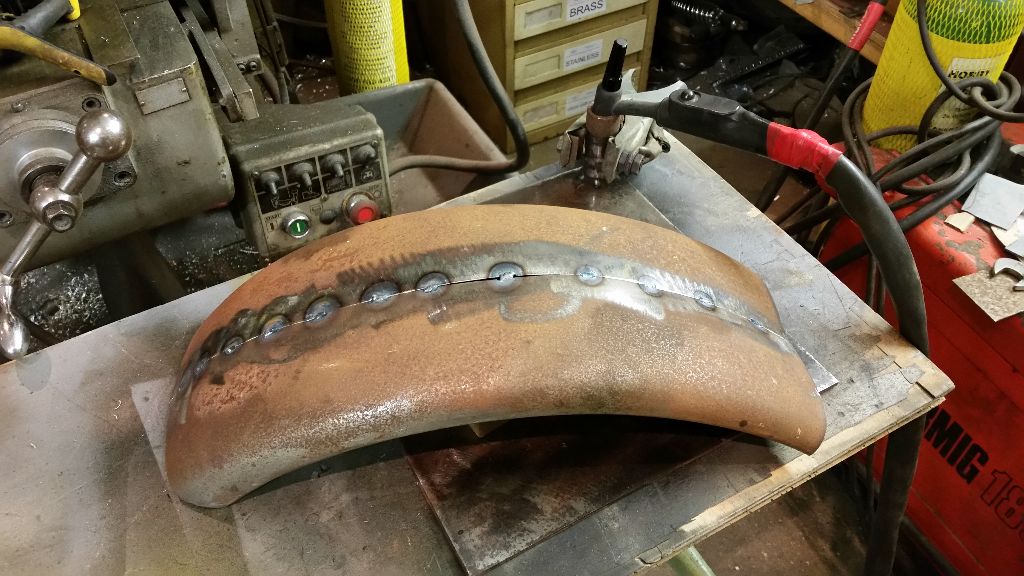
Started tacking it in to one piece but it’s very mis-shapen, not due to me getting it hot or even cutting off the line, it’s just a bit of a rough part to start with, just how we like’em.
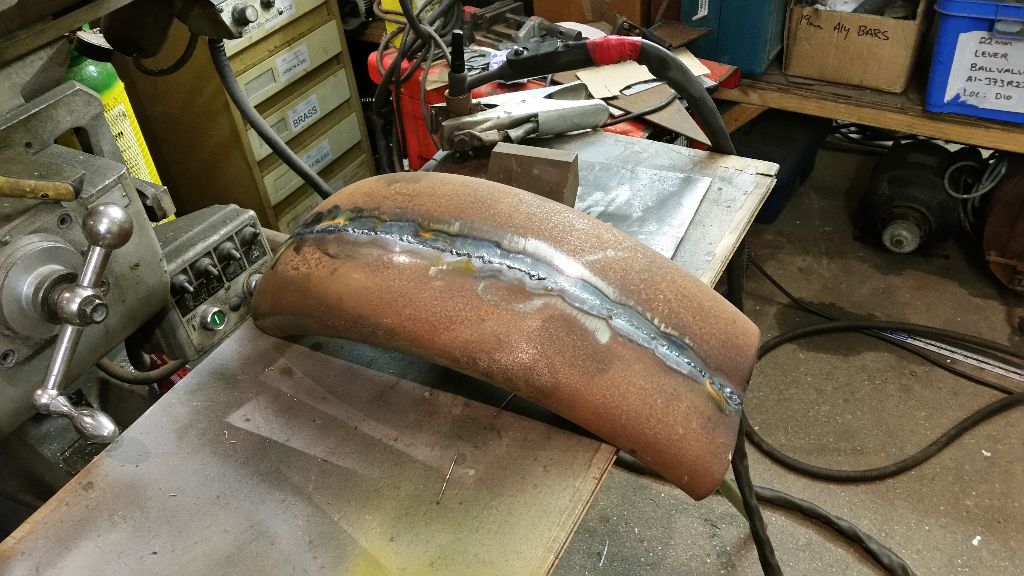
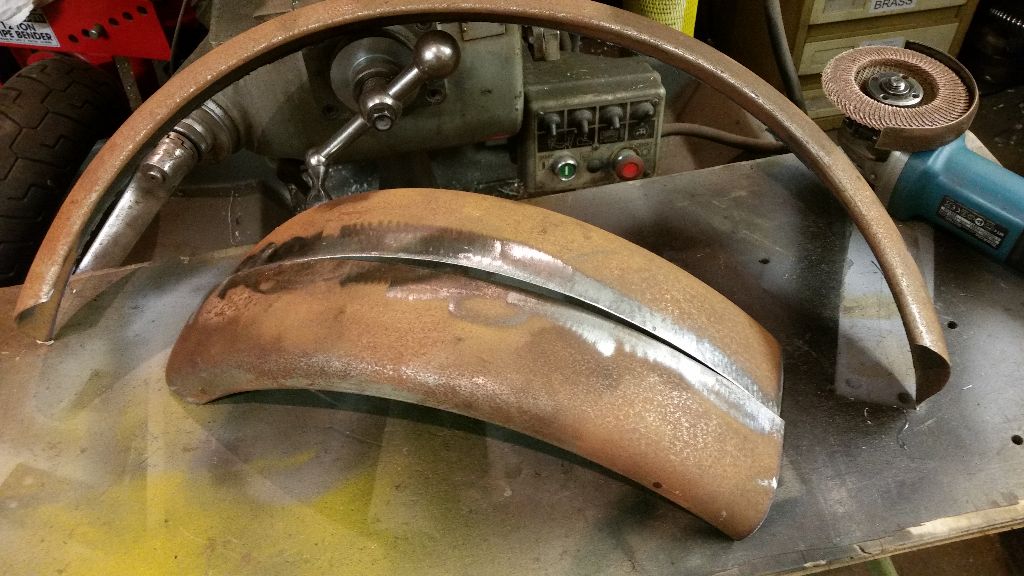
Now welded all the way from end to end, the next job is to minimise the welds with a flap wheel and try to beat it in to some kind of a nice looking shape, I dont have an English wheel but my dad does have a hammer with a flat head so I’ll get that and try to straighten it against something soft.
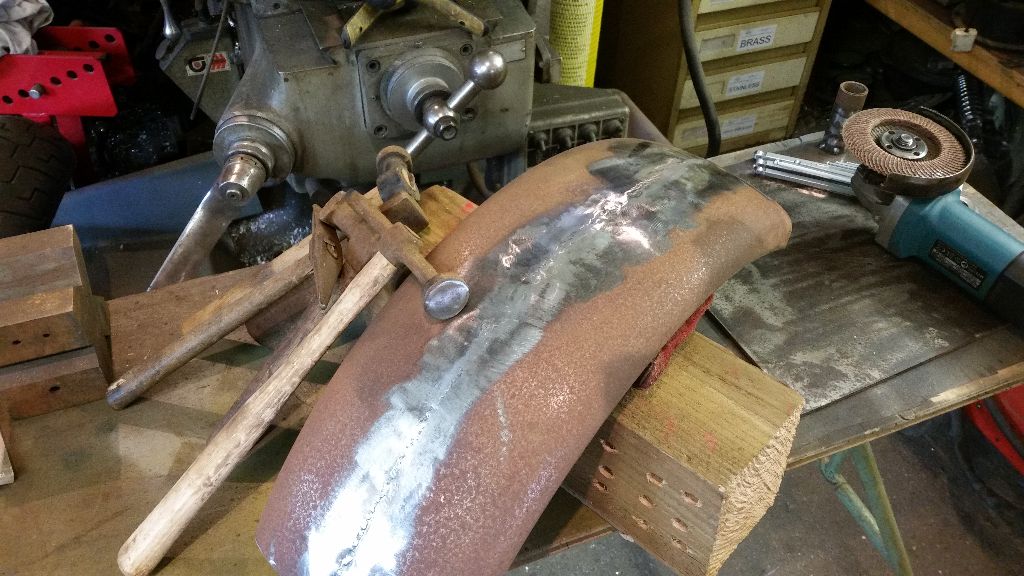
Well as luck would have it my dad has a few of these ‘fancy’ hammers so I bundled up some leather gloves and a lump of wood and started beating it in to shape, didn’t take long and it starts to look pretty good.
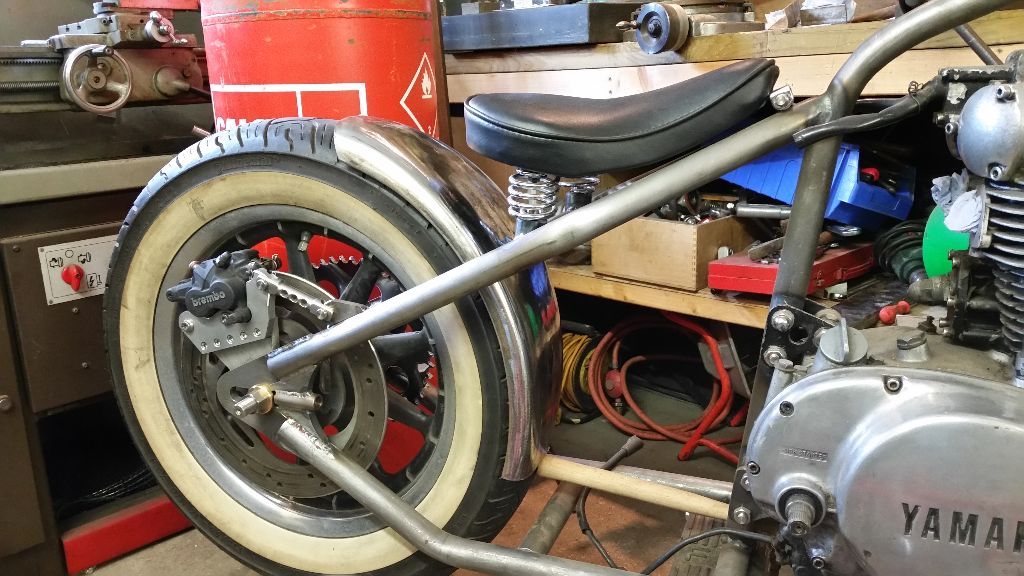
I’ve propped it in place to get a first look at possition and figure out how to mount it, should be fairly straight forward, I’ll make a plate to attach at the bottom as I’ve left the bottom tube unwelded so I can slide it in to possition, not sure about the top mounts yet but I might try to sneak some brass in if I can.
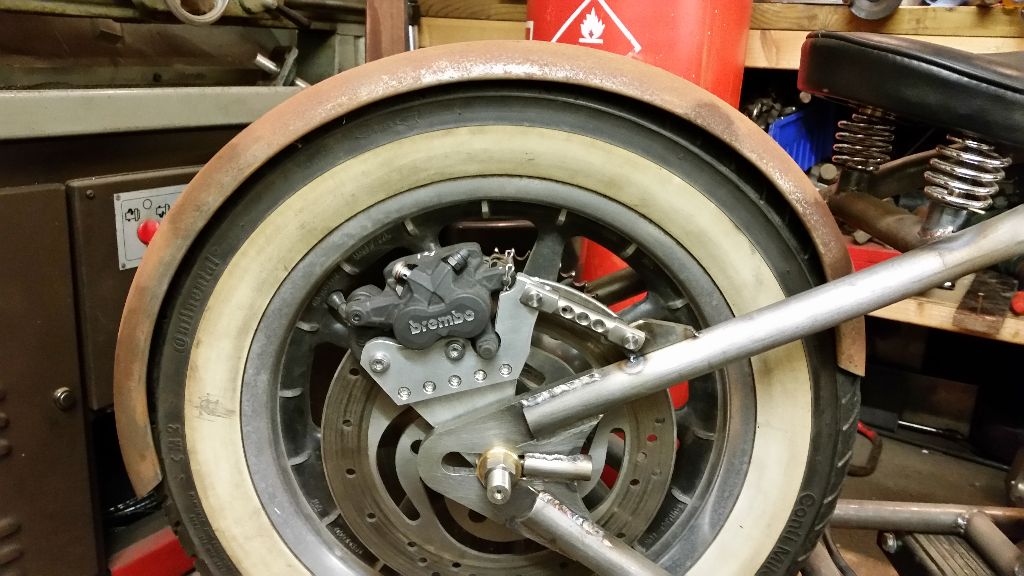
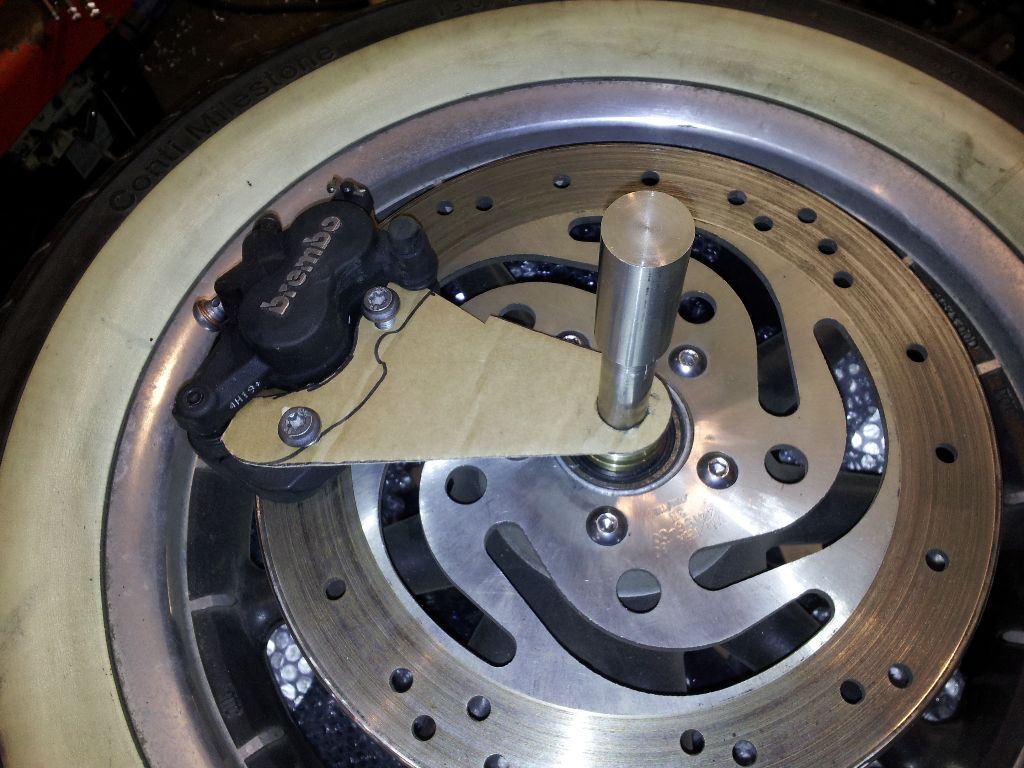
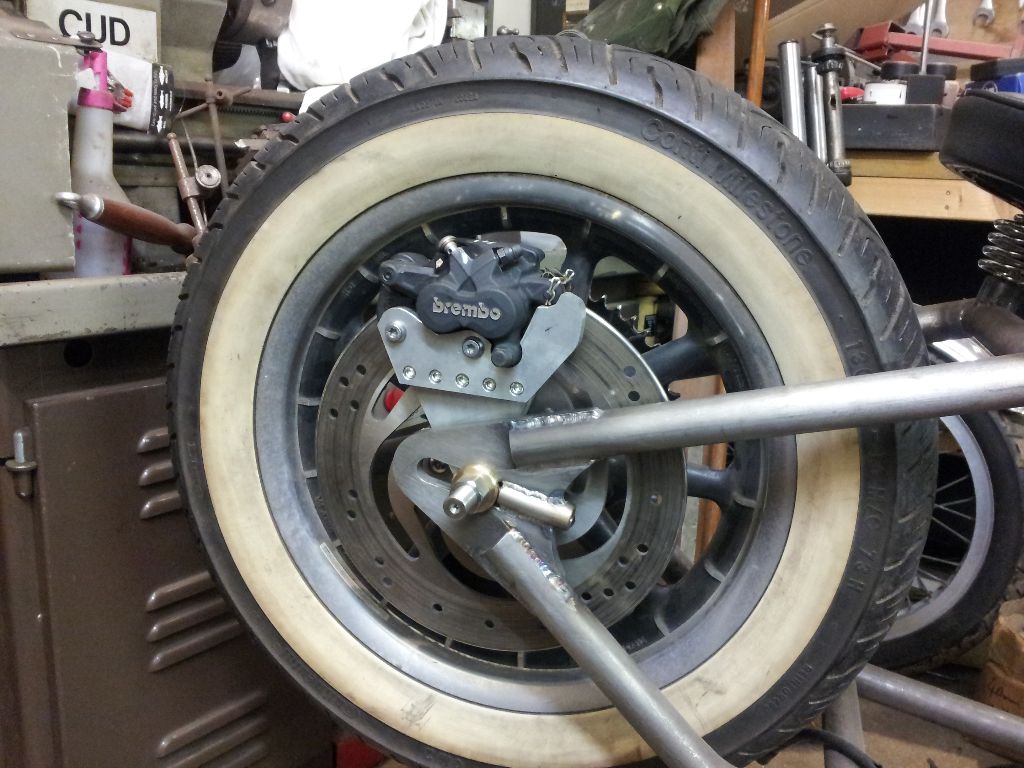
Thought I had better make a start on the rear brake, I learned a lesson when I fitted brakes to my last bike, fit good ones if you want to stop, it’s fun to ride without brakes but I don’t think I’d get away with it for long, I’ve had a few near misses already…. So with my new wisdom I bought off eBay a rear Brembo off a couple of year old BMW with good pads for £50 delivered and it seems to fit quite well.
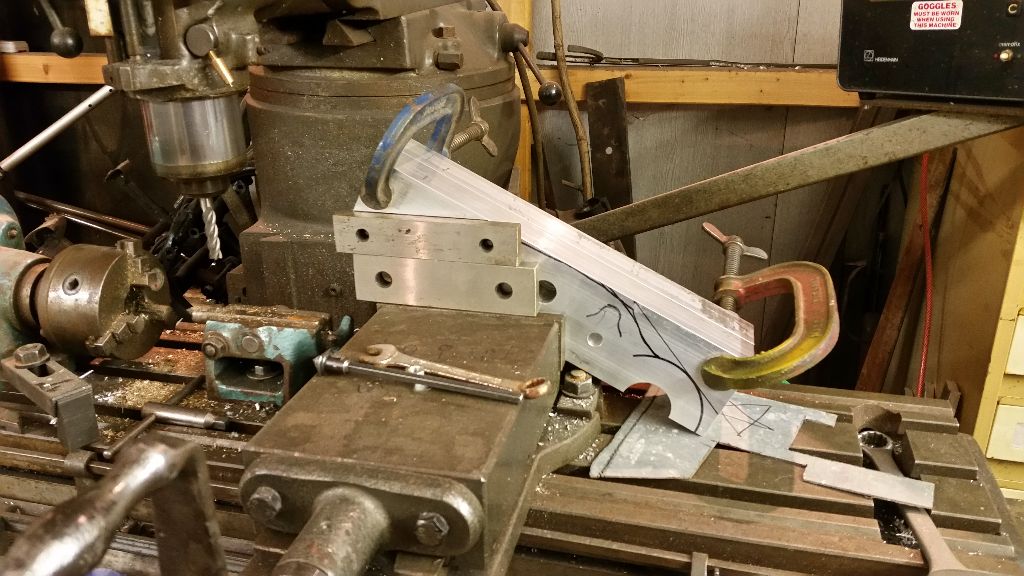
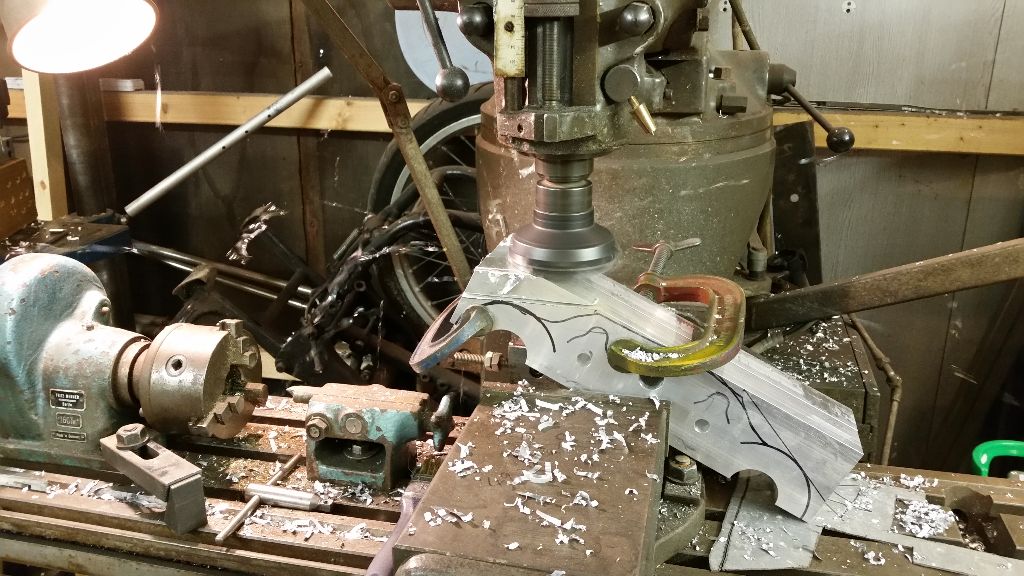
So, I thought I’d show you how I’ll make the bracket, it needs to have a dog leg to get around the disc bolts so I’ll make it from something chunky and remove excess material on my mill, here’s the mock up in cardboard, I would have started making the real one tonight but instead I’m going to watch Bear Grylls……
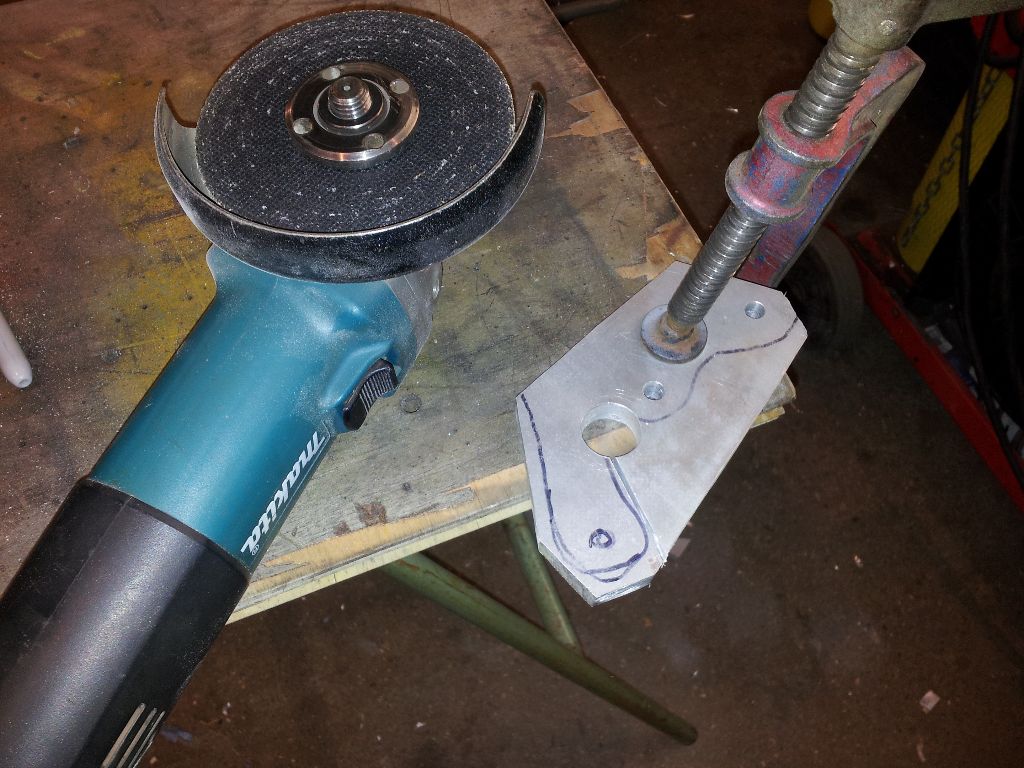
So, the plan was to make the bracket out of a large chunk of ali and remove material to leave a dog legged bracket, I searched through my extensive stock of s#1te and found nothing usable so I decided to join a couple of thinner bits together out of desperation…. I drew around my cardboard template to get a rought idea of size and to keep the distance from the axle to the caliper right, out came my faithful angle grinder and start roughing!
I joined the two halves together with a few stainless bolts and although it’s pretty rough you should be able to see where I’m going with this.
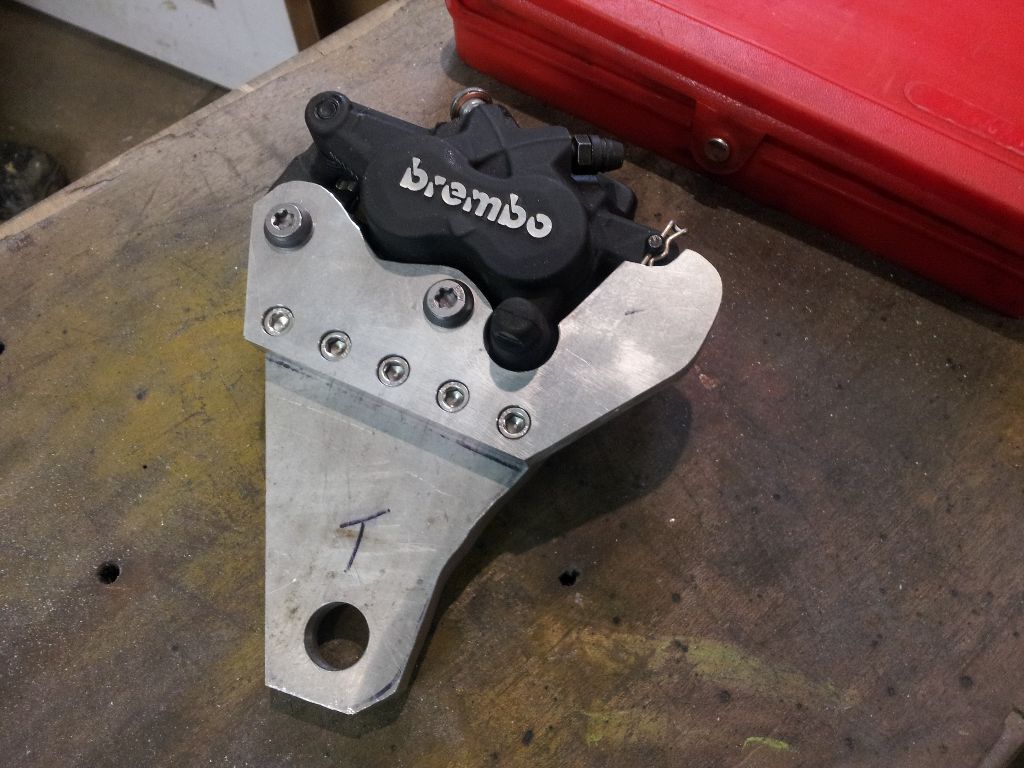
I’ve left a big lug to the right to accept a mount for a stay bar, I’ll nail this to the frame with something that allows movement so the wheel can be adjusted back and forth.
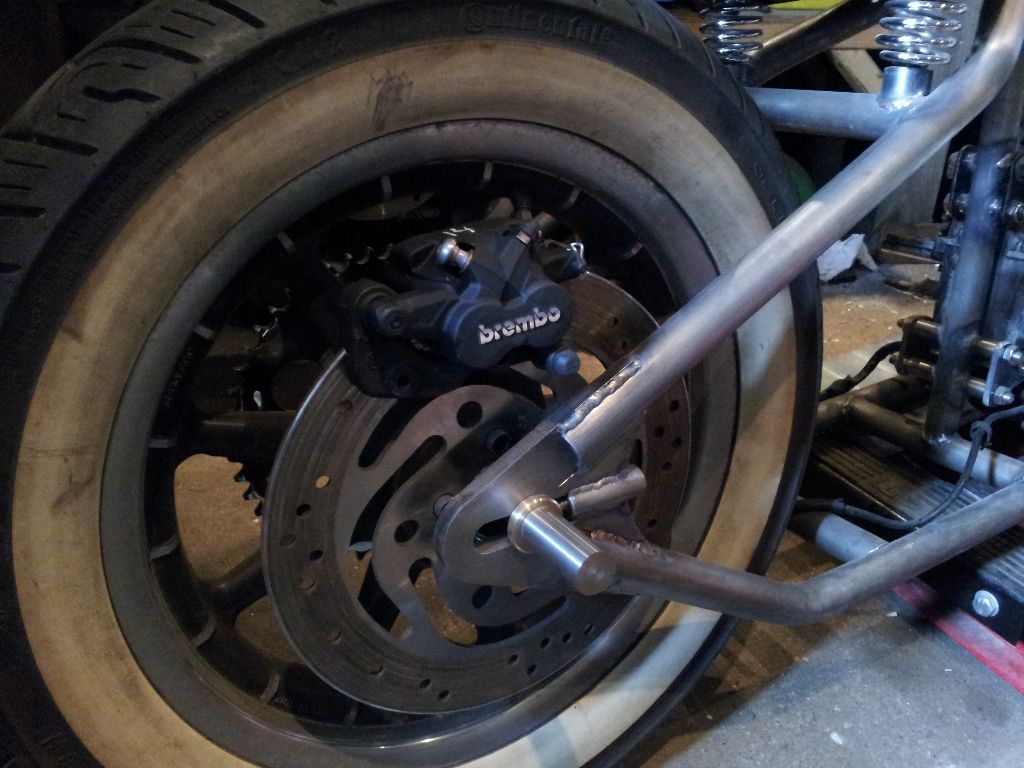
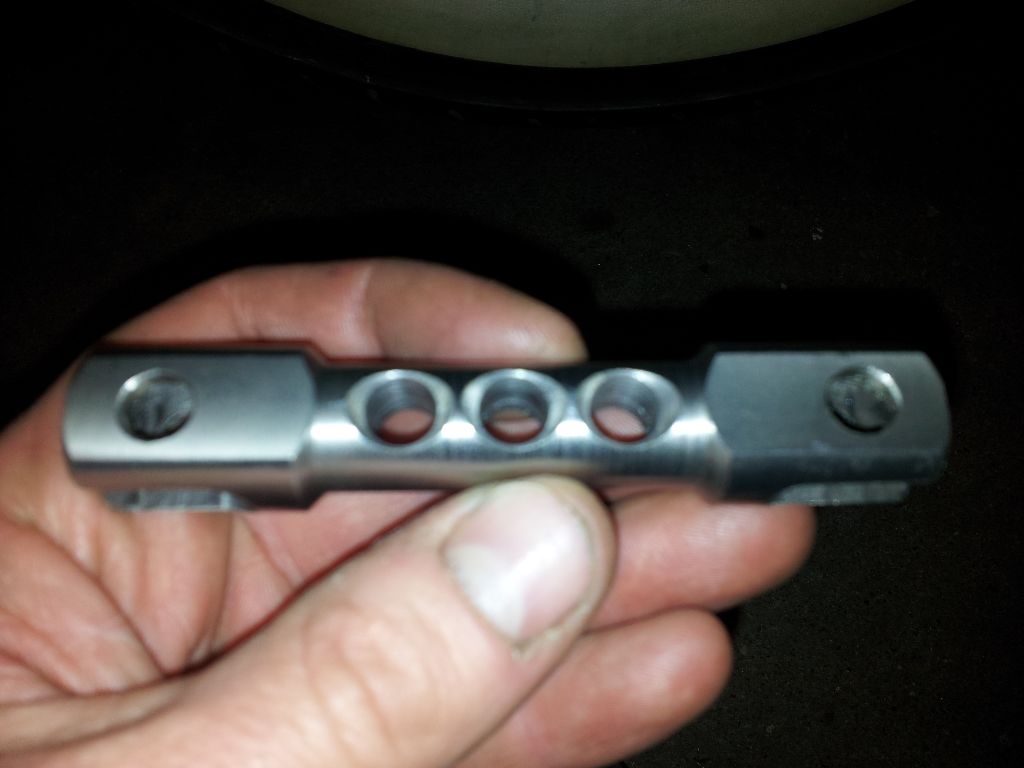
I’m back!! After a hectic few weeks with work (need to be able to pay for beer to fuel this build) I found a little time tonight to continue so as I planned I started the brake stay bar, it’s on show so I have tried to make it pretty, made it from a length of stainless bar I had in stock, turned down the centre to add some shape and drilled some holes in it to make it look ‘tough’, I don’t know why drilling holes in things makes them look tough but it just does.
And a quick shot of it roughly in place (some imagination needed), need to make something to mount it to the frame, it doesn’t line up quite square but should be fine to weld a bracket to one side.
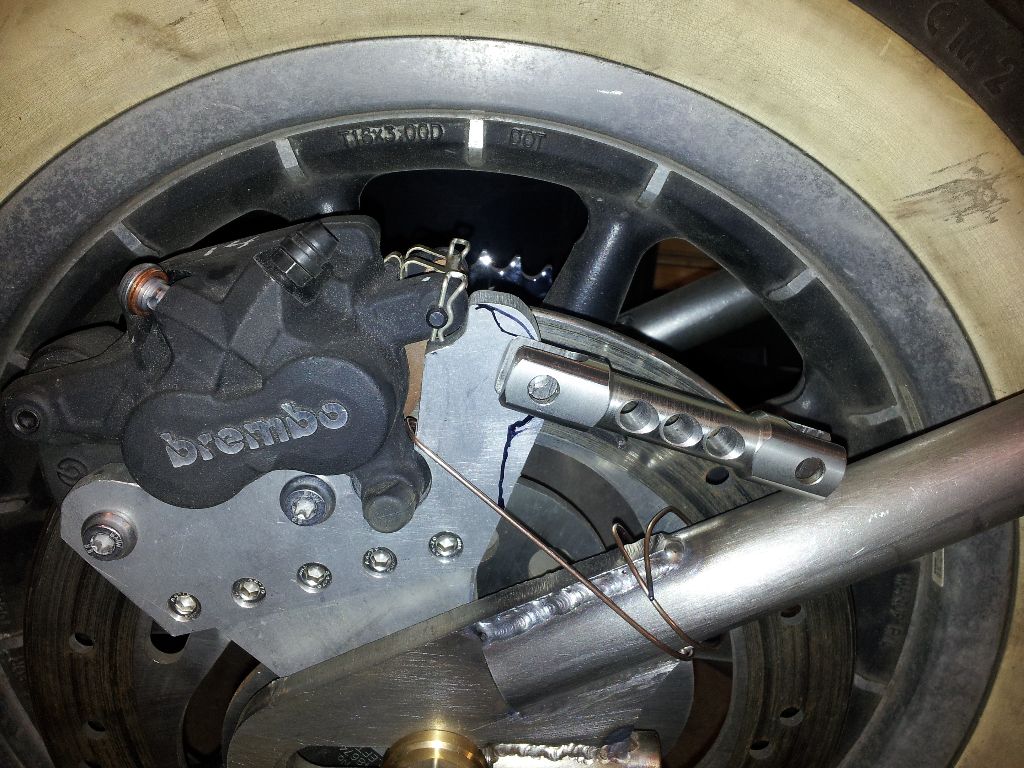
OK, so it lined up better than I thought, it’s in the middle……more luck than judgement but I’m claiming it as skill. I made up a small bracket from some 10mm steel and reamed an 8mm hole, tacked it on the tube, made a couple of pins from some stainless bar I had in stock, drilled to accept R clips.
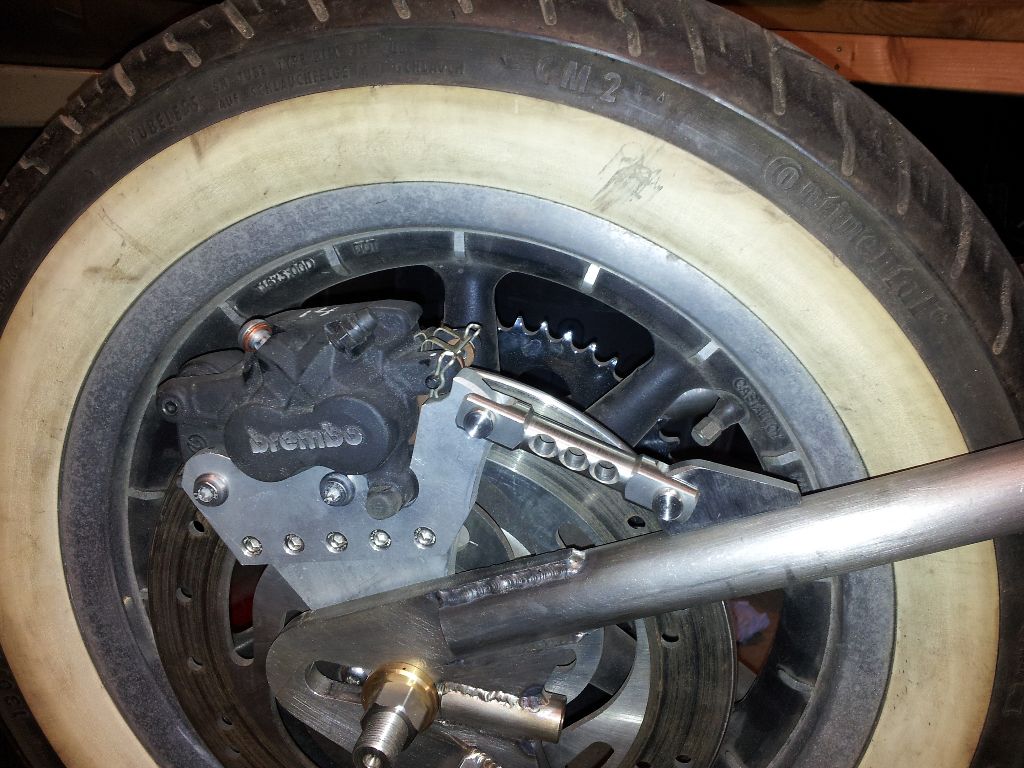
That will do for now, it all seems to work, the wheel spins freely. I’ll come back to this later in the build and tart it up as the main bracket does look somewhat ‘rough & ready’.
Not decided what to attack next, maybe the handle bars or maybe the steering stops as I’m getting sick of the yokes trying to bash my sexy new tank.


